Unleash the creative genius within you by exploring the vast world of Cricut projects! This comprehensive collection of 55 DIY Cricut crafts and beginner-friendly projects is designed to help you develop your crafting skills and bring out the artist in you. From intricately designed paper wedding bouquets to innovative interior decorations, these Cricut project ideas will inspire you to create unique and stylish masterpieces that make perfect gifts or add a personal touch to your home. With easy-to-follow instructions and helpful step-by-step guides, you’ll be empowered to start your Cricut journey today and learn how to craft exceptional pieces with ease. Whether you’re looking to transform simple materials into beautiful and functional creations or simply want to explore new horizons in the world of crafting, this list of DIY Cricut projects has something for everyone – from chic clothing items to sophisticated home decor. So, grab your Cricut machine and let your imagination run wild as you turn your artistic visions into reality.
How to Get Started with Cricut Crafting for Beginners
Embarking on a Cricut crafting adventure can be daunting for newcomers, but with the right foundation, you’ll soon discover it’s a highly fulfilling and enjoyable pursuit. As you begin your journey, you’ll want a reliable roadmap to guide you through the process. Here, we’ll provide a comprehensive introduction to get you started and set you up for long-term success.
Understanding Your Cricut Machine
When it comes to choosing a Cricut machine, there are several options to consider. The Cricut Explore Air 2 is an excellent choice for those who want to cut, write, and score over 100 different materials. It’s a versatile machine that can handle a wide range of projects. If you’re looking for even more capabilities, the Cricut Maker may be the way to go. This machine offers all the same features as the Explore Air 2, but also includes tools specifically designed for cutting fabrics and thicker materials. For those who want a compact machine perfect for quick, everyday projects, the Cricut Joy is a great option. Regardless of which machine you choose, setting it up is relatively straightforward. Simply follow the manufacturer’s instructions to install the Cricut Design Space software on your computer or the app on your smartphone.
Navigating Cricut Design Space
Immerse yourself in Design Space, the hub where creativity meets customization. Take some time to explore its vast offerings and familiarize yourself with the tools at your disposal. Here, you can craft unique designs by adjusting sizes, colors, and adding personalized text.
Begin with a straightforward project from the Design Space library. Simple endeavors like vinyl decals or greeting cards are perfect for beginners, allowing you to grasp the fundamentals without feeling overwhelmed. By starting small, you’ll gain confidence in your abilities, making it easier to tackle more complex projects down the line.
Gathering Your Materials and Tools
When it comes to crafting, having the right materials and tools can make all the difference. Let’s start with the basics. Vinyl is a great choice for projects like stickers and home decor, while cardstock is perfect for paper crafts, greeting cards, and scrapbooking. If you’re looking to move your vinyl designs to their final surface, transfer tape is an essential tool to have in your arsenal.Moving on to our essential tools, weeding tools are a must-have for removing excess vinyl from your projects. A scraper is also a valuable addition to your toolkit, allowing you to smooth out materials on your mat and remove any pesky bubbles. Finally, cutting mats are available in different grip strengths to accommodate various materials and provide the perfect surface for cutting and crafting.
Your First Project
To begin creating with Cricut, start by designing a simple layout in their software, Cricut Design Space. Feel free to personalize it to suit your needs. Once you’re satisfied with your design, proceed to the physical process of preparing your material for cutting. This involves placing your chosen material on the cutting mat, ensuring it’s aligned correctly. Next, load the mat into the machine by following the on-screen instructions provided in Design Space. After cutting, remove any excess material using your weeding tools. Finally, if you’re working with vinyl, use transfer tape to smoothly relocate your design to its final destination.
Tips for Success
When introducing a new material to your cutting routine, it’s crucial to perform a test cut first. This simple step ensures that your machine is properly calibrated for the specific material, preventing any potential issues with accuracy or quality. Additionally, double-checking the material settings in Design Space can also make all the difference in achieving successful cuts. It’s easy to overlook something like incorrect settings, but it only takes a minute to verify and save yourself from frustration down the line. Moreover, regular maintenance is vital for maintaining precise cuts. This includes keeping your blades clean and replacing them when necessary. By prioritizing these essential steps, you’ll be well on your way to achieving professional-grade results.
Learning and Growing
As you embark on your Cricut crafting journey, consider joining online forums and social media groups to connect with fellow crafters, ask questions, share projects, and find inspiration. To hone your skills, don’t be afraid to experiment with different materials and projects – practice is key to mastering this creative outlet. When seeking guidance or tips, tap into the wealth of online tutorials available on YouTube and crafting blogs. These resources can prove invaluable as you learn and grow. Remember, the most important aspect of getting started with Cricut crafting isn’t perfection, but rather embracing the process and enjoying the journey. As you become more comfortable with your machine and Design Space, you’ll unlock endless possibilities for personalization and creativity – a true hallmark of any successful crafting adventure.
Cricut Paper Wedding Bouquet

Bring your wedding vision to life by crafting a breathtaking DIY paper wedding bouquet and matching flower girl barrettes. This charming project allows you to infuse your special day with personalized flair, creating a one-of-a-kind keepsake that will remain intact for years to come.
Using your Cricut Explore to cut intricate 3D flowers, along with scrapbooking paper, glue gun, green wooden picks, floral foam, and fabric or ribbon, this exquisite bouquet takes shape. The straightforward steps and affordable materials make it an accessible project for anyone eager to add a unique element to their wedding celebration.
The matching flower girl barrettes beautifully complement the bouquet, creating a cohesive look that exudes love and commitment. By taking on this DIY endeavor, you’ll not only save money but also enjoy an exciting way to participate in your wedding preparations, resulting in a truly unforgettable bouquet that encapsulates the essence of your special day.
Beginners Guide to Gift Wrapping With Cricut
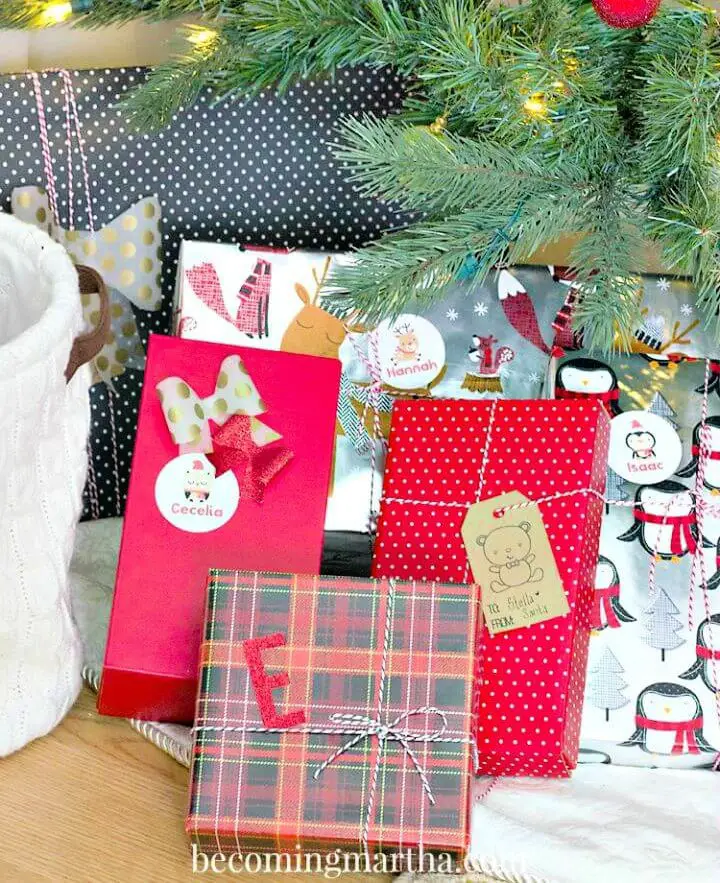
Transform the presentation of your gifts with ease using the Cricut Explore. This intuitive crafting tool empowers even those without extensive crafting experience to design impressive gift toppers and tags. With a range of materials at your disposal, including cardstock, Cricut pens, tape, and string, you can customize your presents with precision and flair. The Cricut Explore’s capabilities extend beyond simple doodling, allowing you to create pre-addressed labels, score cardstock for intricate bows, and much more. What’s more, this user-friendly tool is accessible to everyone, not just those with a background in crafting. By leveraging the Cricut Explore’s versatility and ease of use, you can unlock a world of creative possibilities and add a unique touch to every gift, making it an essential addition to your gift decorating arsenal.
How to Make Cricut 3D Flowers
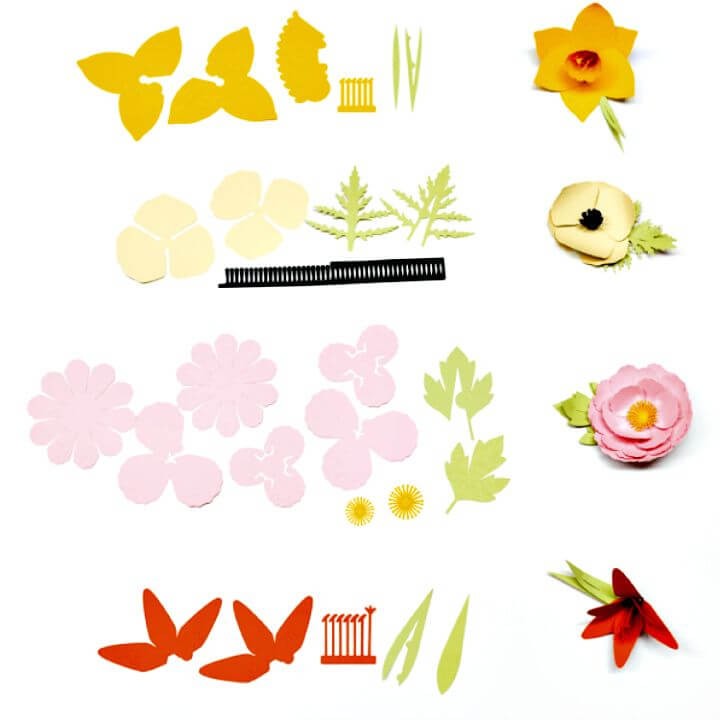
Transform your crafting experiences with the user-friendly Cricut Explore or Maker machines. By following these step-by-step assembly instructions for creating 3D paper flowers like daffodils, Tiger Lily, Poppy, and Peony, you’ll unlock your creative potential. Assembling these beautiful flowers involves folding, gluing, stacking petals, and assembling leaves and pistils/stamens, making the process enjoyable and stress-free. To get started, gather cardstock paper, a Cricut machine, and quick-drying tacky glue. With these materials and our guidance, you’ll be able to create stunning floral pieces that can be used for event decorations, gifts, or to add a touch of elegance to your living space. By mastering these techniques, you’ll confidently use your Cricut machine to elevate your DIY projects with vibrant colors and sophisticated designs.
Hot Air Balloon Laptop Decal With Cricut
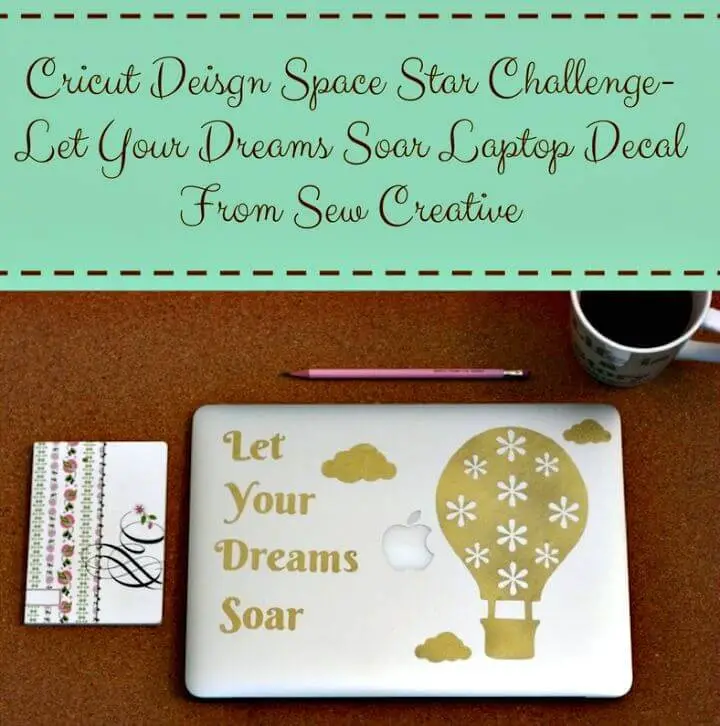
Discover the art of DIY crafting with the Cricut Explore, a versatile tool that brings your creative ideas to life. With its capabilities in cutting materials like vinyl, fabric, and leather, you can unleash your imagination and create unique designs. Take, for instance, the ‘Let Your Dreams Soar’ hot air balloon laptop decal, crafted using the Cricut Explore. This stunning design represents Crystal’s aspirations and is available in three distinct variations to cater to various tastes. If you’re eager to craft this decal, gather your essential tools: a pencil, paper, iPhone camera, standard cutting mat and blade, Cricut Weeding Tool, and Cricut Vinyl and Transfer Tape. This innovative approach allows you to personalize your gadgets while celebrating your creativity and manifesting your dreams.
make A 3D Butterfly Effect Lampshade
Transform a plain lampshade into a breathtaking masterpiece using the Cricut Explore and a DIY 3D butterfly effect. By combining white-on-white tones, you’ll create an elegant and subtle butterfly motif that will add a touch of sophistication to any room. To achieve this look, you’ll need a few simple supplies: a white lampshade, iron-on vinyl, white glitter, white cardstock, vellum, and a hot glue gun.
To start, design a cascade of butterflies in varying sizes using the Cricut Design Space. Once designed, iron the butterfly motifs onto the lampshade for a permanent and elegant finish.
Next, cut intricate butterfly shapes from both cardstock and vellum, then glue them together to create a layered effect. Attach these 3D butterflies to the larger iron-on design using a hot glue gun. The result is a stunning lampshade that will beautifully illuminate any room with its unique charm.
This creative project is the perfect way to add a personalized touch to your home decor, making it a unique and thoughtful addition to any space.
Colorful DIY Vinyl Pantry Labels
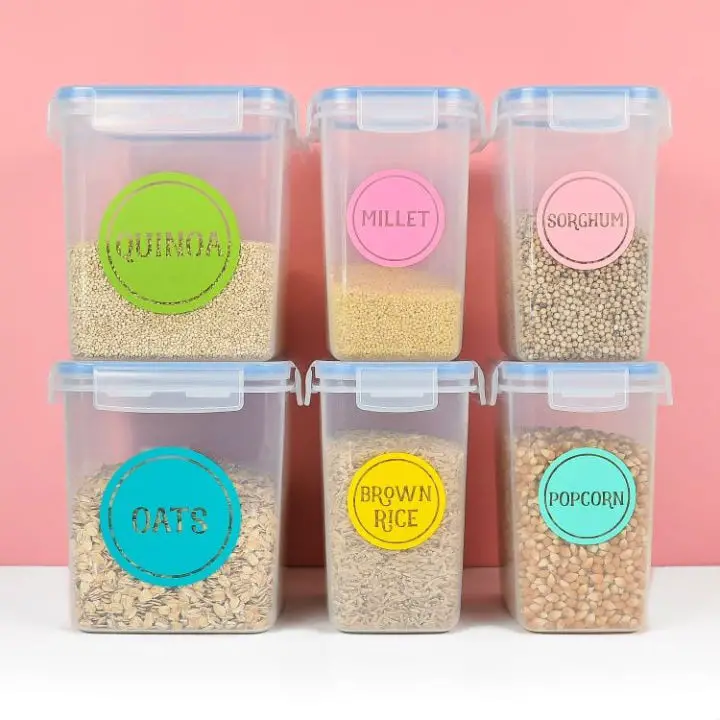
Transform the look of your pantry with customizable DIY vinyl labels that can be tailored to your personal style. Using a Cricut or similar cutting machine, cut out 137 unique SVG designs and follow the accompanying tutorial to apply them to your jars or canisters. This comprehensive guide includes step-by-step instructions on how to use adhesive vinyl and a Cricut machine to achieve a professional-looking finish. With three distinct design options – modern colorful, classic farmhouse mason jar, and Spice Jar Label sets for organizing herbs and spices – you can give your pantry a fresh makeover that’s both organized and chic. For just $5, you can elevate the functionality and aesthetic appeal of your pantry with these versatile vinyl labels.
Playroom Accent Wall With Vinyl Words

Transforming a dull basement into a vibrant playroom accent wall can be a game-changer for kids’ imagination and creativity. Our story begins with an unexpected water issue that necessitated an overhaul of the space, ultimately leading to a wonderful opportunity to create an exciting play area. The process is surprisingly straightforward, requiring only a few basic supplies: paint, measuring tape, vinyl words, and the Cricut tool set. By painting squares in various colors, you can achieve a visually striking grid design that will catch kids’ eyes. Adding vinyl words that represent joy and childlike play takes it to the next level, making the wall even more engaging. The beauty of this project lies in its efficiency – with the Cricut Basic Tools Set, you can easily cut and apply the words, making the process enjoyable as well. The end result is a captivating accent wall that brings the playroom to life, inspiring kids’ imaginations to soar.
DIY Chevron Artwork Made With Paper
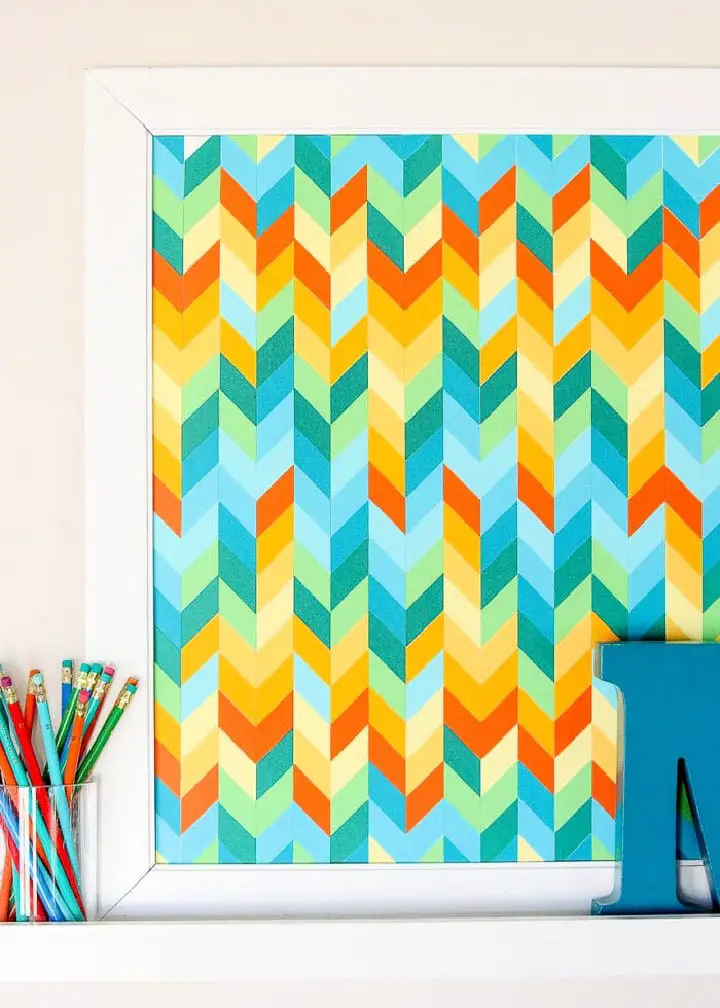
Transform any room’s interior space into a stunning work of art using DIY chevron artwork, a budget-friendly and captivating project that allows you to express your unique style. With minimal supplies like cardstock, white poster board, foam core, scrapbooking adhesive, rotary cutter, and e-cutter, you can create a one-of-a-kind piece of art tailored to your personal taste. The beauty of this project lies in its versatility – from color palette to pattern and size, every element can be customized to fit your aesthetic. Despite its intricate appearance, the resulting chevron or herringbone design is surprisingly easy to achieve. Not only does this project elevate your home’s decor, but it also provides a fun and engaging crafting experience that allows you to unleash your creativity. It’s time to give those blank walls a makeover with paper – and let your imagination run wild!
Cricut Valentine’s Day Centerpieces
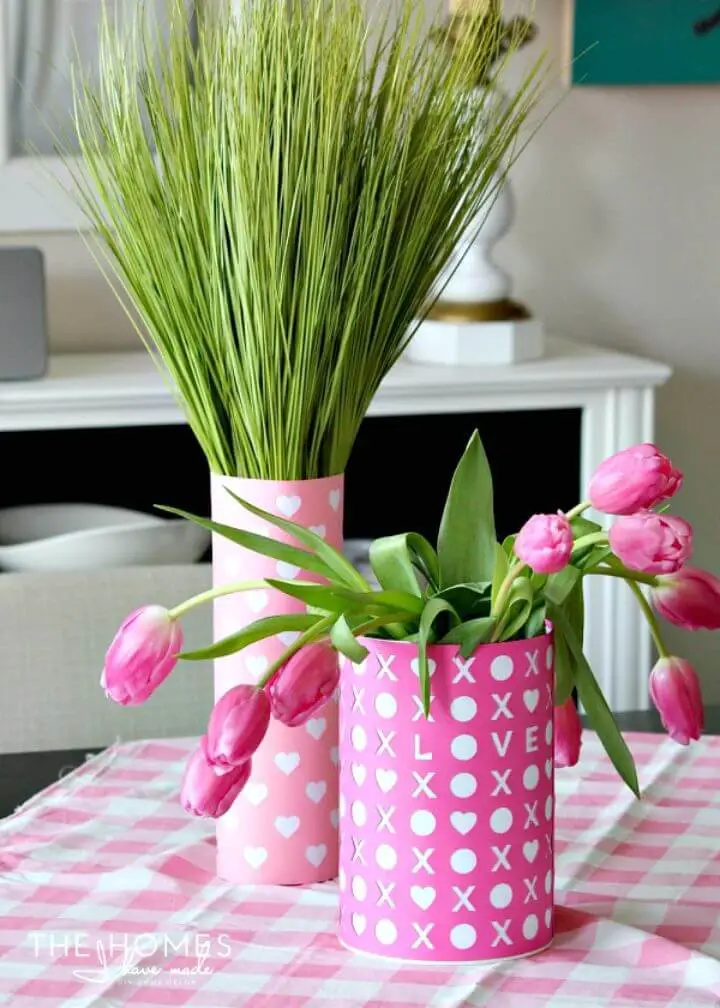
Transform your space into a romantic haven this Valentine’s Day by crafting charming DIY paper vases that are not only budget-friendly but also infinitely customizable. Using a Cricut machine and solid-colored cardstock, you can create one-of-a-kind ‘vase wraps’ that can be wrapped around any waterproof vessel, such as a vase or jar. Simply cut out your preferred design – whether it’s a heartwarming message or a whimsical love-themed motif – to give your decor a personal touch.These temporary and disposable vases are perfect for dressing up plants, bouquets, or mantel pieces, adding a romantic ambiance to your space without the hassle of storing extra holiday decorations. Plus, they make unique gifts for loved ones, teachers, co-workers, or family members, making this Valentine’s Day one to remember.
DIY Magnetic Memo Boards
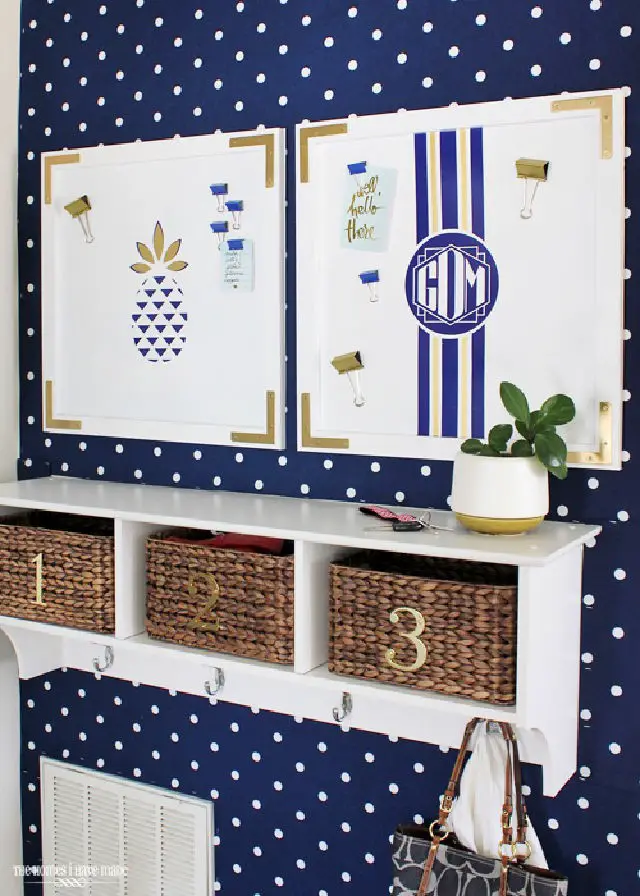
Elevate the ambiance of your home by infusing it with personality and functionality through a custom DIY magnetic memo board. This ingenious creation is a testament to the power of continuous improvement in home organization, as showcased by a resourceful homemaker. By transforming plain sheet metal into a decorative and practical tool, you can seamlessly integrate the ‘pin-it-up-for-all-to-see-and-find’ philosophy into your daily routine. The process is straightforward: construct a wooden frame, attach it to spray-painted sheet metal, and adorn it with vibrant vinyl decals that reflect your unique style.What sets this board apart is its exceptional versatility – it can hold magnets and utilizes color-coded binder clips, providing unmatched strength and organization capabilities. This engaging and cost-effective DIY project empowers you to customize, create, and organize according to the evolving needs of your family.
Make Wedding Invitations With Cricut
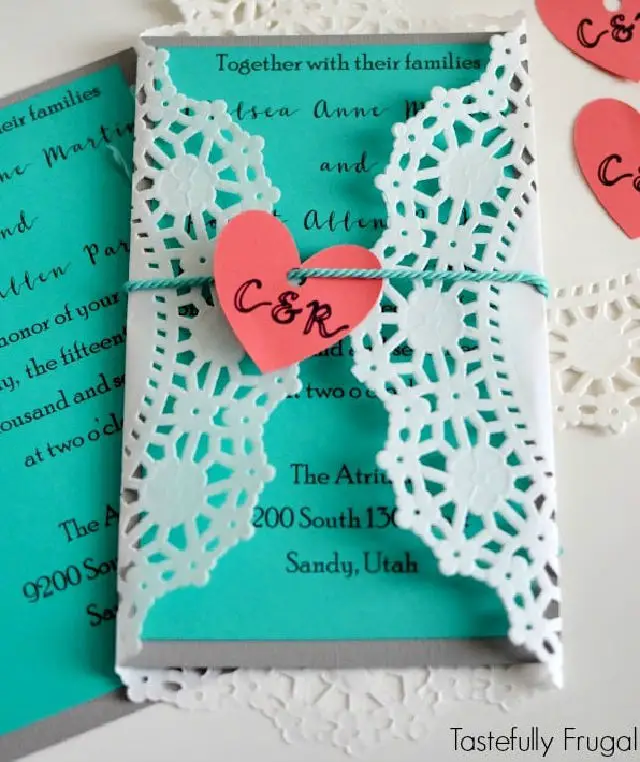
Transform the art of crafting DIY custom wedding invitations with the Cricut Explore Air into an unforgettable experience. With unparalleled control and significant cost savings, you can create over 100 personalized invites for just $20 – a fraction of the average $2 per invite. This budget-friendly approach allows you to tailor every invitation to your wedding’s unique theme, from colors to wording, leaving a lasting impression on your guests. As you work with cardstock, paper doilies, ribbon, and adhesive rollers, bring your vision to life and immerse yourself in the creative process. The Cricut Explore Air machine provides accuracy and ease of creation, serving as an invaluable partner in this project. By taking control of your wedding invitations’ design, you’ll not only save money but also express your excitement and personality through these one-of-a-kind, handmade masterpieces.
DIY No-Sew Felt Coffee Cozies
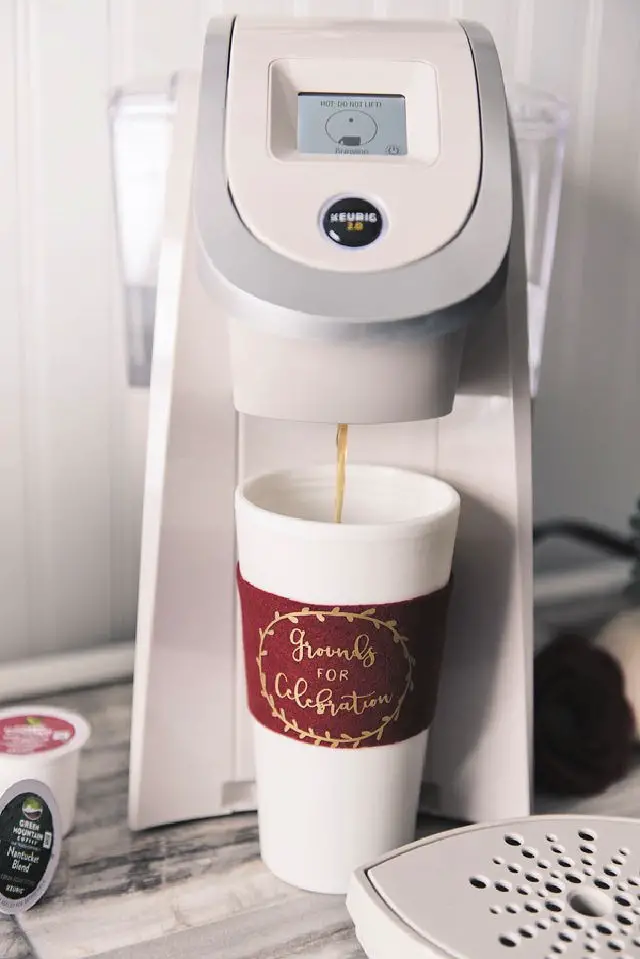
Transform the cozy atmosphere of an autumnal gathering by creating personalized DIY no-sew felt coffee cozies that double as unique favors for a fall bridal shower. This uncomplicated project allows your guests to savor their favorite hot beverages, such as apple cider or rich coffee, while enjoying a thoughtful touch. The array of flavors and scents available – from bold coffees to sweet teas – makes these ‘Grounds for Celebration’ cozies the perfect accompaniment to freshly brewed mugs. With simple instructions guiding your creative journey, you’ll craft delightful keepsakes that not only add warmth to your daily coffee routine but also serve as a meaningful token of appreciation for your loved ones.
Wedding Dress Bunting Banner With Cricut
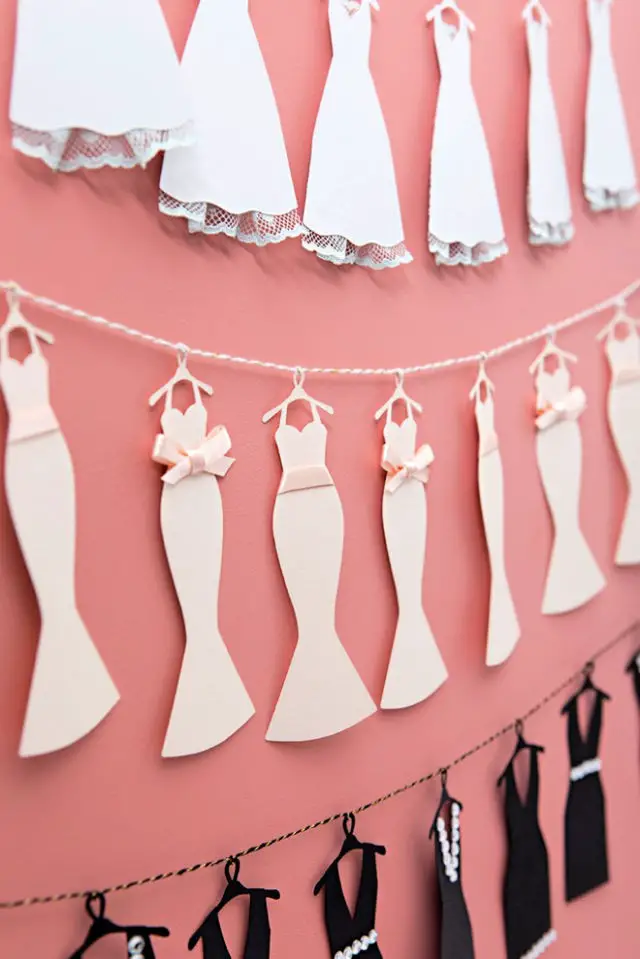
Elevate your bridal shower or bachelorette party with a touch of personal flair by crafting custom-made mini-wedding dress buntings. Using a Cricut Explore Air2, cardstock in a color that matches the celebration’s aesthetic, and embellishments like lace, ribbon, or sequins, these charming decorations can instantly upgrade any party decor. Beyond their decorative appeal, they also double as thoughtful gift tags or unique photo props for the bride-to-be during her dress fitting session. The creative possibilities are vast – experiment with different color combinations, embellishments, or even repurpose them as iron-on appliques. Create something truly special and meaningful with our step-by-step guide on crafting these delightful mini-dress decorations.
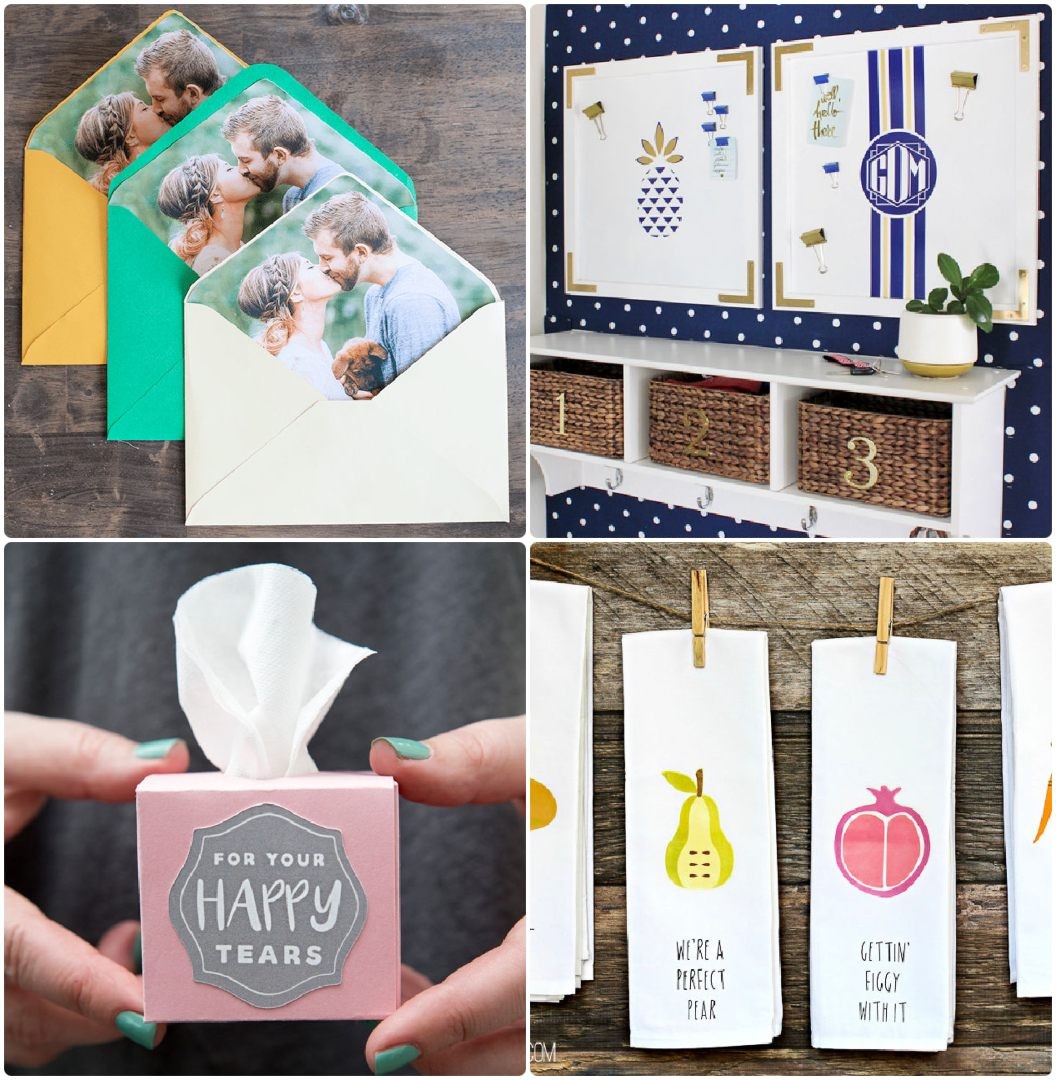
Make Your Own Photo Envelope Liners
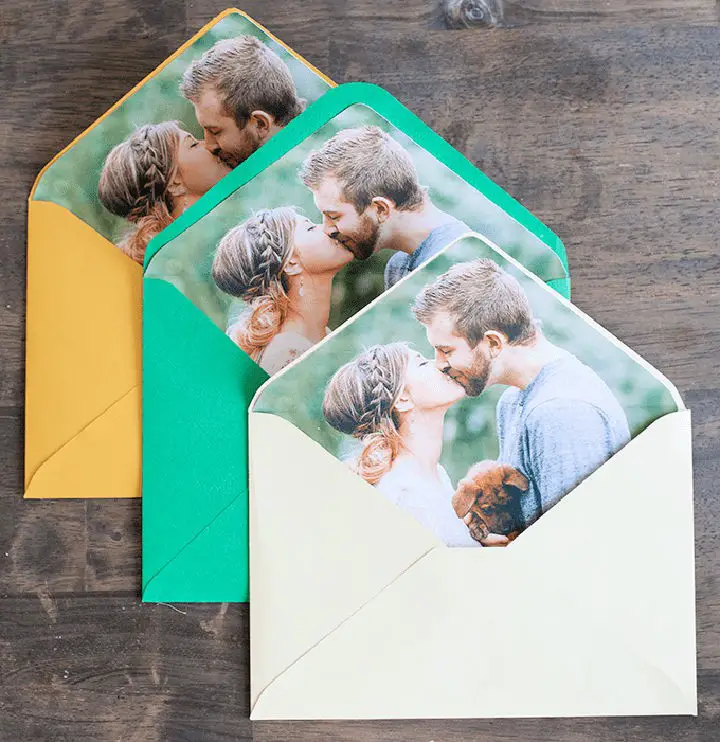
Transform your wedding celebration into a one-of-a-kind masterpiece with the Cricut Explore Air™, an indispensable tool for any DIY enthusiast. This cutting-edge device empowers you to infuse your special day with personal touches that reflect your unique style and love story.
One creative project that’s sure to delight is crafting photo envelope liners, a fun and effortless way to share your engagement memories at pre-wedding gatherings. With just a few simple tools like a color printer, photo paper, envelopes, and double-sided tape, you can create customized envelope liners that capture the essence of your love story.
By following this easy-to-follow process, you’ll be able to highlight your journey in a way that’s truly unique and special. Cricut makes it remarkably easy to add that extra touch of glamour to your wedding preparations, allowing you to focus on what really matters – celebrating your love with the ones you cherish.
Miss to Mrs. Banner for Bridal Shower Decoration
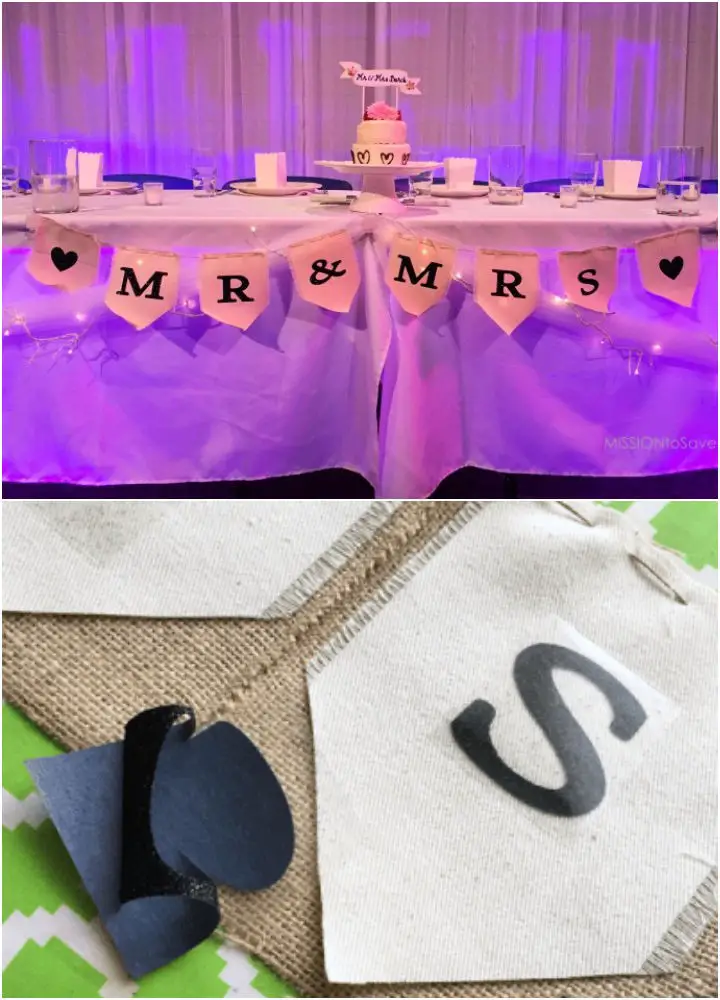
Transform any celebration into a memorable experience with Cricut’s exceptional crafting supplies. For instance, host a charming bridal shower with a personalized ‘Miss to Mrs’ banner that exudes love and effort. Combine the Cricut machine’s precision with materials like burlap, cream-colored twill, twine or hemp cord, and Cricut black glitter iron-on paper to create a sophisticated look.
The process is not only budget-friendly but also allows for customization, making it a unique aspect of the celebration. You can even give your DIY project a fun twist by modifying the banner after the shower to adorn the couple’s head table at the wedding reception. Simply swap out some letters and watch as it elevates the event decor with its handmade charm.
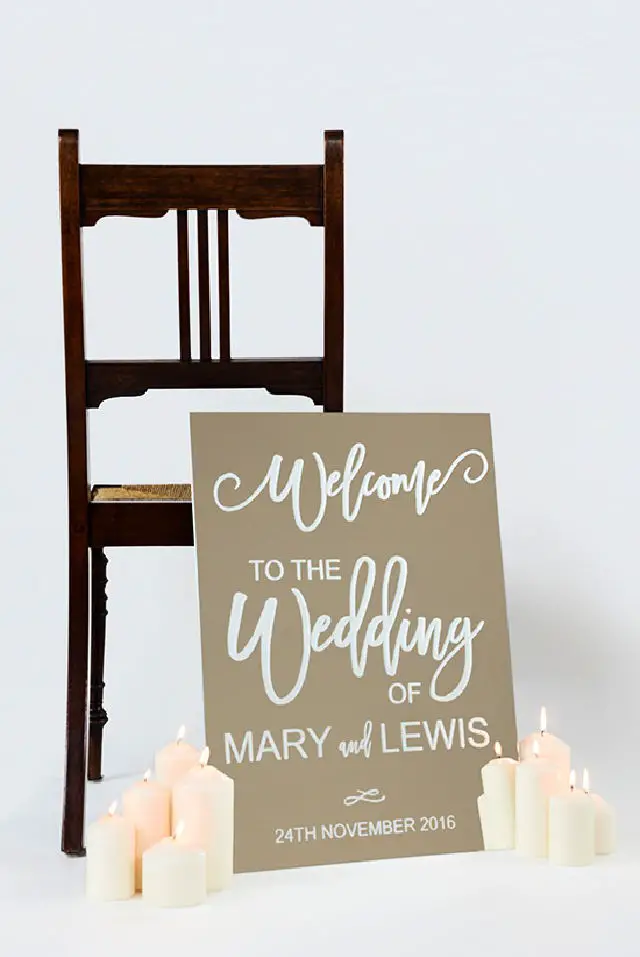
Wedding Day Countdown Chalkboard Sign With Cricut
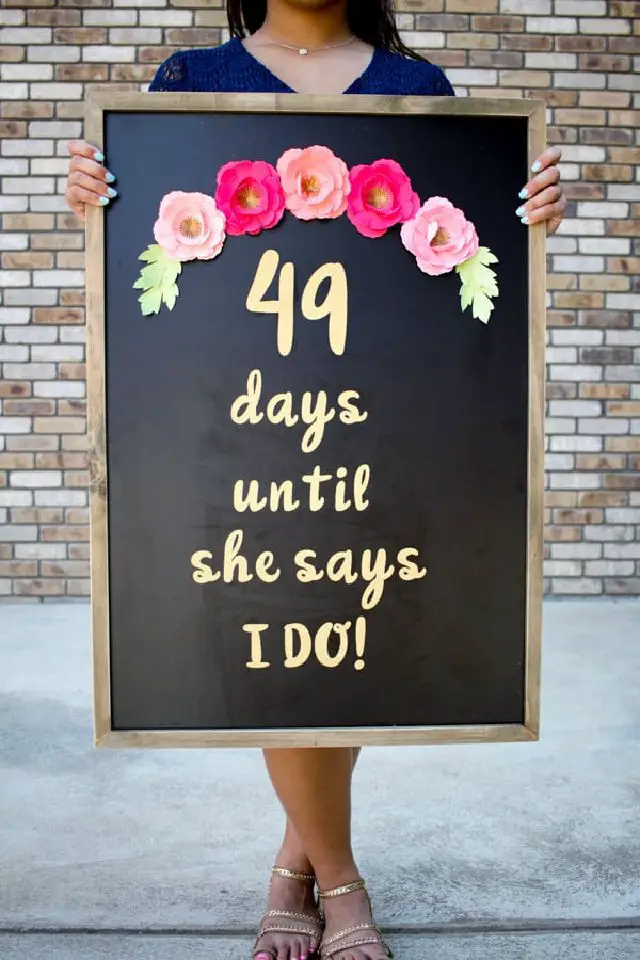
Transform your wedding celebrations into an unforgettable experience by crafting a one-of-a-kind DIY project that embodies creativity, love, and personalization. A wedding countdown sign is the perfect gift for a bridal shower, offering a unique blend of whimsical design and sentimental value.
Combine the precision of the Cricut Explore with your own creative flair to create a breathtaking sign that not only counts down the days until the big day but also serves as a cherished keepsake for the newlyweds. This project exemplifies the limitless potential of Cricut in weddings – allowing you to craft a story that’s uniquely yours and tells the tale of love, laughter, and joy.
With readily available crafting tools and a dash of imagination, you’ll be amazed at what you can create.
DIY Wedding Guest Gift Bags and Essentials
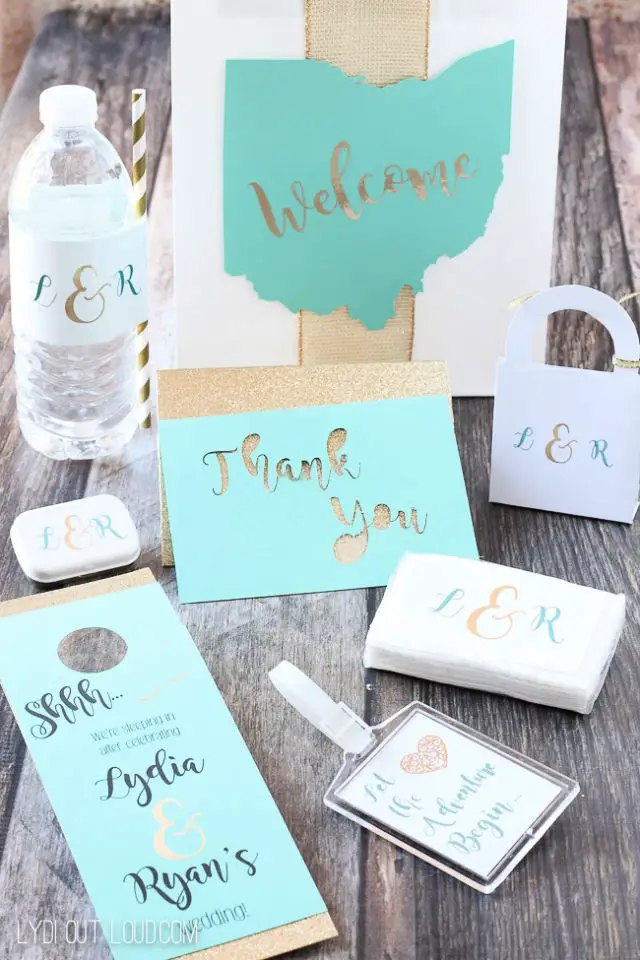
Elevate the ambiance of your wedding with personalized DIY guest gift bags, made possible by your trusty Cricut machine! This customizable project not only provides a thoughtful welcome to your guests but also offers a budget-friendly solution. By combining the Cricut Explore Air with cardstock in your chosen color, adhesive foil, and other materials, you can create bespoke bags that reflect your unique style.
Take it to the next level by adding a hotel room door hanger, luggage tag favors, or monogrammed water bottle labels. These thoughtful touches transform your gift bags into keepsakes that will be cherished long after the celebration. And don’t stop there – consider including monogrammed mint tins, tissues, and favor boxes to add an extra layer of personalization.
With plenty of room for creativity, you can craft these detailed yet easy-to-follow wedding guest gift bags and leave a lasting impression on your special day.
Flower Girl and Ring Bearer T-Shirts
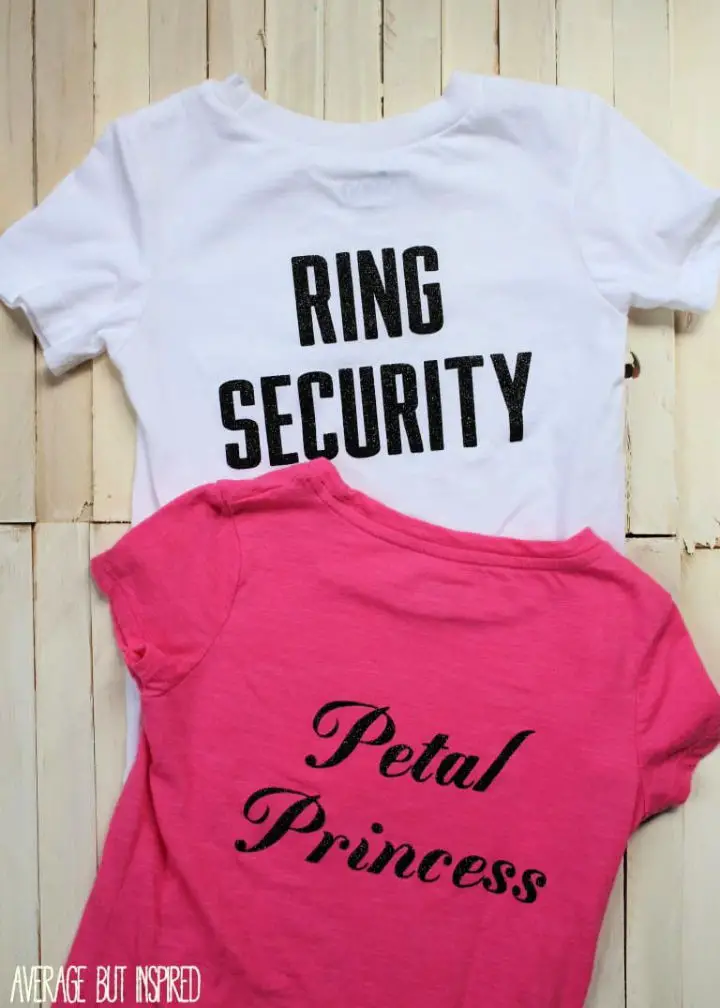
Transform a special occasion into an unforgettable experience with DIY flower girl and ring bearer t-shirts that exude love and enthusiasm. Whether it’s a wedding, family reunion, or any other celebration, these customized shirts can be a unique touch. With plain t-shirts, an electronic cutting machine like a Silhouette Portrait, and heat transfer vinyl, you’re just a few steps away from creating your desired design.
Alternatively, opt for pre-cut iron-on transfer letters and embellishments without the need for a cutting machine. Simply use the machine’s software to create and mirror your design, then cut the vinyl to your specifications.
To finish, apply the design onto the t-shirts with an iron, following the vinyl package’s instructions. These custom-made shirts not only serve as adorable identifiers for your young participants but also make beautiful keepsakes to cherish the memorable day.
Make a Wedding Hand Fans With Cricut
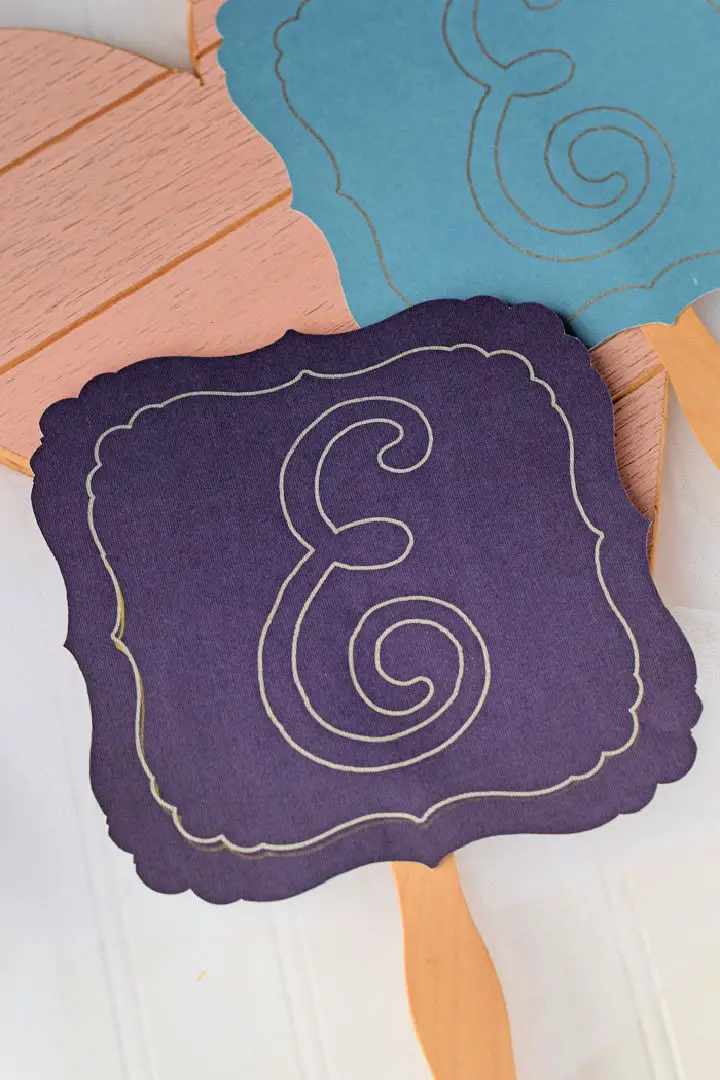
Elevate your outdoor wedding with a charming touch of Southern hospitality by crafting bespoke DIY wedding hand fans using the intuitive Cricut software. These elegant fans not only provide a refreshing respite from the springtime heat but also serve as unique mementos that can be personalized to commemorate the special day. With the freedom to customize monograms, wedding dates, or other meaningful elements, these handmade fans become a thoughtful gesture that reflects your personal style.
To bring this creative endeavor to life, you’ll need a few essential tools: the Cricut Explore Air 2, a standard grip cutting mat, Cricut card stock, and a hot glue gun. Your journey in the Cricut Design Space will be an exciting one as you select and size shapes, add textual elements, and watch your design come to life.
Take it to the next level by attaching the fan to wooden handles for a polished finish that adds an air of sophistication. The simplicity of this project belies its impact, making it an ideal introduction to the world of creative customization with Cricut. So, get ready to elevate your wedding celebration with this practical yet thoughtful DIY hand fan project that’s sure to delight.
DIY Wedding Shoe Stickers With Cricut
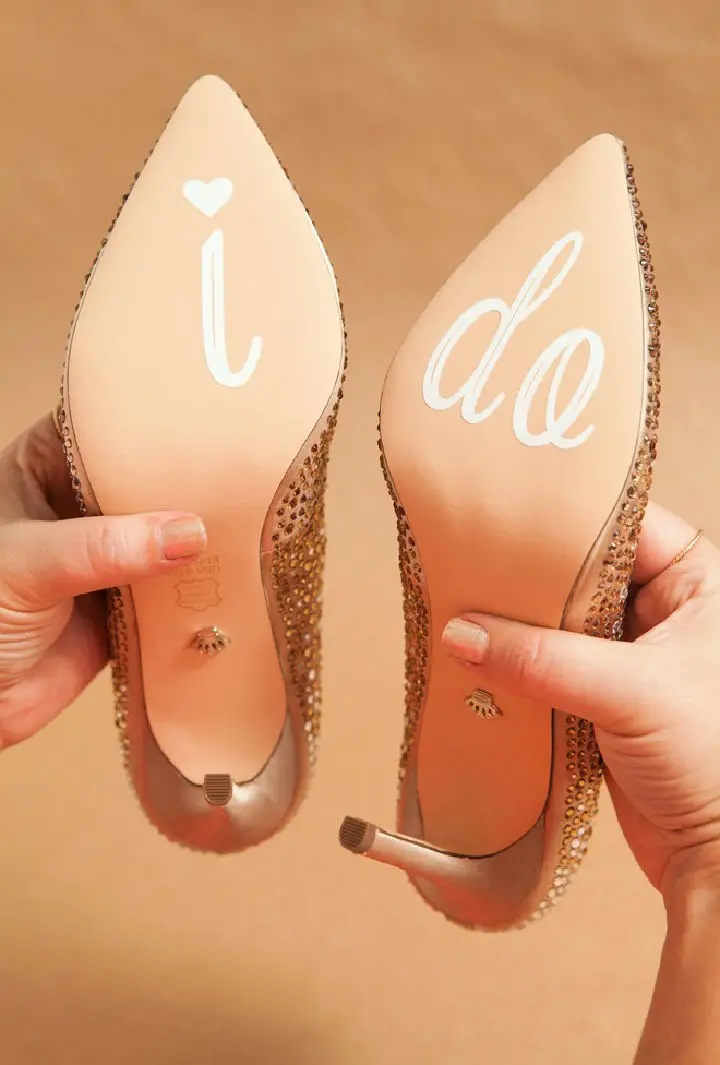
Elevate your crafting experience with our curated collection of Cricut projects, designed to inspire your creative spirit. Take your wedding day style to the next level by incorporating custom DIY elements, such as personalized stickers for your shoes. Using the Cricut Explore, you can create charming and unique designs that reflect your personal taste or special memories. Perfect for the bride, bridesmaids, and groom, these vinyl stickers add a touch of elegance to any smooth surface, including leather or faux leather. With a range of font styles and motifs at your fingertips, you can craft meaningful messages or clever quotes to adorn your shoes. The process is straightforward: design, cut, weed, and transfer your desired stickers onto your shoes. As you take each step, you’ll be creating memories that will last a lifetime.
Adorable DIY Ring for a Kiss Cowbell
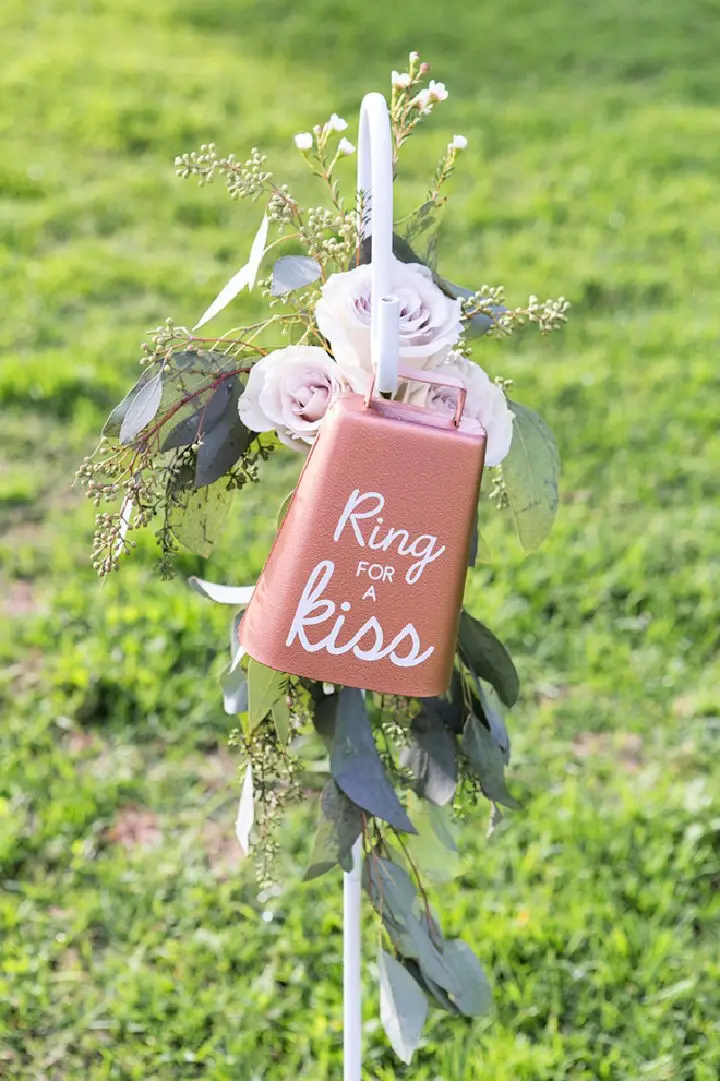
Transform your wedding celebration into a playful haven for love and affection with a whimsical DIY ‘Ring For A Kiss’ cowbell. This charming addition brings an air of delight to the reception, encouraging a cascade of tender moments. To create this delightful keepsake, gather a shepherd hook, cowbell, spray paint, fresh flowers, floral wire, stickers or paint pen. Customise your materials to harmonize with your wedding theme, adding an extra layer of personalisation.
As you place the hook and adorned cowbell at your reception, the sweet sound of the cowbell will signal the start of a romantic encounter. And after the celebration comes to a close, repurpose this charming keepsake in your garden, allowing the magic to linger long after the big day.
This 30-minute project is an effortless way to infuse your wedding with a unique and unforgettable detail that will leave a lasting impression on you and your loved ones.
Modern DIY Beach Wedding Seating Chart
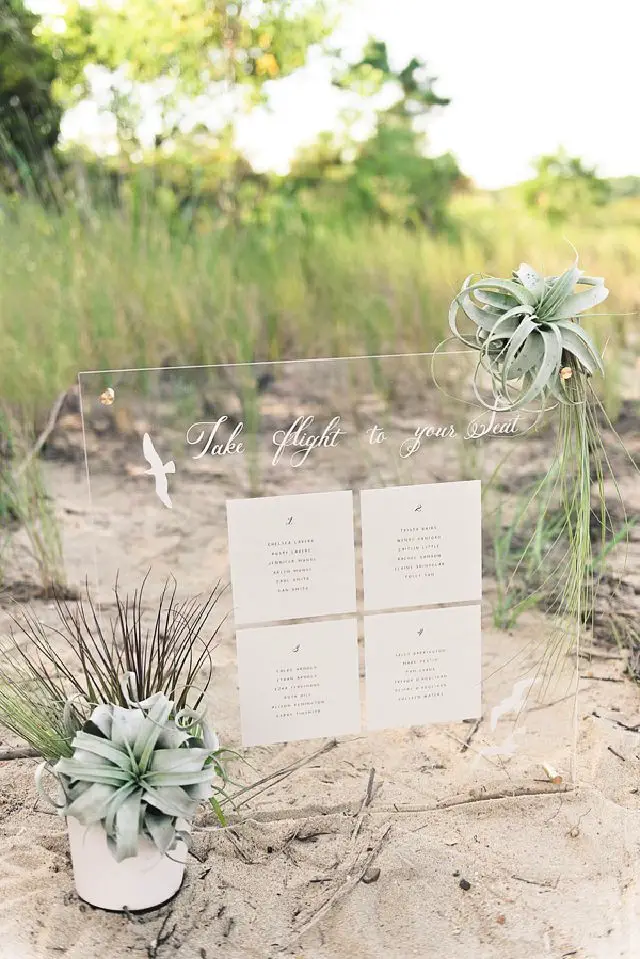
Unleash your creativity and make your coastal-themed wedding truly unique by embarking on this DIY modern beach seating chart project. As you craft, let the serene beauty of beachy neutrals inspire you to infuse your personal style into every detail. With a Cricut Explore Air machine, ‘Pebble’ vinyl, various crafting tools, and your computer at your fingertips, you’ll bring the soothing coastal vibe directly to your wedding seating arrangement. This project not only elevates the aesthetic of your event but also serves as a functional guide, effortlessly directing guests to their seats. By following the detailed steps, you’ll create a professionally-crafted seating chart that captures the intimacy and charm of a beach wedding. As you craft, remember to have fun and enjoy this special part of planning your big day.
Handmade Mini Wedding Tissue Boxes With Cricut
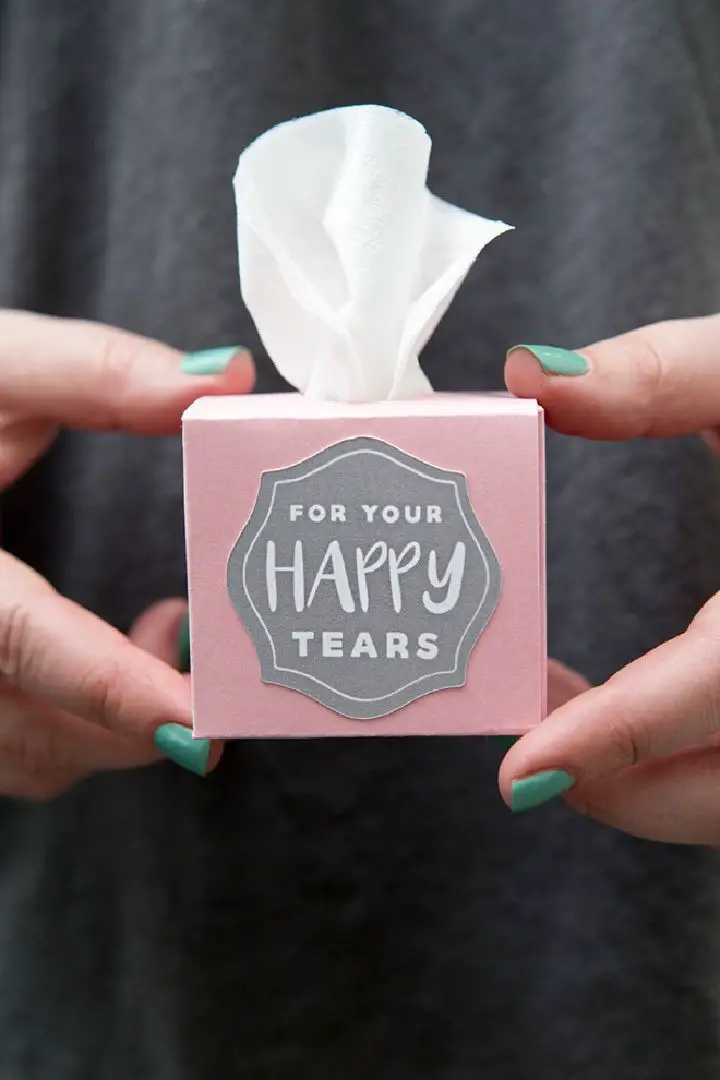
Get set for a delightful DIY project that adds a touch of whimsy to your special day with our step-by-step guide on creating mini wedding tissue boxes. With the help of a Cricut Explore machine, sticker paper, and cardstock, you’ll be able to craft these charming little containers in no time. The beauty of this tutorial lies in its simplicity – customize our downloadable print-and-cut file to match your wedding’s color scheme, and voila! You’ll have tiny tissue boxes that are perfect for capturing those special moments. Your guests will appreciate the thoughtfulness behind these pint-sized pieces, making them a lovely addition to your celebration. With this DIY mini wedding tissue box tutorial, you’ll take your event to a new level of adorable.
Personalized Etched Glass Wine Bottle
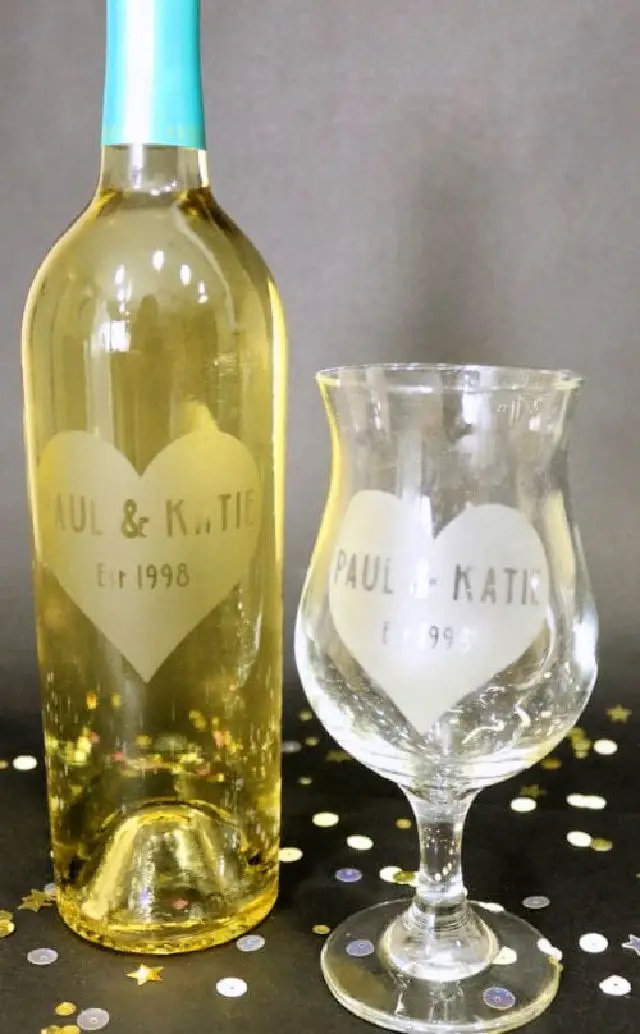
Transform any special occasion into an unforgettable memory by crafting a one-of-a-kind DIY etched wine bottle. This customized glass etching project is an ideal way to commemorate anniversaries, making it a heartfelt gift and a fun creative outlet. To get started, gather the necessary materials such as a glass bottle, Cricut Cutting Machine, vinyl, Etchall Etching Creme, and other supplies. Begin by designing your stencil in Cricut Design Space, then remove the bottle label using Goo Gone before applying the vinyl stencil. Once in place, apply the etching cream and let it sit for 15 minutes before rinsing it off. With a beautifully etched bottle as your result, you’ll have a stunning keepsake perfect for gifting or decorating. So, why not start creating and make your next celebration truly special with a personalized etched wine bottle?
DIY Table Numbers With Cricut
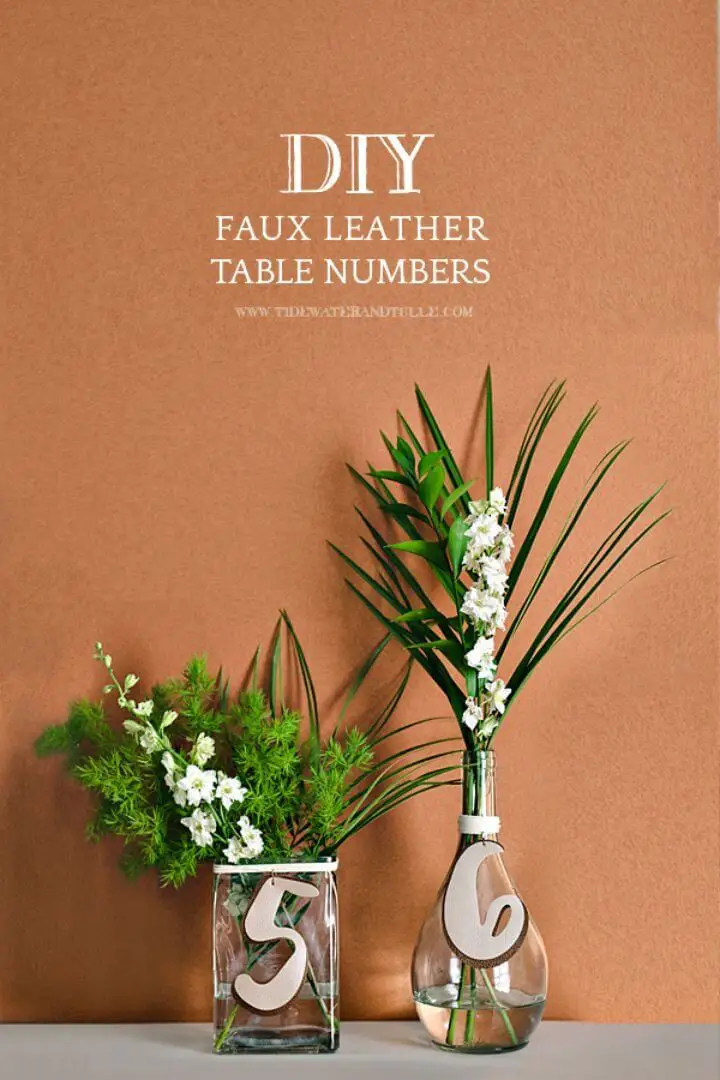
Infuse the carefree essence of a beachy summer into your wedding celebration by crafting faux leather wedding table numbers. This effortless DIY project adds a personal touch to your special day’s theme and can be completed in just 10 minutes. To achieve this unique look, we’ll utilize Cricut’s faux pebbled leather in its two stunning hues – Champagne and Beige – for their striking jewel-toned colors and ease of cutting. With a few additional crafting essentials like glass bottles, double-sided tape, a hot glue gun, and a Cricut machine at your disposal, you’ll be able to bring these charming table numbers to life. By following this detailed step-by-step guide, you’ll effortlessly dress up your wedding tables with the modern summer aesthetic that exudes romance and whimsy. Join the creative journey and celebrate your love story with this distinctive DIY centerpiece tutorial.
Table Numbers With The Cricut Explore Air
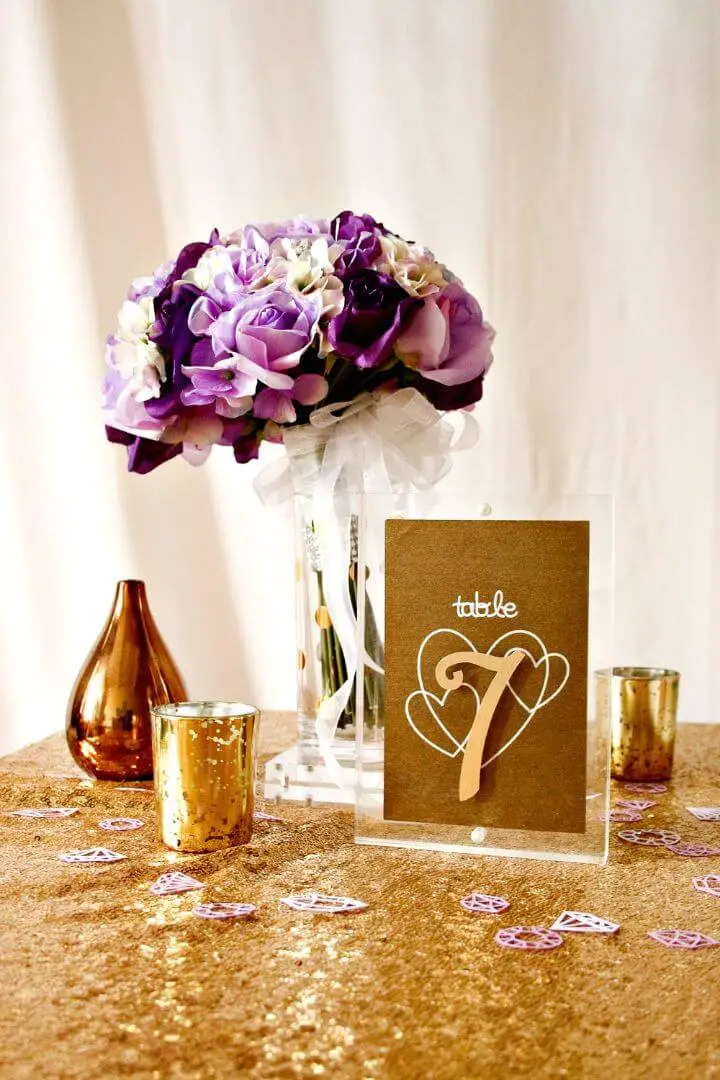
Transform your wedding setup into a one-of-a-kind masterpiece by incorporating acrylic frame table numbers crafted using the Cricut Explore Air Machine. This project’s versatility allows you to select from three unique designs that cater to your personal style.
The first design features vinyl lettering printed inside, enabling you to create custom table numbers and decorations with a Cricut pen. The second design boasts an inverse glitter number that stands out due to its tactile texture and radiant shine, while the third design presents a simple yet elegant glitter table number.
As a result, this DIY project yields a visually stunning addition to your wedding decor and a heartfelt keepsake for guests to treasure long after the event. By unleashing your creativity with Cricut, you’ll create an unforgettable wedding experience that’s truly yours.
DIY Faux Etched Mirror Sign
Create show-stopping wedding accents with ease using the versatile Cricut machine and a simple DIY etched mirror sign tutorial. By selecting a frosted window cling for the design, you’ll achieve a beautiful etched effect that can be easily applied and removed from your mirrors post-wedding. To get started, gather your supplies: a mirror, the Cricut Machine, accessories, and our provided design templates. Then, follow our step-by-step guide on customizing, cutting, weeding, and applying the design to fashion a one-of-a-kind and eye-catching mirror sign that adds an individual touch to your special day.
Paper Bridal Bouquet With The Cricut
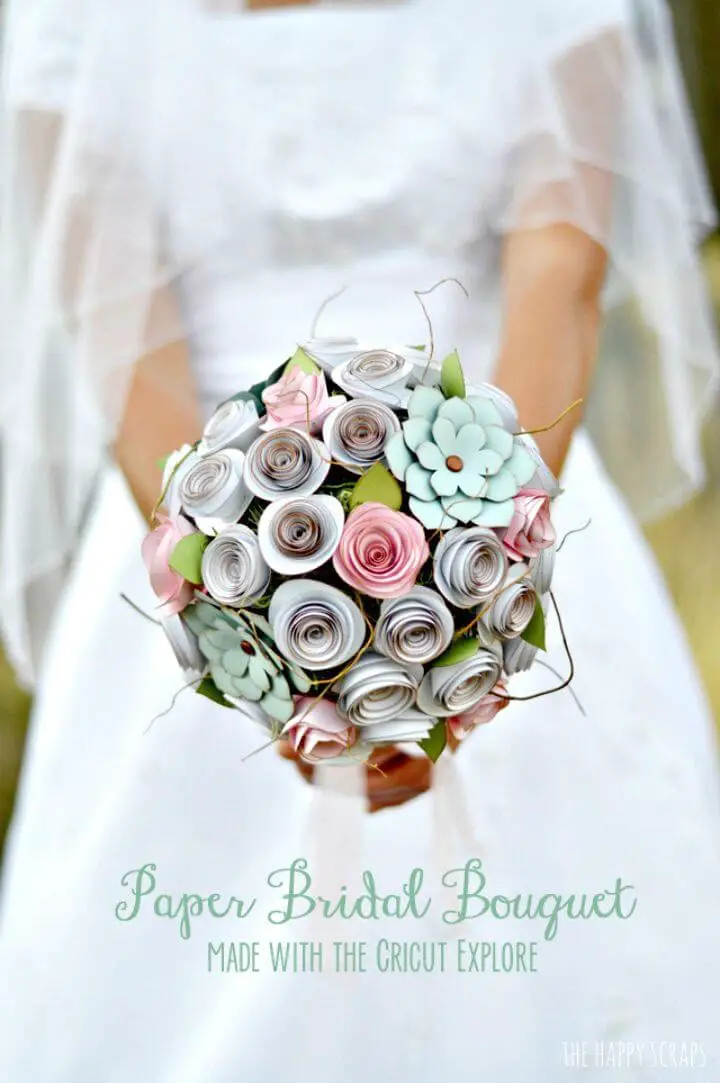
With the versatility of a Cricut and some paper, crafting your own bouquet for the special day has never been more accessible. This innovative DIY paper bridal bouquet is a true masterpiece of handcrafted beauty, exceeding expectations in its final form. Inspired by a Wedding/Celebrations theme with subtle undertones of Floral/Woodland charm, this breathtaking arrangement relies on simplicity and straightforward materials to bring it to life.
By following the step-by-step guidelines to cut and assemble flowers and leaves, you’ll create a visually stunning and deeply personal bouquet that will transcend your wedding day. As a handmade masterpiece, this DIY project adds an extra layer of emotional resonance to your celebration, allowing you to share a piece of yourself with loved ones.
Through these detailed, engaging, and easy-to-follow instructions, you’ll unlock the secrets to crafting an enduring floral charm that will leave a lasting impression on all who behold it.
DIY Photo Booth Stick Props
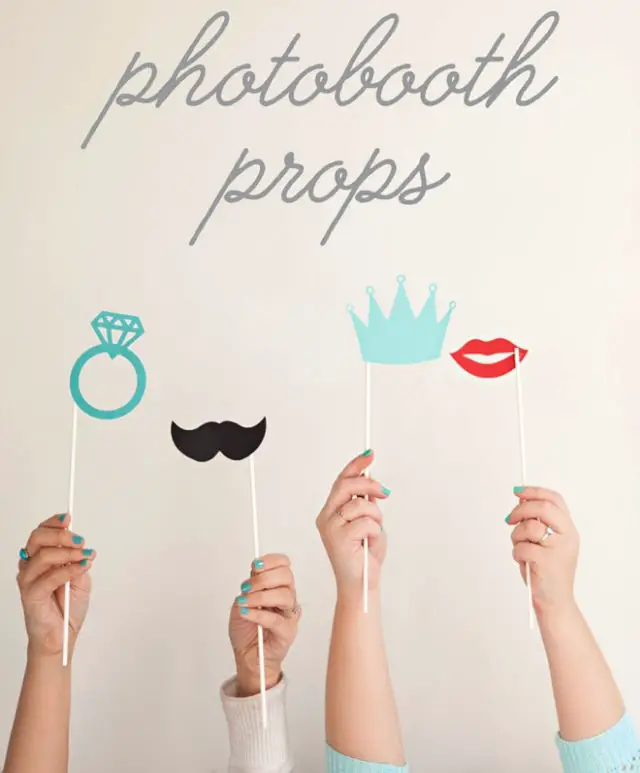
Elevate your event’s creative quotient by whipping up these DIY photobooth props – a fantastic, one-of-a-kind, and reusable project that will leave your guests beaming. The best part? You can craft them with ease using heavy-weights cardstock in your favorite hues, a trusty glue gun, lollipop sticks, and either a Cricut Explore or scissors. This adaptable project lets you cut out custom designs or utilize pre-existing free files to suit your style.
What’s more, the fun doesn’t stop at crafting these props – it extends to the joy of watching your guests use them! So, get creative today and infuse a personalized touch into your next gathering with these photo booth props.
Duotone Leather Utensil Sleeves Tutorial
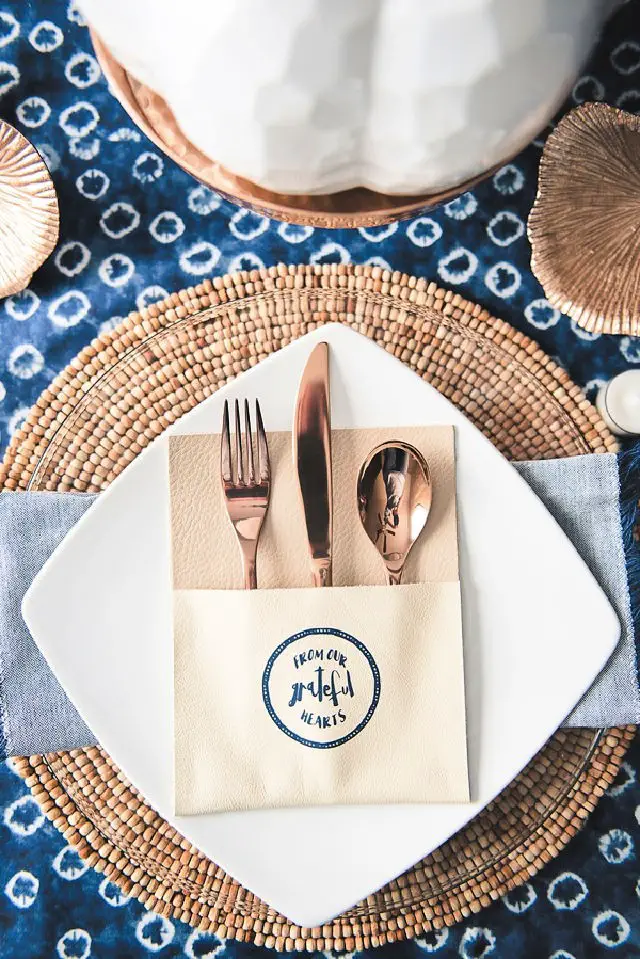
As you prepare to express gratitude to your loved ones at your rehearsal dinner, consider gifting them uniquely crafted DIY duotone leather utensil sleeves. These no-sew accessories elevate the table setting and serve as a thoughtful token of appreciation. By repurposing leather scraps, you’ll not only create something beautiful but also contribute to a more sustainable lifestyle.
nThe process is surprisingly straightforward, requiring just a few materials: a pencil, craft glue, an iron-iron material, and a personal cutting machine like a Cricut. With these simple tools, you can create utensil pockets that are both functional and visually appealing.
nThis easy-to-follow guide empowers you to transform your rehearsal dinner into a truly special occasion, allowing you to connect with your loved ones on a deeper level. By infusing creativity into your table setting, you’ll create a lasting impression that will be cherished for years to come.
Easy Cricut DIY Wedding Giveaway
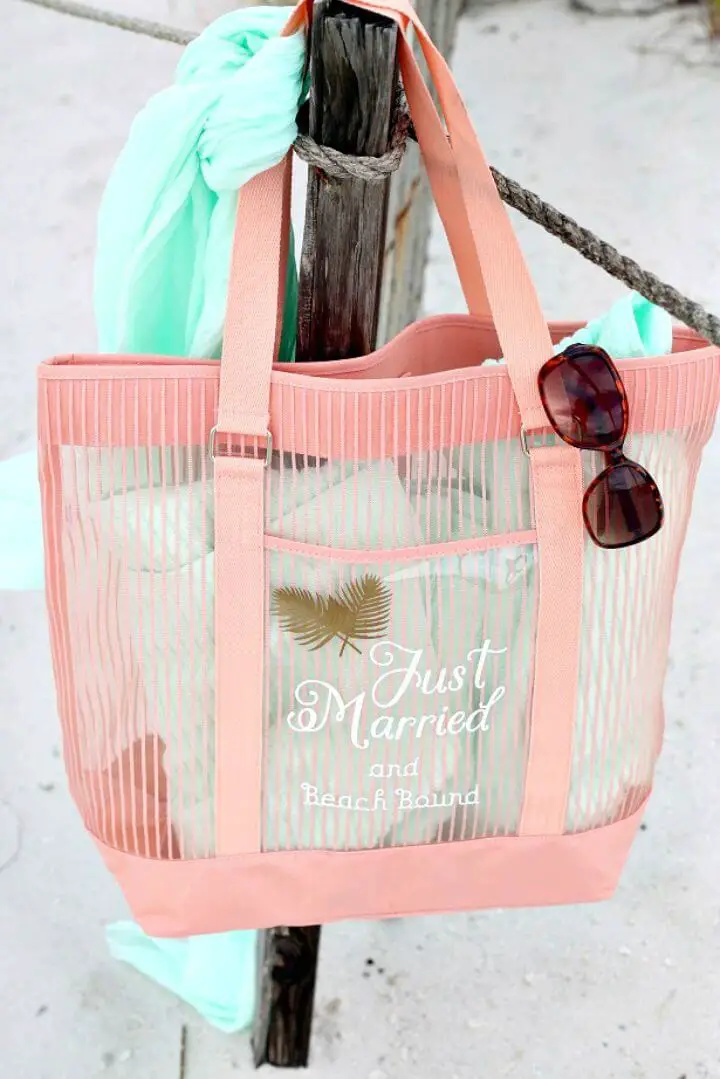
As you prepare to embark on the adventure of a lifetime with your loved one, why not infuse your special day with a unique DIY touch? This extraordinary Cricut wedding giveaway offers the perfect blend of creativity and romance. Whether you’re the bride herself or the maid of honor, this charming honeymoon tote is the ideal way to celebrate your love story. With easy-to-follow instructions, you’ll be able to bring this delightful project to life in no time. So why wait? Unleash your inner crafter, fire up your Cricut machine, and create a one-of-a-kind memento that will treasure for years to come.
Make Your Own Honeymoon Passport Cover
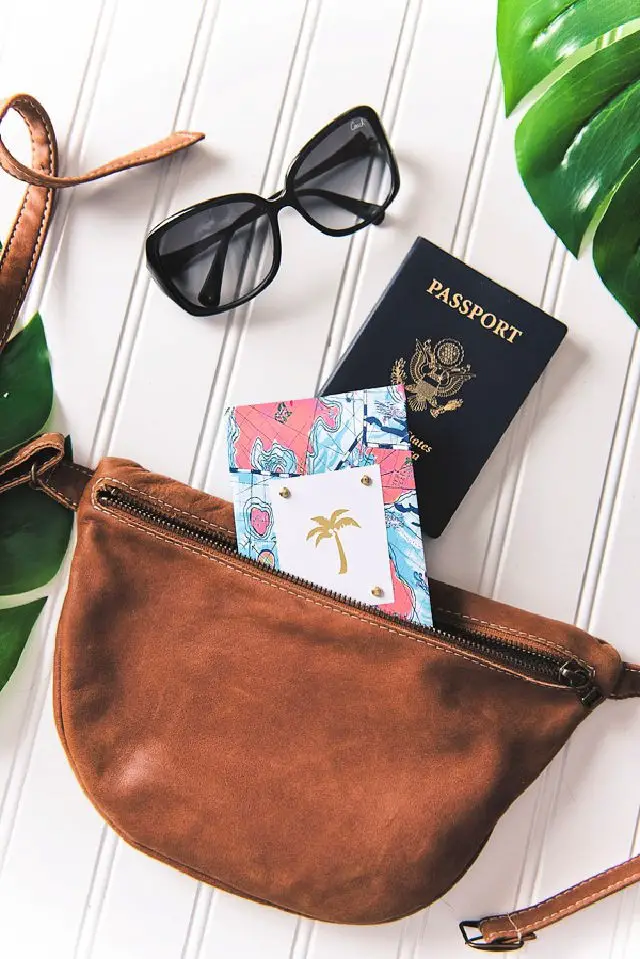
Unleash your creativity by crafting a vibrant DIY passport cover inspired by Lilly Pulitzer’s playful designs. Perfect for those seeking a touch of tropical flair, this easy-to-make accessory adds a personalized and fun twist to your travel essentials.
With just a few simple materials – colorful non-adhesive vinyl, a ruler, craft glue, scissors, and a dash of imagination – you can bring the Caribbean beaches to life at your craft table. From carefully marking your vinyl to adding golden accents with brads, each step in this guide will guide you towards creating a one-of-a-kind masterpiece that’s ready to accompany you on all your travel adventures.
Stay organized and stylish with this cheerful passport cover that combines functionality with a playful splash of color.
Cricut Geek Chic Leather Tablet Sleeve
Unleash your creativity and bring your imaginative ideas to life with our comprehensive Cricut tutorials and guides. For fashion-conscious tech enthusiasts, we’re excited to share a DIY project that combines style and functionality: a stunning leather tablet sleeve that’s perfect for Kindle or any other brand of tablet. This versatile accessory can be crafted from genuine or faux leather, allowing you to personalize it according to your unique taste using the Cricut Explore cutting machine. The project also utilizes other essential tools like a Cricut cutting mat, Cricut Color Antiquity pen set, sewing machine, leather needle, heavy-duty thread, and scissors. This affordable DIY alternative to expensive tablet sleeves available in the market seamlessly blends functionality with aesthetic appeal, making it an excellent gift idea for tech-savvy friends and family. So why wait? Dive into crafting your very own Geek Chic leather tablet sleeve today!
Stickers With Cricut Print Then Cut
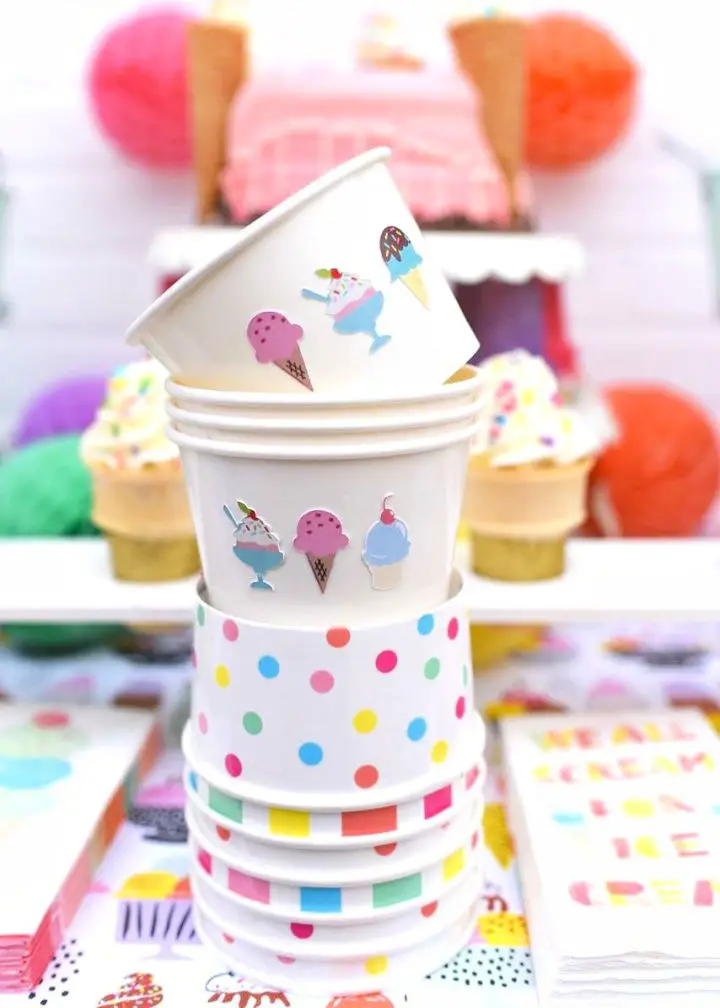
Unlock the creative potential within you by delving into our meticulously curated collection of DIY Cricut crafts, where personalized creations are just a cut away. This in-depth guide takes you by the hand, walking you through the step-by-step process of creating stickers using the Cricut Print and Cut feature. Whether you’re working with the Cricut Explore Air 2 machine or a Cricut Maker, this tutorial ensures that your designs take shape exactly as envisioned.The possibilities are endless – from simple stickers to elaborate party decorations, your imagination is the sole constraint. The Cricut print and cut process is remarkably straightforward, allowing for efficient and high-quality crafting that’s sure to leave you feeling accomplished.This comprehensive guide also addresses common challenges like jammed sticker paper, ensuring a seamless and enjoyable crafting experience. And the best part? These stickers are incredibly versatile, easy to create, and perfect for adding a unique touch to your parties or gifts. Start exploring the world of Cricut sticker creation today and watch your designs spring to life!
Coffee Mug With Vinyl Statement Using a Cricut
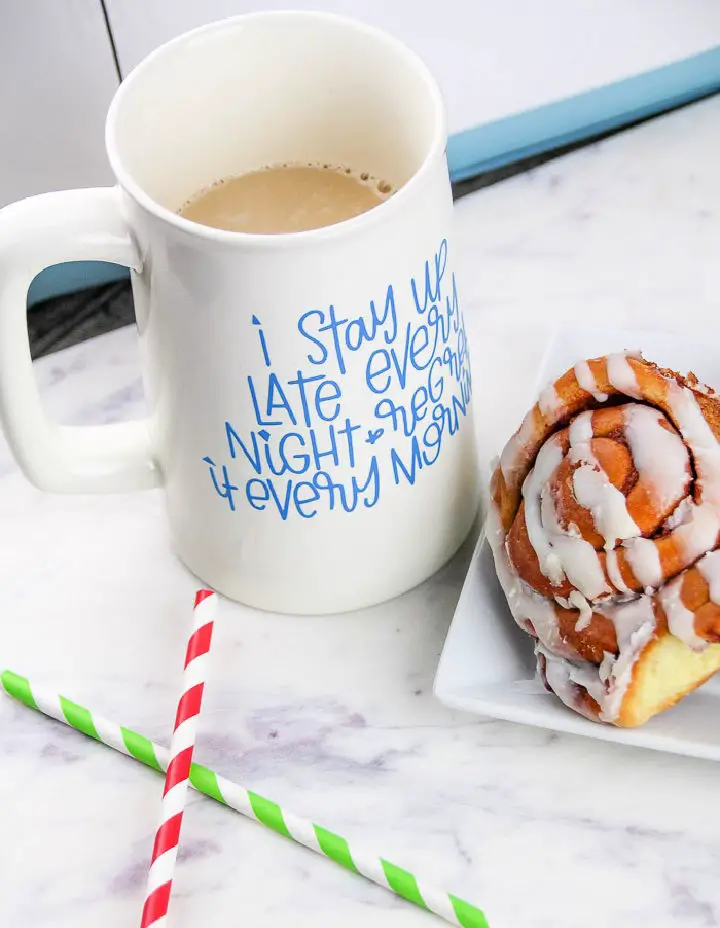
Elevate your morning routine by transforming your coffee mugs into personalized masterpieces using your Cricut machine. Create a unique and quirky design with an inspirational quote, such as “I Stay Up Late Every Night & Regret It Every Morning,” that reflects your personality or serves as a thoughtful gift for a loved one. This DIY project is perfect for both beginners and seasoned crafters, as it requires minimal supplies and provides a step-by-step guide on how to use the Cricut software, prepare the vinyl, and apply it to the mug using transfer tape. With each mug costing just 99 cents to create, you can indulge in this creative outlet without breaking the bank.
How to Make a Large Wooden Sign
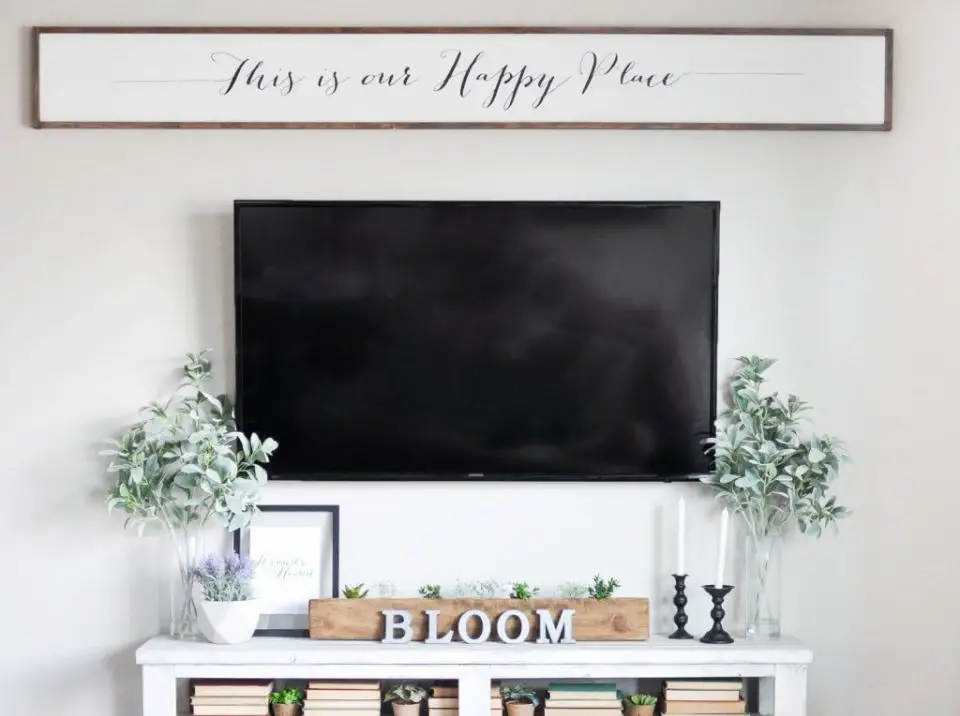
Transform your living space with a unique DIY project that combines personal style with the power of Cricut Explore Air technology. This comprehensive guide walks you through the process of creating an impressive 8-foot wooden sign, infusing your decor with character and charm. By following our step-by-step approach, you’ll learn how to harness the cutting-edge capabilities of the Cricut machine, bringing your design to life in striking vinyl lettering. With easy-to-follow instructions and a focus on creativity, this project is designed to help you achieve a seamless process, resulting in a treasured piece that reflects your home’s personality. So, gather your materials and unleash your imagination as you craft a one-of-a-kind large wooden sign that becomes a beloved part of your living space.
Cricut Explore Banners Tutorial

Step into the world of DIY creativity with the Cricut Explore, a cutting machine that unlocks endless possibilities for custom projects. While its numerous features may initially seem overwhelming, fear not – this tutorial will walk you through creating stunning banners that bring your ideas to life.
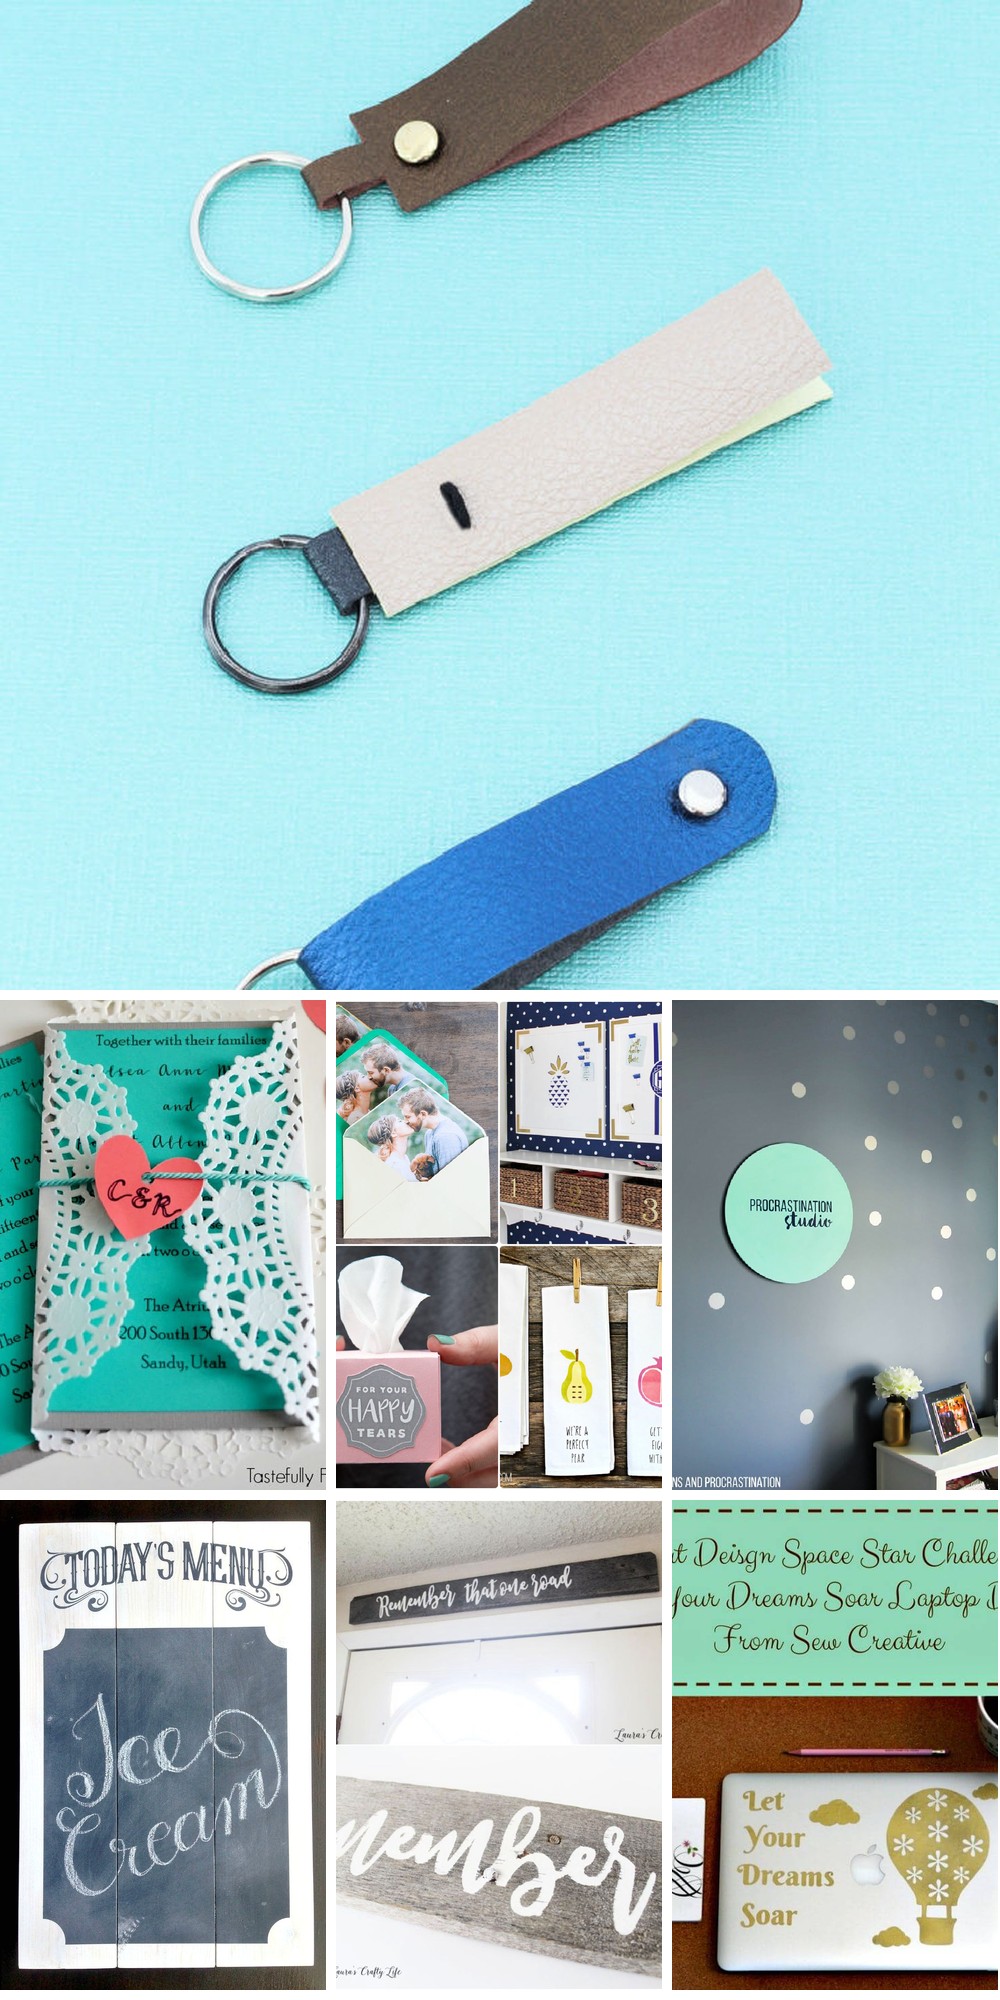
DIY Leather Key Fob Gift with Cricut
Transform ordinary key fobs into extraordinary ones by infusing them with love and personality! With this easy-to-follow DIY guide, you can create custom leather key fobs that reflect your unique style. Using a Cricut Explore Air or Cricut Maker, along with a variety of faux leather colors, the process involves cutting out your design from a template, personalizing it with a Cricut pen, and securing it with rivets. Take it to the next level by adding iron-on details with the EasyPress 2 for an extra touch of flair. Not only will these leather key fobs make a thoughtful gift, but they’re also quick to make. Unleash your creativity and add some personality to your keys or surprise someone special with this one-of-a-kind handmade gift. This project beautifully combines functionality with aesthetics, making it a must-try for DIY enthusiasts.
Easy DIY Kitchen Towels
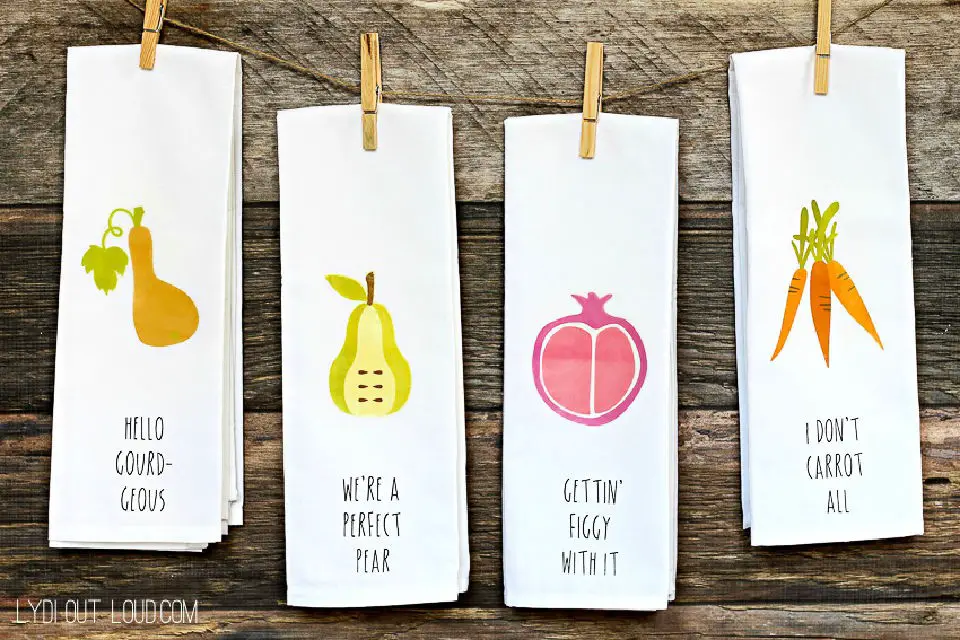
Add a dash of humor and creativity to your kitchen with these easy-to-make DIY kitchen towels. With playful food puns that are sure to bring a smile, these towels not only serve their functional purpose but also double as decorative pieces that will add a touch of whimsy to your cooking space. To create them, you’ll need just a few basic supplies: a Cricut Explore Air 2 or Maker, kitchen towel cut files, Cricut Everyday Iron-ON in Black, printable iron-on, a Cricut Weeder Tool, and white flour sack kitchen towels. You’ll also require an EasyPress or iron and press cloth for printing. Follow the simple instructions and add a bit of fun to your kitchen – or better yet, gift them to your food-loving friends who appreciate a good pun. After all, cooking should be an enjoyable experience, and these DIY kitchen towels are the perfect way to keep things light-hearted and enjoyable!
Make Floral Faux Wallpaper With Cricut
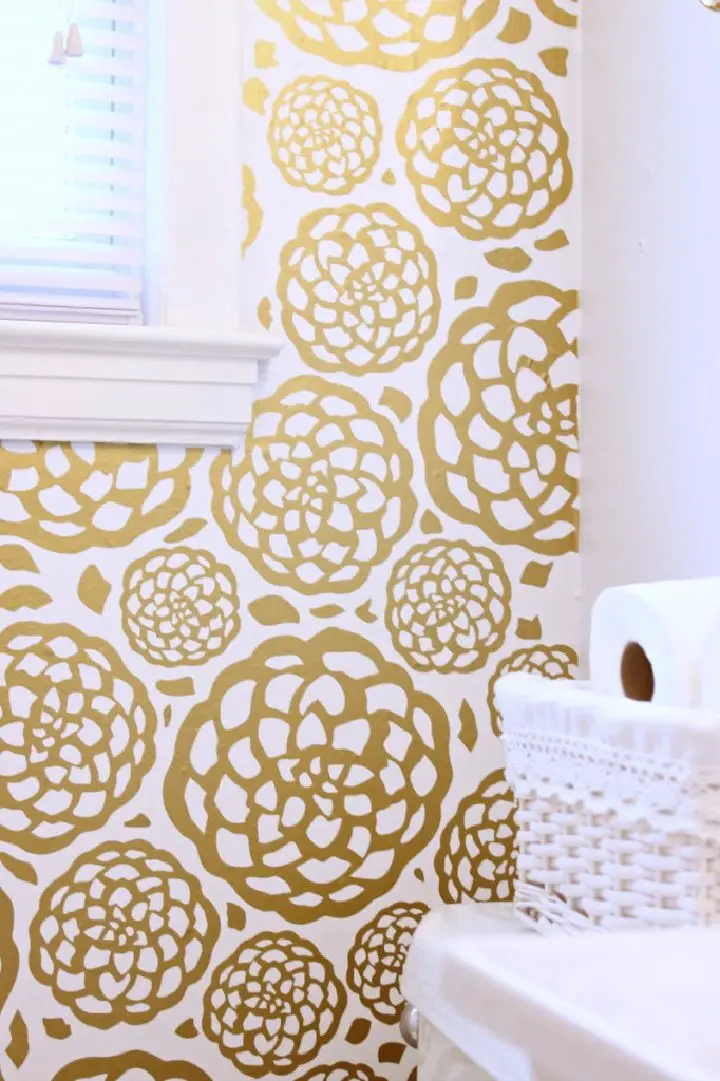
Unleash your creativity with a stunning DIY floral faux wallpaper, perfect for small spaces like bathrooms. Using your Silhouette Cameo machine and gold vinyl, design and cut out intricate flower decals featuring your favorite blooms, such as Dahlias. The process is simple: run the vinyl through the machine, peel off the backing paper, and apply the delicate details to your wall. To add a touch of finesse, use leftover petals from the cut-outs to fill in negative spaces between each flower, resulting in a polished finish. Alternatively, if you don’t own a Silhouette machine, you can purchase this vibrant design directly from an Etsy shop, available in various colors. With minimal effort, transform your tiny bathroom into a blooming beauty and enjoy the fruits of your labor.
Diamond Hanging Planters With Cricut
Transform your home decor into a haven of greenery by crafting unique diamond hanging planters. This DIY guide combines technology and creativity to help you produce stunning pieces that rival expensive store-bought options. Using easily accessible materials like chipboard, acrylic paint, and the Cricut Explore Air with standard grip cutting mat, you’ll create an array of elegant and budget-friendly planters. Whether you choose to hang them in your living space or use them as desk organizers, these diamond-shaped masterpieces will be the crowning jewel of your decor. Let your creative spirit soar and bring new life to your room with this DIY project.
Monogram Headboard With Cricut
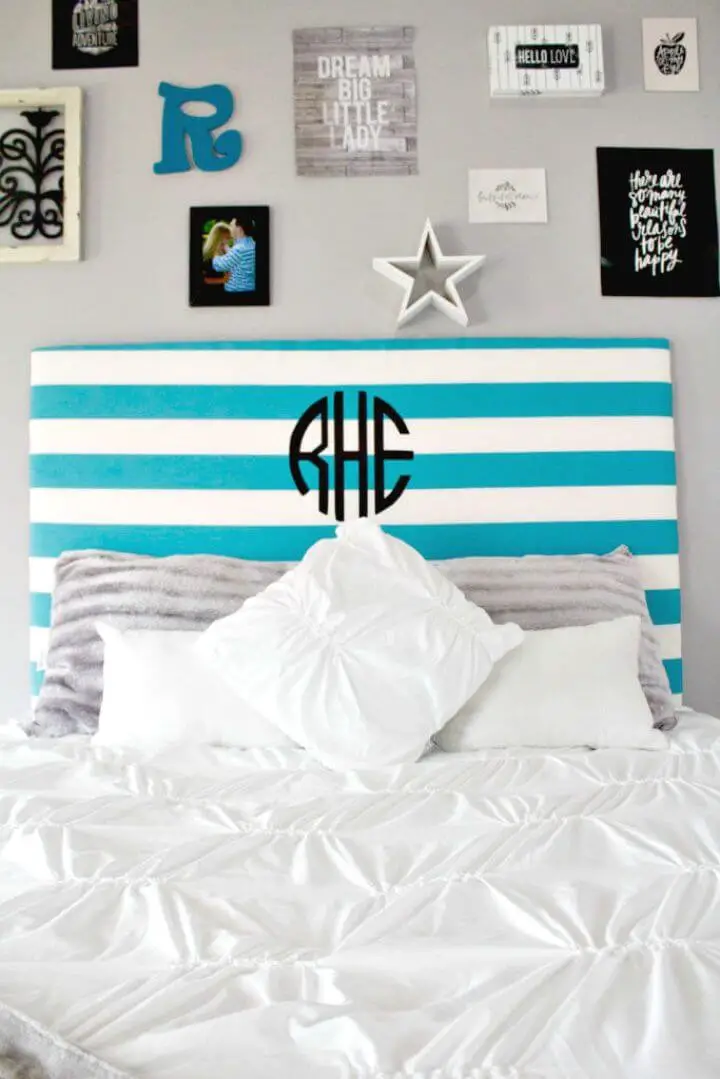
Transform ordinary materials into extraordinary masterpieces with Cricut projects, allowing you to unleash your creativity and add a personal touch to your living space. For a unique summer project, consider crafting an easy DIY monogram headboard that reflects your personality above your bed. The beauty of this piece lies in its customizability, making it simple to express yourself through fabric selection, foam layering, and iron-on details. Using Cricut Design Space and Iron On, create a personalized monogram element that sets your headboard apart from the ordinary. The process involves layering and trimming fabrics and foam, stapling them onto a wooden board, crafting the monogram, and finally ironing it into place. This DIY project not only adds an aesthetic touch to your room but also fosters creativity, individuality, and self-expression. Start creating today and make your room a true reflection of you.
Luggage Tags + Cricut Explore Air Giveaway
Elevate your DIY endeavors by exploring our vast collection of Cricut craft ideas, guaranteeing impressive outcomes with every creation. One such project is the charming leather luggage tag that not only exudes elegance but also serves a practical purpose. This personalized accessory adds a touch of sophistication to your travel gear, making it a thoughtful addition to your suitcase. To recreate this stylish tag, you’ll need a Cricut Explore Air, at least 6 inches by 6 inches of leather, some leather string, a midnight pen, and either a hot glue gun or fabric glue. The resulting tag is double-sided for added durability, featuring your name and contact information prominently displayed. Once designed and cut, the pieces can be easily glued together and then secured to your luggage using the leather string. This simple yet effective project yields fantastic results, enhancing your travel experience with a unique and personalized touch.
Monogram Your Converse Sneakers Using a Cricut Machine
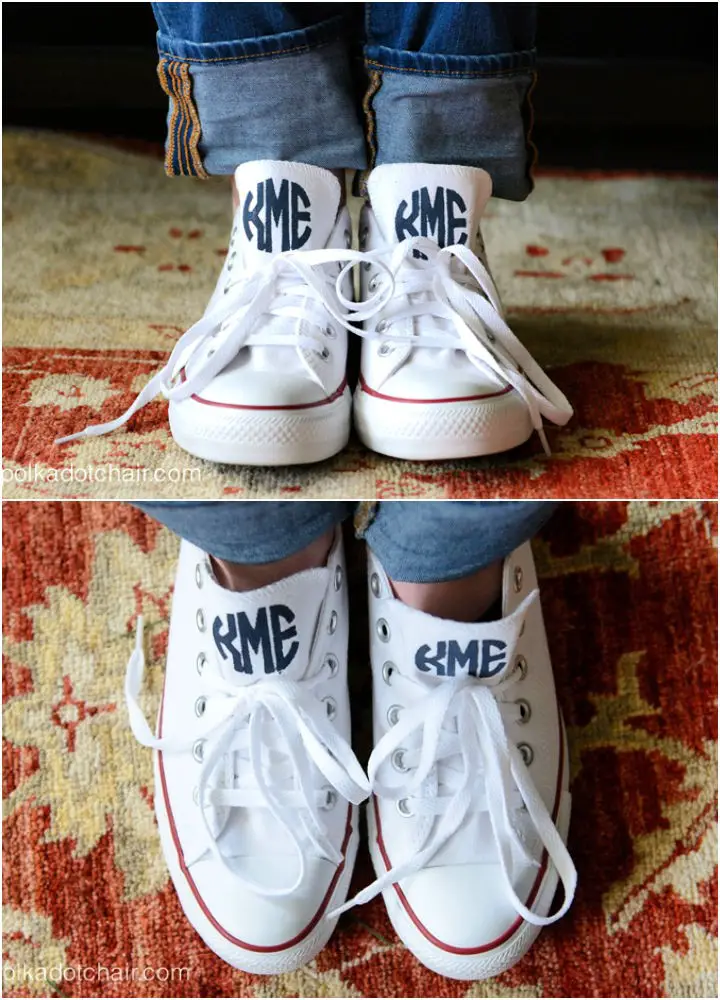
Transform your sneakers into one-of-a-kind masterpieces with this straightforward DIY guide on monogramming. With minimal materials required – including Converse sneakers, a Cricut machine, freezer paper, colored craft paint, and your preferred monogram font – you’ll be well-equipped to unleash your creativity. The process begins by designing the monogram using Cricut Design software, then cutting the stencil onto freezer paper with precision. Next, transfer the design onto your shoes using an iron, allowing for a seamless integration of art and footwear. To complete the look, apply a thin layer of mixed acrylic paint and fabric medium, followed by the removal of the stencil once it’s dry. The end result is a pair of uniquely personalized sneakers that exude your personal style and flair – perfect for adding a touch of individuality to your wardrobe.
DIY Row House Wall Art
Transforming everyday items into stunning works of art is just a Cricut machine away! If you’re looking for a creative outlet to enjoy from the comfort of your own home, look no further than these inspiring DIY craft ideas. Take the popular Madeline-inspired row houses project, for instance. With just a few simple materials like a Cricut Explore Air, black vinyl, and some paint, the possibilities are endless. The downloadable vintage revivals designs add an extra layer of convenience to this project, allowing you to focus on the fun rather than precise sizing. And don’t worry if your creation isn’t perfect – a touch of wonkiness can actually add character! Simply paint within the vinyl outlines, let it dry, and then peel off the vinyl for a beautiful, handcrafted piece of decor that’s sure to bring a touch of whimsy to any room. This project is all about injecting creativity into your living space, and with love, patience, and imagination, even the most challenging days can be turned around. So why not give it a try? Craft your row houses today and turn your walls into vibrant streetscapes!
Cricut Explore Gallery Wall
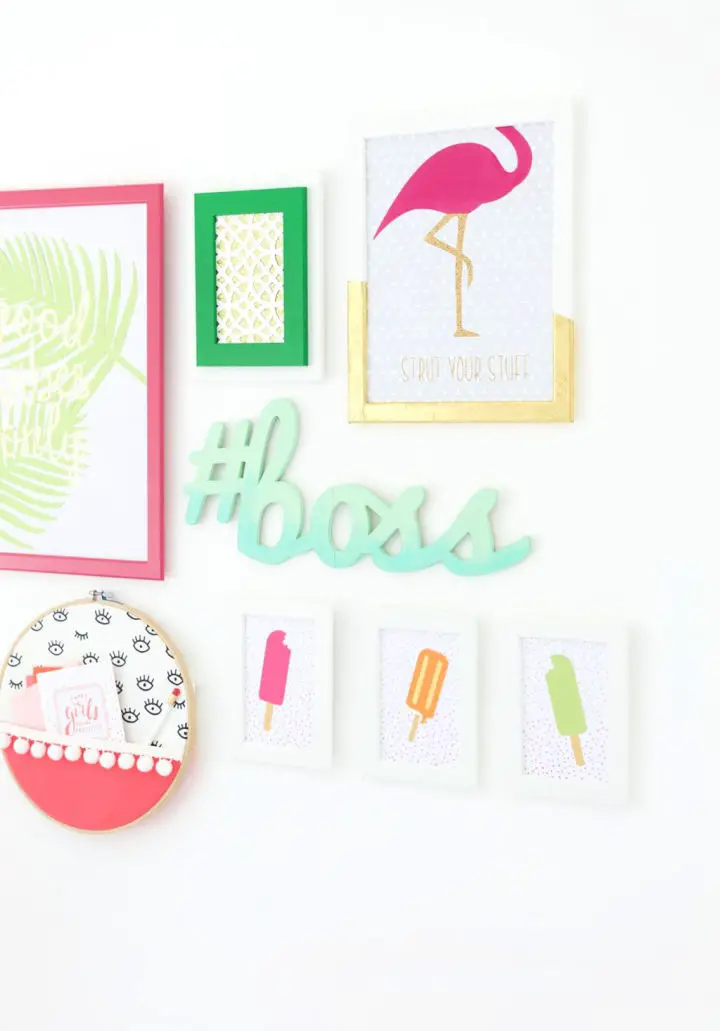
Elevate your walls with a one-of-a-kind DIY gallery wall crafted using the Cricut Explore and everyday craft supplies. This innovative project transforms affordable frames into stunning works of art, thanks to the Cricut Explore’s versatility and a few creative materials. The possibilities are endless, from a dimensional ‘#boss’ piece made from chipboard to a flamingo-inspired statement art featuring pink and gold iron-on vinyl. You can also create charming popsicle trio wall art or add a touch of sophistication with faux laser-cut patterns. Not only do these creations add visual appeal to your home, but they’re also budget-friendly and an absolute blast to make. With the Cricut Explore, you can express your creativity and give your walls a unique flair that reflects your personal style.
How To Make A Fall Wood Sign With Cricut
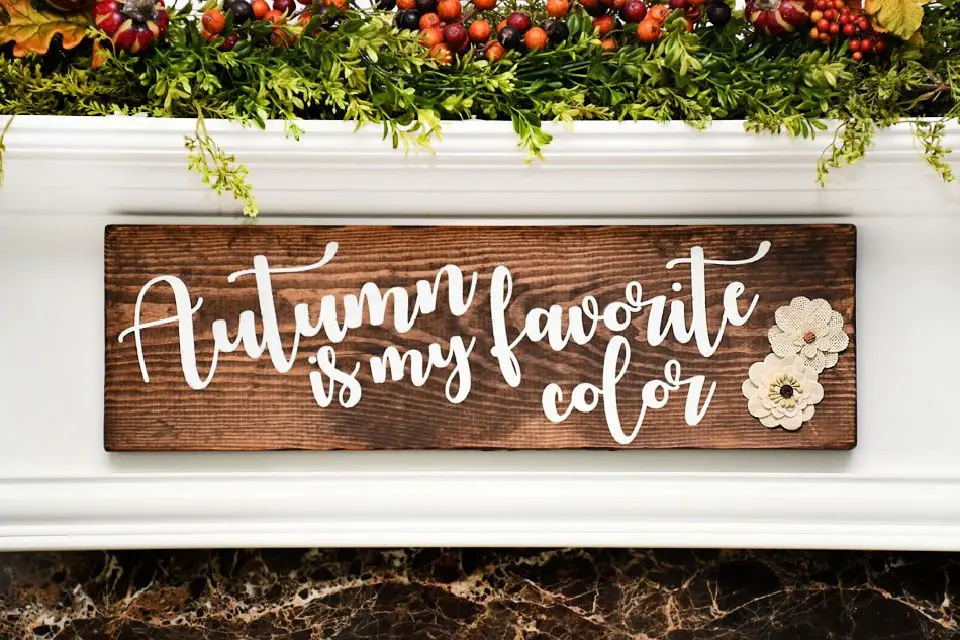
Elevate your DIY skills with these standout Cricut projects that will leave friends and family impressed. To add a warm touch to your fall home decor, create a cozy DIY wood sign for your fireplace. Start by laying the foundation using a 1×8 board cut to 24 inches wide and staining it with Rustoleum Ultimate Wood Stain in Dark Walnut. Then, use your Cricut Explore Air2 Mint Machine and import a JPG design to create a unique expression of your love for autumn’s warm hues. Cut out the design on stencil vinyl, apply it to the board, and fill it in with white acrylic paint. Once dry, simply peel off the stencil to reveal your heartfelt message. Add a charming touch with cute little flowers before securing the finished piece with Command Brand strips. This project harmoniously blends creativity and crafting with the warmth of autumn, inviting you to enhance your living space with this personalized and easy-to-make masterpiece today.
Director’s Clapboard With Cricut
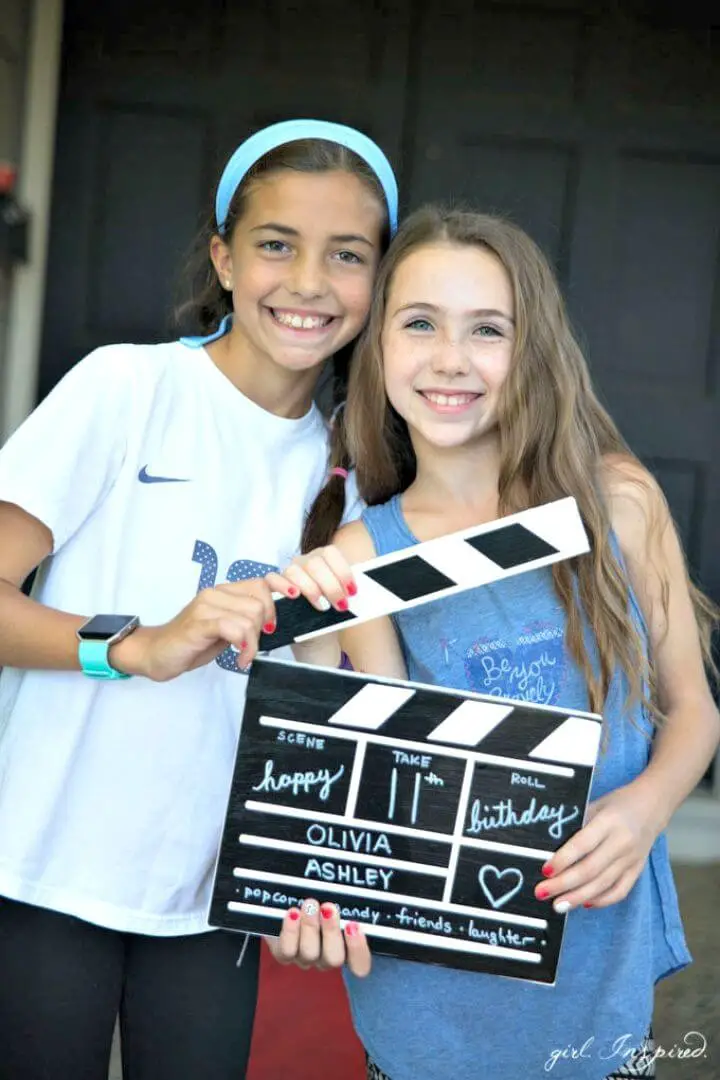
Host an unforgettable outdoor movie night that combines creativity, delicious treats, and a dash of whimsy! The idea was born from a joint birthday celebration, where attendees crafted their own unique clapboard decorations using a Cricut Explore and basic supplies like plywood and vinyl. This DIY project brings an exciting twist to the party. To take it to the next level, indulge your guests with scrumptious popcorn cupcakes that are easy to make with striped baking cups, frosting, and mini marshmallows. Don’t forget to set up a candy table and popcorn popper for a truly cinematic experience. The fun doesn’t stop there – craft box trays and little red gift boxes filled with caramel corn and packs of gum serve as party favors, elevated by ribbon and tags. By incorporating these creative ideas and projects, you’ll show your love for movies and add a personal touch to the celebration.
Easy Beginner’s Cricut Project Idea
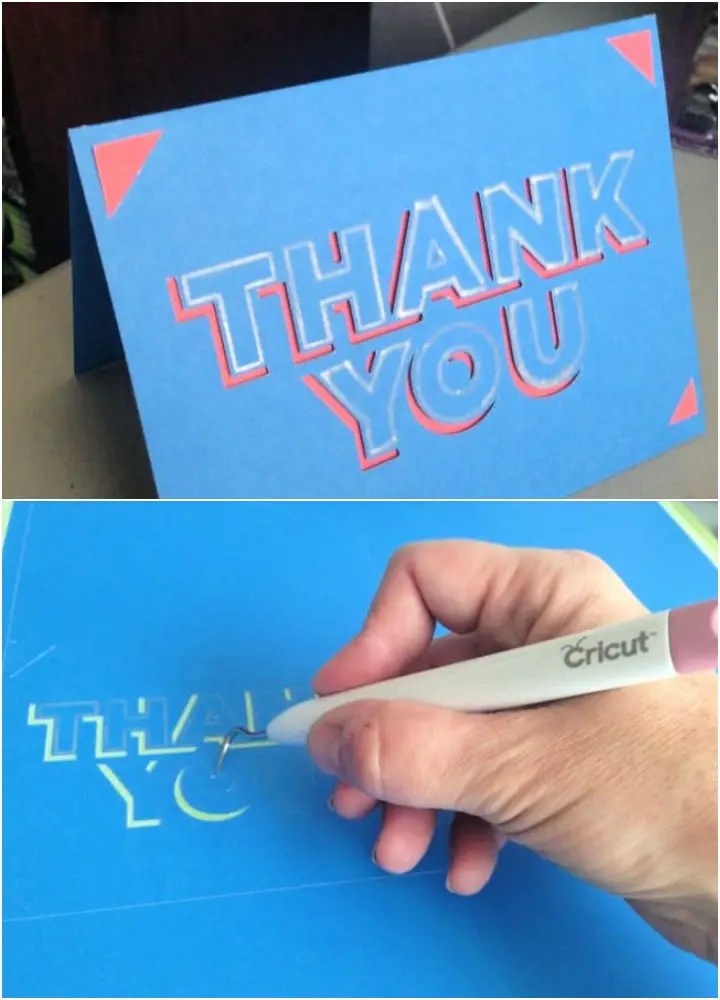
Unleash your creativity with the Cricut Explore Machine + Basic Starter Set! This comprehensive crafting kit provides an intuitive setup process, guiding you through aligning and syncing the machine with your computer. As a beginner-friendly bundle, it includes a range of essential tools to streamline your crafting experience. The included sticky mat ensures precision cutting, while paper-handling tools simplify the process. Start by crafting a simple DIY ‘Thank You’ card, navigating the colors and weights of your cardstock as you learn the ropes. By optimizing with materials like double-sided paper for pinwheels, you’ll avoid common pitfalls and unlock the full potential of your Cricut machine.
Making a Love Pillow Using the Cricut Explore Air 2
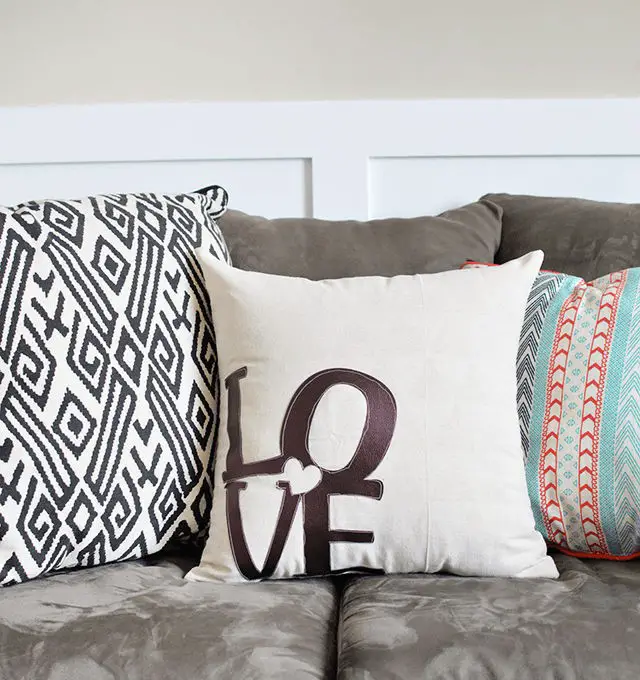
Transform your home into a haven of love this Valentine’s Day by crafting a unique ‘Love’ throw pillow using the Cricut Explore Air 2. This simple yet personalized DIY project allows you to infuse your decor with heartfelt messages and create a special bonding experience for the whole family.
The process begins by cutting out the letters L, O, V, and E from faux leather using the Cricut Explore Air 2’s versatility. These cutouts are then sewn onto a pillowcase, incorporating a small heart that adds an extra layer of charm to the design. The choice of faux leather brings an air of elegance to the project, making it surprisingly easy to work with.
This DIY endeavor serves not only as a decorative accent but also as a fun bonding activity for kids to participate in. The final result is a charming, personalized pillow that exudes warmth and love, filling your living space with a sense of togetherness and celebration.
DIY Custom Shirt With Your Cricut
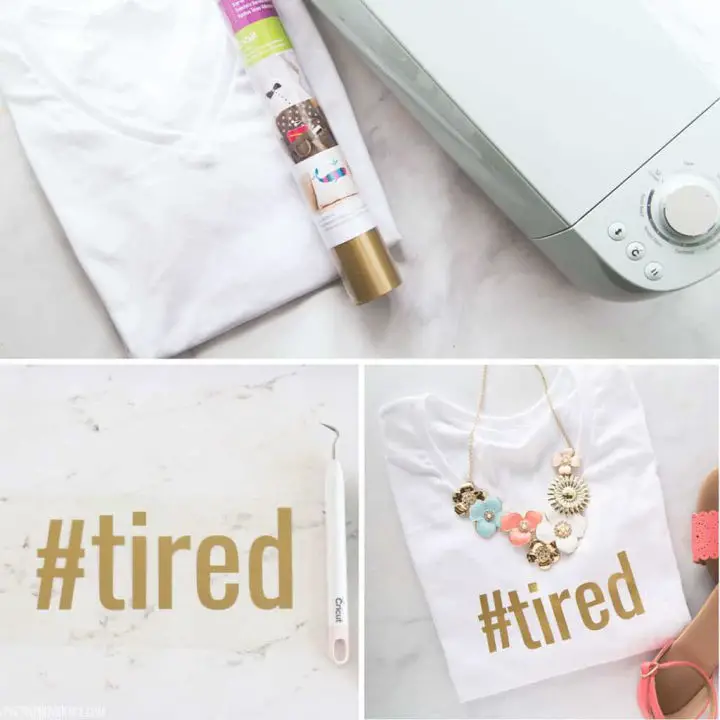
Discover the art of transforming ordinary t-shirts into extraordinary pieces with a Cricut machine. This step-by-step guide takes you through every aspect of designing and creating unique shirts, from initial concept to cutting iron-on vinyl. By following this comprehensive tutorial, you’ll effortlessly become a skilled ‘Cricut shirt maker’. Designing custom shirts is an excellent way to showcase your personality and create one-of-a-kind gifts, celebration wear, or matching outfits for special occasions. To get started, you’ll need a plain t-shirt, Cricut Everyday Iron-On Vinyl, a StandardGrip Cricut Mat, a Cricut Machine, Design Space software, and an iron. With these simple materials and this guide, you’ll be well on your way to creating shirts that make a statement.
Chalkboard Menu Sign With Cricut
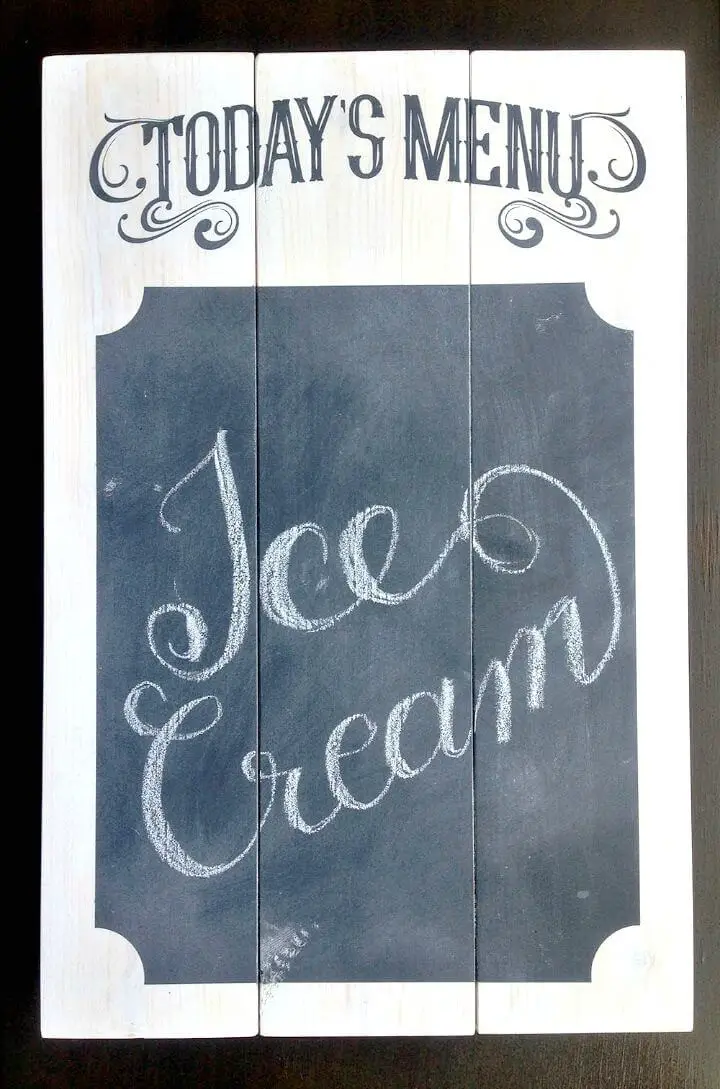
Unleash your inner artist by crafting a unique kitchen menu sign with Cricut’s DIY chalkboard creation. Combining whitewash and chalkboard elements, this project requires a variety of supplies, including dimensional lumber, wood screws, Minwax water-based whitewash pickling, Rustoleum’s chalkboard spray, and other essential tools. To bring your vision to life, follow the step-by-step instructions, which cover cutting and staining lumber, sealing boards, assembling the structure, preparing the stencil, sealing lettering, applying chalkboard paint, and priming the board. With each stage clearly explained, you’ll be guided towards a stunning final product. Dive into DIY creativity and create your custom chalkboard menu sign today!
Father’s Day Gift Idea With Cricut
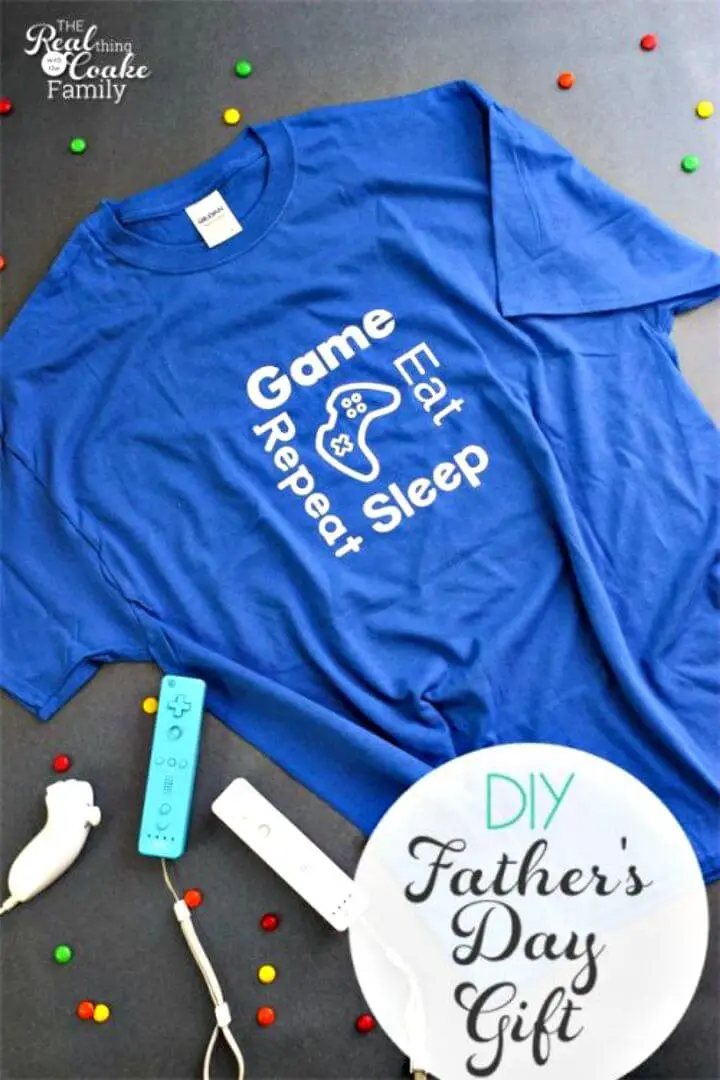
This Father’s Day, surprise the special dad in your life with a thoughtful, DIY t-shirt that celebrates his passions and interests. Using a Cricut Explore, iron-on materials, and a basic tee, you can create a one-of-a-kind design that reflects his unique personality. Whether he’s an avid gamer, outdoor enthusiast, or music lover, there’s a way to incorporate his favorite hobbies into the design.The best part? The process is easy to follow and adaptable to your dad’s individual style. You can customize graphics, text, and colors to ensure the final product is truly personalized and meaningful.While iron-on materials might be a bit pricier than expected, the end result is well worth the investment: a handmade keepsake that he’ll treasure for years to come. With this unique gift idea, you’ll show your appreciation in a way that’s both memorable and heartfelt.
DIY Hand Painted Sign With Cricut
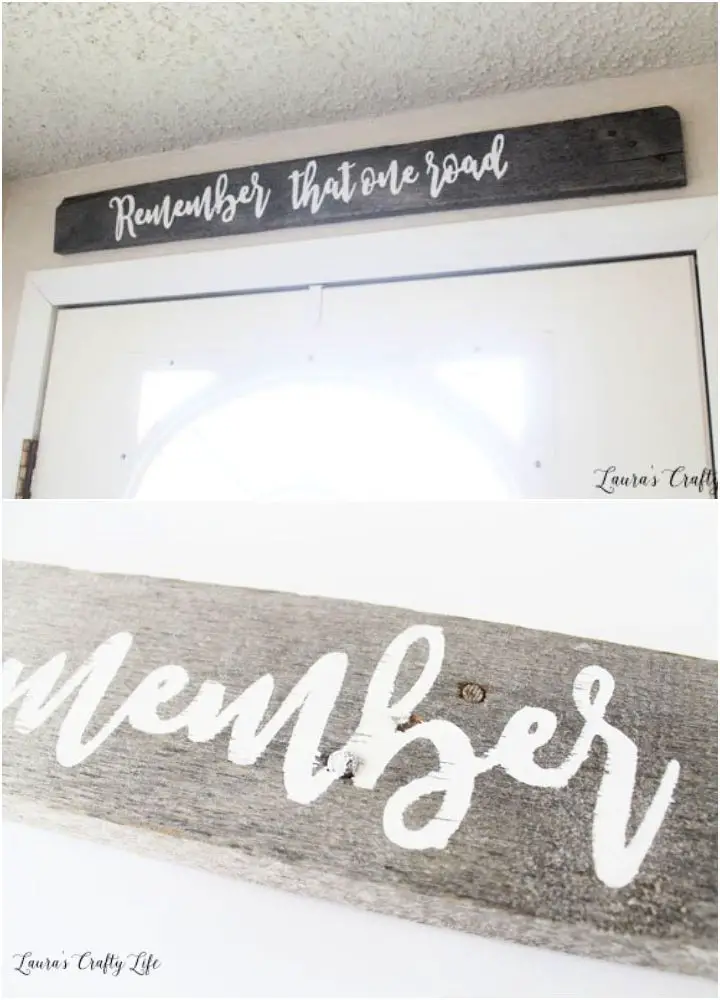
Transform your home decor with a one-of-a-kind DIY hand-painted sign crafted from a pallet board and leftover vinyl scraps using the versatile Cricut Explore. This creative project seamlessly repurposes materials, starting with preparing the board by thoroughly cleaning it, allowing it to dry, and cutting it to your desired length. Next, utilize the Cricut Design Space to design your text using a downloaded font, ensuring connected letters for a seamless cut. Instead of removing excess vinyl around the letters, leave the letter outlines on the paper backing, adding an extra layer of dimension. Once transferred to the board and carefully smoothed down, fill the empty spaces with acrylic craft paint, giving your sign a unique, personalized touch. This project’s versatility makes it an ideal way to memorialize cherished phrases or create meaningful gifts, offering limitless possibilities for your interior design.
Make Sign Lettering – Cricut Project
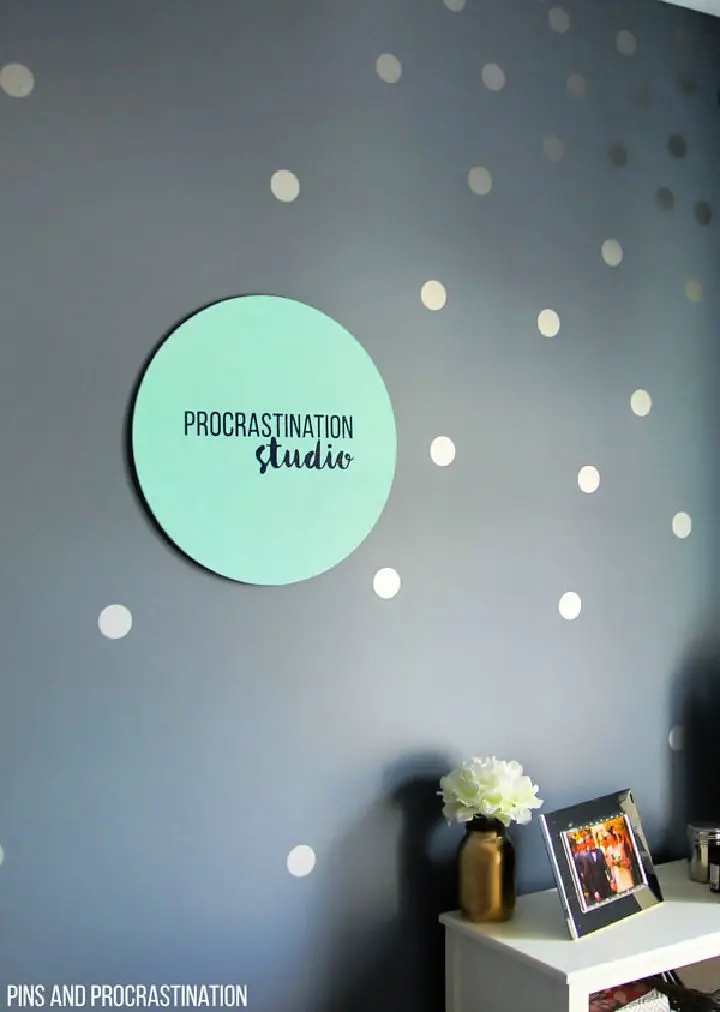
Transform your workspace into a reflection of your unique personality with a personalized office sign crafted using your Cricut Explore Air machine. This DIY project combines the soothing hues of mint and navy to create a calming atmosphere in your home office. Beyond just creating a sign, this endeavor is about infusing your work environment with your signature style. With the flexibility of supplies like vinyl, craft paint, and a wooden sign, you can shape your workspace to inspire creativity and joy every time you enter. So why not get creative and make your sign with Cricut? It’s the perfect partner in crime for any procrastinator looking to add a personal touch to their office.
Conclusion:
As the world of Cricut projects and crafts unfolds, a plethora of innovative ideas await those willing to tap into their creative potential. Whether you’re just starting out or seeking more complex DIY designs, the possibilities are endless. By delving into realms like wedding bouquets, home decor, and personalized gifts, your Cricut machine becomes an extension of your unique style. For those eager to incorporate this art form into their crafting journey, we invite you to explore these beginner-friendly DIY Cricut project ideas and watch your creative spirit soar.
