Crocheting a bow can unleash a world of creative possibilities, as it enables you to add a personal touch to everyday items. With 25 free crochet bow patterns available, crafting unique and eye-catching bows has never been easier. This guide is designed to help crafters of all skill levels produce stunning bows, serving as a perfect project for those looking to practice and enhance their crocheting abilities.
The process of creating a bow is straightforward and rewarding. From crafting the top loop section to securing the center, each stage of the pattern guides you smoothly through the crafting experience. Whether you wish to decorate a hair clip, enhance a headband, or give your gift wrapping a special touch, these patterns provide the versatility needed for all your creative ventures. By diving into the joyful process of crocheting bows, you’ll discover the perfect pattern that speaks to your style and project needs.
Why Crochet a Bow?
When it comes to crafting, crocheting a bow can be a surprisingly fulfilling experience that extends far beyond the joy of creating something with yarn. Here’s why you might consider picking up your hook and starting on a bow project: The versatility of these bows is one of their greatest strengths – they can be used in everything from fashion accessories like hair clips and bow ties to adding a touch of whimsy to gift wrapping or home decor. And, by choosing the colors, sizes, and patterns that suit you best, you can create pieces that are uniquely yours, or tailored to the tastes of those you might give them to. Of course, making your own bows can also be a cost-effective option, especially when you’re working with leftover yarn from other projects. Additionally, crafting these bows can be a great way to develop your crocheting skills – whether you’re just starting out or looking to refine your technique. And let’s not forget the therapeutic benefits of crochet – it’s a relaxing activity that can help reduce stress and anxiety while giving you a sense of accomplishment when you finish a project. By making your own accessories, you’re also doing your part for sustainability by reducing waste and the need for mass-produced items. Finally, there’s the joy of gift-giving – handmade bows make thoughtful, personalized gifts that show you’ve invested not just your creativity but also your time. So why not start your crochet bow project today?
Skill Level
To ensure a successful and enjoyable crocheting experience, it’s essential to understand the skill level required for each bow pattern. This understanding is crucial in helping you determine which patterns are suitable for your current crochet abilities. To help you navigate this process, here’s a breakdown of what you can expect from beginner, intermediate, and advanced patterns.
Beginner-friendly patterns typically involve straightforward stitches and techniques, such as the slip stitch, chain stitch, and single crochet. These patterns are perfect for those who are new to crocheting or looking to refresh their skills.
Intermediate patterns may introduce more complex stitches and techniques, including double crochet, half double crochet, increases, and decreases. They might also involve working in the round or following a slightly more intricate pattern.
Advanced patterns are geared towards experienced crocheters who have a solid foundation in the basics. These patterns can include intricate stitch patterns, complex colorwork, or advanced techniques such as Tunisian crochet or broomstick lace.
Remember, don’t be discouraged if a pattern seems too challenging at first. With practice and patience, you can improve your skills and tackle more complex projects.
Estimated Time for Completion
While the time it takes to create a crochet bow can be affected by several factors, including pattern complexity and individual skill level, here’s a general breakdown of what you might expect:
For beginners, small bows tend to take around 1-2 hours to complete. As you gain more experience and move on to medium-sized bows, the time required can range from 2-4 hours.
However, if you’re looking to create larger, more intricate bows, be prepared to spend at least 5 hours or more on the project. Keep in mind that these estimates are only rough guidelines, as everyone crochets at their own pace and that’s perfectly okay. What’s most important is that you enjoy the process and take pride in your finished product.
Tips and Tricks
To create stunning crochet bows, pay attention to these essential tips: Maintaining a consistent yarn tension is crucial in achieving even stitches. If you encounter difficulties, adjust your grip on the hook or hold the yarn differently. Regularly counting your stitches will also help ensure you’re following the pattern correctly and avoid any mistakes. Stitch markers are another useful tool for marking your place, keeping track of stitch counts, or indicating increases or decreases. Don’t forget to take breaks during long crocheting sessions to rest your hands and eyes. Remember, every crocheter has their unique style and techniques. Feel free to experiment and find what works best for you, even if it’s different from someone else’s approach.
How to Crochet an Easy Bow – Tutorial for Beginners
While crocheting a bow may seem like an intimidating task, it can actually be a great way to add a touch of elegance and whimsy to various accessories like hats, scarves, shawls, bags, and more. By following this easy-to-follow guide, specifically designed for beginners, you’ll gain the skills and confidence to create a beautiful and charming crochet bow. This step-by-step tutorial has been crafted to help even those new to crocheting navigate the process with ease, resulting in a delightful crafting experience.
What You’ll Need
To create your beautiful bows, you’ll need a few essential materials. First and foremost, grab yourself some worsted weight yarn. Don’t worry if you’re not sure what that means – just know that it’s the perfect thickness for making all sorts of bow sizes. If you want to create larger or smaller bows, simply adjust the yarn size accordingly. Next up, get your hands on a trusty Size G crochet hook. This will be your go-to tool for shaping and crafting those adorable little bows. Of course, no craft project is complete without some good ol’ scissors to snip and trim as needed. And if you’re feeling extra fancy, why not add a dash of clear nail polish to the mix? A quick dab here and there can help secure any stray knots and keep your creations looking their absolute best.
Creating the Top Loop Section
Begin by creating a foundation chain of 36. With your yarn looped and ready, start by making a foundation chain of 36 stitches. Next, move on to the first row. Skipping the initial chain from the hook, insert your hook into the next stitch and work a single crochet. Continue this process until you have completed a total of 35 single crochets. The pattern will repeat for rows two through six. For each subsequent row, start by chaining one and then turning your work. From there, make a single crochet in each stitch across the row, resulting in a total of 35 single crochet stitches per row. After completing six rows, leave a tail at the end of your work, as this will be used later for assembling the bow.
Joining the Ends
To complete the crocheted piece, fold the two shorter ends towards each other, ensuring a seamless join. Secure the connection by sewing the folded edges together using your preferred stitch. While it’s not essential to achieve perfection, as this portion of the finished project will be relatively concealed, take care to ensure a sturdy and consistent bond.
Securing the Center
To create the foundation of your bow, wrap an 8-inch piece of yarn around the center of your formed loop, ensuring it’s snug and secure. Next, tie a knot that’s tightly cinched to define the top section of your bow shape. Don’t worry about the loose ends just yet; they’ll be used later in the process.
Making the Lower Tapered Section
Start by chaining 16. To begin, skip the initial chain and make a single crochet in each stitch across, finishing with 15 single crochet stitches. Then, proceed to rows two through six. Here’s how it works: start each of these rows by chaining one and turning your work. The key is to increase the number of stitches gradually. Do this by making two single crochet stitches in both the first and last stitch of each row, while keeping a consistent pace by making one single crochet in each intervening stitch. As you complete six rows, you’ll notice the tapered ends taking shape due to the increasing stitches.
Combining the Sections
To secure the tapered section, begin by cinching and tying off the center of the piece with a length of yarn. This will create a stable foundation for the next step. Next, bring the top loop section over the tapered section, adjusting it as needed to achieve your desired fit. Finally, use the remaining yarn ends to tie both sections together, ensuring a secure and lasting bond.
Finishing Touches
Elevate your bow-making skills by adding a touch of elegance with embellishments. Consider sewing or hot gluing a decorative button or some sparkly bling to the center for an added pop of personality. For extra security, apply a small drop of clear nail polish to each knot if needed. While not mandatory, this step can significantly boost the chances of your bow staying intact and looking its best.
Video Tutorial
To further enhance your understanding of creating a simple crochet bow, we recommend watching Donna Wolfe’s step-by-step video guide on naztazia’s YouTube channel. This visual companion piece to the written tutorial provides an invaluable perspective on each stitch, making it even easier to follow along and master the technique. With this comprehensive approach, you’ll be well-equipped to craft beautiful, handmade crochet bows that can elevate any project or accessory with a touch of personal flair.
Troubleshooting Guide
While crocheting bows, many enthusiasts encounter various obstacles that can hinder their progress. To help you navigate these challenges, let’s explore five common issues and potential solutions: First, uneven stitches can arise from inconsistent yarn tension. By maintaining a consistent grip on the yarn and hook, you’ll find your stitches become more even over time. Second, pattern confusion often stems from complexity rather than comprehension. Breaking down the pattern into smaller sections or seeking guidance from online communities or experienced crocheters can be invaluable in clarifying any misunderstandings. Third, issues with bow size can be attributed to the choice of hook. If the bow is too loose, a smaller hook may be necessary, while a larger hook can help if it’s too tight. Fourth, running out of yarn before completing a pattern often indicates excessive yarn usage per stitch. By maintaining even tension, you’ll reduce your yarn consumption and avoid last-minute scrambles. Finally, difficulty in starting a pattern can be alleviated by using a larger hook for the foundation chain, making the first row easier to work into. Remember that every crocheter encounters setbacks at some point. With patience, practice, and persistence, you’ll overcome these hurdles and continue to refine your skills.
Variations
One of the most appealing aspects of crocheting is the flexibility it offers. With a little creativity, you can transform a simple crochet bow pattern into a unique masterpiece that reflects your personal style. To take your creations to the next level, consider incorporating some of these innovative twists:
Experiment with diverse yarn textures and colors. For instance, try pairing cotton’s softness with wool’s warmth or acrylic’s durability with novelty yarns’ playful charm.
Don’t be afraid to think outside the box when it comes to color schemes. Stripes, gradients, and multi-color effects can add visual interest and depth to your bows. Variegated yarns are an excellent way to achieve a multi-color look without having to change yarns multiple times.
Scale up or down to create bows of varying sizes. A small bow can make a thoughtful hair clip or brooch, while a larger one can serve as a decorative accent or gift topper.
Take embellishments to the next level by adding beads, sequins, buttons, or even tiny crocheted flowers to your bows. These touches of personality can elevate your creations from ordinary to extraordinary.
If you’re feeling adventurous, try incorporating different stitches into your bow patterns. This can lead to intriguing textures and designs that will set your projects apart.
FAQs on Crocheting Bows
As you embark on your crocheting adventure, it’s natural to have some doubts or uncertainties. To put your mind at ease and ensure a smooth start, we’ll tackle the frequently asked questions surrounding the art of creating crochet bows.
What type of yarn is best for crocheting bows?
The yarn you select for your crochet bows can significantly impact their appearance and texture. For newcomers to the craft, medium-weight yarns like worsted weight are often favored due to their ease of use. Additionally, cotton yarn is a reliable option as it retains its shape admirably.
What size crochet hook should I use?
When selecting a crochet hook, it’s essential to consider the weight of your yarn as it directly impacts the size you should use. Fortunately, most yarn labels provide a recommended hook size for their specific product. For medium-weight yarns, a size H/8 (5mm) hook is often the go-to choice.
How can I make my crochet bows stiffer?
When it comes to giving your crochet bows some extra structure, you’ve got several options at your disposal. For starters, you can try using a homemade concoction of equal parts white glue and water, or mix things up with sugar water for an added touch of sweetness. Alternatively, if you’re looking for a more streamlined approach, commercial fabric stiffeners are always a reliable choice. To get started, simply submerge the bow in your chosen mixture, gently squeeze out any excess liquid, shape it to your liking, and allow it to dry completely before use.
How can I keep my stitches even?
To achieve even stitches, it’s crucial to maintain consistent tension on your yarn. While this may take some time to develop through practice, there are also a few simple adjustments you can make to help improve your technique. For instance, experimenting with different grip styles for both the yarn and hook can make a significant difference in the overall quality of your stitches.
How do I count my rows and stitches?
When working on a knitting project, using stitch markers can be a game-changer in keeping your place and staying organized. One effective way to employ them is by placing a marker at the start of each row, then moving it up as you complete each one. This visual cue helps you maintain your rhythm and avoid mistakes that can occur when rows get jumbled or forgotten.
How do I change colors when crocheting?
As you near the end of your current color, finish it by completing the final stitch. Next, create a loop using the new color by yarn overing and then pulling through to form the next stitch. From this point forward, work exclusively with the new hue.
How do I weave in ends?
To complete the finishing process, start by threading the end of the yarn onto the yarn needle. Next, weave the needle in and out of the stitches on the wrong side of your work, working carefully to ensure a seamless finish. Once you’ve completed this step, simply cut off any excess yarn to achieve a neat and tidy result.
How do I block my crochet bows?
In crocheting, wet blocking is a widely used technique to achieve the desired shape and texture of finished products. The process begins by soaking the completed piece in water, followed by gentle squeezing to remove excess moisture. Next, shape the item into its intended form and secure it to a blocking mat or a clean towel with pins. Allow it to dry completely before handling or displaying.
Can I wash my crochet bows?
Before diving into the world of knitting and crochet, it’s essential to familiarize yourself with the unique characteristics of each yarn type. Specifically, you’ll want to investigate the care instructions for your chosen yarn. Some yarns possess the durability to withstand machine washing, whereas others require the gentle touch of hand washing. A thorough understanding of these differences will enable you to treat your creations with the necessary TLC, ensuring they remain in pristine condition for years to come.
How can I make my crochet bows more unique?
Customizing your bow-making experience is all about experimentation and self-expression. You can infuse your creations with unique personalities by playing with various yarn textures, incorporating decorative elements, or crafting bows in a range of sizes. Don’t be hesitant to explore and let your imagination run wild – the possibilities are endless, and the results will truly reflect your personal style.
How to Crochet a Bow: 25 Free Crochet Bow Patterns
Discover the joy of adding a charming finishing touch to your handmade creations by mastering the art of crocheting a bow. Explore an impressive collection of 25 free crochet bow patterns, each one designed to bring a smile to those who behold them. Whether you’re a seasoned crafter or just starting out, these versatile and easy-to-follow tutorials will inspire you to get creative and start crafting your very own beautiful bows today!
Crochet Decorative Bow for Gifts

Create a stunning decorative bow with this easy-to-follow crochet pattern, perfect for gifts! Without prior sewing skills, you can still master this design thanks to our detailed step-by-step instructions accompanied by visual aids. All you need is double-knit yarn and a 4mm crochet hook to get started. The bow consists of three components: the core, the tail, and the cover tie. With our comprehensive tutorial, you’ll be able to create handmade decorations that will spread joy among your loved ones.
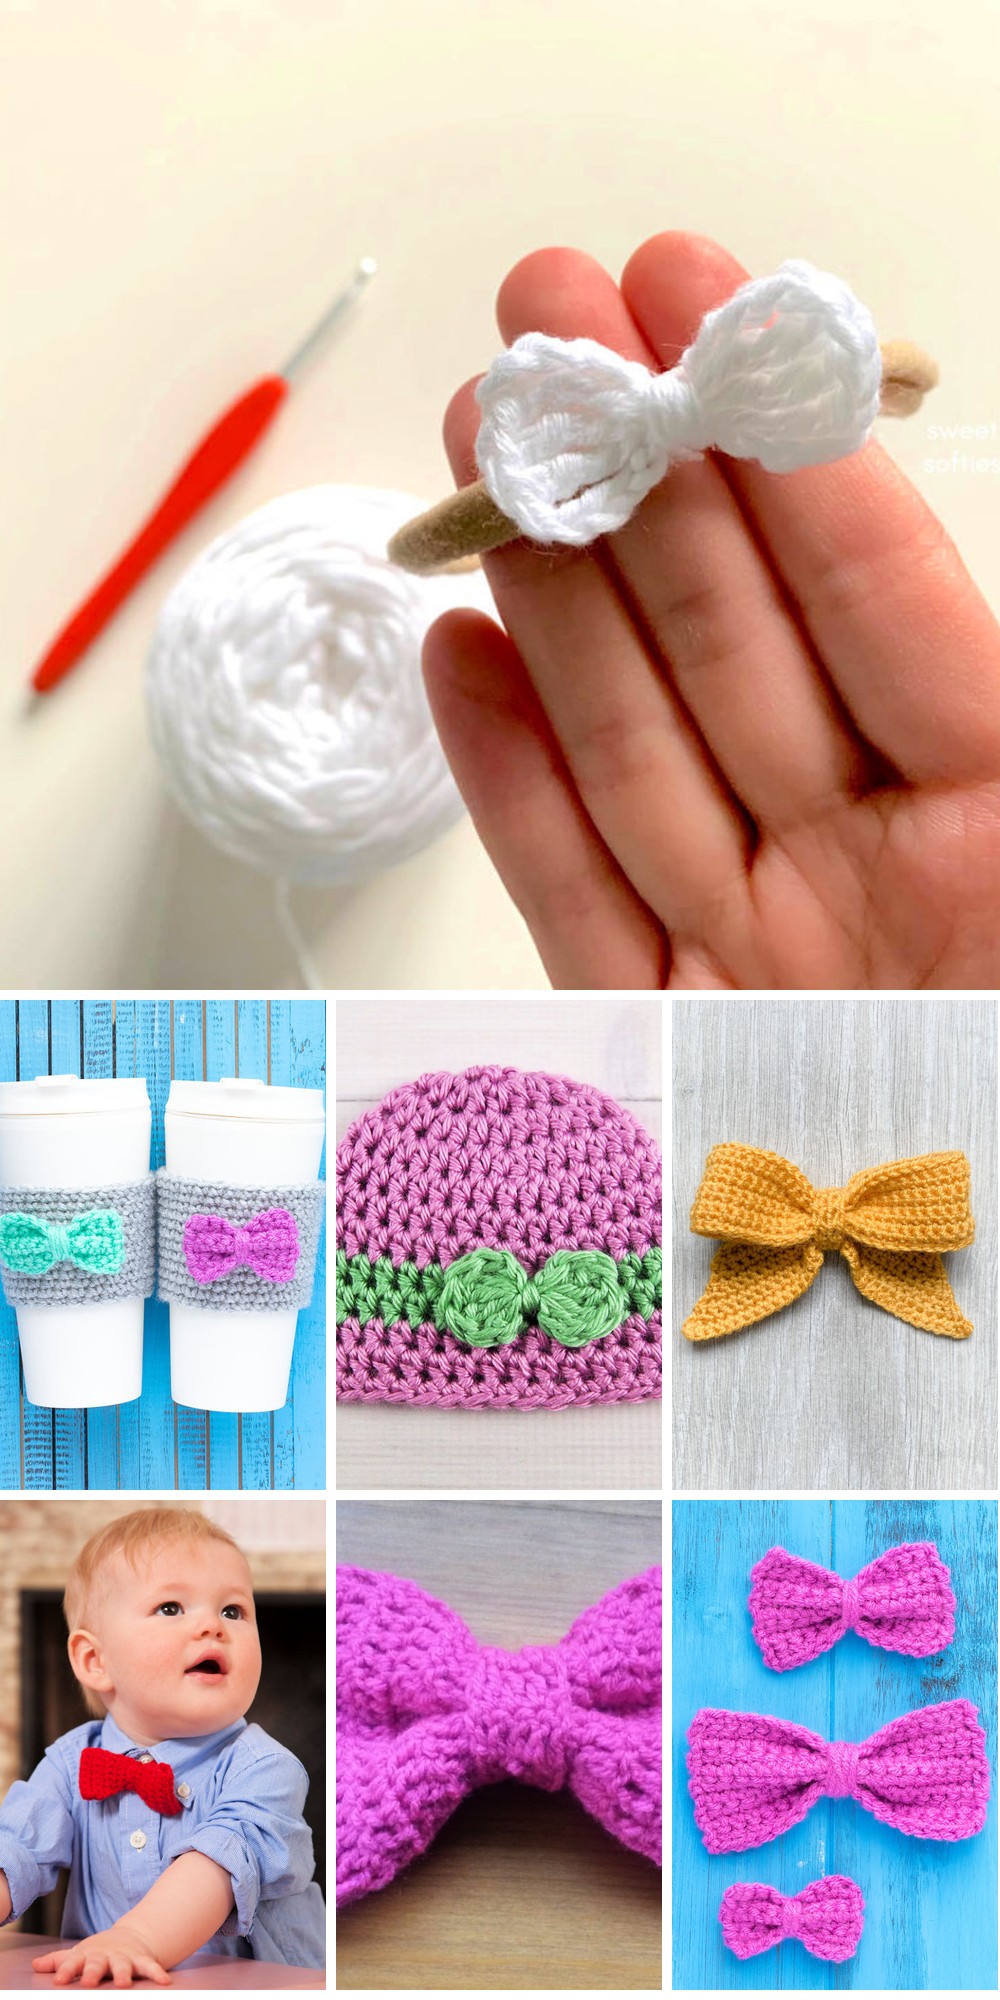
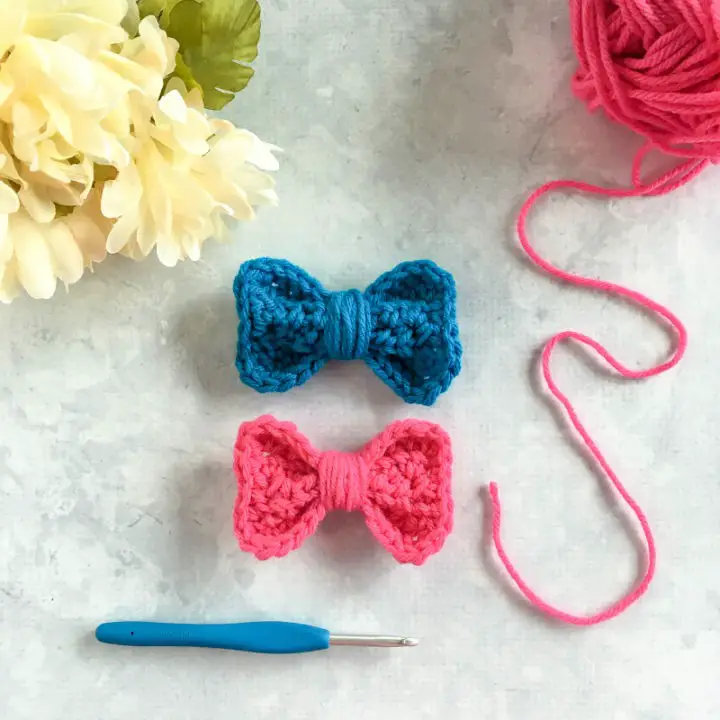
Quick and Easy Crochet Mini Bow Pattern
Surprise your loved ones with a thoughtful, handmade gift that’s both personal and practical. Try this easy-to-follow mini crochet bow pattern to create beautiful, custom bows that can be used as hair clips or headbands. Measuring 2 1/2 inches when complete, these adorable bows are perfect for beginner to intermediate crocheters. With just a few balls of yarn and a size F crochet hook, you can make multiple bows in no time. So why not get creative and start crafting today? You’ll be treasured by your loved ones for the effort you put into making something special just for them.
Crochet Bow Tie for Teddy Bear
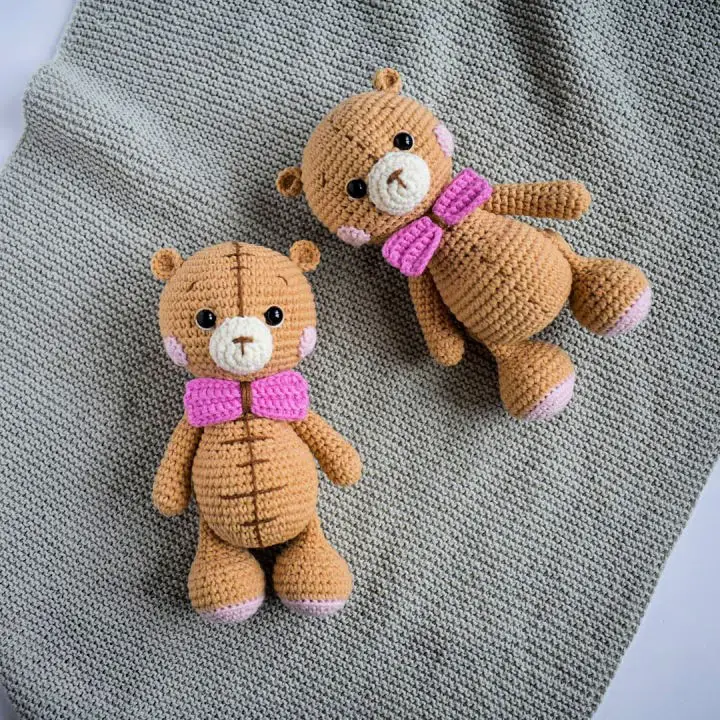
To create this adorable crochet teddy bear adorned with a charming bow tie, simply gather the following materials: yarn, jeans (optional), a 2.00 mm crochet hook, 8mm half beads, buttons, fabric glue, a sewing needle, and fiberfill. With these essentials at your disposal, you can craft an amigurumi toy measuring approximately 15 cm (5.9 inches) in height. Follow the provided free pattern to guide you through each step, and start bringing this lovable creation to life today. All it takes is a few simple tools and supplies to create a handmade teddy bear infused with love – so don’t hesitate any longer!
Free Crochet Hair Bow Pattern

Want to elevate your style with a charming accessory? You’re in luck because this free crochet hair bow pattern is a must-have for anyone looking to add a touch of whimsy to their outfit. With its simplicity and ease of creation, you can whip up one of these adorable bows in under an hour using just a 3mm hook, king cole luxury merino DK yarn, scissors, tapestry needle, crocodile clip, and glue. Whether you’re a kid or an adult, this pattern is perfect for adding that finishing touch to any look. Simply download the PDF and get started on making your own unique crochet hair bow today! trulycrochet
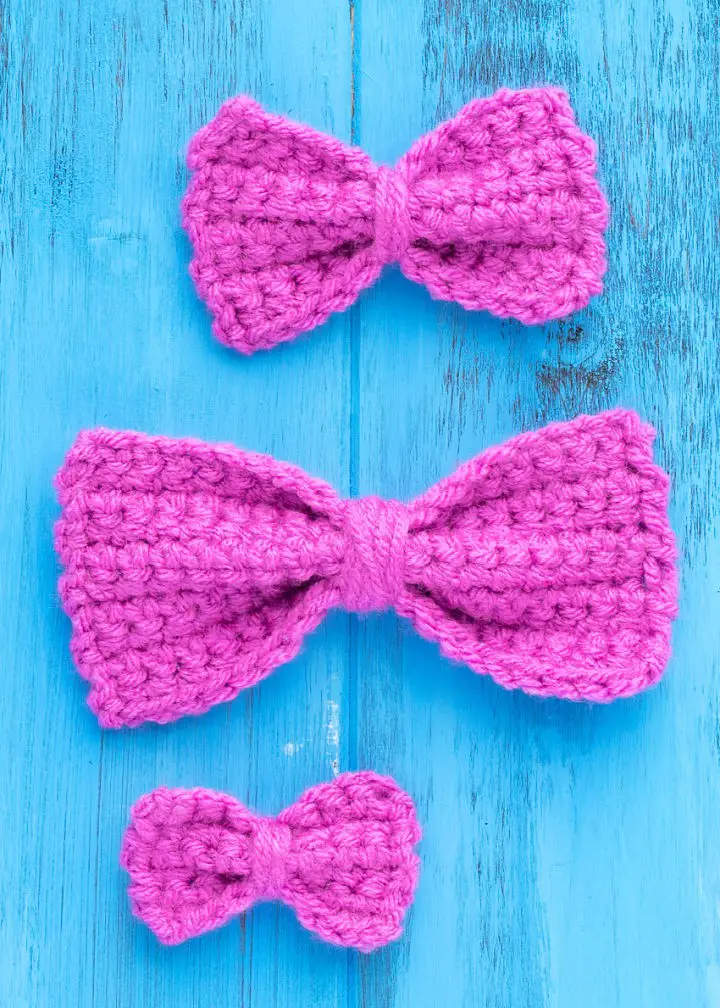
Free Crochet Small Bow Pattern
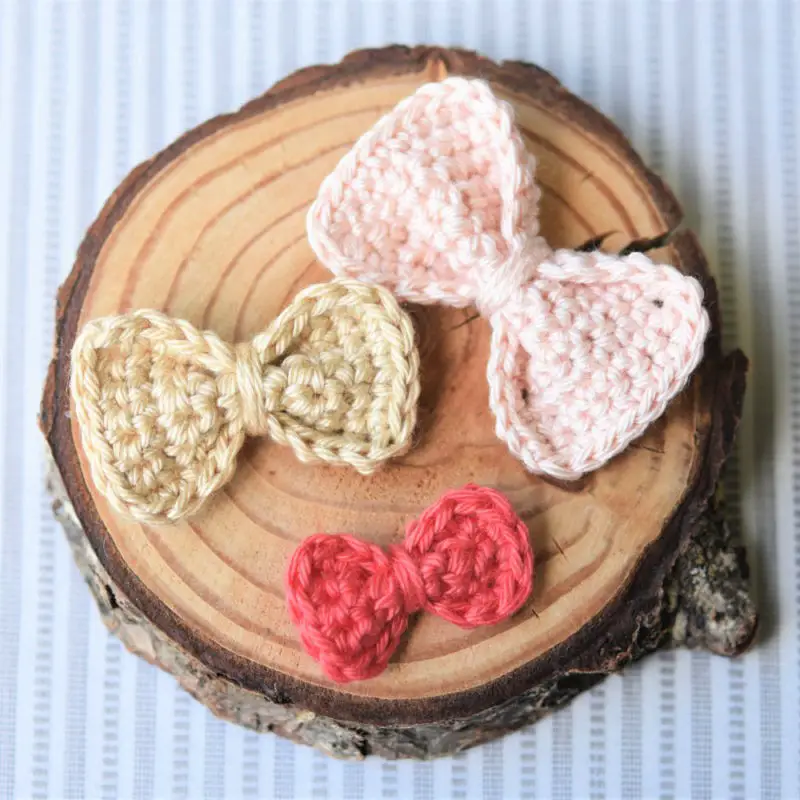
To create stunning crochet bows in various sizes without breaking the bank, simply follow this step-by-step guide. With three distinct size options, you can adorn your amigurumi animals and dolls or use them as charming accessories for little girls. To get started, gather your essential supplies: Madame Tricote Camilla yarn, a 2.5mm crochet hook, and a trusty tapestry needle. Whether you’re a novice or an experienced crafter, this pattern is designed to be so easy to follow that anyone can master it. So why not give it a try today? We’re confident you’ll fall in love with the end result!
How to Crochet Bow for Baby Booties
Create exquisite lemon drop baby booties for your little bundle of joy with this user-friendly free crochet pattern. This accessible design is ideal for beginners, as it utilizes basic stitches and techniques that are easy to master. To get started, you’ll need a 3.50mm crochet hook, 8ply yarn (such as Paton’s cotton blend), a tapestry/ yarn needle, and scissors. The finished size accommodates babies from 0-6 months old, making it an excellent choice for new parents or those looking to create special keepsakes. The step-by-step instructions in the pattern ensure that you’ll achieve flawless results every time. In no time at all, these one-of-a-kind booties will become treasured mementos.
Crochet Bonafide Bow Tie Pattern
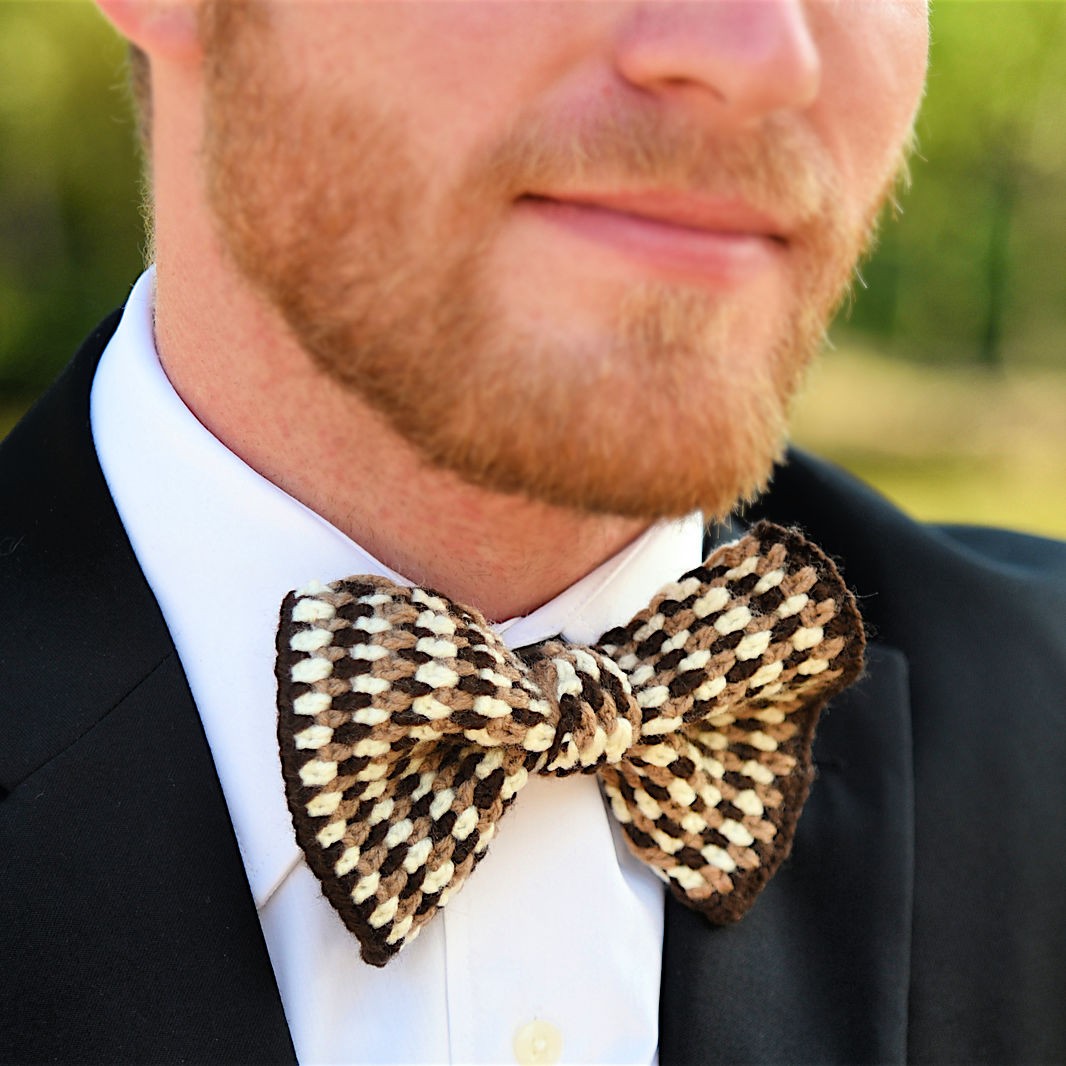
Add a touch of elegance to any occasion with this free crochet pattern for a bonafide bowtie. Perfect for adding a finishing flourish to your little girl’s hairstyle or creating a stylish accessory for yourself, this versatile piece is designed for ease and fun. To get started, gather the necessary materials: Patons Astra Light 3-ply yarn, a size C2 (2.5mm) crochet hook, yarn needle, scissors, and stitch marker. With its straightforward difficulty level, you’ll be able to create something truly special that will withstand all of life’s memorable moments.
Cute Crochet Bow – Free Pattern
Create stunning crochet bows with this easy-to-follow pattern, perfect for beginners and ideal for adding a finishing touch to bags, hats, ear warmers, and more. Turn your scrap yarn into unique hair clips to sell at craft fairs or simply enjoy the satisfaction of using up every last bit of yarn. To get started, gather worsted weight yarn, an i/5.5mm crochet hook, a yarn needle, and scissors. Follow along step-by-step, remembering that chain stitches at the beginning of each row don’t count as actual stitches. With these simple instructions, you can create something beautiful today!
Crochet Bow Pattern for Hat
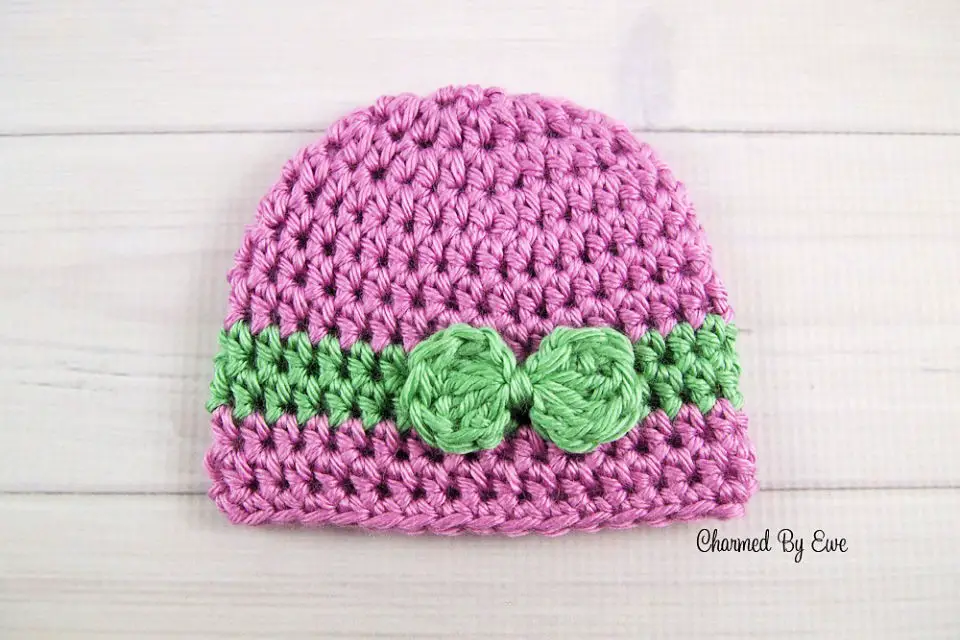
For those seeking a charming handmade crochet hat featuring a bow pattern, this accessible free pattern is an excellent choice for novices! Using Caron Simply Soft yarn and a 5.0 mm (H-8) crochet hook, you can create this one-of-a-kind gift in any color that suits your style. The straightforward stitches involved make it an ideal project for those just starting out with crochet. Take on the challenge and unleash your creativity with a multitude of color options – the result will be nothing short of stunning!
Crochet Big Red Bow With Tails
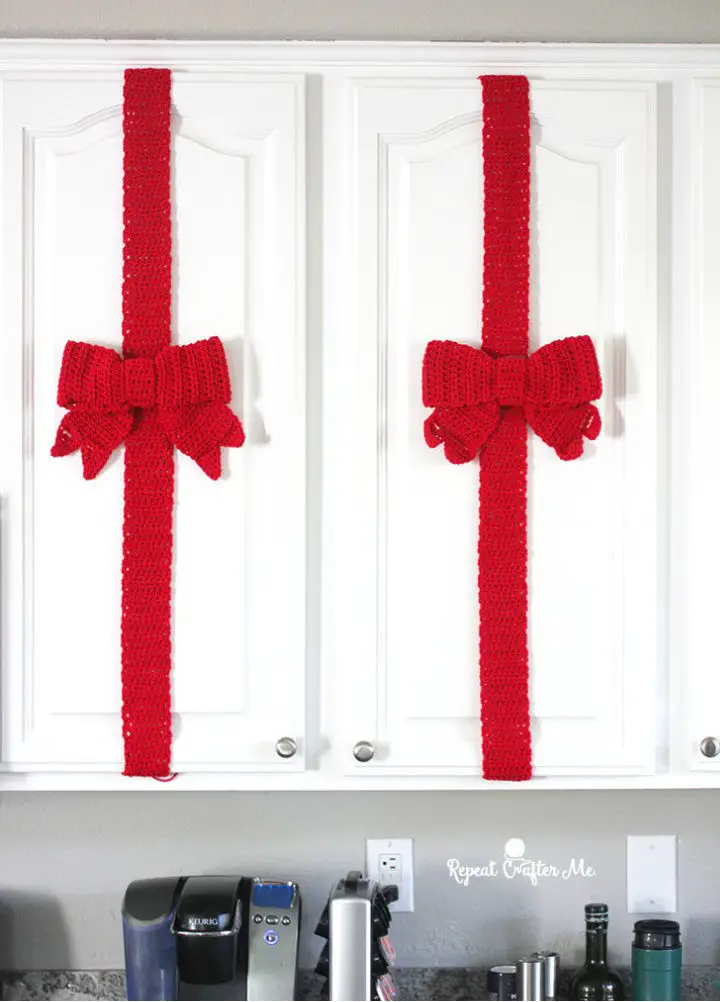
Create a stunning, festive big red bow in no time! This versatile accessory is perfect for decorating your door, wreath, tree, or packages. With just Bernat Super Value yarn, size H crochet hook, and tapestry needle required, this pattern is straightforward and easy to follow. The finished product measures 9 inches long by 7 inches tall, making it a great addition to any holiday decor. To make it uniquely yours, feel free to switch up the colors! With this free crochet big red bow pattern, you can add an extra touch of magic to your season, creating lasting memories for years to come.
Classic Crochet Sailor Hair Bow – Free Pattern
A delightful free crochet pattern ideal for novice crafters! With only basic materials and techniques required, this classic sailor hair bow can be effortlessly created. Simply gather caron soft yarn, a size H/5.00mm crochet hook, scissors, yarn needle, and stitch markers to get started. The single crochet stitches will ensure a tight weave, preventing fraying and keeping your finished product in shape. Make one for yourself or surprise someone special with a thoughtful gift. Feel free to get creative with colors and personalize it according to your unique style.
How to Make a Tiny Bow – Free Crochet Pattern
Kick-start your creative journey by crafting adorable bows using this beginner-friendly crochet pattern, available in three sizes (and it’s free!). This easy-to-follow guide takes you through each step, ensuring a seamless experience as you create these charming decorations. Use them to add a personal touch to coffee sleeves, cat collars, hats, headbands, hair ties, and presents. Gather your supplies, including Brava Worsted yarn, an H 5.0 mm crochet hook, scissors, and a tapestry needle, before diving into the instructions. So, what’s stopping you? Grab your hook and get ready to create something special today!
Crochet Your Own Curly Bow
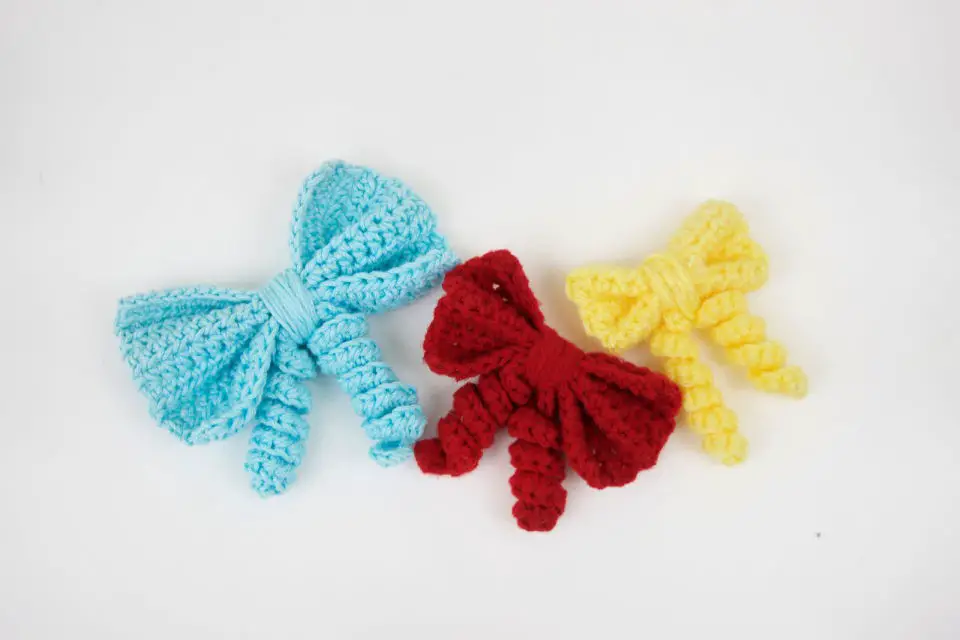
Elevate your crochet skills with this user-friendly pattern, perfect for beginners! Create stunning bows in a range of sizes and colors using just worsted-weight yarn, a size 4mm hook, scissors, and a darning needle. With three adjustable sizes (large, medium, and small) to choose from, you can easily customize your bow to fit any project or occasion. Follow Lion Brand Yarn’s expert guidance to craft an impressive handmade accessory that will leave everyone in awe.
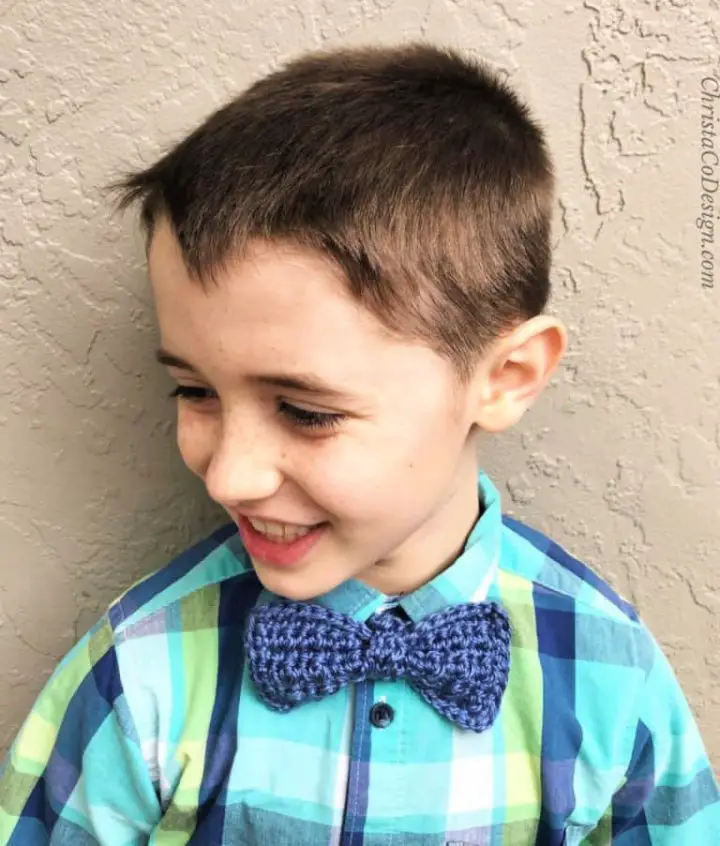
Crocheted Toddler Bow Tie Pattern
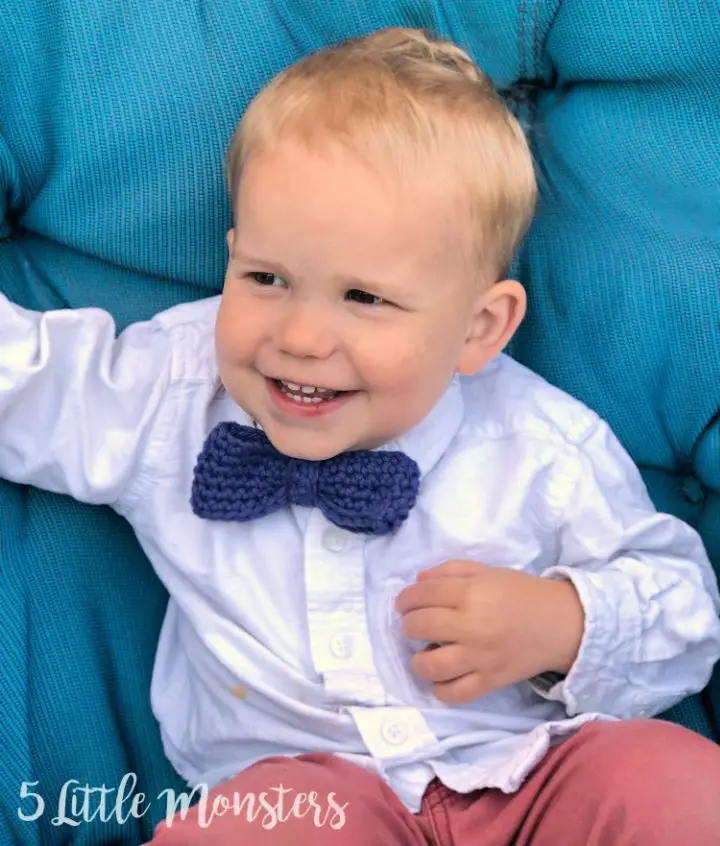
Craft a charming crocheted bow tie for your little one with this effortless and free pattern! This beginner-friendly project requires only basic single and double crochet stitches, making it a swift and yarn-efficient endeavor. To bring the look to life, gather cotton worsted weight yarn, an I crochet hook, a button, a yarn needle, and scissors. The finished size of the bow tie is adaptable, allowing you to customize its size to fit your toddler perfectly – make it bigger or smaller as desired!
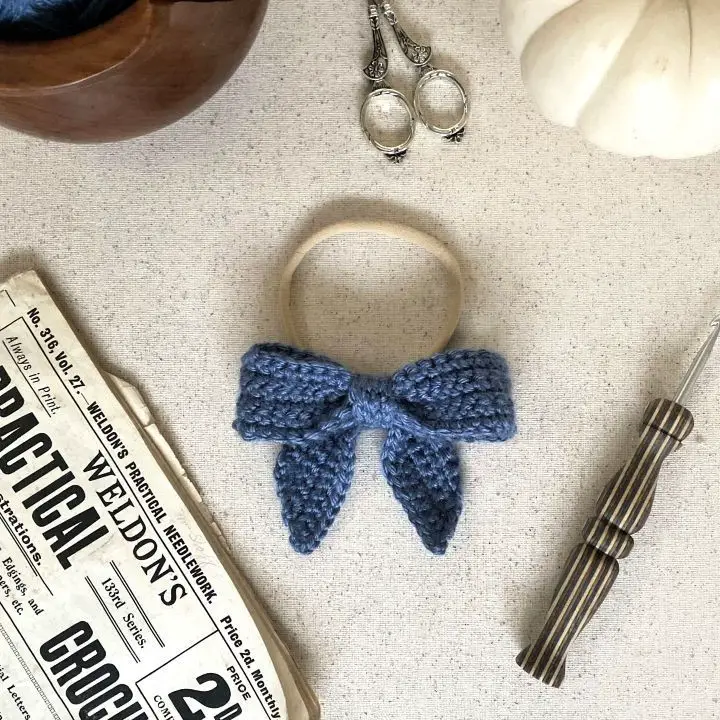
Free Crochet Small Bow Ring Pattern
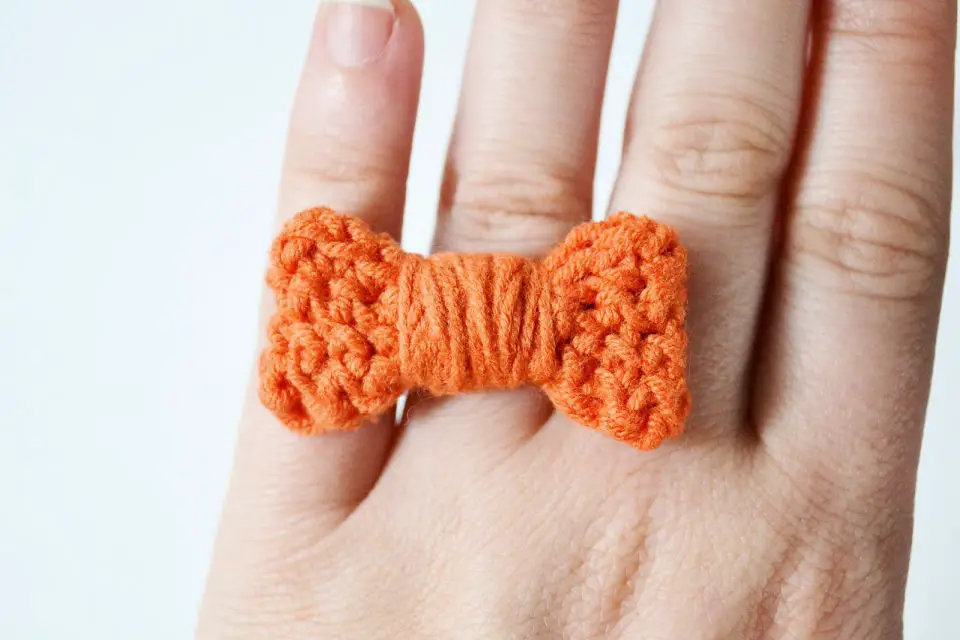
This charming crochet bow ring tutorial is an excellent way to infuse your jewelry collection with a touch of homemade charm. With just two essential materials – Lion Brand Vanna’s Glamour yarn and Bernat Cotton-Ish yarn – along with one hook size 3.75 mm (F), you can effortlessly craft this delightful little ring in mere minutes! This free pattern is remarkably easy to follow, making it an ideal choice for beginners looking to dip their toes into the world of crochet. If you’re seeking a unique and handmade accessory that exudes personality, look no further than this fun and quirky bow ring tutorial.
How to Crochet a Bow Tie
Give the gift of uniqueness with this effortless crochet bow tie pattern! The alternating texture rows and single crochet stitches create a trendy accessory that can elevate any outfit. To get started, you’ll need worsted-weight yarn, a 5mm hook, scissors, a measuring tape, a button, and a sewing needle and thread. In no time at all, your loved one will be the proud owner of an exclusive handmade bow tie they’ll treasure for years to come.
Free Crochet Baby Bow Tie Pattern
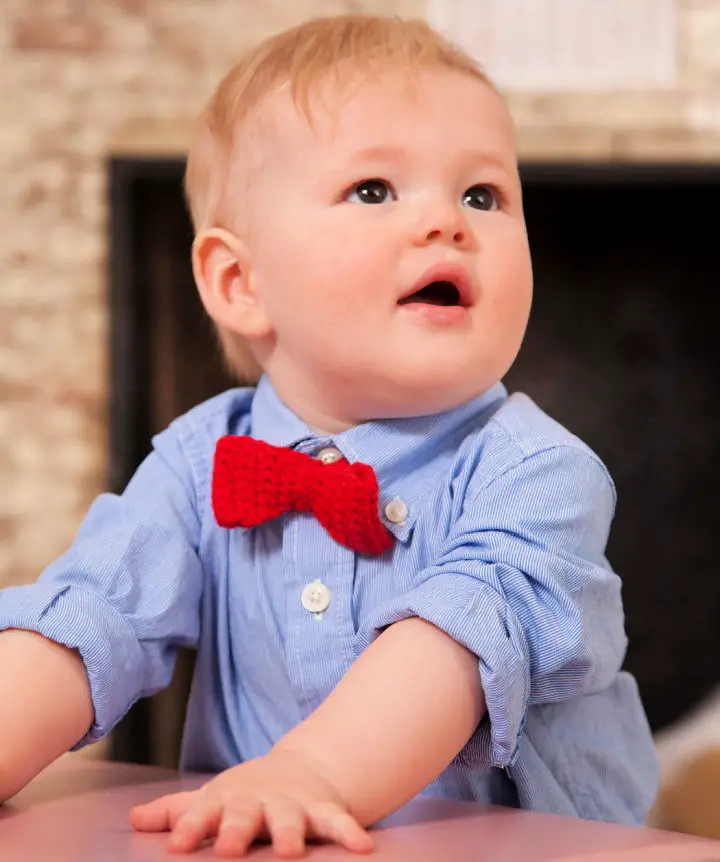
Create a charming hipster accessory for your little one with this easy-to-make free crochet bowtie pattern! Using just Red Heart Anne Geddes Baby Solids, a 3.25 mm crochet hook, and a yarn needle, you can craft a stylish piece that’s perfect for any outfit. The best part? It’s simple to clean and requires no stretching of chain stitches when fitting the neckband. Simply download this printable PDF pattern and get ready to make a dashing bowtie that’s sure to delight your tiny tot.
Free Crochet Childs Bow Tie Pattern
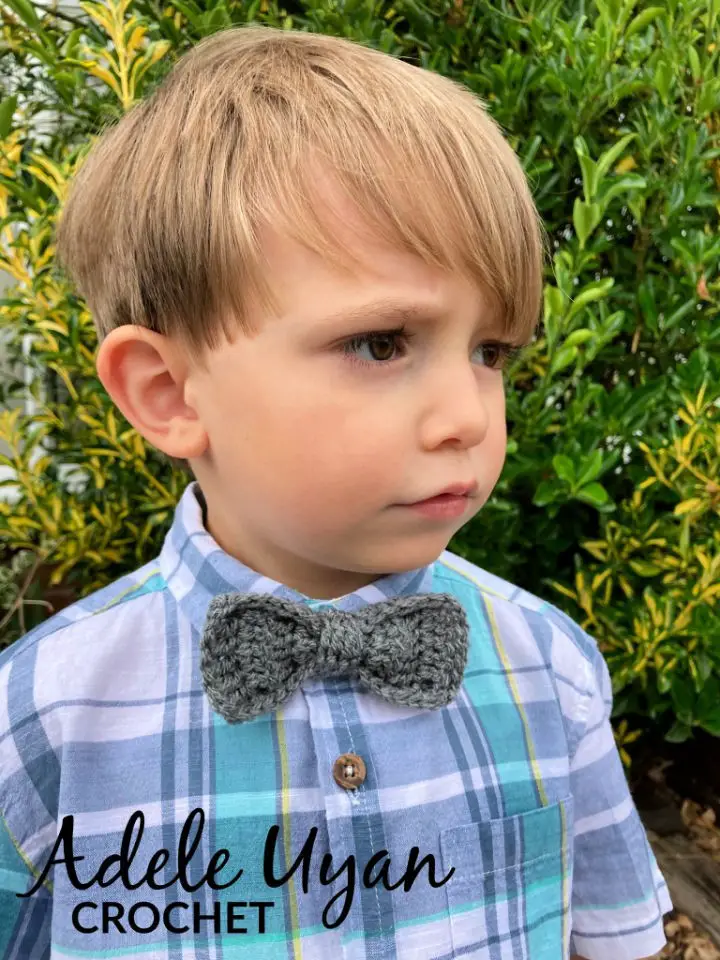
Create a stylish and adorable bow tie for your child with this easy-to-follow free crochet pattern! By adjusting the neck strap’s length, you can customize the fit for any age range – simply add or remove rows depending on the child’s size. For this project, all you need is a 4mm hook, double-knit yarn, and a small button. The finished bow tie is suitable for children aged four years old and up, making it an excellent fashion accessory for your little one to wear.
Crochet Minnie Mouse Bow Pattern
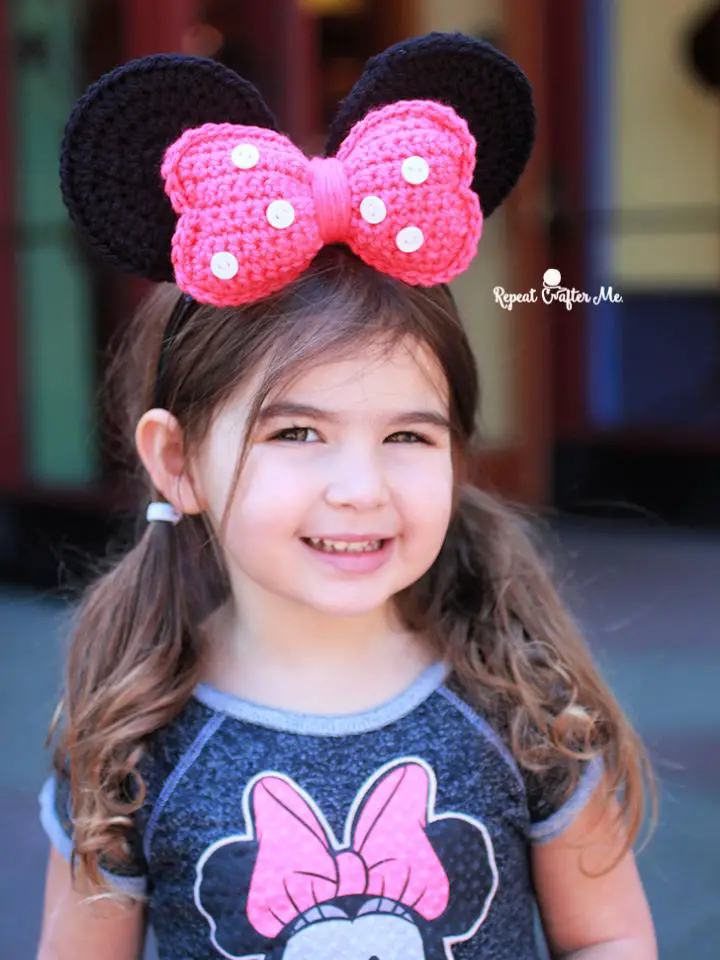
Bring your style to life with this free crochet pattern for Minnie mouse ears headbands! This simple yet unique design is perfect for creating a personalized accessory that’s sure to add a touch of whimsy to any outfit or occasion. To get started, you’ll need Bernat Super Value yarn, a size H crochet hook, a black headband, six small white buttons, a hot glue gun, and a tapestry needle. With these materials at the ready, you’ll be able to craft this adorable headband in no time. The best part? It’s an easy project that requires minimal time commitment but yields big results. So why not give it a try? Follow our step-by-step instructions and get ready to show off your new favorite accessory! With the help of this tutorial, you’ll be able to create something truly special for yourself or as a thoughtful gift for a friend.
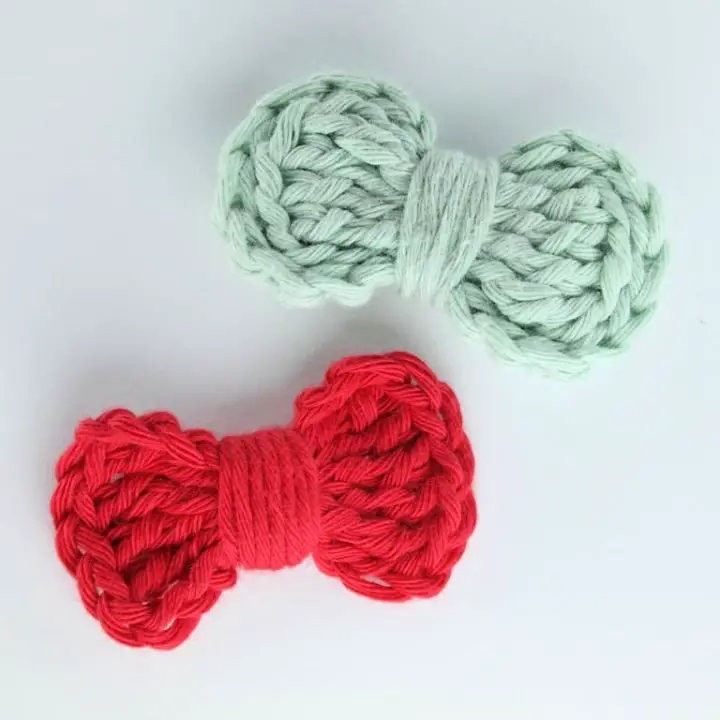
Easiest Crochet Small Bow Pattern
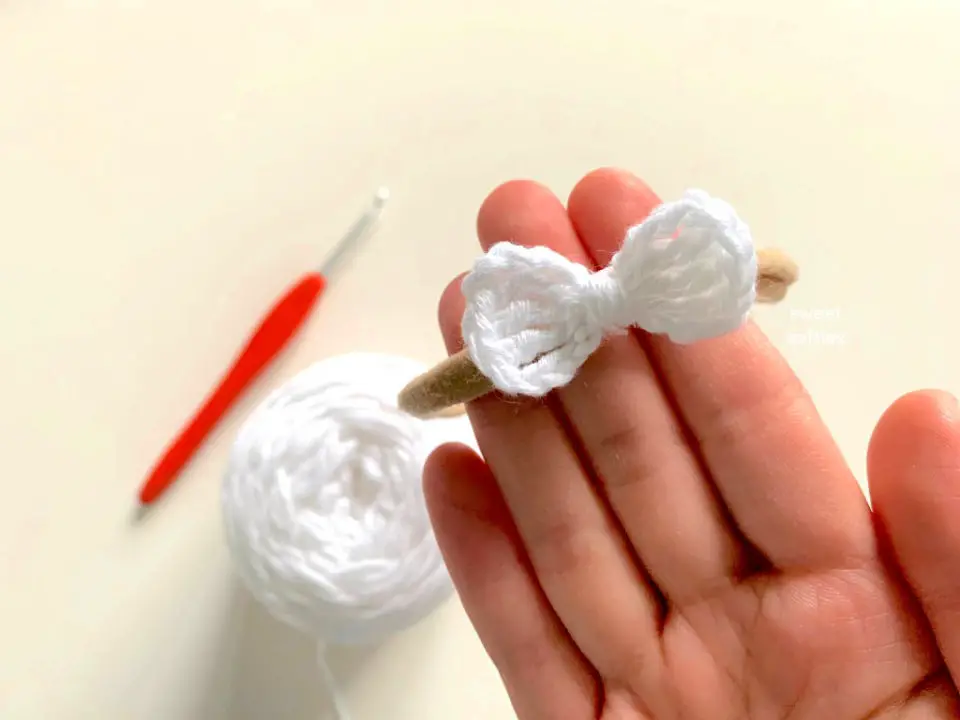
In just under five minutes, you can create an adorable mini bow that’s perfect for adding a touch of whimsy to your crochet projects. Whether you’re looking to add some flair to hair accessories or decorations, this simple yet charming design is ideal for beginners and experienced crafters alike. All you need is Lion Brand Coboo Yarn and a 3.25mm hook. To get started, simply follow our free crochet pattern and video tutorial – we promise it’s the easiest little bow you’ll ever make!
Adorable Crochet Baby Bow Headband
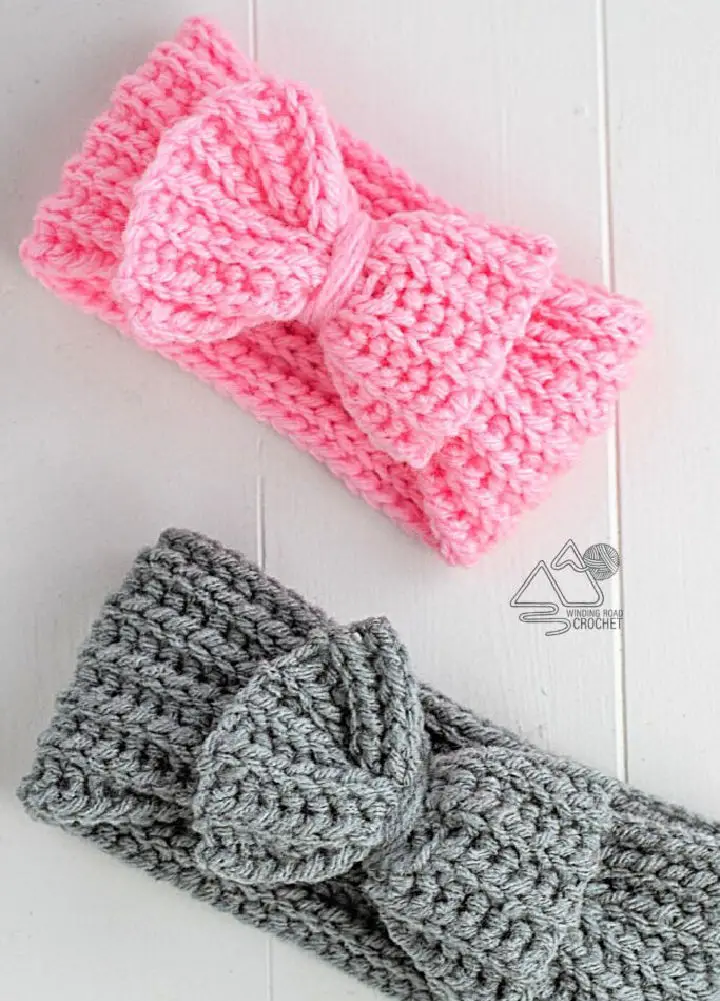
Looking for an adorable and easy-to-make baby bow headband? You’re in luck! A free crochet pattern with a corresponding video tutorial is available, requiring only a minimal amount of materials. Specifically, you’ll need Red Heart With Love yarn, a size H 5mm crochet hook, a yarn needle, and scissors. This project works up quickly, making it perfect for a last-minute baby shower gift or a thoughtful addition to your own stash. To achieve the right size headband, be sure to check your gauge and remember that your stitch count will always be one less than your starting chain.
Free Crocheted Awareness Ribbons Pattern
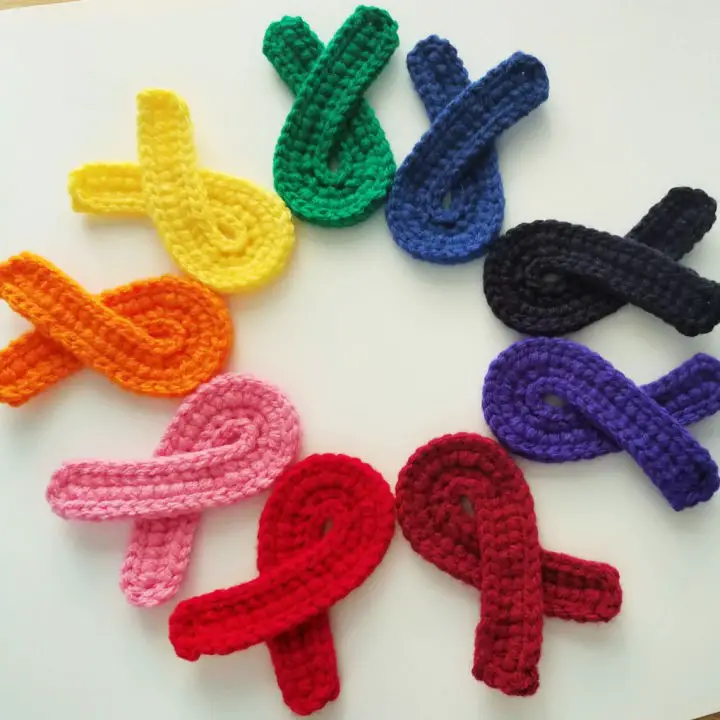
Show your support by creating a thoughtful awareness ribbon with this simple, free crochet pattern. All you need is a 3.75mm (F) hook and some worsted weight yarn. You can customize it into a keychain, pin, or magnet to spread the message in a way that’s truly personal. With just a few basic materials, you can craft a meaningful symbol of solidarity.
Crochet Bow for Coffee Sleeves
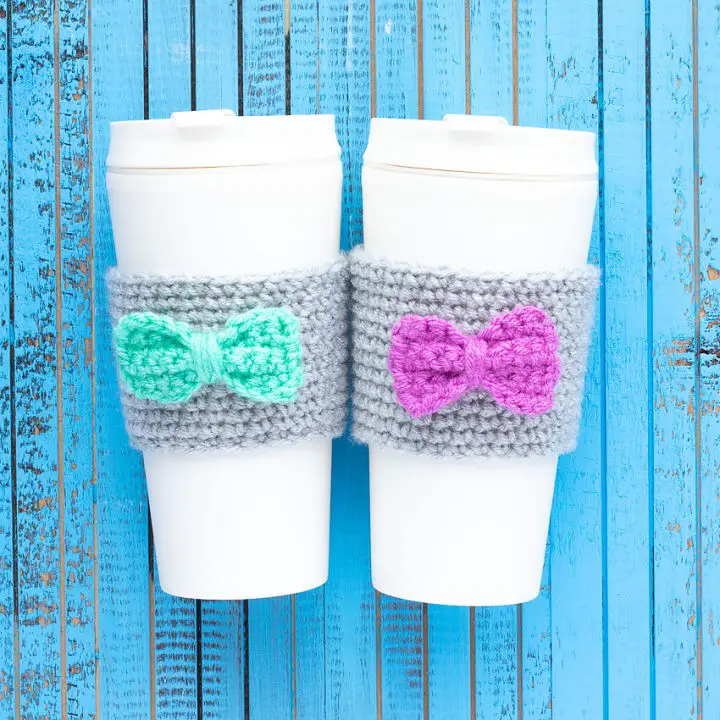
In search of a delightful and accessible crochet project? You’re in luck! This charming coffee sleeve pattern with bows is an excellent choice for newcomers to the world of yarn crafting. By employing single crochet stitches, you can create a reusable sleeve that showcases your skills while adorning your coffee cup with flair. Not only is it enjoyable and straightforward to complete, but the required materials are budget-friendly – all you need is worsted-weight yarn, a hook, a stitch marker, scissors, and a tapestry needle. Gather your supplies and embark on this delightful and practical craft today!
Free Crochet Large Bow Pattern
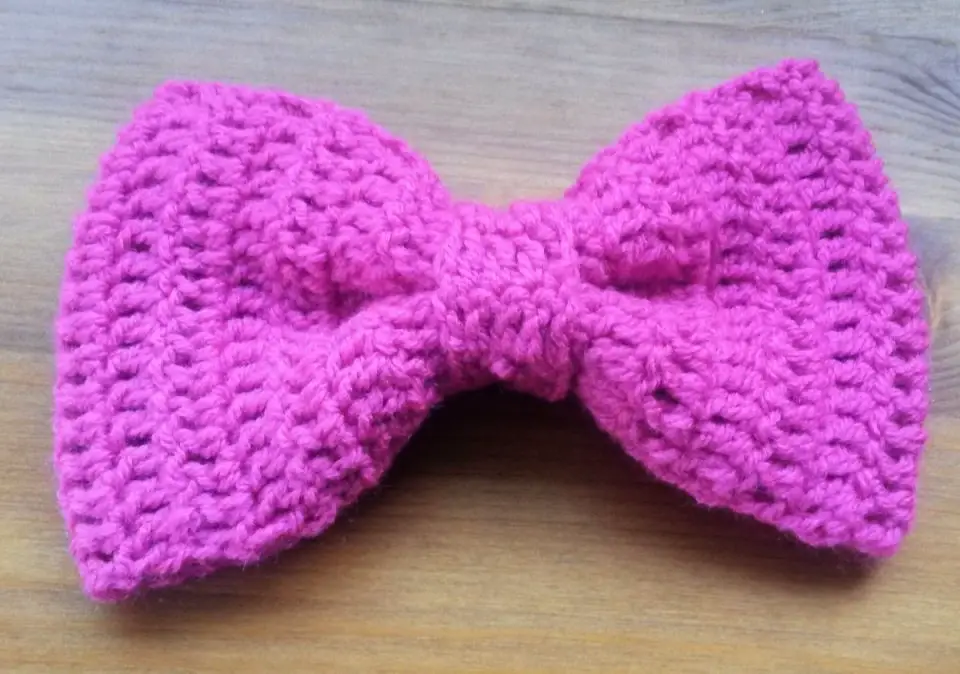
Want to add a dash of whimsy to your creations? Look no further! With this simple and free pattern, you can create stunning big bows that are perfect for embellishing bags, baskets, or even little fashionista’s hair. This beginner-friendly tutorial requires just a few basic materials: a 4mm crochet hook, Deramores Studio DK yarn, and a knitter’s needle. Get ready to unleash your creativity and give your projects the finishing touch they deserve!
Crochet Bow Tie for Dogs
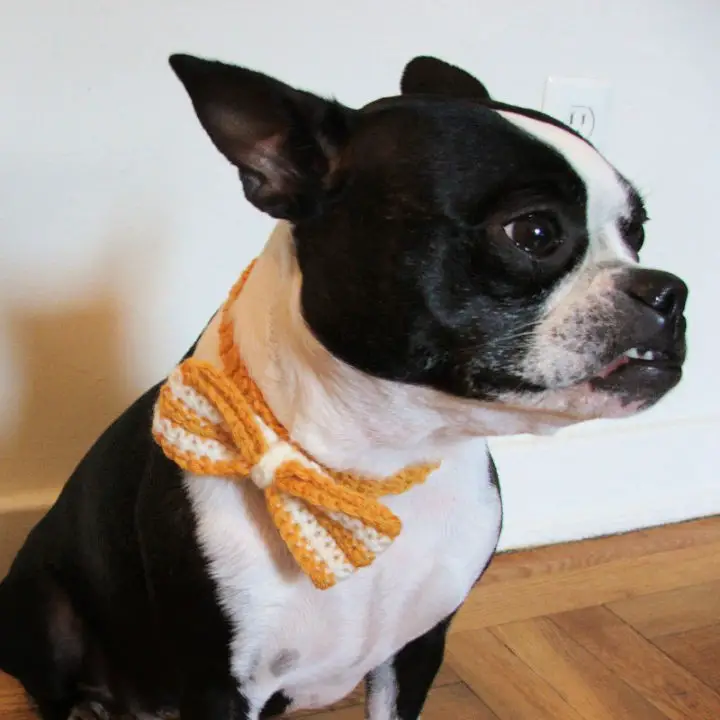
Bring some joy to your furry friend with this easy-to-make doggie bow tie crochet pattern, perfect for beginners! With just a few simple materials – sport-weight yarns, a 4mm hook, a large needle, and scissors – you can create a unique accessory that’s sure to turn heads. Customize the colors to match your pup’s personality or coordinate with their favorite collar. Before you know it, you’ll have a snazzy new bow tie for your pooch. So why wait? Gather your materials today and start crocheting an adorable accessory that will show your pup some serious love.
Conclusion:
Mastering the art of crocheting a bow unlocks a world of creative possibilities for crafters of all skill levels. With our extensive collection of 25 free crochet bow patterns, you’ll discover a delightful blend of inspiration and practical guidance to elevate your crafting experience. Whether you’re looking to add a personal touch to hair accessories, enhance gift presentations, or create unique home decor pieces, these free patterns provide the perfect starting point for unleashing your creativity. By following our step-by-step tutorials and leveraging the helpful FAQs we’ve provided, you’ll be well on your way to crafting stunning, professional-looking bows that reflect your unique style. The key to success lies in selecting the right materials, refining your technique, and embracing your creative voice. With these elements in place, you’ll be hooked (pun intended!) and eager to see what other creative possibilities await.
