Transform any space with the unique charm of DIY mason jar lights, where rustic elegance meets personal flair. This comprehensive guide presents 25 inspiring ideas that cater to various styles and occasions, elevating ordinary mason jars into captivating light fixtures. Whether you’re looking for simple yet effective or creative designs, these projects provide a perfect blend of form and function for indoor or outdoor settings. Embarking on this DIY adventure not only fosters creativity but also allows you to personalize your decor with ease. With clear instructions, we’ll guide you through the process from start to finish, making it accessible to anyone. Let’s bring a touch of handmade magic into your surroundings.
Why Make DIY Mason Jar Lights?
When you create DIY Mason Jar Lights, you’re not just adding a personal touch to your space – you’re transforming it into a reflection of your personality and style. This craft offers several compelling reasons to give it a try.
Firstly, DIY Mason Jar Lights are an affordable option compared to store-bought alternatives. You can often use materials you already have on hand, making this project budget-friendly. Additionally, by repurposing mason jars and other recyclable materials, you’re contributing to reducing waste and upcycling items that might otherwise end up in the landfill.
One of the greatest advantages of DIY projects is their customizability – and Mason Jar Lights are no exception. You can tailor every aspect of your project to your exact preferences, from the color of the jars to the type of light you use. The possibilities are truly endless.
These lights are also incredibly versatile. They can be used for a variety of purposes, from providing a cozy glow in your bedroom to adding a decorative touch to an event or serving as a warm ambiance on your patio.
The best part? Making DIY Mason Jar Lights is surprisingly simple and accessible, even for those without extensive crafting experience. With straightforward instructions and readily available materials, anyone can create beautiful lights that reflect their unique style.
Perhaps most rewarding of all, however, is the sense of satisfaction that comes from making something beautiful with your own hands. DIY Mason Jar Lights offer an enjoyable crafting experience with a rewarding outcome that’s sure to bring you joy for years to come.
How to Make a Mason Jar Light
Crafting a rustic and cozy mason jar light or lantern is a delightful DIY project that can elevate any room’s ambiance. Inspired by The Sorry Girls’ creative endeavor, this guide will lead you through the straightforward process of transforming a mason jar into a charming lantern. As you complete each step, you’ll not only create a unique decorative piece but also showcase your crafting prowess and add a warm, inviting glow to your space.
Materials Needed:
To create your unique mason jar chandelier, gather the following materials: a large mason jar, a lighting cord with socket that can be found at IKEA for an affordable price, a vintage or decorative light bulb that complements the jar’s aesthetic, and optional spray paint to give it a metallic finish. For assembly, you’ll need basic tools like a hammer, nails, pliers, and masking tape. If desired, satin nickel spray paint serves as a finishing touch to complete the piece.
Step-by-Step Guide:
To create a unique and functional lighting fixture, start by disassembling the mason jar. Next, place the socket on the back of the lid and use a pen to trace its outline. This step is crucial in preparing the metal for further manipulation.Using a hammer and nails, carefully perforate the traced outline with small holes, weakening the metal and making it easier to puncture through. After completing this process, make a hole in the center of the lid and use pliers to pull out the metal piece, creating an opening for the socket.If you desire a metallic finish, mask the part of the cord you do not wish to paint and spray the socket and top of the mason jar lid with satin nickel spray paint or any other metallic paint that matches your desired aesthetic. Once the paint has dried, punch additional holes around the periphery of the lid to allow heat to escape and prevent overheating.To assemble the light, thread the lighting cord through the lid hole and secure the socket in place by screwing on the provided fixtures from your lighting cord set. Install your chosen light bulb into the socket, ensuring it is properly seated for optimal performance.Finally, reassemble the mason jar by attaching the lid with the installed light socket to the jar. Use the remaining fixtures to tightly secure everything in place, ensuring a snug and safe fit. Your mason jar light is now ready to be used as a decorative lantern or a functional lighting fixture. Simply plug it into an electrical outlet, hang it from a hook, or place it on a table for instant ambiance.
Tips for Success:
To avoid any issues with your DIY project, make sure you wait until all spray paint is completely dry before moving forward with assembly. This will prevent any smudging or unwanted effects on the final product. Additionally, exercise caution when handling the lid and its sharp edges, which can be prone to creating rough spots during opening. Furthermore, consider opting for LED bulbs in your mason jar’s lighting setup. Not only do they produce less heat, but they’re also a safer choice for enclosed spaces like this type of container.
Video Tutorial
To supplement the written guide and gain a deeper understanding of the process, I recommend watching The Sorry Girls’ video tutorial on creating a DIY mason jar light/lantern. This visual approach offers an immersive experience, allowing you to see each technique in action and further clarify any steps that may have been unclear.By embracing this project, you’ll be able to infuse your home with a unique personal touch. Whether you’re looking to create a warm and inviting atmosphere for cozy evenings or add ambiance to gatherings, your DIY mason jar light/lantern is sure to become the focal point of any room, sparking conversations and creating lasting memories.
Safety Precautions
When embarking on a DIY Mason Jar Light project, it’s crucial to prioritize safety above all else. To ensure a successful and accident-free experience, heed the following essential guidelines:
Glass Handling: As mason jars are made of fragile glass, handle them with utmost care to avoid breakage. In the unlikely event of a jar shattering, swiftly clean up any resulting glass fragments to prevent potential harm.
Electricity Precautions: When integrating electric lights into your Mason Jar Light design, ensure that power is turned off during installation or replacement. Furthermore, maintain a safe distance between lit components and flammable materials to minimize the risk of accidents.
Tool Usage: Familiarize yourself with the proper usage of any tools involved in your project, and use the appropriate tool for each specific task to prevent mishaps.
Work Environment: When utilizing paints or adhesives, maintain a well-ventilated workspace to prevent the accumulation of harmful fumes. This is particularly important if you’re working in an enclosed or poorly ventilated area.
Child Supervision: If children are involved in your DIY endeavor, ensure they are continuously supervised to guarantee their safety. Keep sharp objects and small parts out of their reach to minimize the risk of accidental ingestion or injury.
By prioritizing safety, you’ll be able to create beautiful Mason Jar Lights without compromising on caution. With proper precautions, you can enjoy a stress-free DIY experience that yields stunning results.
Troubleshooting Guide
When crafting your DIY Mason Jar Lights, you may encounter some obstacles along the way. Fortunately, we’ve compiled a list of common issues and their corresponding solutions to help you troubleshoot and get back on track.If your lights fail to turn on, double-check the wiring connections and ensure they’re secure. Additionally, verify that the light bulbs themselves are functioning properly. On the other hand, if you’re struggling to fit the lights into the jar, try arranging them loosely instead of forcing them in. Consider using a larger jar or smaller lights to achieve a better fit.Decorations not adhering to the jar? Ensure the surface is clean and dry before decorating, and consider applying a primer or adhesive spray for added hold. Should you notice the jar heating up after prolonged light use, consider switching to LED lights which generate minimal heat. Always keep an eye on the jar while it’s in use to prevent any potential fire hazards.Lastly, if hanging your mason jars proves challenging, try using strong twine or a metal wire for added support. Double-check that the attachment is secure to avoid any accidents.Remember, every problem has a solution, and part of the fun with DIY projects lies in overcoming these challenges.
Maintenance and Care
To get the most out of your DIY Mason Jar Lights, it’s essential to take good care of them. Not only will this extend their lifespan, but it’ll also keep them looking their best. To start with, make sure to regularly dust off the jars to prevent dirt and grime from building up. If you need to get a bit more thorough, use a damp cloth to gently wipe them down. Just be careful not to use any harsh chemicals that could damage the glass or the lights themselves.It’s also crucial to keep an eye on the lights themselves, making sure they’re all working properly. If one goes out, don’t hesitate to replace it – this will help prevent any potential electrical issues from developing. When handling your Mason Jar Lights, remember that the jars are made of delicate glass and can break easily if dropped.When you need to store your lights, find a safe, dry place to keep them in. If possible, try to store them in their original packaging to prevent any damage or scratches. And finally, if you’re using your Mason Jar Lights outdoors, be sure to bring them inside during bad weather – this will help protect them from water damage.By following these simple tips and taking good care of your DIY Mason Jar Lights, you can enjoy the warm, inviting glow they provide for years to come.
FAQs on DIY Mason Jar Lights
As we delve into the world of DIY Mason Jar Lights, it’s natural to encounter a few common queries that may arise during the creative process. In an effort to clarify any doubts and provide a more comprehensive understanding, we’ll be addressing some of the most frequently asked questions in this section, shedding light on key aspects to help you bring your unique vision to life.
Frequently Asked Questions (FAQs)
You have the flexibility to use any size Mason Jar for this project, but keep in mind that the size will impact the number of lights you can fit inside. When it comes to choosing lights, LED options are recommended due to their energy efficiency and low heat output. However, as long as the lights are safe for use within a glass jar, you’re free to select any type. For outdoor use, your Mason Jar Lights can definitely be taken outside, but make sure the lights themselves are waterproof and bring them inside during bad weather to prevent water damage. Regular dusting should suffice for cleaning, although if needed, a damp cloth is acceptable. Avoid harsh chemicals that could harm the jar or lights.If a light isn’t working, inspect the wiring to ensure secure connections and check the light bulbs to verify their functionality. If a bulb goes out, replace it promptly to avoid potential electrical issues. It’s crucial to have vent holes in the lids of your Mason Jars to allow heat from the bulbs to escape. For attaching the light socket, you can cut out a hole in the lid and attach the pendant light socket to the jar.The lifespan of your lights will depend on the type used – for example, LED lights can last many years with regular use. You can also create DIY lantern jars using Mason Jars, battery-operated tea lights, or other types of lights, and add any embellishments you like. If you’re looking to purchase small LED lights for your project, you can find them at various online retailers or local stores.
Can I use any type of light bulb for my mason jar light?
When selecting light-emitting diode (LED) bulbs or alternatives, safety is a top consideration, particularly when used in enclosed spaces like a mason jar. LED bulbs are often preferred due to their lower heat output, which reduces the risk of fire hazards. If you opt for a different type of bulb, ensure it has a suitable size and heat profile that won’t compromise the space or create excessive warmth.
How can I customize my mason jar light?
Bring your mason jar to life by infusing it with color and personality. Start by painting the jar or lid in a hue that reflects your style, whether bold and bright or soft and subtle. Next, add a metallic or frosted finish to give your creation a unique sheen. But what’s inside is where things really get creative – fill the jar with decorative items like twinkling fairy lights, smooth pebbles, or delicate faux flowers. And don’t forget to tailor your masterpiece to the occasion or room it will inhabit, whether that’s a seasonal theme, holiday decor, or a cohesive look for a specific space.
How do I prevent the mason jar light from overheating?
When choosing a lamp, it’s crucial to ensure that the lid or housing provides sufficient ventilation holes to facilitate the escape of heat. This is particularly important for energy-efficient options like LED bulbs, which produce less heat compared to traditional incandescent lamps. By doing so, you’ll significantly minimize the risk of overheating and maintain a safe operating temperature.
How do I clean my mason jar light?
To thoroughly clean your light fixture, start by disconnecting it from its power source and gently removing the bulb. Next, take a soft, damp cloth and wipe down the glass or crystal component of the fixture to remove any dirt, grime, or stubborn stains. Be cautious not to use any harsh chemicals that might compromise the integrity of the jar’s surface or detract from any decorative finishes it may have.
Is it safe to leave my mason jar light on all the time?
When utilizing an LED bulb in conjunction with proper ventilation within the jar, the setup can be considered safe. Nevertheless, for optimal energy conservation and lamp longevity, contemplate employing the light only as required or integrating a timer to regulate its usage.
Can children help with making mason jar lights?
While it’s true that kids can participate in certain parts of the process, it’s crucial to provide close supervision during tasks that involve electricity, sharp objects, or opening the jar lid. However, they can definitely help out with safer activities like painting or filling the jars with their favorite treats. This collaborative effort can be a fun way to bond and create something truly special – like personalized mason jar lights that add a personal touch to your home decor. For a seamless crafting experience, refer to these helpful FAQs!
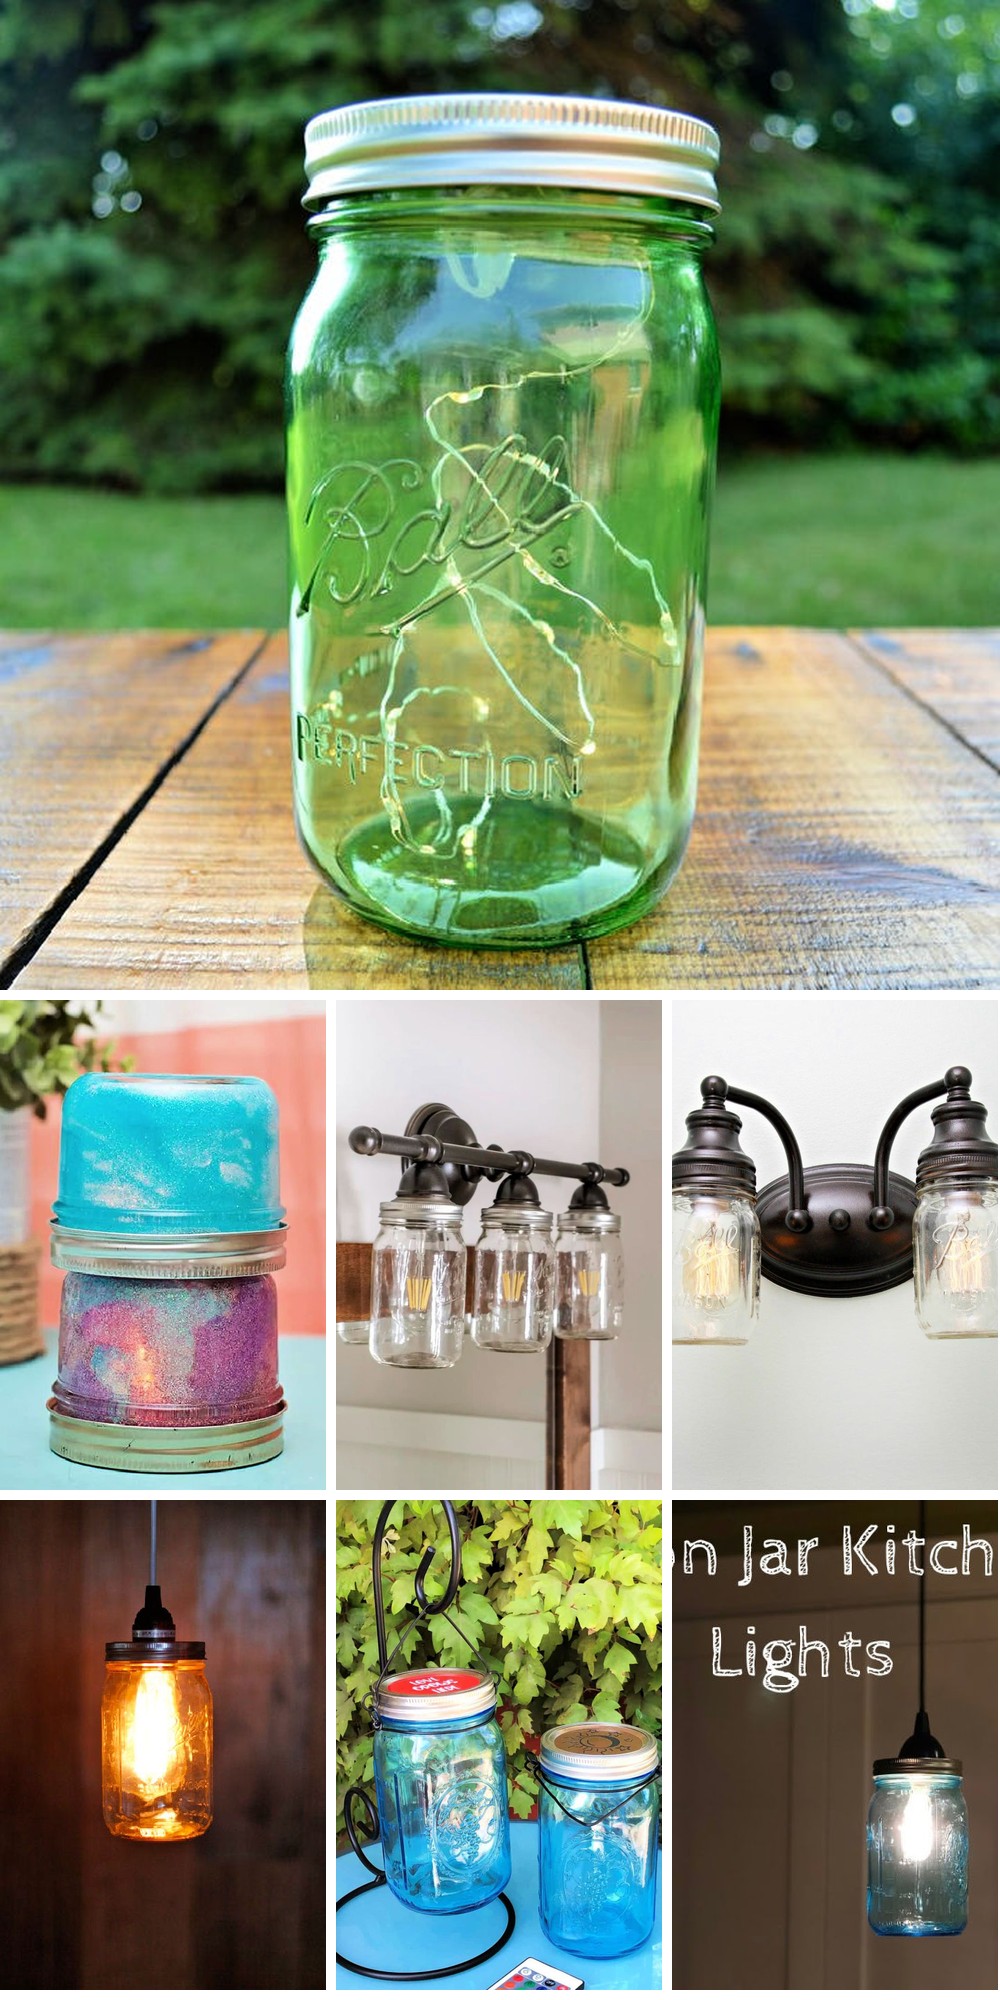
DIY Mason Jar Lights (25 DIY Mason Jar Light Ideas)
Elevate your living space by crafting a unique ambiance with 25 innovative DIY mason jar lighting ideas. These versatile and adaptable projects enable you to transform your home into a warm and inviting sanctuary, tailored to your personal style.
How to Make a Mason Jar Light
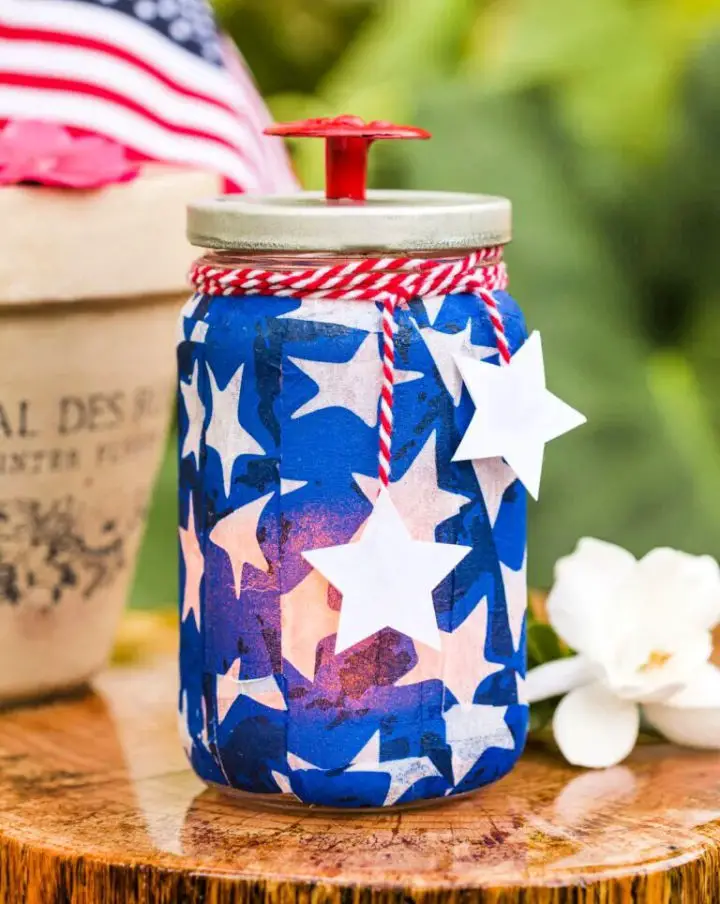
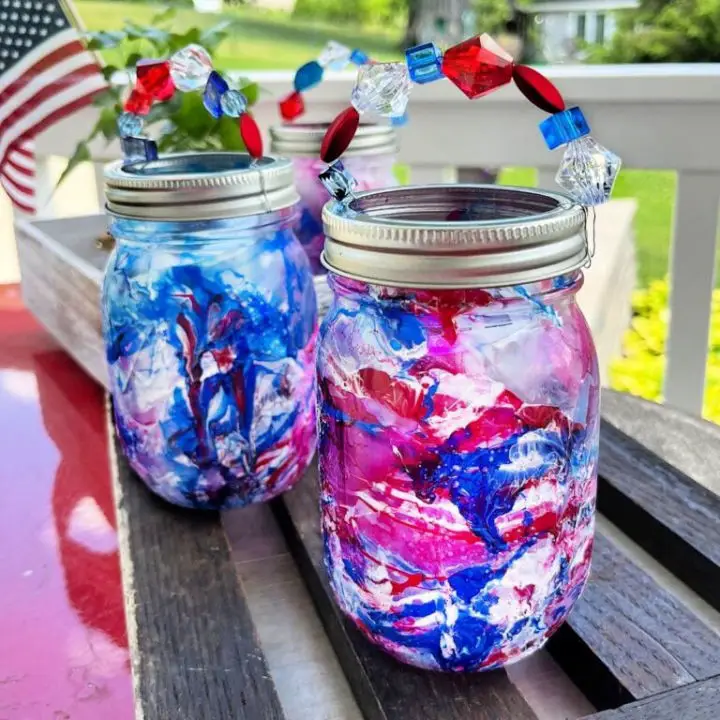
Bring new life to discarded treasures by transforming them into captivating DIY mason jar lamps with Kippi at Home’s easy-to-follow tutorial. Utilizing readily available materials, you’ll be able to craft enchanting lights perfect for a variety of occasions. Whether you’re celebrating a special event like a wedding or outdoor gathering, or simply want to add a touch of whimsy to your garden, these customizable lights will shine brightly with a patriotic flair for the 4th of July and beyond. Get creative and illuminate your space with an affordable and stunning display of magical glow.
Homemade Mason Jar Canning Light
Transform any setting with a DIY mason jar canning light that effortlessly blends into indoor and outdoor spaces. This easy-to-follow craft turns ordinary mason jars into vibrant lighting fixtures, perfect for personal use, gifting, or even selling. The comprehensive guide not only provides step-by-step instructions but also offers customizable options, including decorating lids and creating wire hangers. With 10 free files available to get you started, head to MakesWithLove to access the materials and tutorials needed to bring your project to life.
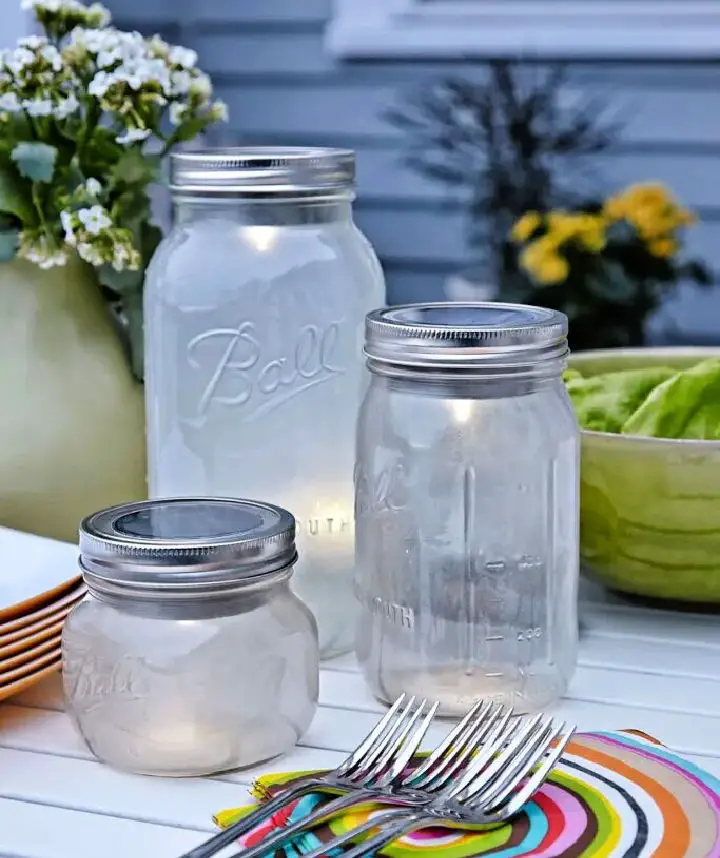
DIY Mason Jar Light With Flowers
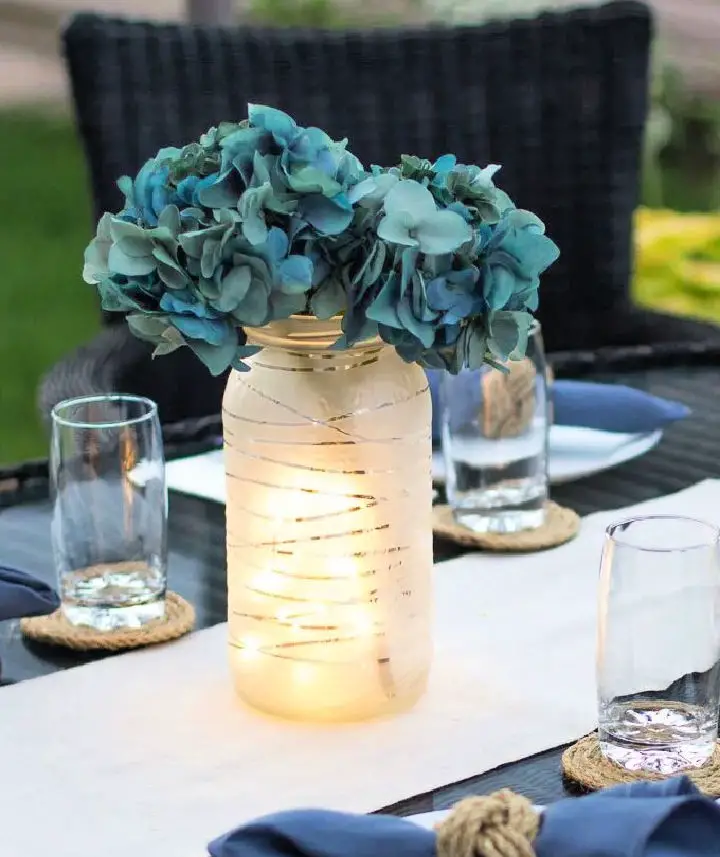
Elevate your gatherings’ ambiance by transforming large glass jars into enchanting upcycled light centerpieces. This eco-friendly project requires just three simple supplies: a glass jar, fairy lights, and faux flowers, allowing you to effortlessly create mesmerizing displays that bring a touch of magic to any occasion. Perfect for rustic weddings or cozy patio dinners, these budget-friendly centerpieces will add a warm, inviting glow to your special events. For step-by-step instructions and more creative DIY wedding centerpiece ideas, visit Sustain My Craft Habit.
Quick and Easy Mason Jar Light
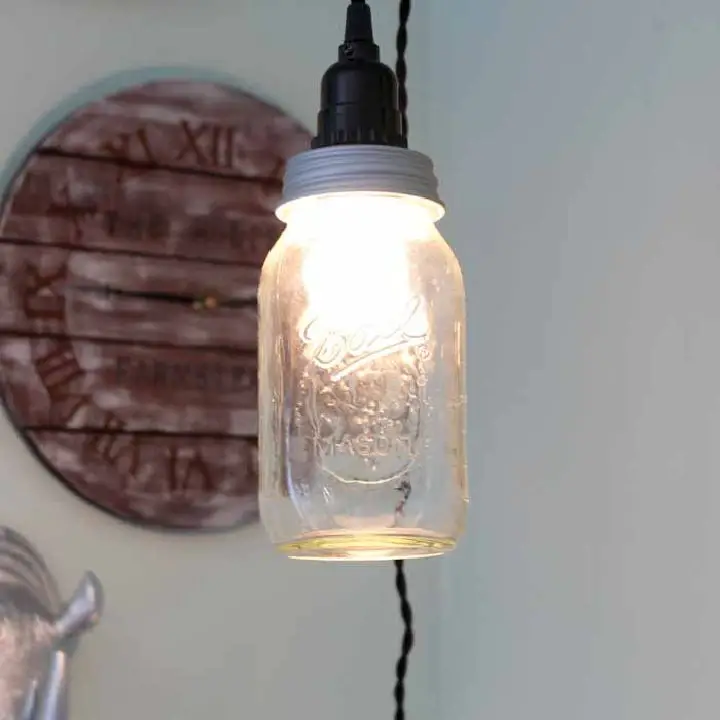
Transform your space’s ambiance with a whimsical DIY mason jar light, effortlessly infusing any room with a rustic charm. This uncomplicated project merely requires a pendant light kit, a mason jar, and a low-wattage light bulb, making it an ideal DIY endeavor for farmhouse kitchens or cozy nooks. For an added splash of color, consider using colored mason jars, but be sure to choose an open-bottomed jar or a low wattage bulb to prevent overheating. To learn more about this captivating project and discover additional inspiration, visit The Country Chic Cottage for a comprehensive step-by-step guide.
DIY Mason Jar Pendant Light
Bring warmth and charm to your space with the soft glow of Mason Jar Pendant Lights. This comprehensive guide takes you by the hand through a fun and creative process that yields unique and stylish lighting. Designed specifically for DIY enthusiasts seeking to infuse their décor with a personal touch, this tutorial is perfect for anyone looking to elevate their home’s ambiance. So why not dive in and let your creativity shine?
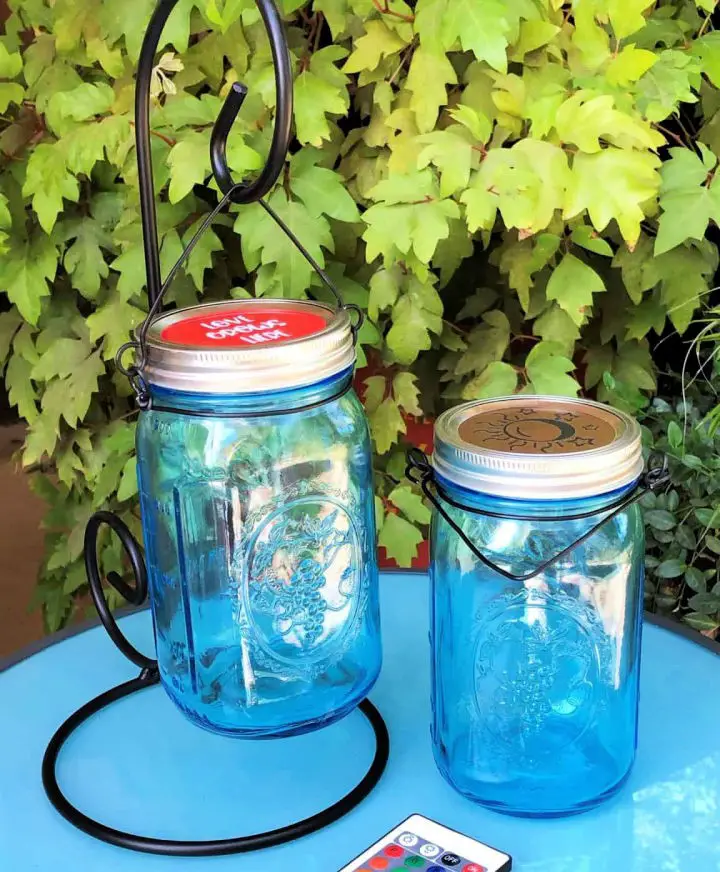
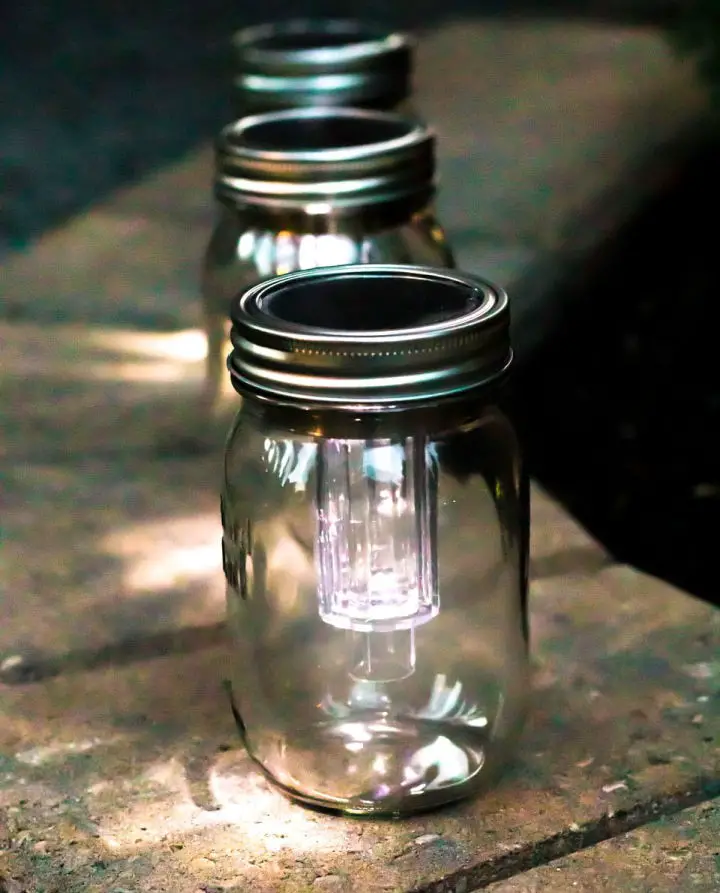
Making a Solar Mason Jar Patio Light
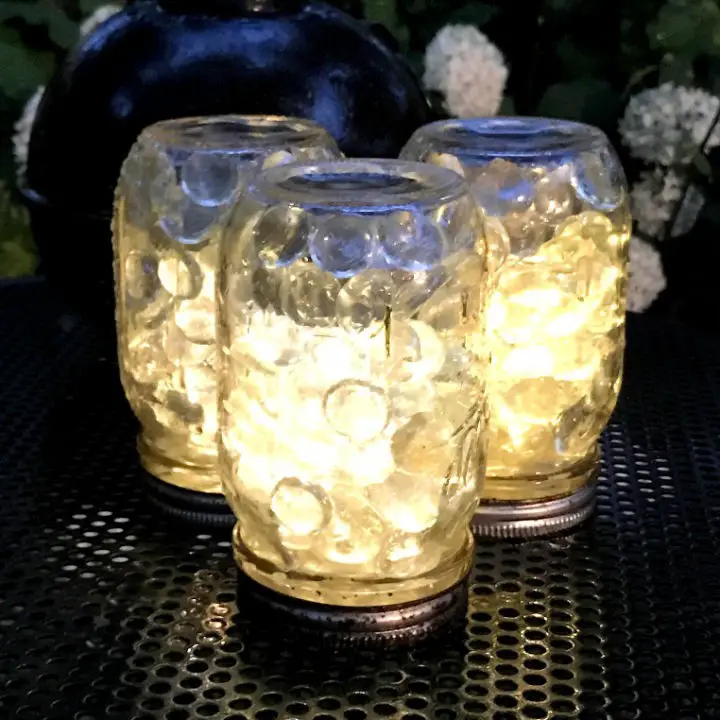
Transform your backyard into an enchanting retreat by crafting DIY Solar Mason Jar Patio Lights. This budget-friendly project can be completed for under $15, requiring just mason jars, mini solar lights, and glass gems. The process is straightforward: simply remove the cap from the solar light, place it inside the jar, add a dash of sparkle with the glass gems, and you’re done! Hang them from tree branches or place them on your patio table – either way, these radiant orbs are sure to captivate. To bring this unique ambiance to life, start now and illuminate your outdoor space with a personal touch.
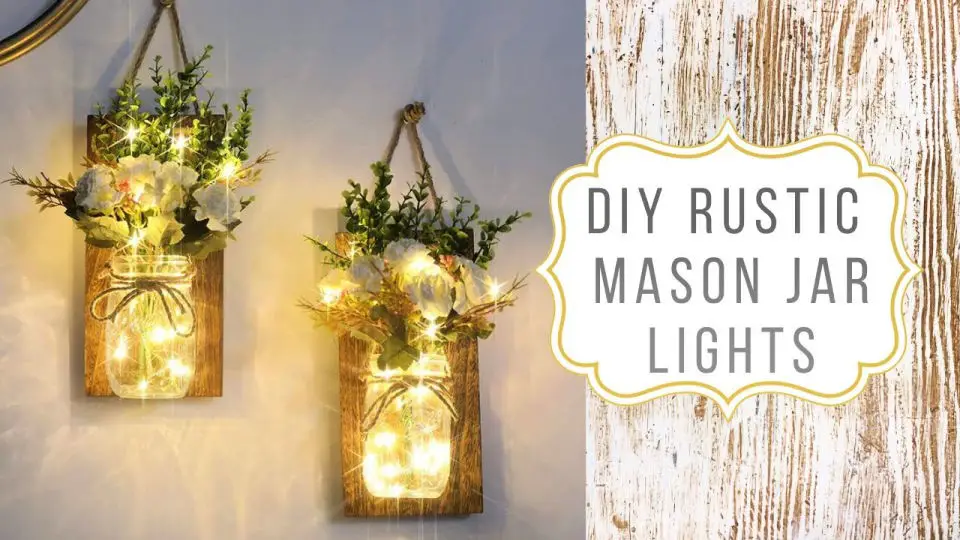
Embellished Winter Mason Jar Light
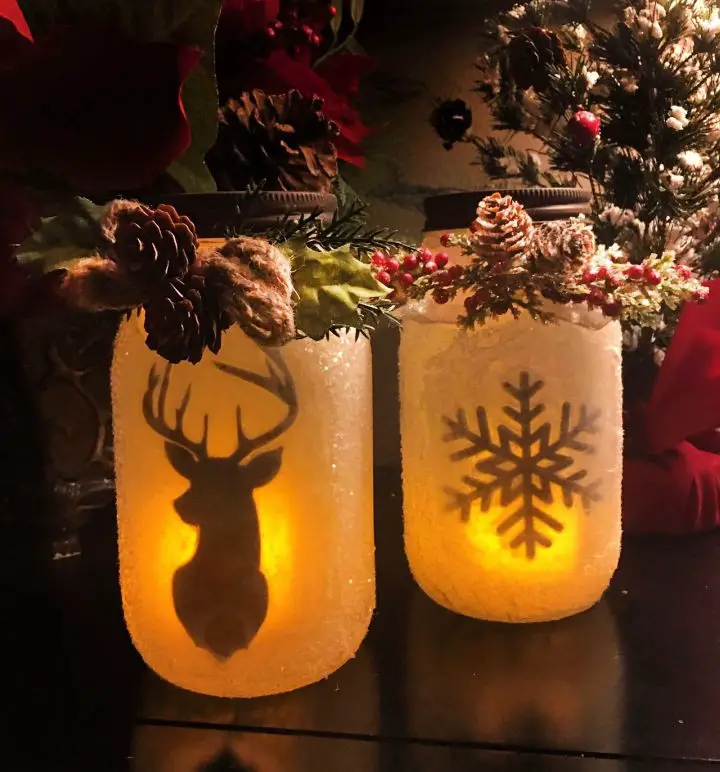
Transform your winter evenings with a touch of magic using Embellished Winter Mason Jar Lights. These DIY creations combine creativity and simplicity, making them perfect for adding a cozy ambiance to any room. Our step-by-step guide at Amanda Made makes it easy to turn ordinary mason jars into enchanting winter decorations, suitable for all skill levels. Whether you’re looking to brighten up the festive season or simply create a warm and inviting atmosphere at home, these lights are sure to do just that.
Marbled Solar Mason Jar Light
Transform any outdoor or indoor space into a stunning haven by crafting marbled solar mason jar lights. This DIY project is perfect for both teens and adults, requiring only a few affordable materials from Dollar Tree. Feel free to get creative with glass jars that fit solar lights and choose nail polish colors that match your desired decor theme. For an added touch of sparkle, consider incorporating glitter options into your design. A detailed video guide and simple supply list are available on Craftidly to help you bring these radiant lanterns to life. As the sun sets, illuminate your evenings with these one-of-a-kind, handcrafted lights that radiate a warm glow.
DIY Mason Jar Night Light on a Budget
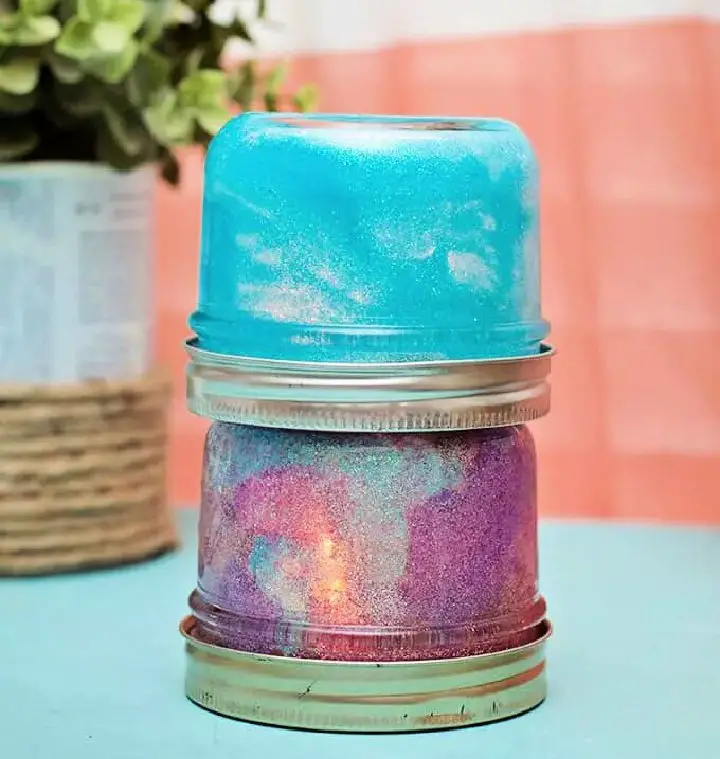
Transform your child’s room into an enchanting space with this whimsical mason jar night light project. By combining the sparkle of glitter with the warm glow of a tealight candle, you can create a captivating companion for bedtime that’s both budget-friendly and perfect for crafting together as a family. The three-step process is designed to be easy and accessible for little hands, making it an excellent activity for a fun-filled weekend. For a comprehensive guide and more creative inspiration, visit Mod Podge Rocks Blog.
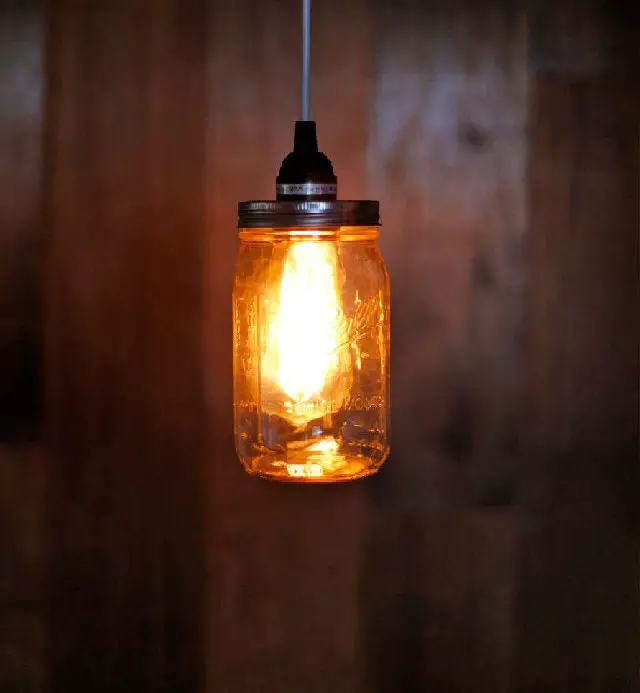
Make a Ball Mason Jar Light in 10 Minutes
Elevate your home’s ambiance in just 10 minutes with a charming DIY Mason or Ball jar light. This budget-friendly project requires minimal supplies: a Mason or Ball jar, a vintage lid, and a basic light fixture. By following the easy-to-follow steps from selecting your jar to adding the light bulb, you’ll create a unique and cozy glow that will add a personal touch to any room. For a comprehensive guide and more creative DIY ideas, visit Lehman Lane.
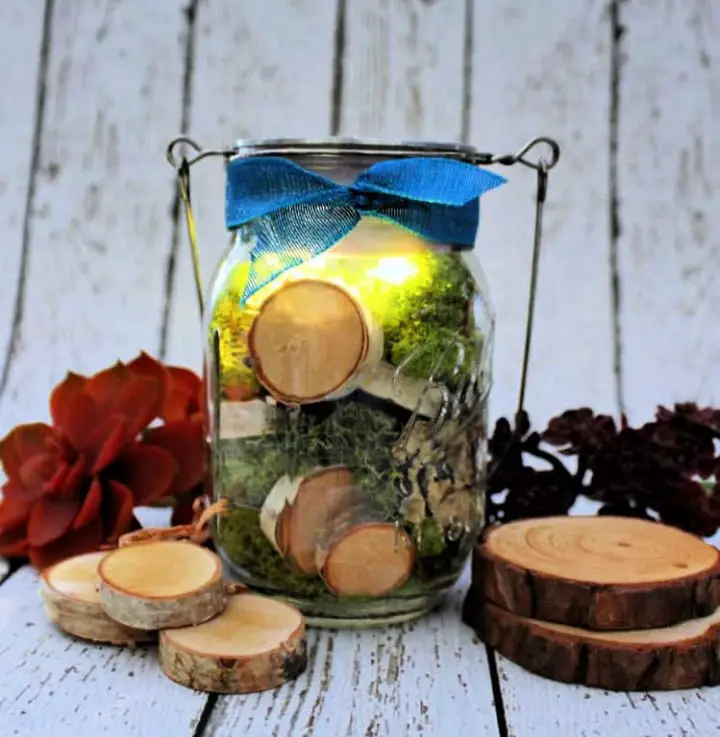
DIY Firefly Mason Jar Light at Home
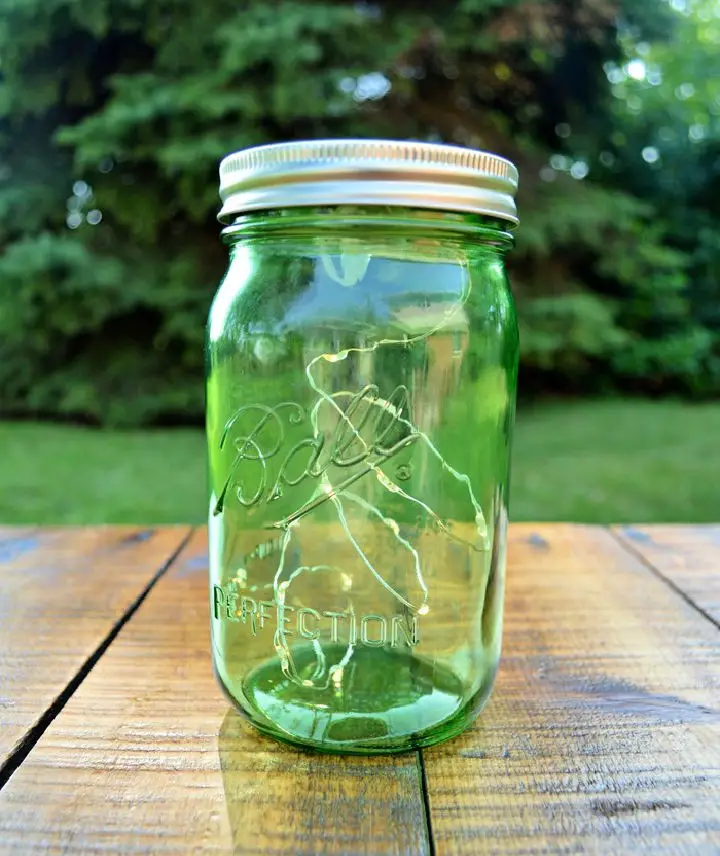
Transform your evenings into a magical experience by creating DIY Firefly Mason Jar Lights. This effortless project brings the warmth and charm of summer fireflies to your outdoor spaces in no more than 15 minutes using just three simple supplies: a mason jar, adhesive mounting dots, and a string of LED lights. The result is enchanting lanterns that perfectly mimic the captivating glow of fireflies, adding a whimsical touch to your backyard decor or special occasions. With its ease of creation and versatility in use, this DIY project is an ideal way to craft your own unique lighting solution for outdoor gatherings.
How to Make a Solar Mason Jar Light
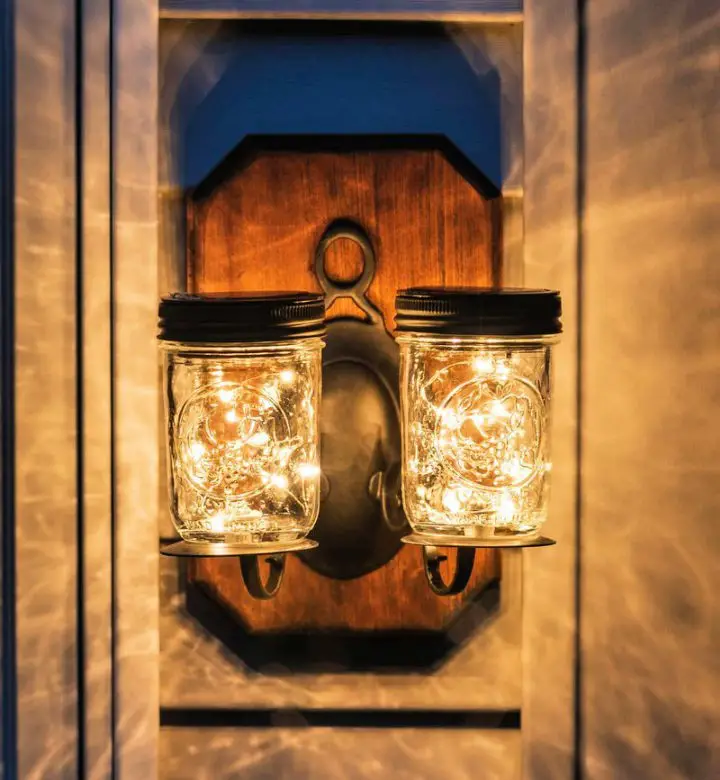
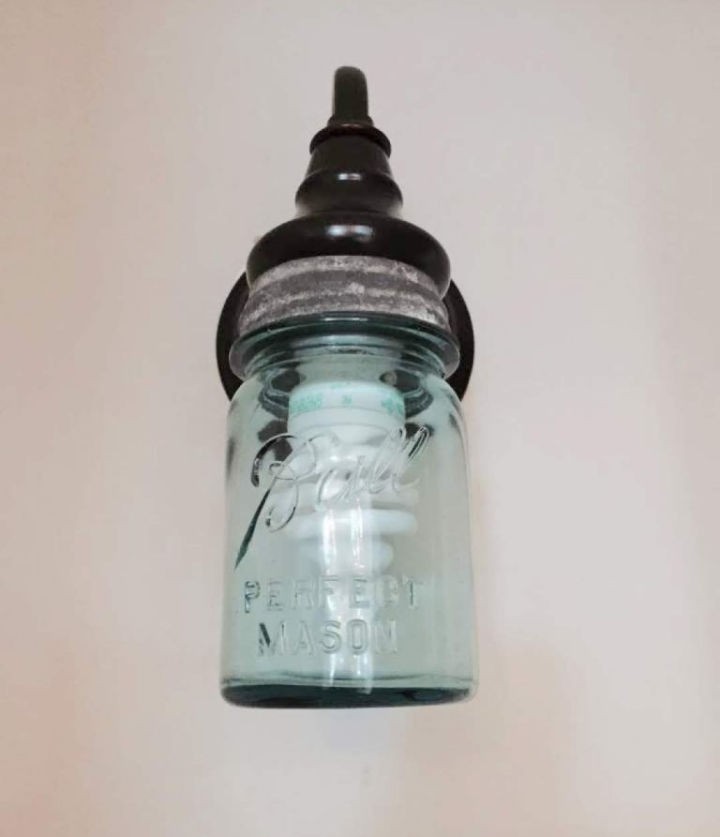
Elevate your outdoor space with a warm and inviting ambiance by transforming old sconces and mason jars into unique DIY solar lights. This easy project requires minimal effort, yet yields impressive results that will leave you wondering why you ever settled for ordinary lighting in the first place. To create a truly magical atmosphere, simply add some solar-powered fairy lights to your evening routine, watching as they cast a soft, ethereal glow across your patio or backyard. With this step-by-step guide, anyone can bring a touch of whimsy and charm to their outdoor decor, all while promoting eco-friendliness and sustainability.
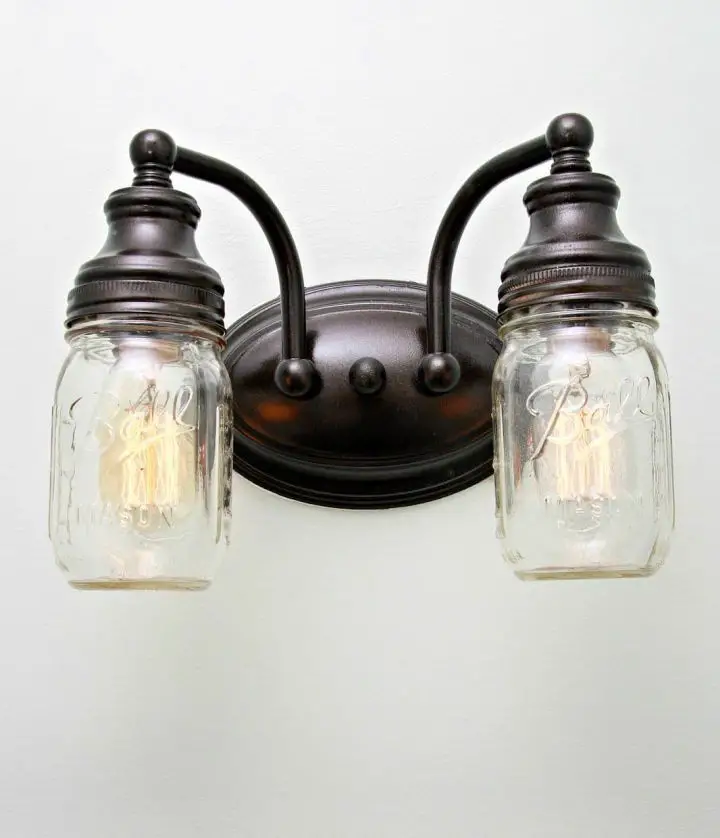
Mason Jar Bathroom Vanity Light Ideas
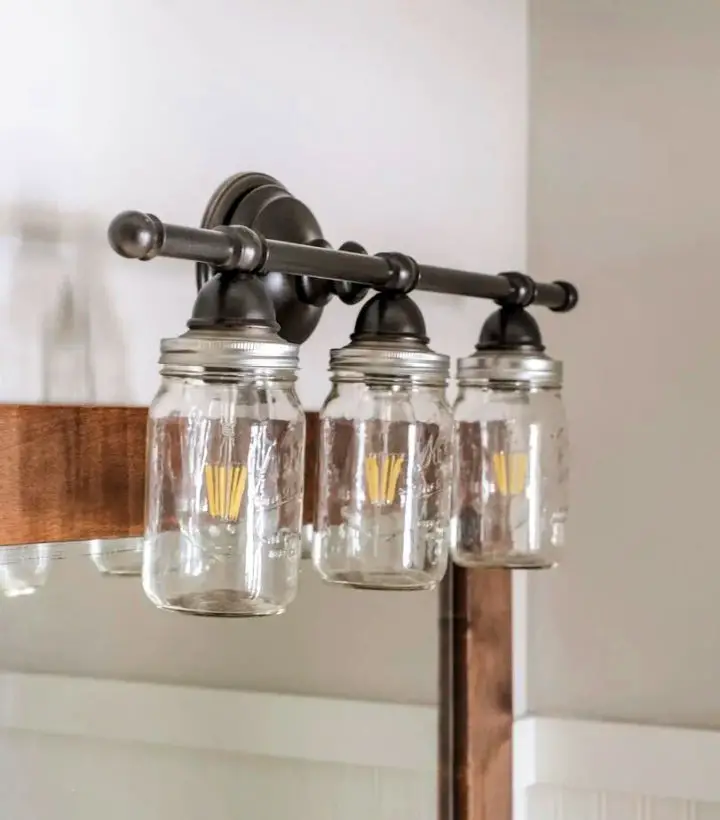
Breathe new life into your bathroom’s ambiance without breaking the bank by transforming an old light fixture into a charming Mason Jar Vanity Light Fixture. This budget-friendly DIY project is perfect for those seeking to add farmhouse flair to their space. By incorporating essential supplies and simple steps, including spray painting and mason jar installation, you can create a unique and captivating glow that illuminates your space with personality. Whether looking to upgrade your home’s overall look or infuse it with personal touches, this DIY is an excellent starting point.
How to Make a Mason Jar Patio Light
Transform your patio into a warm and inviting oasis by creating solar-powered Mason jar lights that shine long after the sun sets. With this easy-to-follow guide, you’ll learn how to turn wide-mouth Mason jars into stunning lanterns using solar cells and a touch of creativity. To give your creations a unique, vintage look, we recommend using Rust-Oleum’s Frosted Glass Spray. By following our simple steps for assembling these wire-free lanterns, you’ll be able to enjoy their warm glow for years to come. For the full instructions, visit This Old House and start illuminating your outdoor spaces today.
Make Your Own Mason Jar Light
Elevate the ambiance of your living space by incorporating a rustic farmhouse-inspired lighting element into your decor. Our DIY mason jar light tutorial is a budget-friendly and easy-to-follow guide that will add a charming touch to any room. With just a few materials and a dash of creativity, you can create a warm and inviting atmosphere that’s perfect for relaxing and socializing.
From choosing the ideal light fixture to assembling your mason jars, we’ll walk you through each step of the process, ensuring a delightful end result that brightens up your home with style. For more detailed instructions, visit Bless This Nest and get started on this cozy project today! You’ll be enjoying the warm glow of your new lighting fixture in no time.
DIY Mason Jar Fairy Light – Step by Step Instructions
Step into an enchanting crafting adventure with a Mason Jar Fairy Light Craft that transforms ordinary mason jars into captivating lanterns, perfect for patio centerpieces or outdoor decor. This adaptable project encourages creativity, allowing you to add your personal touches such as lush green moss, succulents, or tiny fairy figurines. To get started, collect the necessary supplies, including a mason jar, an LED lid insert, and your preferred decorations. This comprehensive guide will lead you through the process of crafting a whimsical light feature that can illuminate a path or adorn a table, capturing the essence of fairy tales.
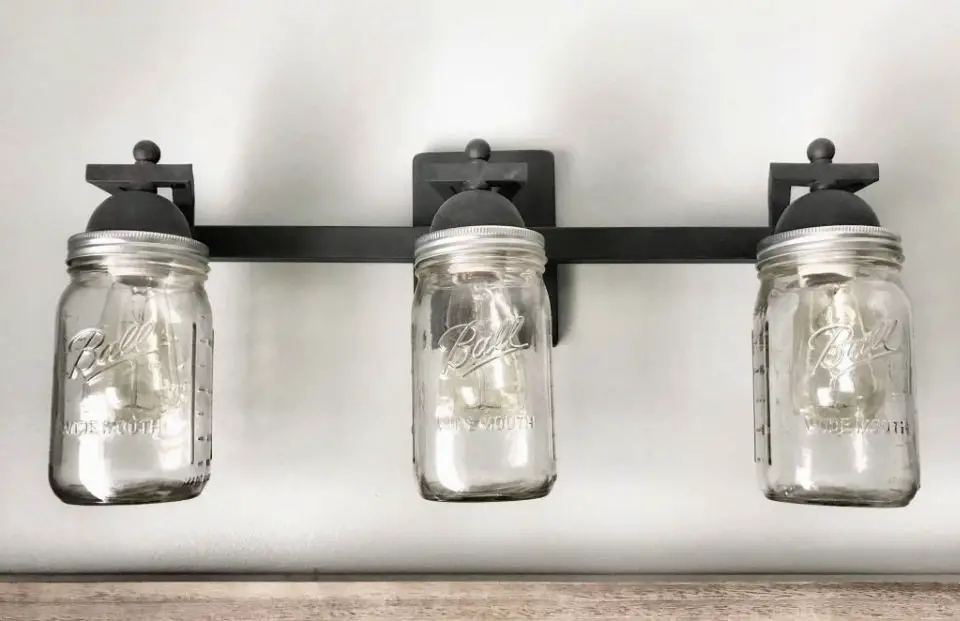
Make a Mason Jar Vanity Light
Give your bathroom’s aesthetic a fresh twist with a DIY Mason Jar Vanity Light. By repurposing mason jars and adding a dash of creativity, you can transform a mundane vanity light into a charming farmhouse-inspired fixture without breaking the bank.
This budget-friendly project requires no specialized tools or equipment; just a few basic materials like mason jars, spray paint, and some elbow grease. With a mere 20 minutes of your time invested, you’ll be amazed at how this DIY project can elevate your home’s decor without sacrificing precious hours or draining your wallet.
For a step-by-step guide on bringing this unique lighting fixture to life, head over to Blesser House and experience the stunning transformation for yourself.
How to Do You Make Mason Jar Light
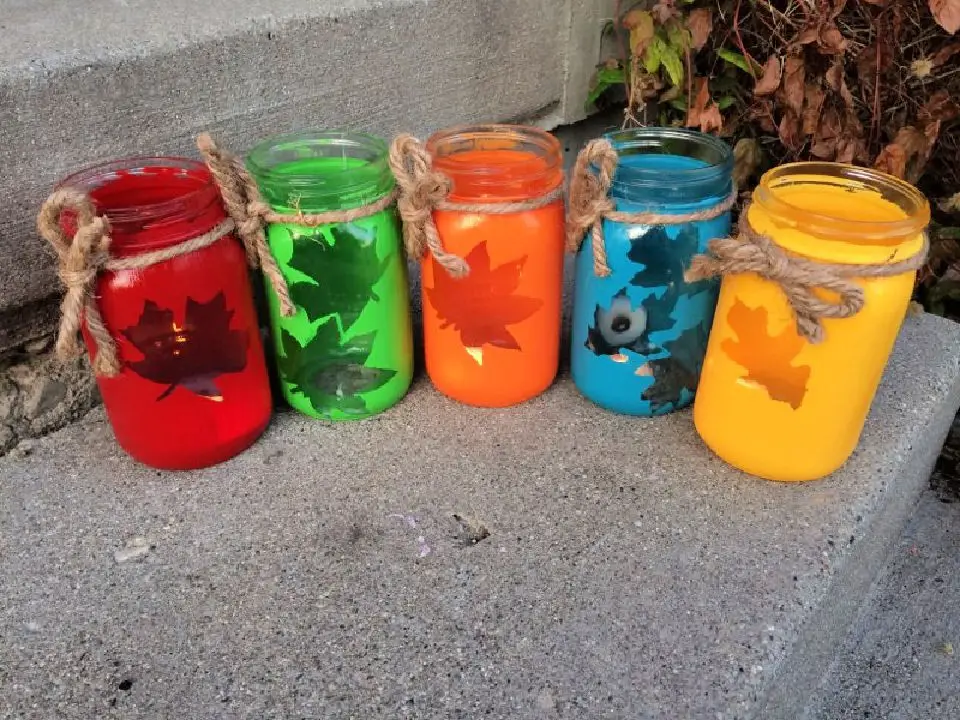
Transform your home with a unique touch using DIY Mason Jar Lights! This easy-to-follow guide shares a fun and creative way to upcycle. With an array of seasonal designs at your fingertips, from lush greenery to delicate snowflakes, bring a splash of personality to any room. The process is simple: gather basic materials like mason jars, acrylic paint, and vinyl stencils. Whether you’re looking to infuse a festive atmosphere or preserve cherished memories, this project’s straightforward steps will guide you in creating charming and personalized decorations that not only elevate your space but also bring the satisfaction of crafting something with your own hands.
Farmhouse Light With Mason Jar
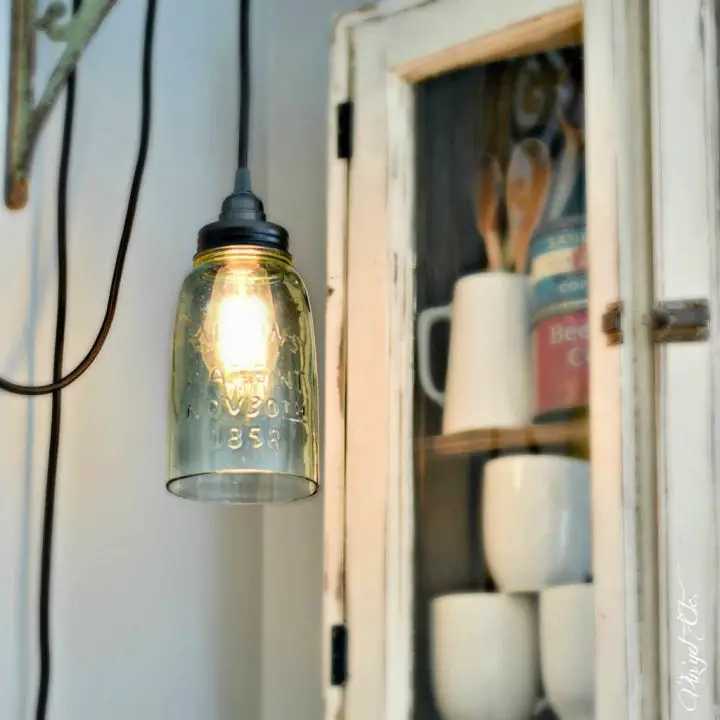
Elevate the ambiance in your home with a unique DIY farmhouse light created from a mason jar, courtesy of Vin’yet Etc. This straightforward tutorial will transform a classic vessel into a captivating light fixture, requiring only a few basic tools and an Ikea lighting kit. By following our easy-to-follow guide, you’ll learn how to cut, fit, and assemble the components to bring your new piece to life. Whether you’re looking to add a touch of rustic charm or create a cozy farmhouse atmosphere in any room, this project is sure to inspire.
DIY Outdoor Mason Jar Chandelier for Under $10
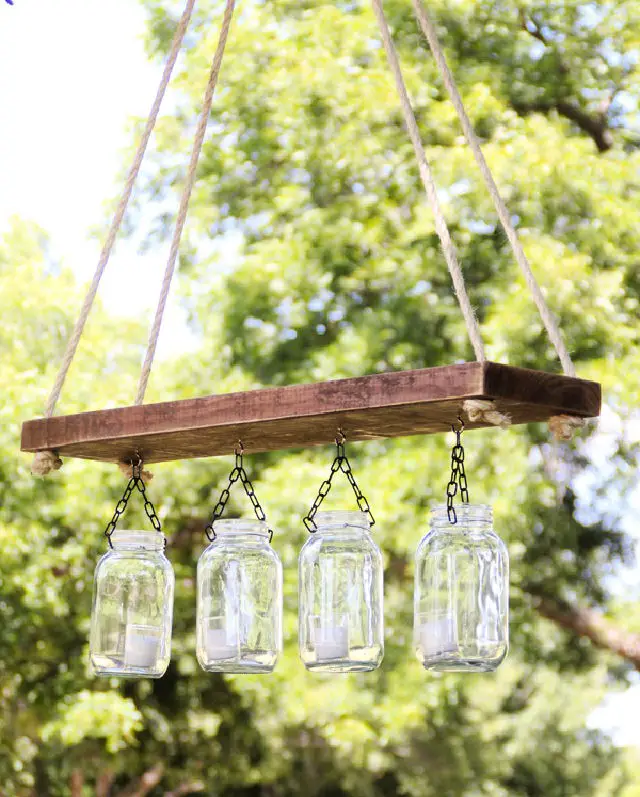
Create a whimsical and budget-friendly ambiance in your outdoor space by crafting a DIY Mason Jar Chandelier. This charming project requires only a few simple materials, including mason jars, wire, and chain, and can be completed for under $10. Perfect for a fun night with friends or family, this chandelier adds a warm and cozy glow to any outdoor setting. To get started, visit Shanty-2-Chic and learn how to create your own unique piece.
How to Make Your Own Mason Jar Lamp
Transform any space into a warm and welcoming haven by crafting a charming DIY Mason Jar Lamp, affectionately known as the Coffee Bean Lamp, at Happy Hour Projects. This accessible project requires only basic skills, such as screwing a lid onto a jar, making it an ideal endeavor for enthusiasts of all levels. Add your personal touch by customizing with any filling material – coffee beans create a warm, inviting ambiance. By combining just a few simple elements, including a jar, adapter, and shade, you can create a cozy lamp that seamlessly integrates with your décor. Step into this effortless and speedy project, and illuminate your world with a unique touch.
DIY Solar Light Using Mason Jar
Transform your outdoor space into a cozy retreat by crafting DIY mason jar solar lights that are not only easy to make but also budget-friendly. Perfect for backyards, camping trips, or decking areas, these eco-friendly lights can be created in just minutes with materials easily sourced from dollar stores or popular retailers like Walmart and Target. This engaging family project is perfect for kids to join in on the fun, making it a great way to spend quality time together. By following step-by-step instructions and expert tips available at CraftsbyAmanda.com, you can create a warm and inviting glow that’s sure to enhance your outdoor gatherings.
Rustic DIY Mason Jar Light
Transform any room into a cozy oasis without breaking out the power tools – literally! This stunning DIY project requires zero drilling and yields a mesmerizing Mason Jar Light that’s sure to become a festive favorite. The best part? It’s an all-inclusive crafting bundle, so you won’t need to scrounge for supplies. Perfect for adding a warm glow to your holiday decor or sprucing up your everyday space, this rustic-chic creation boasts a charming color palette and effortless charm. Simply click the link to get started on your creative journey and watch as your space is transformed with ease!
Handmade Mason Jar Light Tutorial
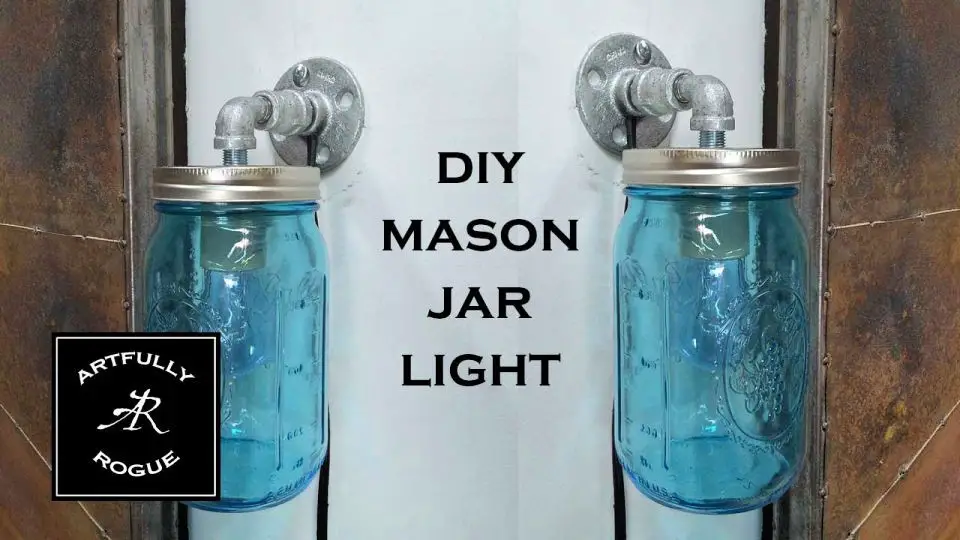
Transforming an ordinary Mason jar into a captivating wall light is a straightforward DIY project that requires minimal tools. With Artfully Rogue’s guidance, you’ll learn the essential steps to convert your jar into a charming fixture, perfect for adding a personal touch to your home decor. By following this step-by-step tutorial, you’ll be able to create a unique Mason jar light that will make your space cozy and inviting.
Make a Mason Jar Kitchen Light
Elevate your kitchen’s ambiance by turning mason jars into captivating lighting fixtures that exude rustic charm! This DIY endeavor is effortlessly achievable with accessible materials from your local hardware store or online. Begin by selecting a corded light socket designed for ceiling installation, and then precision-mark and drill a hole in the jar’s lid to accommodate the socket. With basic tools, assemble the fixture and bask in the warm, vintage glow of your new kitchen lights. For a detailed walkthrough, refer to this informative tutorial: [insert link]. This project is ideal for those seeking to infuse their home with a touch of handmade elegance!
Conclusion:
By now, it’s clear that DIY mason jar lighting is more than just a creative outlet – it’s a way to infuse your home decor with a personal touch. With the comprehensive guide we’ve provided, you’re equipped to bring your own 25 DIY mason jar light ideas to life, from gathering materials to final installation. As you craft each light, remember that customization is key, so let your creativity shine through in every aspect. Not only do these lights add a stylish dimension to any space, but they also make for thoughtful, handcrafted gifts. So why wait? Start crafting your unique mason jar lights today and illuminate your surroundings with a warm, inviting glow.
