Transforming a simple mirror into a stunning work of art is just as much about embracing nature’s beauty as it is about showcasing your creativity. By repurposing driftwood, you can create a one-of-a-kind mirror that not only reflects the sea’s bounty but also brings a touch of serenity and rustic charm to your home. This DIY project is perfect for anyone who wants to infuse their living space with the calming essence of nature, regardless of their skill level. The process involves a series of straightforward steps, from preparing the base to adding the finishing touches, making it an accessible adventure for craft enthusiasts of all kinds. With detailed guidance, including a comprehensive list of materials and a step-by-step approach, you’ll be well-equipped to embark on this creative journey that promises not only a show-stopping decorative piece but also a deeply satisfying DIY experience.
Why Make Your Own Driftwood Mirror?
Creating a DIY driftwood mirror is not just a fun weekend activity, but a journey of self-expression, sustainability, and cost-effectiveness. The process offers numerous benefits, making it an attractive endeavor for crafty individuals and those seeking unique decor solutions. When you embark on this project, you gain control over the final product’s design, size, and overall aesthetic. Here’s why this DIY project stands out: First, personalization plays a significant role. Each piece of driftwood boasts its own distinct shape, size, and texture, allowing you to craft a mirror that perfectly reflects your style and complements your space. Second, making your own driftwood mirror can be an eco-friendly move. By repurposing old mirrors and reusing driftwood, you’re reducing waste and giving new life to materials that might otherwise go unused. Additionally, this project provides an opportunity for creative expression and self-satisfaction. The process of crafting something with your own hands is both fulfilling and therapeutic. Furthermore, a handmade driftwood mirror can serve as a thoughtful gift idea, showcasing your effort, creativity, and personal touch. Lastly, the versatility of driftwood mirrors makes them suitable for various decor styles, from coastal to rustic to modern, allowing you to customize the size, shape, and additional decorations to match any room’s unique character. In conclusion, creating a driftwood mirror is an enriching experience that combines creativity, sustainability, personal expression, and cost-effectiveness, making it a rewarding project to undertake.
How to Make a DIY Driftwood Mirror
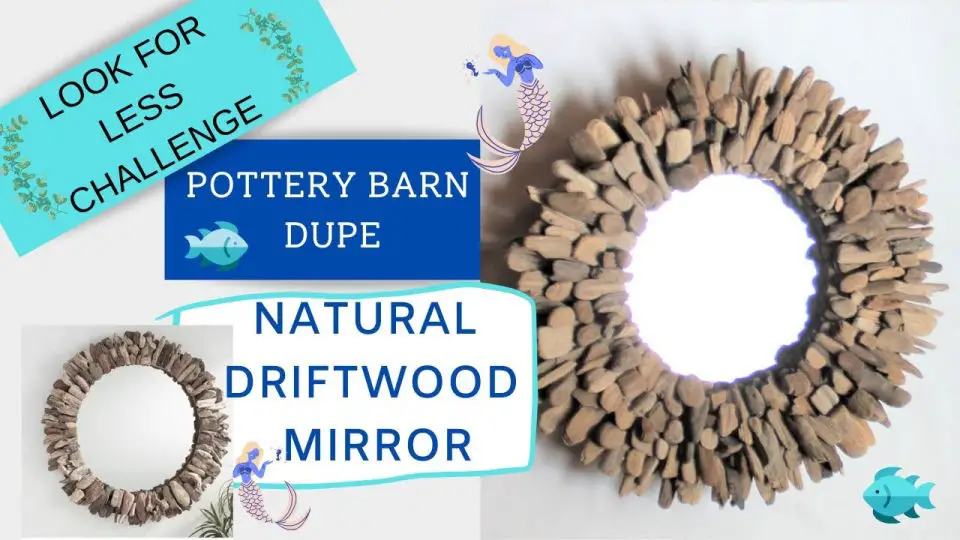
Transforming your living space with coastal charm doesn’t have to come with a hefty price tag. With this straightforward guide, you can create a striking driftwood mirror reminiscent of Pottery Barn’s high-end designs at a fraction of the cost. Perfect for those seeking to infuse their home decor with a touch of nautical flair, we’ll walk you through the steps to craft your own show-stopping mirror.
Materials Needed:
To create your driftwood mirror, start by gathering a collection of unique driftwood pieces. You’ll also need an old mirror with a flat edge – a ship’s wheel mirror works well for this project. Next, you’ll require some sandpaper to smooth out any rough edges on the driftwood. Additionally, you’ll need E6000 glue and a hot glue gun with glue sticks for assembling your design. While shells can be used to add extra decoration to your finished piece, they’re entirely optional.
Step 1: Prepare Your Mirror Base
Begin by transforming an vintage nautical element – a ship’s wheel mirror. To give it new life, strip away the outer spokes, leaving the mirror’s edge smooth and even. This will provide a sturdy base for attaching driftwood pieces. Once prepared, thoroughly clean the mirror surface to remove any lingering dust or debris that may have accumulated.
Step 2: Collect and Prepare Driftwood
Before commencing the project, it’s time to organize your driftwood collection. If you’ve been gathering these natural treasures over time, now’s the perfect opportunity to repurpose them. Start by inspecting each piece for any irregular edges that might hinder the gluing process. For those with jagged or rough surfaces, take a few minutes to sand them down or carefully clip off any protrusions. This will ensure you’re left with smooth, flat surfaces that can be effortlessly attached to the mirror’s edge, creating a sturdy and visually appealing foundation for your driftwood mirror frame.
Step 3: Arrange and Attach Driftwood
Begin by combining the reliability of E6000 glue for long-term durability with the instant hold of hot glue. To create a sturdy foundation for your driftwood mirror frame, start by attaching larger pieces around the perimeter. Ensure the flat edges of these initial components align perfectly with the mirror’s edge. This process proves to be surprisingly simple and efficient, allowing you to quickly build the base layer.
Step 4: Add Layers and Details
As you build upon the foundation of driftwood pieces on your mirror, it’s time to introduce smaller fragments to create texture and visual interest. Think of this step as an intricate puzzle, where each piece is carefully placed to fill gaps and craft a harmonious whole. Drawing inspiration from your original design, feel free to add additional layers to cover more surface area or achieve the desired aesthetic.
Step 5: Final Touches
As the final touches are applied to your driftwood mirror, you may choose to incorporate additional decorative elements that complement the nautical aesthetic. Strategically place shells or other embellishments within the arrangement to fill any remaining voids or amplify the charm of the piece.
Clean and Display
To unveil the full charm of your newly crafted driftwood mirror, start by giving it a thorough cleaning to remove any debris or residue. Once sparkling clean, carefully position it in a spot that will allow its coastal farmhouse beauty to take center stage. Consider placing it in a prominent area like a grand foyer or main living space where it can become the focal point of your home’s décor.
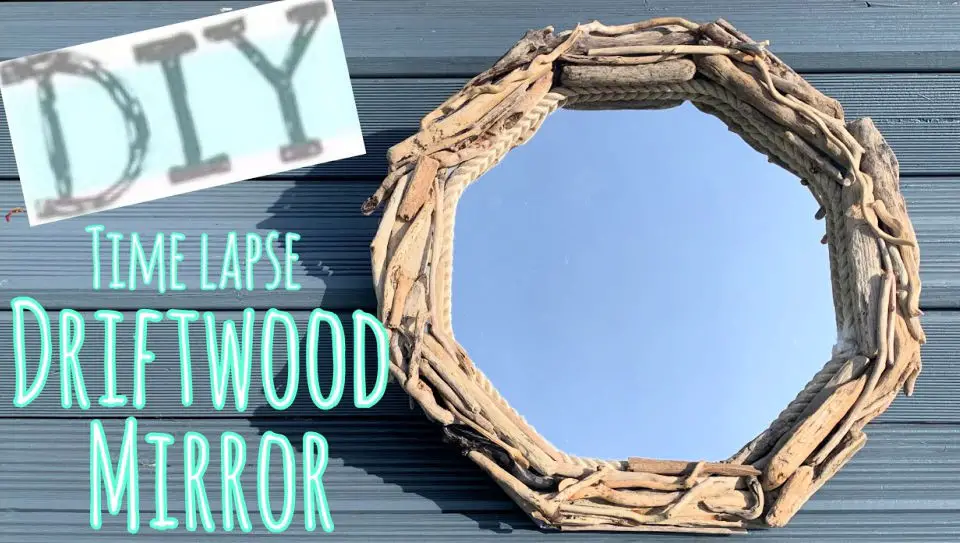
Video Tutorial
If you’d like to learn how to create a stunning DIY driftwood mirror, I highly recommend supplementing this written guide with our accompanying YouTube video tutorial. This visual representation of the process will not only make the techniques more comprehensible but also provide a step-by-step walkthrough of the project. By following along with these instructions and watching the video, you’ll be able to recreate a beautiful piece that rivals those found at high-end retailers like Pottery Barn – all without breaking the bank. Not only will you end up with a unique addition to your home decor, but you’ll also experience the satisfaction of creating something truly special with your own hands.
DIY Driftwood Mirror FAQs
Embarking on a DIY driftwood mirror project can be an invigorating experience, and understanding the frequently asked questions beforehand can significantly enhance your creative journey. As you begin crafting your unique piece, it’s essential to address the most common queries that may arise during the process.
What type of mirror should I use for a driftwood mirror?
While transforming any mirror into a driftwood mirror is possible, those with flat edges or simple frames are ideal for this DIY project as they offer a clean slate for attaching the driftwood. The most popular shapes include round and rectangular, but don’t be afraid to think outside the box and choose a unique shape that reflects your personal style.
Where can I find driftwood?
When exploring coastal or waterway areas, a treasure trove of driftwood can often be found along beaches, riverbanks, and lakeshores. It is crucial to first confirm whether collecting driftwood is permitted in the specific location you are visiting. As an alternative, for those unable to access natural sources, craft stores and online marketplaces like Etsy offer a variety of driftwood products.
How do I prepare driftwood for use?
When preparing driftwood for use in crafting projects, it’s essential to thoroughly clean the material to remove any debris, dirt, or other impurities. Begin by gently wiping the wood down with a soft cloth or brush to dislodge any loose particles. Once you’ve removed as much of the unwanted matter as possible, allow the driftwood to air dry completely to prevent any moisture from affecting the adhesive properties when gluing it to your project. If the pieces are irregularly shaped or have rough edges, consider lightly sanding them down or trimming the edges with a craft knife to create a smooth surface that can be easily bonded to your design.
What glue should I use to attach driftwood to the mirror?
To achieve a robust and long-lasting hold, combine the benefits of E6000 glue with those of a hot glue gun. The adhesive properties of E6000 ensure a strong, enduring bond between the materials, while the hot glue provides temporary support as the E6000 dries, allowing for precise positioning and stability.
Can I decorate my driftwood mirror with other items?
Transform your mirror into a stunning coastal-inspired piece by incorporating personal touches like shells, sea glass, or stones. Secure these embellishments using the same adhesives employed for the driftwood, and watch as the nautical or beachy vibe of your mirror is elevated to new heights.
How long does it take to make a driftwood mirror?
When embarking on a driftwood mirror project, it’s essential to factor in the time required for preparation, assembly, and drying. The complexity of your design will inevitably impact the timeframe, as will the glue’s drying period. Plan to dedicate a few hours to collecting and preparing the driftwood, followed by another few hours spent assembling the mirror. To ensure a successful outcome, allocate at least 24 hours for the glue to dry before finally hanging the finished piece.
How do I hang my driftwood mirror?
When installing a mirror, it’s crucial to start with a sturdy backing that can effectively support its weight. A strong hanging wire or bracket system is essential for this purpose, taking into account the type of wall you’ll be mounting it on and the weight of the mirror itself. To ensure a secure fit, consider using suitable wall anchors or studs that are designed to hold the weight of your mirror securely in place.
Can making a driftwood mirror be a family project?
Working on a driftwood mirror project can be a fantastic way to bond with your family while creating a unique piece for your home. While kids can get involved in collecting and cleaning the driftwood, it’s essential to have adult supervision when it comes to tasks like cutting, sanding, or gluing. This collaborative effort allows you to spend quality time together and take pride in your creation.
In addition to adding a one-of-a-kind piece to your décor, making a DIY driftwood mirror also grants the satisfaction of crafting something beautiful with your own hands. We hope that these FAQs have provided the guidance you need to embark on this creative adventure with confidence.
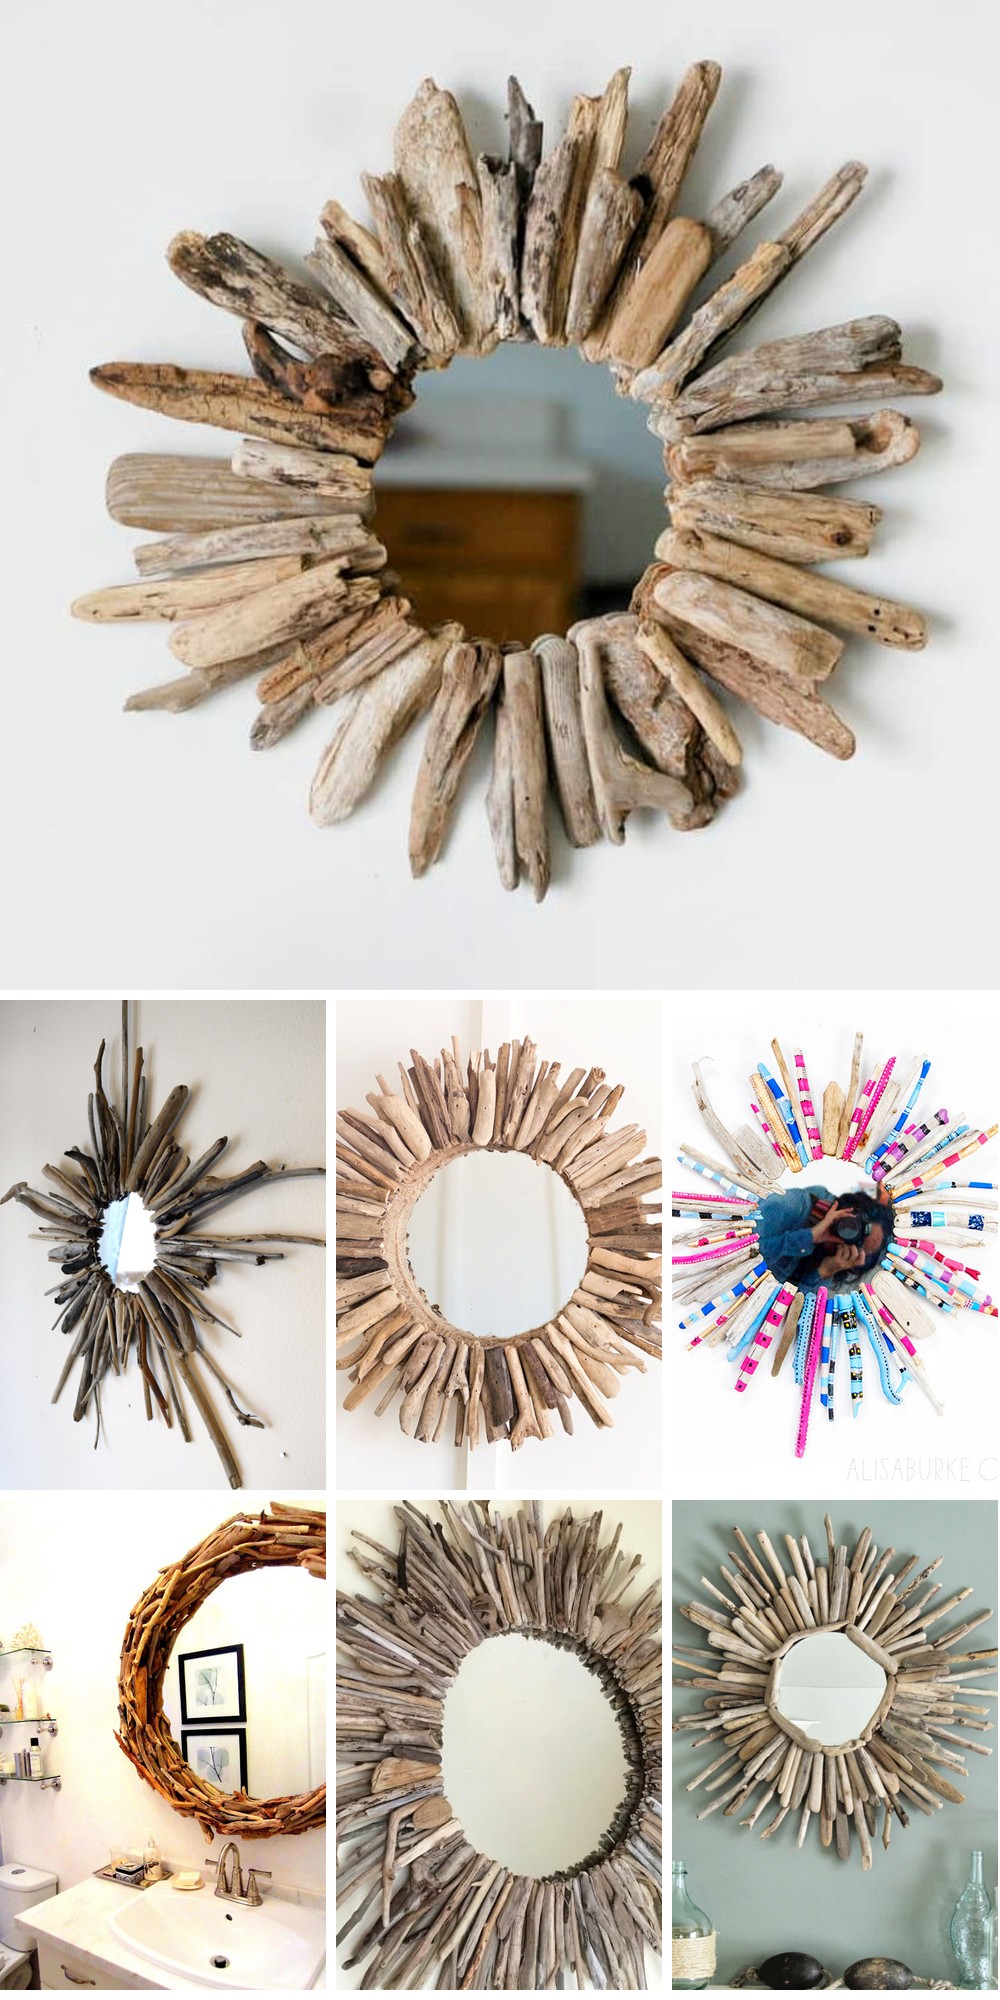
20 DIY Driftwood Mirror Ideas To Make Your Own
Transforming your home’s aesthetic with a touch of natural elegance, consider incorporating driftwood mirrors into your decor. From modern and sleek to rustic and whimsical, there are countless ways to repurpose this versatile material. Explore 20 creative DIY driftwood mirror ideas that will elevate your space with their unique charm.
How to Make a Driftwood Mirror at Home
Transforming your space with a unique DIY Driftwood Mirror is an excellent way to infuse coastal charm into your decor. At Sustain My Craft Habit, we’ve crafted a comprehensive guide that showcases the simplicity of creating a one-of-a-kind piece using readily available materials such as driftwood pieces, a round mirror, and essential tools. This tutorial is perfect for both seasoned crafters and those new to DIY projects, offering step-by-step instructions to ensure a successful outcome. Alternatively, if you prefer not to get your hands dirty, we’ve curated the best places to purchase a ready-made Driftwood Mirror. Get started today and add a touch of nature’s serenity to your home.
Quick and Easy DIY Driftwood Mirror
Transform your space with the effortless charm of an Easy Driftwood Mirror, a DIY project that brings the tranquility of the seaside into your home. With Shayna’s guidance, you’ll discover an uncomplicated process to create a statement mirror that exudes unique texture and visual appeal. Beginning with a plain, large mirror, simply embellish it with driftwood for an unparalleled look that elevates your decor on a budget. This project not only breathes new life into your room but also demonstrates that high-end style doesn’t have to break the bank. Embark on this enjoyable DIY adventure, create a striking driftwood mirror, and give your space the makeover it deserves.
Simple Handmade Driftwood Mirror
Discover the art of transforming DIY mishaps into stunning decor pieces, à la Learner Observer’s incredible driftwood mirror makeover. What initially seemed like a failed project became a masterpiece through the combination of simple tools, unwavering determination, and a dash of creative genius. As you reflect on past missteps, remember that even the most seemingly disastrous outcome can be repurposed into a showstopping focal point, elevating any room’s ambiance.
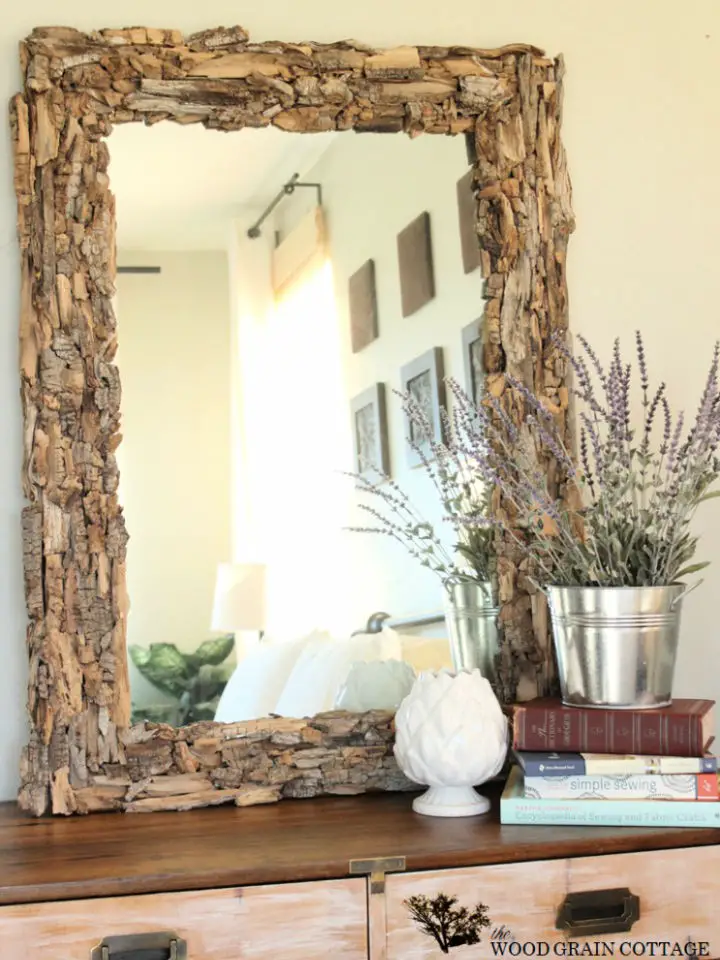
Homemade Driftwood Wall Mirror
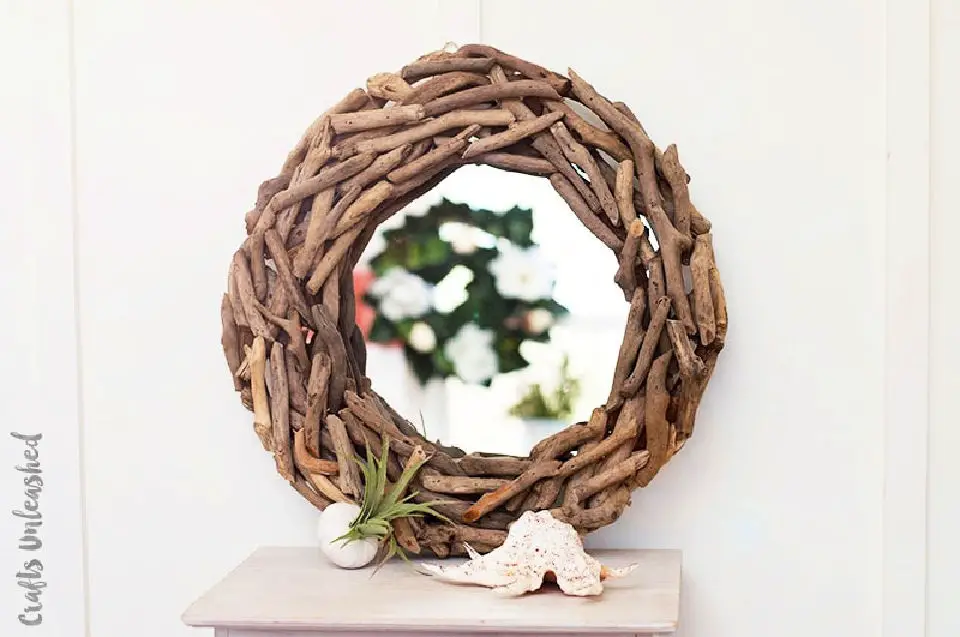
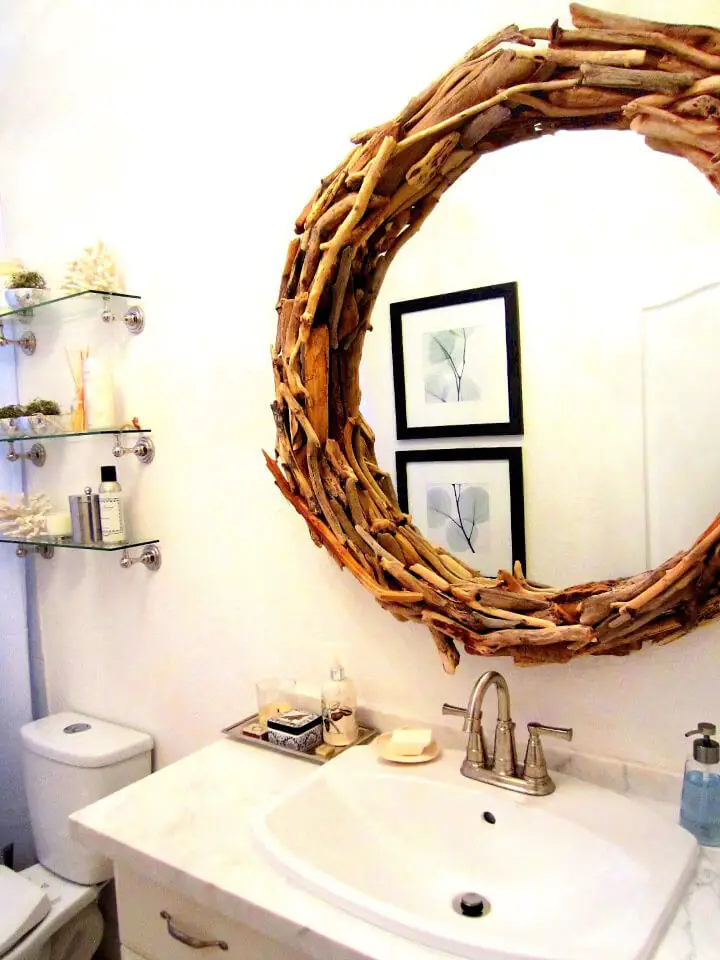
Want to effortlessly enhance the ambiance of your home? Our step-by-step guide at Crafts by Courtney empowers you to create a breathtaking Driftwood Wall Mirror in mere minutes! By combining a humble wreath and a dab of glue, you can craft a sophisticated accent piece that exudes natural elegance. This project is perfect for DIY enthusiasts seeking quick yet impactful results. The resulting mirror not only adds a unique charm but also elevates any room with its rustic beauty.
Making a Driftwood Mirror on a Budget
Imagine yourself surrounded by the serenity of the Oregon Coast, where the rhythmic crashing of waves against the shore harmonizes with the gentle whispers of seagulls. The Wicker House invites you on a creative journey as Emily shares her personal experience in crafting a one-of-a-kind Driftwood Mirror that effortlessly blends coastal charm with rustic elegance. This DIY project is not only an exercise in resourcefulness but also a testament to the beauty of repurposing nature’s discarded treasures. With step-by-step guidance, discover how to curate driftwood pieces, prepare your materials, and meticulously assemble your mirror to achieve a layered look that rivals even the most expensive store-bought options. As you work through this project, allow yourself to be inspired by the allure of the coast and bring a touch of its tranquility into your home decor.
How to Build a Drift Wood Mirror
As you embark on a DIY adventure, there’s something truly special about taking driftwood and turning it into a stylish mirror. This transformation is a perfect example of creativity meeting functionality, making it an absolute must-try for DIY enthusiasts. The journey begins with sourcing unique driftwood pieces from Etsy, paired with a budget-friendly mirror from IKEA. From there, the process becomes an exciting puzzle to solve, as you use adhesive to bring your creation to life. While the steps may seem intricate at first glance, the end result is well worth the effort. With each piece falling into place, you’ll be rewarded with a one-of-a-kind decorative piece that reflects your personal style.
Make a Drift Wood Mirror – Step by Step
Immerse yourself in the world of DIY and thrift finds as Leigh embarks on an inventive journey to transform a one-of-a-kind rabbit-design mirror into a stunning driftwood masterpiece. This #125 edition of Thrifty Thursday showcases how affordable items can be repurposed into unique and captivating home decor pieces. The art of collecting driftwood and assembling your finds is not only a creative outlet, but also a way to add a personal touch to your space without sacrificing style or breaking the bank. If you’re fascinated by the potential of thrift finds to elevate your home’s aesthetic, explore more engaging projects and tips at Leigh’s blog for a comprehensive guide that harmoniously blends thrifty living with creative expression.
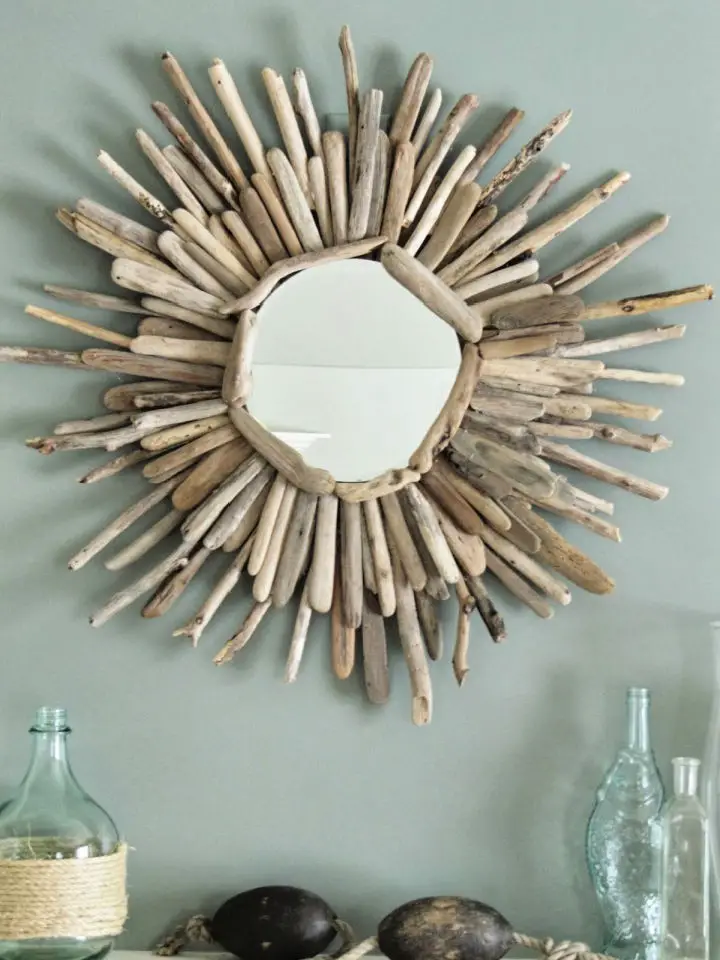
DIY Driftwood Starburst Mirror Tutorial
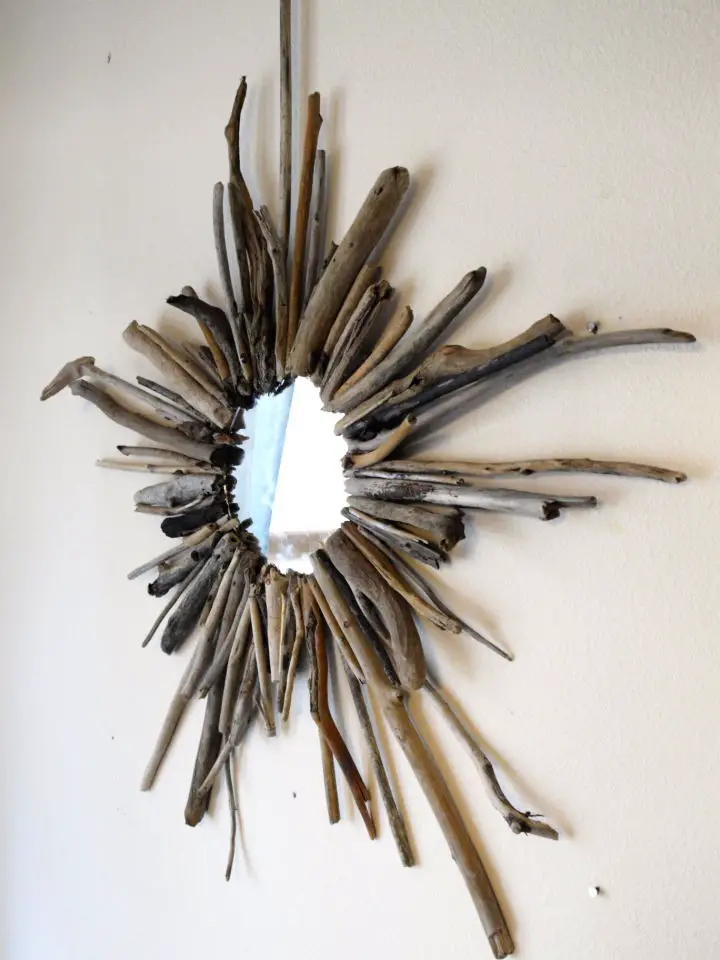
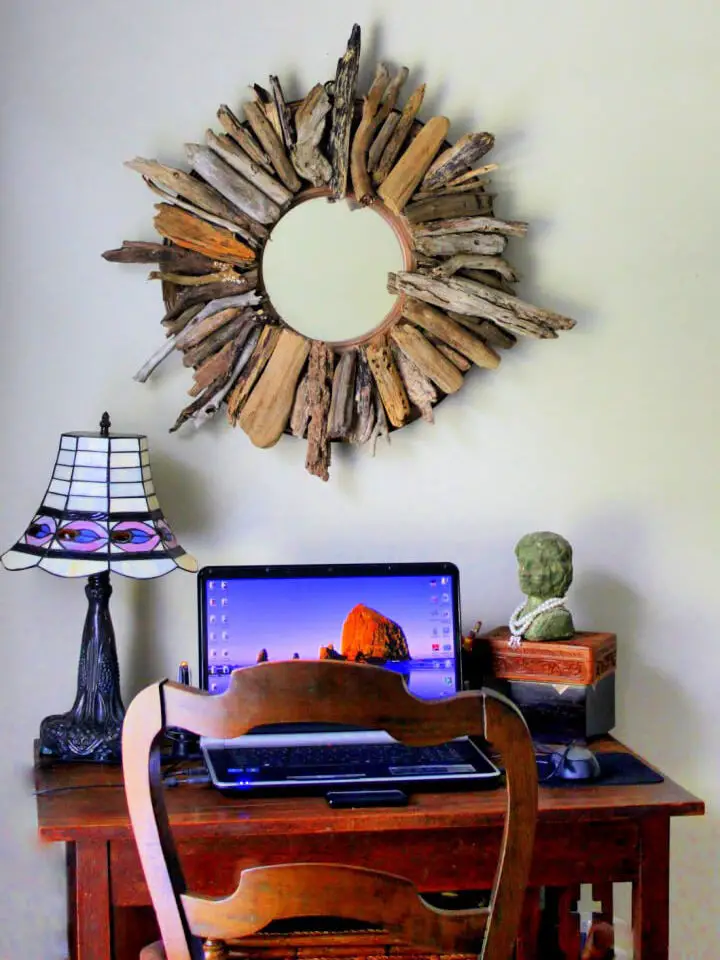
Transform your home decor with an eye-catching DIY Driftwood Starburst Mirror, crafted from collected driftwood and eco-friendly materials. This comprehensive tutorial guides you through the simple process of turning nature’s treasures into a stylish addition to any room. With a mere $3 investment and accessible supplies, this project offers a unique blend of personalization and affordability. A non-toxic wood stain and deliberate arrangement of driftwood pieces bring this coastal-inspired mirror to vibrant life. For step-by-step instructions, visit See Cate Create and discover the art of upcycling with ease.
How to Make a Colorful Driftwood Mirror
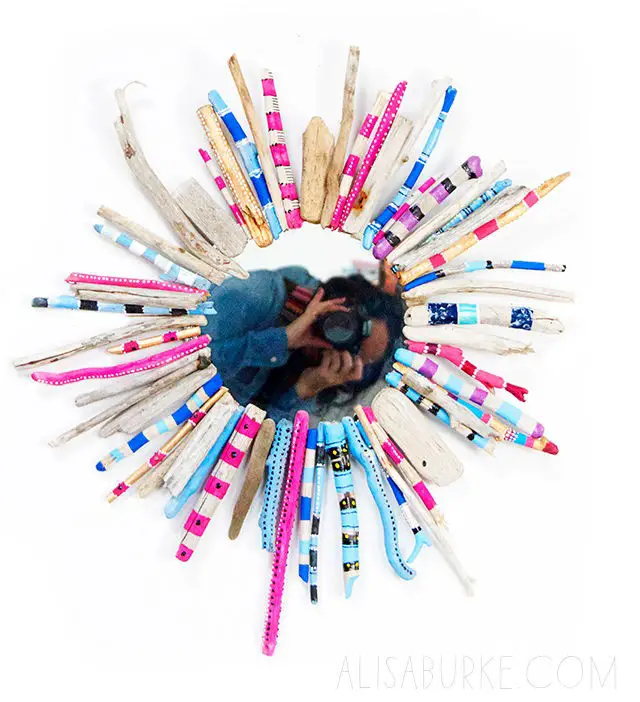
Transform a plain mirror into a stunning work of art by creating a unique DIY driftwood mirror with painted stripes. This creative project involves attaching driftwood pieces to the mirror using Gorilla Epoxy, resulting in a one-of-a-kind home decor piece that’s sure to spark conversation. To add an extra touch, attach a hook and you’ll have a functional piece of art that’s ready to display. For those looking for more inspiration, visit Alisa Burke’s blog for a comprehensive guide on how to bring this creative idea to life. With just a few simple steps, you can craft your own driftwood mirror and add a dash of personality to any room.
Building a Driftwood Mirror With Written Instructions

Transform the treasures you’ve collected from the beach into a stylish piece of home decor with a delightful DIY driftwood mirror project. Inspired by Rachel Teodoro’s blog, this clever way to repurpose Pacific coast driftwood combines a lazy Susan and a small round mirror from garage sales with natural driftwood pieces, resulting in a stunning mirror for under $2. Not only is this project budget-friendly, but it also adds a touch of coastal charm to your home. Whether you’re looking to commemorate a beach vacation or bring the beauty of the sea indoors, this DIY driftwood mirror is an easy and creative project to complete.
Beginner-Friendly DIY Driftwood Mirror

Transform your living space into an ocean-inspired oasis by crafting a one-of-a-kind DIY Driftwood Mirror. This engaging project brings a touch of natural beauty and texture to any room, evoking the serenity of the sea. By combining cardboard, hot glue, and driftwood pieces collected from the beach, you can create a unique mirror that reflects your love for maritime charm. Hang it in your dining area, family room, or bedroom to enjoy a constant reminder of tranquil beach days. For a step-by-step guide on how to make this coastal-inspired decor piece, visit Home on the Corner and start bringing the ocean into your home.
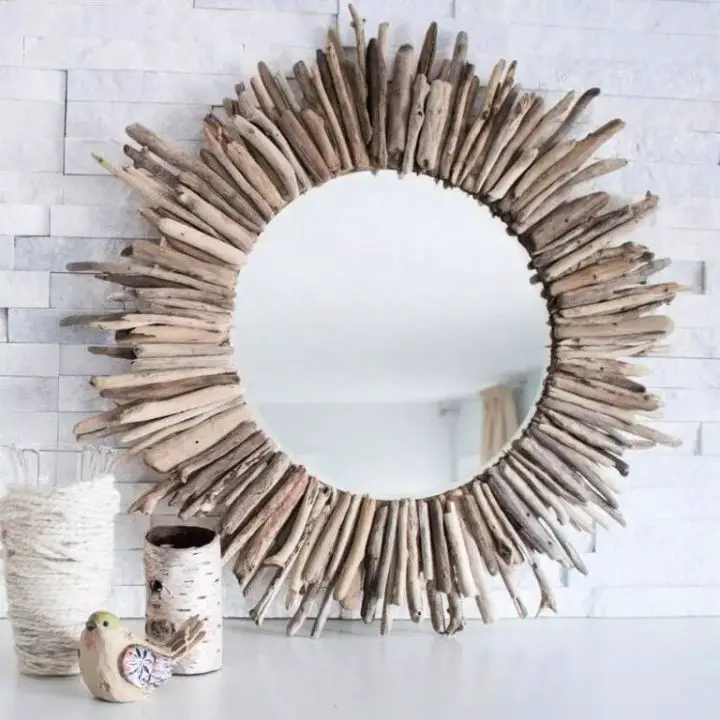
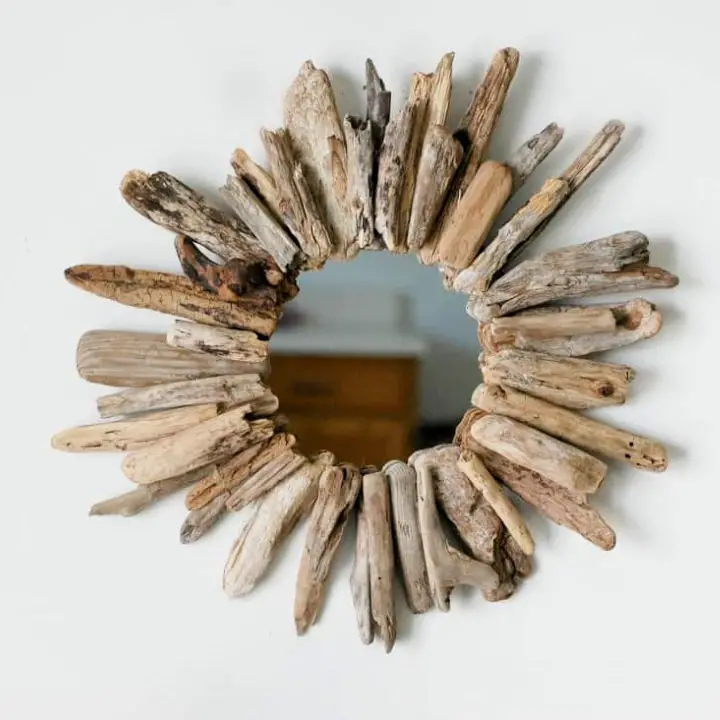
Make a Driftwood Starburst Mirror
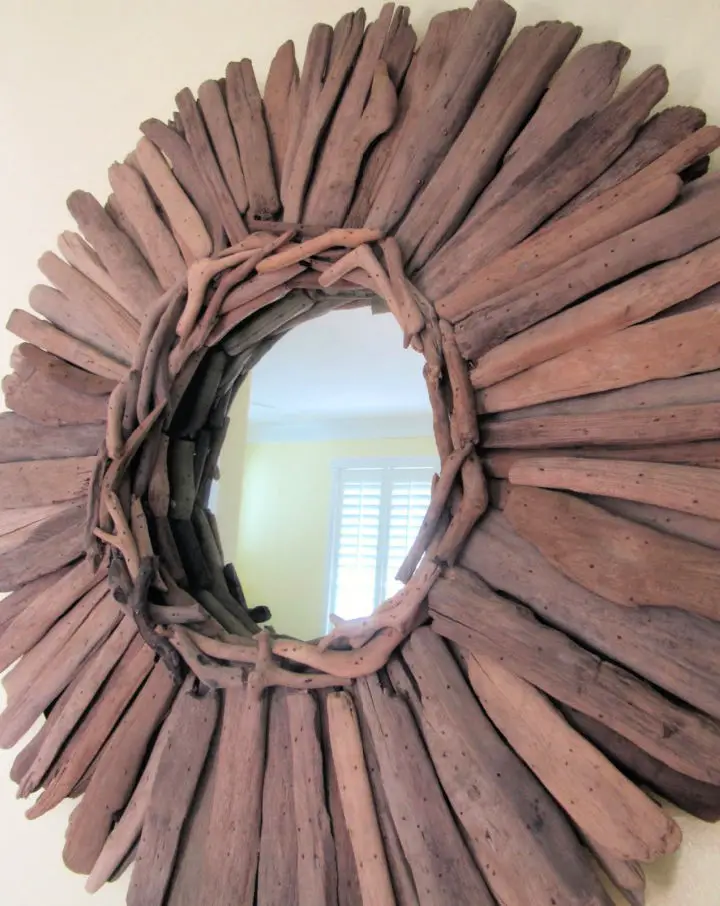
Transform your home’s ambiance into a beachy retreat by crafting a one-of-a-kind DIY Driftwood Starburst Mirror. Begin by securing the mirror to its base with an ultra-strong adhesive, taking care not to compromise the glass. Next, arrange longer driftwood pieces around the mirror’s edge, utilizing glue and allowing sufficient time for it to dry completely. Fill any remaining gaps with shorter sticks to introduce a tactile element, and feel free to add layers for added depth. If desired, incorporate sea glass accents to further enhance the coastal vibe. Once your masterpiece is complete, hang it proudly to bring a slice of seaside charm into your home. For a step-by-step guide on how to recreate this stunning piece, visit Salty Girl and The Long Dog for expert instruction.
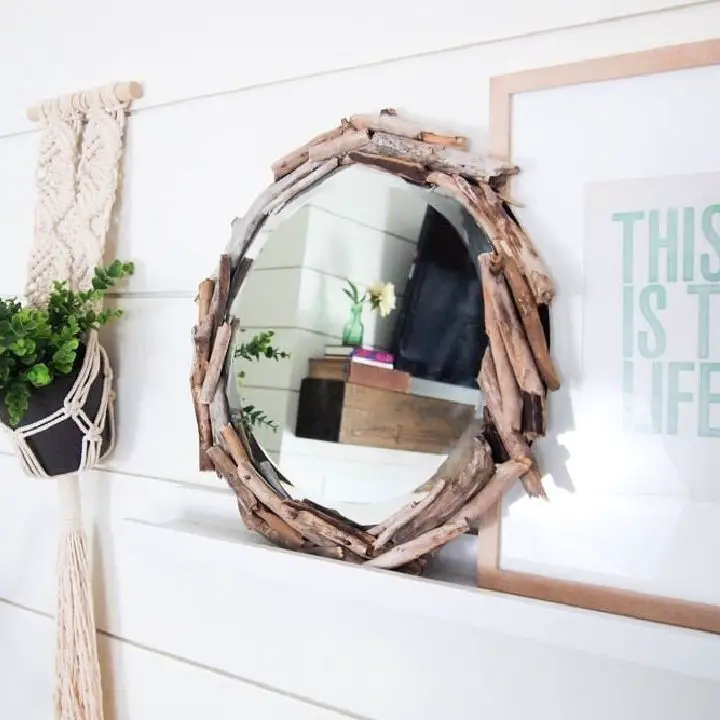
How to Build a Round Driftwood Mirror
Transforming your living space into an ocean-inspired oasis is just a few steps away with this DIY Round Driftwood Mirror project. The perfect combination of modern and natural elements comes together through the use of round mirrors, driftwood, builders adhesive, and a backing board. Begin by cutting out a circular shape from your backing board, leaving a border around the edges. Paint this border black to create a striking shadow effect behind the driftwood. Next, carefully arrange and secure the driftwood pieces onto the mirror using the adhesive, building up layers for a unique, rustic appearance. To achieve a seamless finish, trim, split, and sand any rough edges on the driftwood as needed. With this engaging guide from Scavenger Chic, you’ll not only gain the skills to complete this project but also be inspired to infuse your home decor with creative flair.
Inexpensive DIY Drift Wood Mirror
Create a stunning coastal-inspired decor element by upcycling driftwood into a one-of-a-kind mirror. This budget-friendly DIY project is not only an enjoyable creative outlet, but also a practical way to add a touch of the sea to your home without breaking the bank. By following the straightforward instructions on HappyDealHappyDay, you can transform collected or purchased driftwood into a beautiful mirror using simple materials like a round mirror, hot glue, and cardstock. The result is a unique piece that rivals expensive store-bought alternatives, perfect for anyone looking to infuse their décor with natural charm without sacrificing style.
Making Your Own Driftwood Mirror
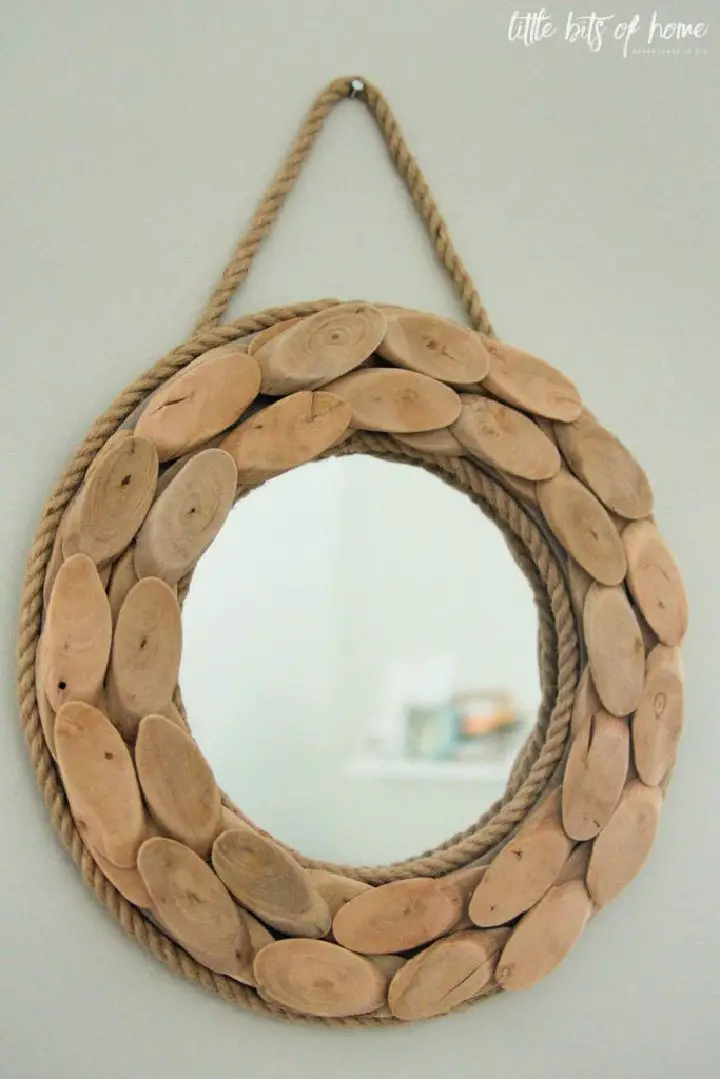
Combining creativity with nature’s essence, DIY projects offer a refreshing way to express oneself. One such endeavour is the DIY Driftwood Mirror, expertly crafted by Samantha at Little Bits of Home. This straightforward yet sophisticated project transforms a space with its blend of warmth and texture. By combining driftwood ovals, jute rope, and a few more materials, Samantha’s guide provides an inclusive journey for DIY enthusiasts seeking to elevate their decor. As you embark on this creative endeavour, get ready for a delightful and fulfilling experience that harmonizes artistry with practicality.
How to Make a Mirror From Driftwood

Transform your space with a personalized flair by crafting an Easy DIY Mirror adorned with driftwood. This unique piece combines the serenity of nature with the elegance of a mirror, creating a coastal-inspired accent that can elevate any room. To achieve this look, you’ll need just a few simple materials: a foam wreath, some jute twine, and driftwood. With these easy-to-find supplies, you’ll be able to create a stunning piece that not only reflects your personal style but also brings the calming essence of the coast into your home. For a step-by-step guide on how to bring this coastal charm to your décor, visit Crafts by Courtney for a straightforward and budget-friendly tutorial.
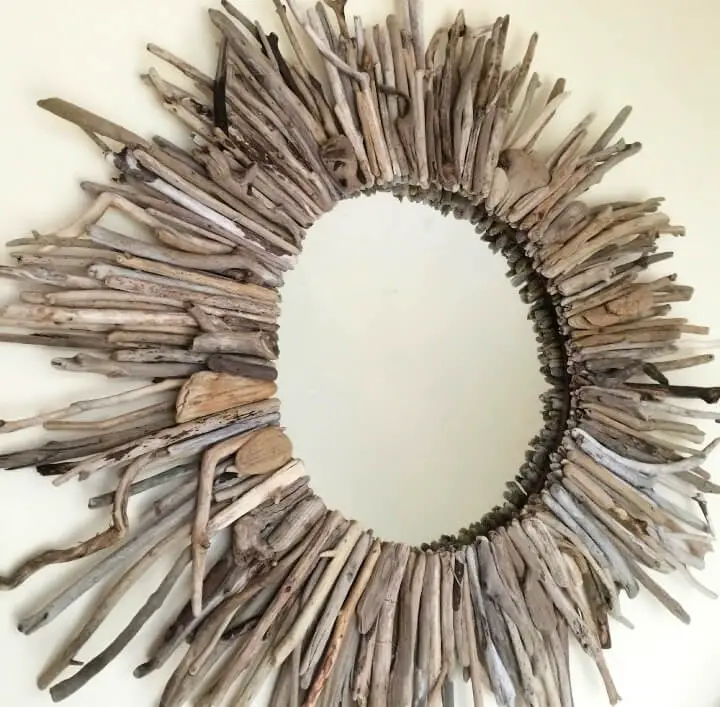
Homemade Driftwood Mirror
Transform your space with a unique Driftwood Mirror by layering driftwood to create an intricate design. This DIY project combines the strengths of Gorilla glue and hot glue to produce a breathtaking effect. With this guide, you’ll learn how to add a natural touch to your decor, perfect for those who appreciate the beauty of the beach. Discover the ideal length for driftwood pieces, as well as expert tips on hanging your masterpiece. Follow our step-by-step instructions to create a stunning mirror that will elevate any room.
Make Your Own Driftwood Mirror
Give your home decor a one-of-a-kind makeover by creating a Driftwood Mirror, an effortless DIY project that brings a touch of nature and rustic charm to any room. Without requiring specialized tools or materials, this straightforward guide lets you tap into your creativity while upcycling driftwood. Follow the easy-to-follow instructions on Silver Penguin ArtyCrafty to start crafting your unique piece today, and discover how anyone can create a stunning and eco-friendly work of art.
Coastal Farmhouse Driftwood Mirror
Transform your love for the coast into a stunning piece of home decor with our easy-to-follow DIY wreath tutorial. This nautical-themed project adds a personal touch to your surroundings, inspired by high-end designs. Learn how to create a beautiful mirror-framed driftwood wreath that echoes serene coastal vibes without breaking the bank. With materials easily found or collected, you’ll be able to add a unique, coastal charm to your home in no time.
Driftwood Mirror Step by Step Tutorial

If you’re captivated by driftwood mirrors’ rustic charm, creating one yourself is surprisingly accessible. Without breaking the bank or requiring specialized tools, this DIY guide takes you through a straightforward process to craft a custom mirror that embodies coastal flair. Collecting materials, assembling the piece, and adding finishing touches are all part of the journey, which promises a rewarding blend of creativity and practicality. To learn more about bringing this unique design element into your home, explore Songbird’s comprehensive resource.
Conclusion
As you complete this DIY driftwood mirror project, you’re not only crafting a unique home decor piece but also infusing it with the essence of nature’s beauty and your personal creative touch. This journey has taken you from scouring for driftwood to adding those final flourishes, and now it’s time to showcase the fruits of your labor. If you’re seeking inspiration for a one-of-a-kind addition to your home decor repertoire, the 20 DIY driftwood mirror ideas presented here offer a wealth of creative possibilities. Whether it’s a statement piece in your living room or a conversation starter in your hallway, a driftwood mirror is more than just an objet d’art – it’s a testament to your artistic vision and a reflection of your personal style. So why not start today and transform a humble mirror into a masterpiece that tells a story all its own?
