
If handmade toys are your passion, creating unique Waldorf dolls can bring immense joy. Our comprehensive guide shares 10 free Waldorf doll patterns, demystifying the process of making these charming companions. Unlike mass-produced toys, Waldorf dolls exude simplicity and character, offering a personal touch that will captivate hearts. This introduction to the art of crafting Waldorf dolls provides a clear roadmap for creating your own cuddly friend, complete with all the necessary resources to get started. As you embark on this leisurely yet rewarding journey, you’ll not only hone your crafting skills but also create a heartwarming keepsake that will be treasured. With our step-by-step guide, every stage of the process is straightforward and satisfying, from selecting the right materials to adding those final, comforting touches.
Why Choose Waldorf Doll Patterns?
When it comes to crafting projects, Waldorf doll patterns offer a unique set of benefits that can delight both makers and recipients. These charming dolls are not only visually appealing but also provide several advantages that make them an excellent choice for eco-conscious crafters. By opting for these patterns, you’ll contribute to a healthier planet while enjoying the simplicity and cost-effectiveness of creating your own doll. Here’s why Waldorf doll patterns stand out from the rest:
Their eco-friendliness stems from the use of natural and recyclable materials, making them an attractive option for those who prioritize sustainability. With Waldorf dolls, you can create a beautiful and meaningful keepsake without compromising your environmental values.
Another significant benefit is the simplicity of the crafting process. Even beginners can learn to make a Waldorf doll with minimal effort and practice, ensuring that this hobby is accessible to everyone. The ease of making these dolls encourages creativity and fosters a sense of accomplishment.
In addition to their eco-friendliness and simplicity, Waldorf dolls are also cost-efficient. You can use materials readily available at home or easily sourced, eliminating the need for expensive supplies. This economical approach to crafting makes Waldorf dolls an attractive option for those on a budget.
The customization options offered by Waldorf doll patterns further enhance their appeal. Each doll can be tailored to your preferences or those of the recipient, resulting in unique and special keepsakes that hold sentimental value.
Overall, Waldorf doll patterns offer an excellent crafting experience that yields cherished keepsakes. With their eco-friendly materials, simplicity, cost-effectiveness, and customization options, these dolls are a delightful choice for crafters seeking a rewarding hobby.
How to Make a Waldorf Doll
With every stitch, a Waldorf doll becomes not only a beloved toy but also a testament to the love and care that went into its creation. As you embark on this artisanal adventure, you’ll find that crafting your first Waldorf doll is an experience that’s both rewarding and enriching. This step-by-step guide is designed specifically for beginners, with a focus on clarity and ease of understanding. So, join me on this journey as we explore the world of dollmaking together!
Gather Your Materials
Before starting your doll-making project, it’s essential to gather the necessary materials. A well-stocked arsenal of fabrics, notions, and tools will ensure a smooth and enjoyable creative process. For this project, you’ll need cotton velour or cotton flannel fabric for the doll skin, 2-inch tubular stockinette for shaping the head, wool batting for stuffing, a needle and thread for sewing, scissors for trimming excess material, and a pattern for constructing the doll body and hat (available on Etsy). While these materials may be found at various online stores, including Etsy, it’s crucial to prioritize quality when selecting your fabrics. Using high-quality materials will result in a durable and plush doll perfect for snuggling.
Step 1: Making the Head
To create the doll’s head, begin by preparing the foundation. Cut a section of tubular stockinette to fit snugly around your wool batting, which will serve as the head’s core. Next, take the wool batting and mold it into a compact sphere that will form the basis of the head. Once you have achieved this shape, place the wool batting inside the prepared stockinette and secure it with a sturdy tie at the base to maintain the head’s overall shape.
Step 2: Forming the Body
When your doll’s head is prepared, proceed by following the fabric-cutting pattern inspired by Etsy. Cut out the body pieces according to the acquired design. Next, sew the individual parts together, leaving a small opening for inserting the stuffing material. Fill the body with wool batting to achieve the desired level of plushness or firmness. Finally, secure the opening by hand-stitching it shut using a needle and thread.
Step 3: Attaching the Head to the Body
To secure the doll’s head, start by aligning it with the body’s top center point. Then, using a needle and thread, sew the head in place, making sure it’s firmly attached and positioned evenly. As you complete the stitching, double-check that the head remains stable and balanced, ensuring a seamless union between the two components.
Step 4: Adding Facial Features (Optional)
For those who want to add an extra layer of realism to their Waldorf-inspired doll, incorporating facial features can be a fun and creative process. One way to do this is by using a fine needle and thread to stitch simple eyes and mouth onto the doll’s face. When it comes to adding these details, remember that less is often more. The minimalist aesthetic of traditional Waldorf dolls actually encourages imagination and creativity, so resist the urge to overdo it with elaborate facial features. Instead, aim for a subtle yet expressive look that invites children (and adults!) to use their imaginations.
Step 5: Crafting the Hat
To bring your doll-making project to life, start by preparing the hat’s fabric. Following the pattern, carefully cut out the fabric for the hat. Next, sew the fabric together according to the instructions, taking care to shape it to fit comfortably on your doll’s head. For a secure and stylish finish, attach the hat to the doll’s head by sewing it around the base – or opt for a detachable design if you prefer.
Finishing Touches
As you hold your freshly finished Waldorf doll, take a moment to inspect its details. Look for any stray threads or areas that may require additional attention. With this first handmade creation now complete, it’s ready to be treasured and nurtured. The charm of handcrafted dolls stems from their subtle imperfections, making each one a true original.
Video Tutorial
As you embark on the enchanting journey of creating your own Waldorf doll, this video tutorial provides an invaluable companion piece to our written guide. The step-by-step instructions will gently guide you through crafting the doll’s head and sewing its simple body, offering a visual complement to the techniques discussed in a clear and accessible manner.
With each stitch and snip, you’ll be infusing your handmade creation with a piece of yourself, whether it’s a thoughtful gift for a child or a charming addition to your home. Let the art of doll-making transport you to a world where creativity and imagination know no bounds.
FAQS on Waldorf Doll Patterns
Embarking on the journey to create a Waldorf doll can be an incredibly fulfilling experience, allowing you to tap into your creative side and produce a unique, handmade piece. To ensure a smooth start or further enhance your existing skills in doll-making, here are some frequently asked questions that will provide valuable insights and guide you along the way.
What materials do I need to make a Waldorf doll?
To bring a Waldorf-inspired doll to life, you’ll need to gather some essential materials. A good starting point is to select a suitable skin fabric – cotton velour or flannel are popular choices among Waldorf enthusiasts. You’ll also require tubular stockinette measuring 2 inches in diameter for shaping the head. A piece of wool batting will be necessary for stuffing the doll, providing a soft and cuddly texture. In addition to these materials, you’ll need a trusty needle and thread for sewing, as well as a pair of scissors to help you navigate the stitching process. Finally, having a pattern on hand for sewing the doll’s body and clothing can be incredibly helpful – there are many free and paid options available online, including those found on popular marketplaces like Etsy.
Can beginners make Waldorf dolls?
While it may come as a surprise, creating Waldorf dolls is an accessible activity that can be mastered by beginners. The simplicity of the process is intentionally designed to allow anyone to learn and grow. By starting with fundamental patterns and gradually moving on to more intricate designs, you’ll be able to refine your skills over time.
How do I add facial features to my Waldorf doll?
To give your Waldorf dolls their signature minimalist facial features, you can employ a few simple embroidery techniques. Using a fine needle and some basic thread, stitch on a pair of eyes and a mouth that are intentionally understated. The goal is to create an expressionless face that invites the child playing with the doll to fill in the emotional blanks with their own imagination. Some crafters prefer to leave the face completely blank or add only subtle features, which can be just as effective in sparking creative play.
Are there any eco-friendly options for making Waldorf dolls?
Waldorf dolls possess a unique quality of being environmentally friendly due to their composition of natural materials. To further enhance the eco-friendliness of your Waldorf doll, consider the following guidelines: Selecting organic cotton or wool fabrics for the doll’s skin is an excellent starting point. When it comes to stuffing the doll, opt for natural wool instead of synthetic alternatives. Additionally, refrain from using synthetic materials for both the doll’s skin and hair to maintain a consistent eco-friendly approach.
How do I care for a Waldorf doll?
For optimal care and preservation of your Waldorf doll, follow these simple steps: Begin by hand washing the doll using a mild soap, taking care to be gentle as you work through any dirt or debris. After cleaning, allow the doll to air dry in a well-ventilated area, making sure it’s kept away from direct sunlight. This will help prevent the colors from fading and maintain their vibrant appearance. If your Waldorf doll features wool hair, take extra care when detangling by using only your fingers or a wide-tooth comb, working slowly and carefully to minimize any risk of matting or tangling.
Can Waldorf dolls be repaired if they are damaged?
While Waldorf dolls can be damaged, they are not beyond repair. Minor flaws such as small tears in the fabric can be skillfully hand-stitched to restore their original appearance. More extensive damage may require replacing entire sections of the doll’s ‘skin’ or re-stuffing specific areas of the body to maintain its characteristic look and feel. To achieve a seamless restoration, it is essential to closely match the original materials used in the doll’s construction.
How can I customize my Waldorf doll?
When it comes to customizing a Waldorf doll, the possibilities are truly endless. One way to make the process even more enjoyable is by incorporating personal touches that reflect the recipient’s personality. This could involve selecting fabric colors and patterns that resonate with their unique spirit. Beyond that, you can also get creative with personalized clothing or accessories for the doll, adding an extra layer of meaning to the overall design. If hair is a key element in your customization plan, consider experimenting with different yarns or wools to achieve a look that’s truly one-of-a-kind. As you work on customizing your Waldorf doll, remember that it’s not just a craft – it’s also an act of love. Each doll has the potential to become a lifelong companion for someone special, and the level of customization you bring to the table can make all the difference in creating a truly treasured keepsake.
10 Free Waldorf Doll Patterns | How to Make Waldorf Dolls
Explore a world of creativity by unlocking 10 free Waldorf doll patterns, each accompanied by step-by-step instructions to guide you in crafting your very own unique dolls. With these accessible tutorials, the journey to creating begins immediately.
Free Waldorf Doll Sewing Pattern
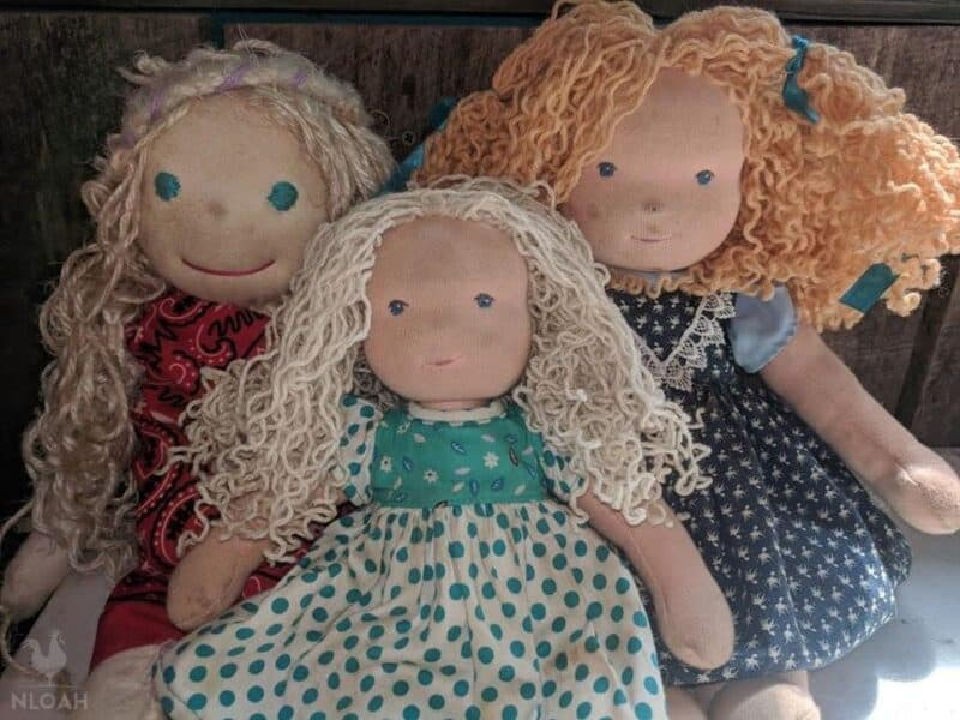
Imagine yourself on a heartwarming adventure of creating a one-of-a-kind Waldorf doll, guided by New Life On A Homestead’s comprehensive resources. With clear instructions, free patterns, and engaging video tutorials at your fingertips, the process unfolds like a gentle stream, effortlessly flowing from shaping the doll’s head to sewing its body. This meticulously crafted guide is designed to make the experience both accessible and enjoyable, allowing you to create a timeless treasure that will bring comfort and joy for years to come, whether it’s a treasured keepsake or a thoughtful gift.
How to Make a Waldorf Doll
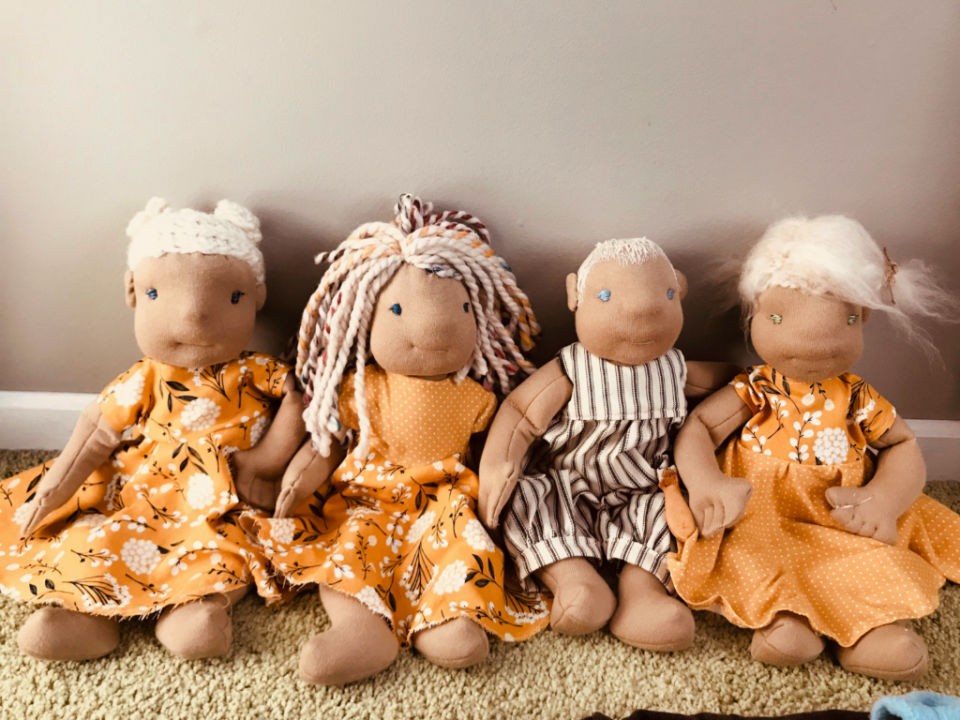
As you near the culmination of creating your Waldorf doll, it’s time to bring its body to life through sculpting. This stage requires precision, patience, and a gentle touch. Our comprehensive guide walks you through the process of crafting lifelike body parts by cutting, sewing, and stuffing with materials like wool and glass beads. From constructing a ‘fabric sandwich’ for seamless sewing to mastering the ladder stitch technique for durable assembly, we’ll take you step-by-step through this crucial phase. By following our instructions and refining your skills, you’ll be able to create a doll that not only looks authentic but also withstands hours of play and handling.
Mermaid Waldorf Doll Tutorial
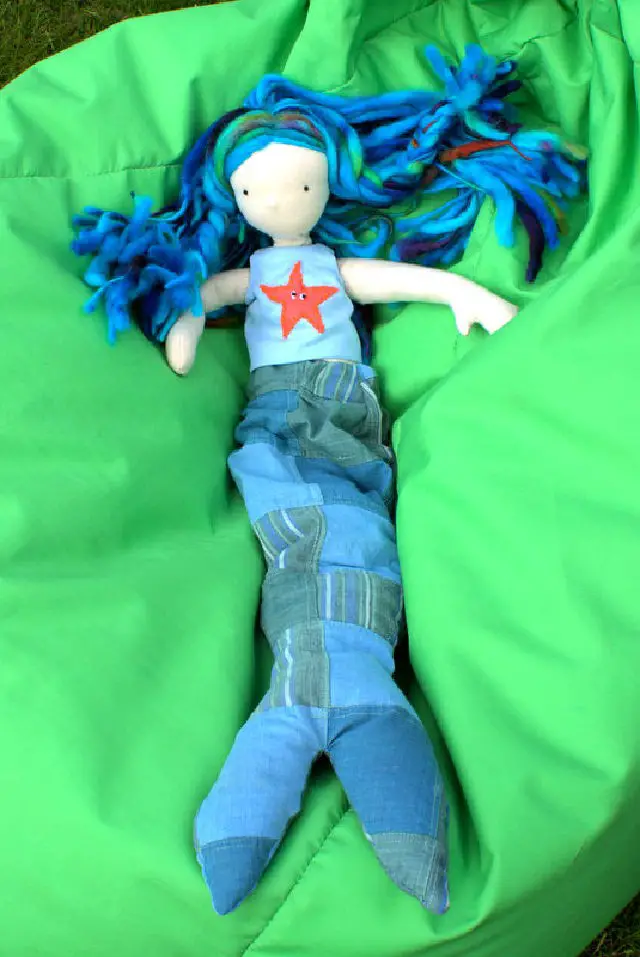
Join the underwater world of creativity by following our step-by-step Mermaid Waldorf Doll Tutorial. As you embark on this charming adventure, discover how to bring a one-of-a-kind mermaid companion to life using natural materials and simple techniques. With easy-to-follow instructions, craft expressive eyes that sparkle with personality, sew a flowing mermaid tail that wraps around your doll’s waist, and add a personalized touch that makes her truly special. This comprehensive guide ensures a delightful outcome, perfect for snuggling up with as you read or play. Together, we’ll create a keepsake that sparks imagination and brings joy to all who see it.
Easy DIY Waldorf Knotty Doll
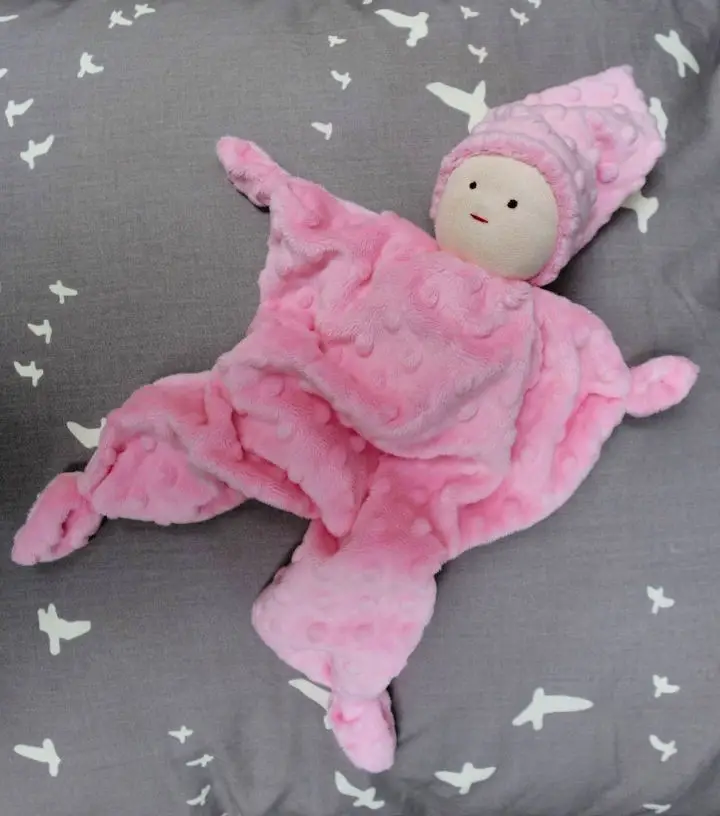
Indulge your creative spirit and bring to life a whimsical, handmade Waldorf ‘Knotty’ Doll with this comprehensive guide. Ideal for gifting or treasuring as a personal keepsake, these endearing dolls are crafted with simplicity and affection. To embark on this charming crafting adventure, head over to Instructables for a detailed, step-by-step tutorial. Let your imagination run wild and create a one-of-a-kind, snuggly companion that will capture hearts.
Making a Waldorf Doll
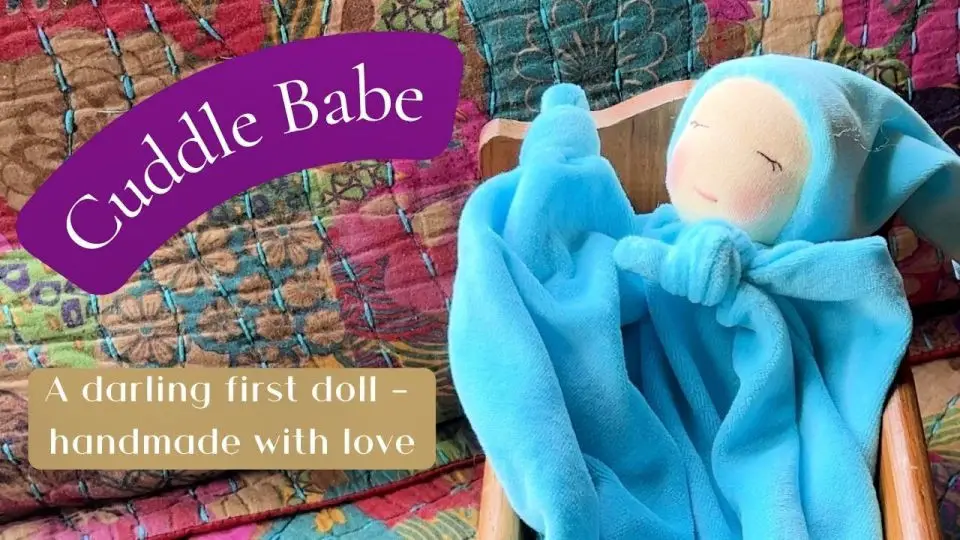
Looking for a last-minute gift that will leave a child’s eyes sparkling? Consider gifting them the experience of creating their own unique Waldorf doll. This remarkable project is not only fun but also fosters creativity, imagination, and a sense of accomplishment. To get started, gather essential materials like soft knit fabric, a detailed pattern, high-quality wool batt or roving, durable strings, and cozy stockinette. With these elements at your disposal, you’ll be well on your way to crafting an enchanting keepsake that will bring joy and wonder to the lucky recipient. The result is a truly personalized gift that’s sure to delight.
DIY Waldorf Weighted Doll

Immerse yourself in a heartwarming experience as you create a Waldorf weighted doll with guidance from Happy Whimsical Hearts. Led by expert Mary Hirsh-Jones, this process transcends traditional crafting, instead focusing on imbuing each doll with love and intentionality. As you shape the head with wool and personalize with simple features, you’ll not only be creating a unique companion but also reflecting on the individual it’s intended for. This journey is perfect for those seeking to explore the satisfying and soulful art of Waldorf doll making.
Waldorf Inspired Glove Puppets
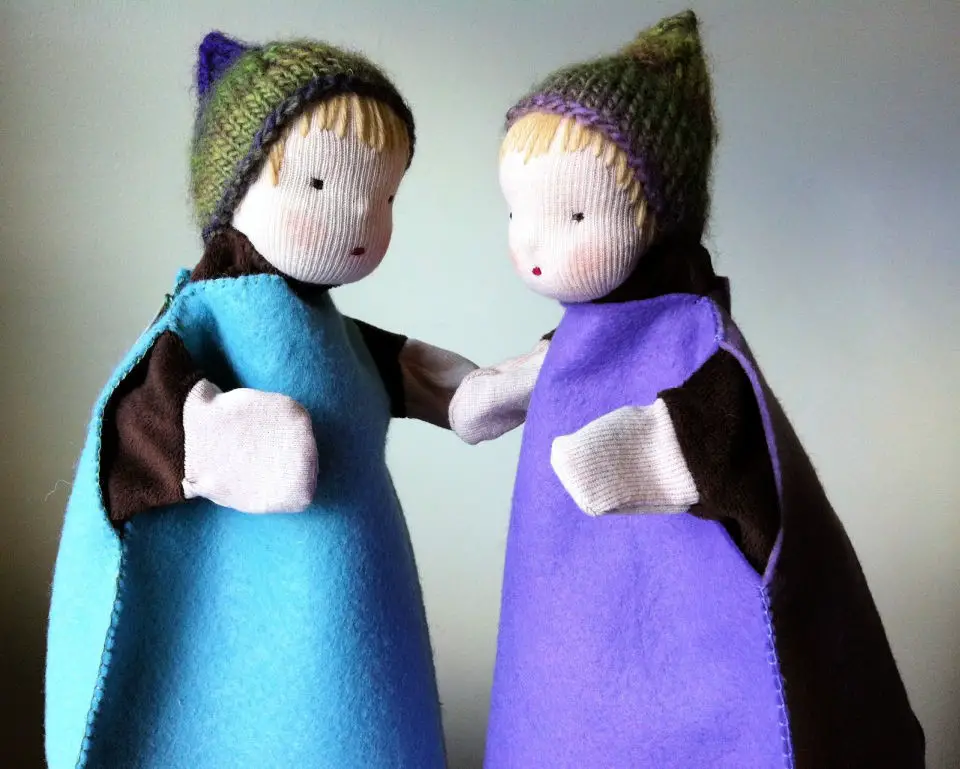
Immerse yourself in the world of Waldorf-inspired glove puppets by creating your own unique masterpieces through this comprehensive tutorial. By combining traditional Waldorf doll-making techniques with the art of puppet-creation, you’ll embark on a creative journey that’s as engaging as it is rewarding. From conceptualizing an original design to crafting the head and body of your puppet, this step-by-step guide will walk you through each stage, encouraging experimentation with scrap materials before moving on to fine cloths. To truly bring your creation to life, focus on incorporating personal touches in costuming for a one-of-a-kind, expressive puppet that reflects your own unique style. And when you’re ready to take your skills to the next level, visit We Bloom Here for a wealth of information and inspiration.
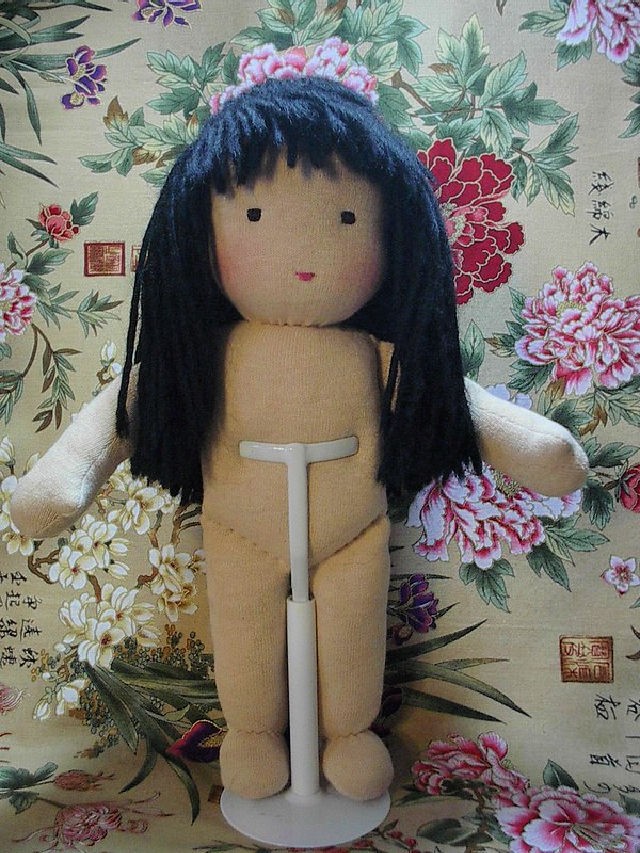
Handmade First Waldorf Doll
Embark on a creative journey by mastering the art of dollmaking with our step-by-step tutorial. This comprehensive guide takes you through the process of crafting a Waldorf-inspired doll, perfect for snuggling up with little ones. With detailed instructions on shaping the head and sewing the body, this project is ideal for a relaxing afternoon spent crafting a soft and cuddly companion. All the necessary materials, including doll skin fabrics and stockinette, are easily accessible. Simply click the link to access the full guide and start creating your own unique doll today!
Waldorf Doll Head Making Tutorial
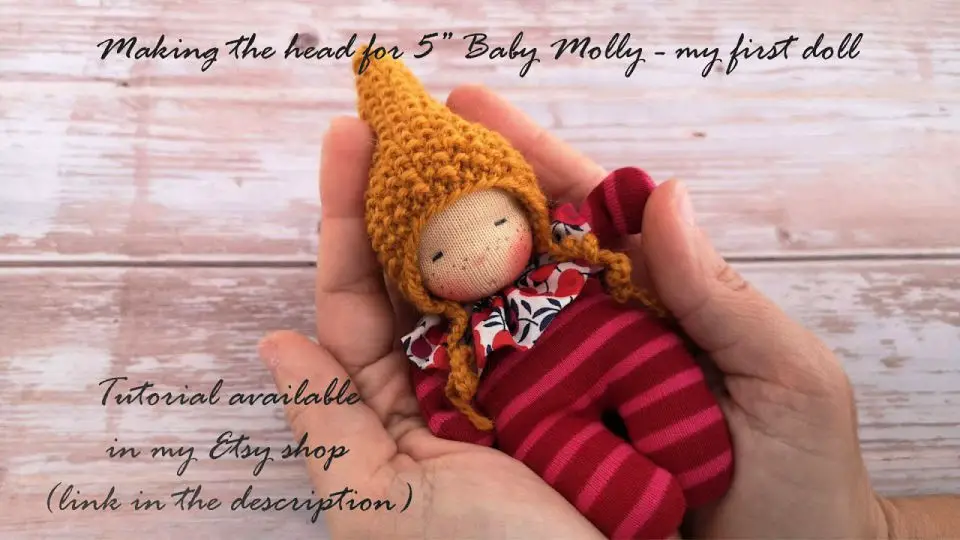
Embark on an enchanting adventure in Waldorf doll crafting by following our step-by-step video guide for creating 5-inch Baby Molly. Designed specifically for craft novices seeking to create their first handcrafted Natural Waldorf doll, this comprehensive tutorial breaks down the process into manageable steps. Supplementing the visual guide is a detailed PDF tutorial available for download, making it easy for anyone to join in on the fun. Begin your doll-making journey today and bring Baby Molly to life with our clear and concise instructions.
Conclusion:
As we conclude our exploration of the 10 free Waldorf doll patterns, it’s clear that this journey has been both engaging and enriching for anyone interested in crafting. These patterns offer a fantastic foundation for creating unique Waldorf dolls, providing step-by-step guidance throughout the process. From selecting eco-friendly materials to shaping the body and head, and finally adding those personalized touches, this guide ensures a rewarding experience. Beyond the practical instructions, our article also highlights sustainable crafting options and offers solutions for doll maintenance, making it an all-encompassing resource. By diving into the charming world of Waldorf dolls, you’ll have the opportunity to bring your creative visions to life with these accessible patterns, leaving you just one project away from having your next handmade friend.
