Transforming a space with homemade charm and color is just a few steps away with the creation of a jelly roll rug. This comprehensive guide offers 15 free patterns, perfect for quilters looking to craft a beautiful rug from colorful fabric strips. Not only does this project allow for personal expression through various patterns and color combinations, but it also provides a sense of accomplishment when you complete your unique piece of home decor. As you embark on this creative journey, you’ll discover the joy of turning simple materials into something both beautiful and functional. Each step, from selecting your jelly roll to finishing your rug, is an opportunity to learn and grow in your crafting skills. With these fantastic patterns, get ready to be inspired and unleash your creativity.
Why Make a Jelly Roll Rug?
Making a jelly roll rug is an experiential journey that transcends mere creation; it’s an invitation to tap into the creative process, yielding numerous benefits. The process of crafting such a piece is not only aesthetically pleasing but also fosters a range of positive outcomes. Firstly, working with jelly rolls liberates one’s creativity, allowing for boundless experimentation with color and pattern combinations, thereby sparking self-expression. Moreover, this endeavour provides an eco-friendly opportunity to repurpose leftover fabric scraps, reducing waste and adding a unique touch to the final product. Furthermore, the project serves as a valuable exercise in honing sewing skills, particularly in mastering the zig-zag stitch and navigating diverse fabrics. Beyond its functional benefits, the jelly roll rug’s practical application adds warmth and comfort to any room, creating an inviting atmosphere. Additionally, this handmade piece can be repurposed as a thoughtful gift, imbued with the personal touch of having been crafted by one’s own hands. The process itself is also an invitation to mindfulness, encouraging relaxation and reducing stress as one becomes fully immersed in the task at hand.
How to Make a Jelly Roll Rug
Creating a Jelly Roll Rug is a rewarding sewing experience that converts fabric strips into a stunning, long-lasting floor covering for your home. This project requires minimal effort and skill, making it an ideal way to utilize leftover jelly rolls while adding a personal touch to your decor. With this step-by-step guide, you’ll be well on your way to crafting your own unique Jelly Roll Rug.
What You’ll Need:
To start crafting a Jelly Roll rug, you’ll need a few essential tools. Begin with the pre-cut fabric strips known as 1 Jelly Roll, which will serve as the foundation for your project. You’ll also require batting strips measuring 2.5 inches wide or an alternative product like Bosal Katahdin On-A-Roll, which can be purchased in two 50-yard rolls. A sewing machine is necessary to bring all the elements together, so make sure it’s equipped with a zigzag stitch capability. To achieve a professional finish, consider using sizing spray, although it’s optional but highly recommended. A reliable iron and ironing board will come in handy for any necessary pressing steps. Wonder Clips will be used to secure your fabric in place as you work on the project. Don’t forget thread that matches or complements your chosen fabric, scissors or a rotary cutter for cutting your materials, and finally, the pattern itself – specifically, the Jelly Roll Rug Pattern by RJ Designs – which will guide you through the process.
Getting Started
Before commencing the rug-making process, carefully unfold your Jelly Roll and visualize the arrangement of your fabric strips. The strategic placement of colors and designs will significantly impact the overall aesthetic of your finished rug. Consider the harmonious blending of hues and the balance of contrasting patterns to achieve a visually appealing outcome.
Next, secure the ends of each strip at a 90-degree angle, ensuring that right sides are aligned as you sew across the diagonal. Repeat this process, gradually building a chain of interconnected strips that will eventually form a single, cohesive long strip.
Pressing and Pairing With Batting
To complete the rug’s construction, start by pressing the seams open after connecting all the strips. To enhance the fabric’s smoothness and prevent puckering, consider spraying sizing on the strips before ironing. This simple step can make a significant difference in the final appearance of your rug. Once the seams are open, move on to attaching the batting. Begin by placing a batting strip on the wrong side of each fabric strip. Next, fold the fabric edges towards the center, ensuring they’re evenly aligned and secure with Wonder Clips. This process effectively transforms individual strips into filled, doubled-over units, ready for sewing.
Sewing the Rug
Begin by following the pattern’s guidance to establish the foundation of your rug. Using a standard quarter-inch seam, sew along the edge where the fabric edges meet. This initial step sets the stage for the rest of the project.Next, focus on building the rug itself. Once you have a sufficient length of filled strip prepared, start coiling the material and secure it with zigzag stitching. Be mindful not to pull or tug on the strip as you sew, as this can lead to unwanted ripples forming in your final product.As your rug grows in size, ensure its weight is evenly distributed to maintain smooth movement. Periodically check the tension and adjust your sewing machine settings if necessary to accommodate the increased bulk.
Finishing Your Rug
As you approach the completion of your rug’s dimensions, bring the strip’s pattern to a close by following the specified finishing techniques. This will ensure a tidy and secure ending. Before moving on, take care to remove any lingering excess batting or fabric, ensuring a clean and polished finish.
Care and Maintenance
The durability of a Jelly Roll Rug is one of its standout features, making it possible to machine wash the rug with ease. While machine washing is an option, it’s recommended to opt for a gentle cycle to prevent any potential damage. Additionally, air drying is suggested to preserve the rug’s appearance and maintain its quality.
Troubleshooting
When encountering issues with a pucker-prone or unevenly lying rug, inspect your stitching technique to rule out any unintentional strip pulls. To address this, try gently stretching out the coiled material to realign its fibers and re-sew as needed, ensuring optimal tension and a smooth finish.
Video Tutorial
If you’re interested in learning the intricacies of making a Jelly Roll Rug, I recommend supplementing this written guide with a step-by-step video tutorial available on YouTube, titled ‘How to Make a Jelly Roll Rug.’ The visual demonstration provided by the video will help solidify the techniques described here, making it easier to follow along and achieve success. Beyond its practical application, crafting a Jelly Roll Rug is also an opportunity to express your creativity, experimenting with different colors and textures as you work. By embracing this process and allowing yourself to fully engage in the sewing journey, you’ll not only create a cozy, homemade rug but also develop a deeper appreciation for the art of crafting.
FAQs on Making a Jelly Roll Rug
What is a jelly roll in quilting?
A jelly roll is a collection of fabric strips that have been pre-cut to uniform dimensions, allowing quilters to quickly access the materials they need for various projects. Each strip typically measures 2.5 inches in width and approximately 42 inches in length, providing a convenient and versatile source of fabric for crafts like jelly roll rugs.
How many jelly rolls do I need for a rug?
Typically, a standard-sized jelly roll rug requires one pack of pre-cut fabric strips from a jelly roll and two 50-yard rolls of batting or Bosal Katahdin On-A-Roll. Although this is the standard requirement, the actual amount needed can fluctuate depending on the desired size of the finished rug.
Can I wash my jelly roll rug?
When it comes to the maintenance of jelly roll rugs, you’re in luck. These versatile floor coverings are not only durable but also machine washable. To keep your rug looking its best, simply opt for a gentle cycle when washing, and then air dry it to prevent any damage or shrinkage. In terms of detergents, stick to mild options that won’t strip the colors of the rug, and avoid using bleach altogether to preserve the vibrant hues.
Why is my jelly roll rug puckering?
When creating fabric strips for sewing projects, it’s essential to maintain a relaxed pace to avoid puckering. As you sew, be mindful of applying too much tension to the fabric, which can cause it to pucker or bunch up. To achieve a smooth, even seam, focus on gentle, deliberate stitches and avoid pulling the fabric taut. Furthermore, taking the time to inspect and adjust your sewing machine’s tension setting may also help minimize puckering issues.
How do I choose the right colors for my rug?
When it comes to selecting colors for your rug, consider the room where it will be placed and your personal preferences. To find harmonious hues, turn to the color wheel, which can help you identify complementary colors. Alternatively, opt for a pre-curated jelly roll with a built-in theme that aligns with your space’s aesthetic.
What type of sewing machine setting should I use?
To create a jelly roll rug using a sewing machine, it’s crucial that you have an appliance capable of producing a reliable zigzag stitch. This is essential for securing the coiled strips together seamlessly. Start by adjusting your machine to a medium zigzag stitch length and width. As you sew, be prepared to fine-tune the tension according to the thickness of your material. The specific settings may vary depending on the materials you’re working with, so it’s crucial to monitor your stitches closely and make adjustments as needed.
Can I make a jelly roll rug without a sewing machine?
Using traditional methods to create a jelly roll rug can be a labor-intensive process, particularly when considering the thickness of the material after adding batting. In contrast, utilizing a sewing machine makes the project significantly more manageable and efficient.
Is there an alternative to jelly rolls?
For those who don’t possess a jelly roll, an alternative method is to cut your fabric into 2.5-inch strips. While this approach offers greater flexibility in terms of fabric selection, it does necessitate additional preparation time upfront. It’s crucial to opt for quilting cotton or a similar weight fabric to achieve the desired outcome.
How do I keep my rug from curling at the edges?
When creating a jelly roll rug, it’s crucial to maintain even tension while sewing the strips together. Avoid pulling on the fabric as you sew, as this can cause curling. To minimize this issue, press your strips before starting the project to keep them flat. Should curling occur despite these precautions, try steam pressing the finished rug and allowing it to cool in a flat position. The process of making a jelly roll rug is rewarding, combining creative expression, skill development, and practical application. As you work on this project, take your time, enjoy the journey, and don’t be afraid to experiment with colors and patterns. Happy sewing!
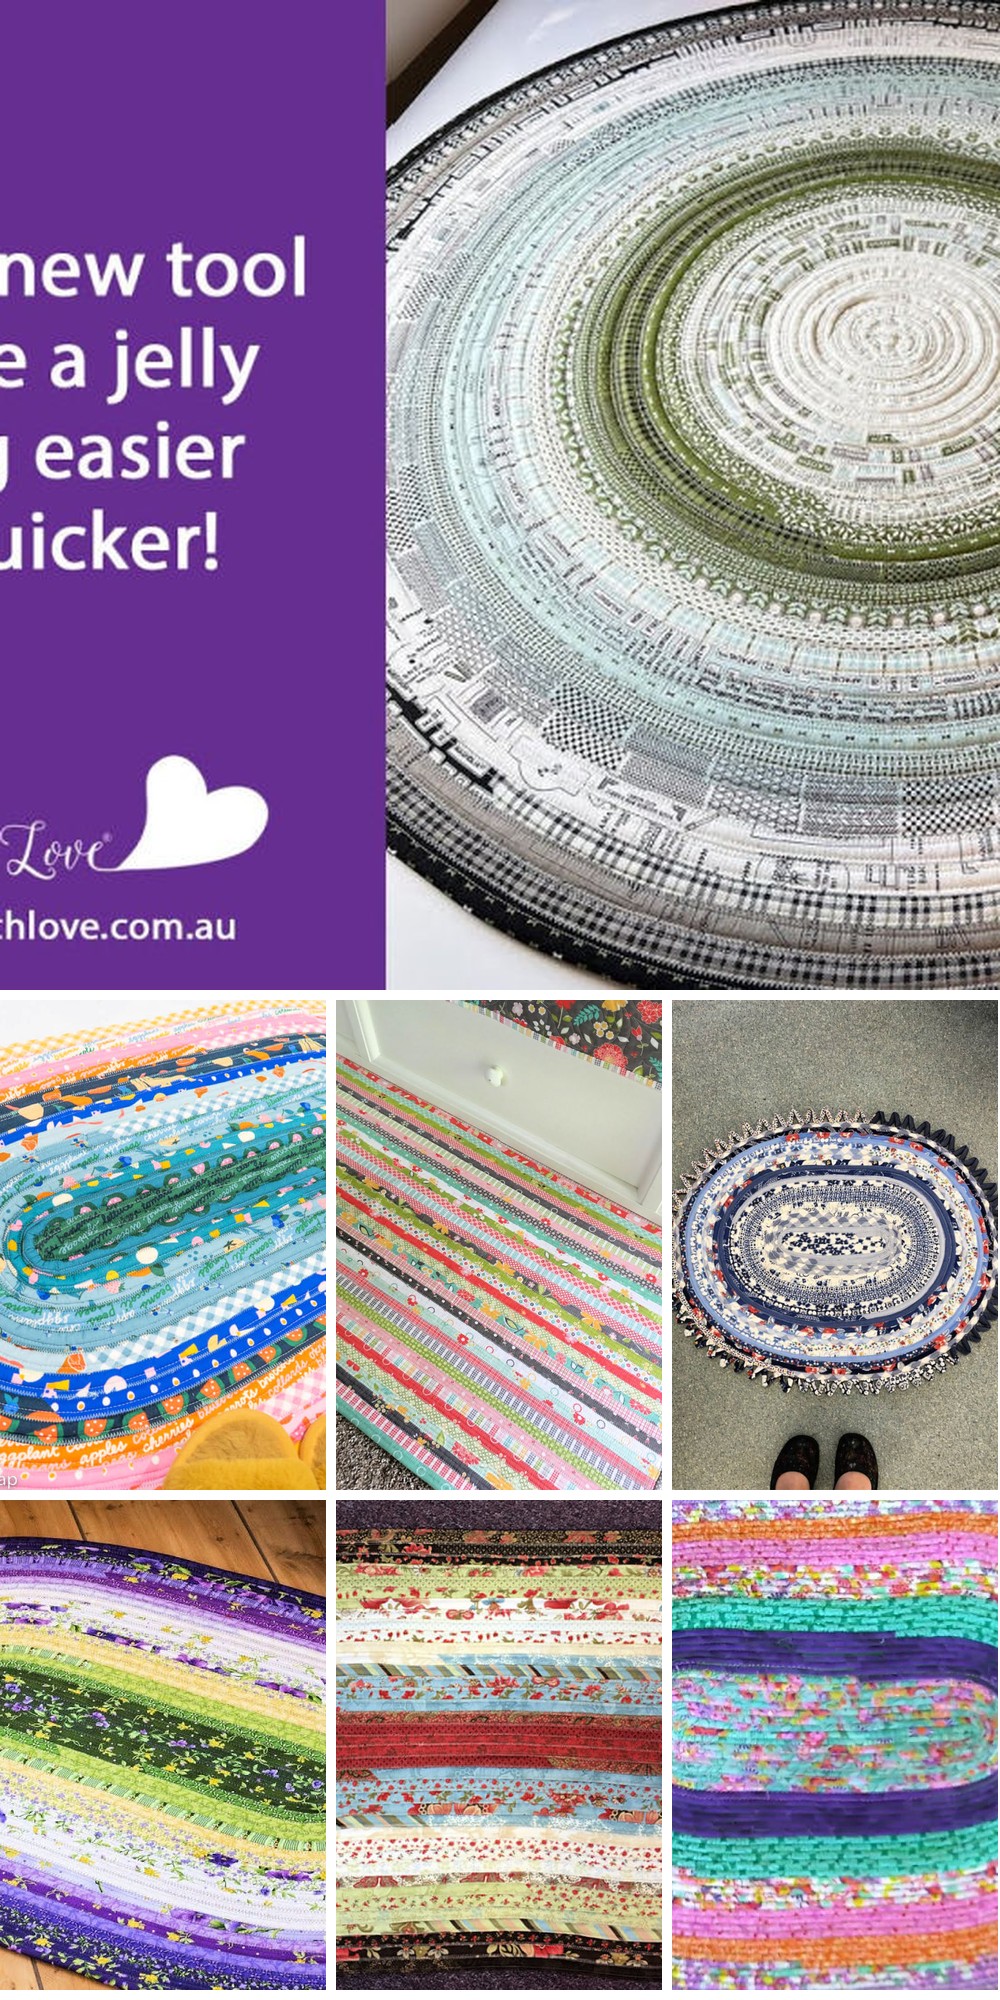
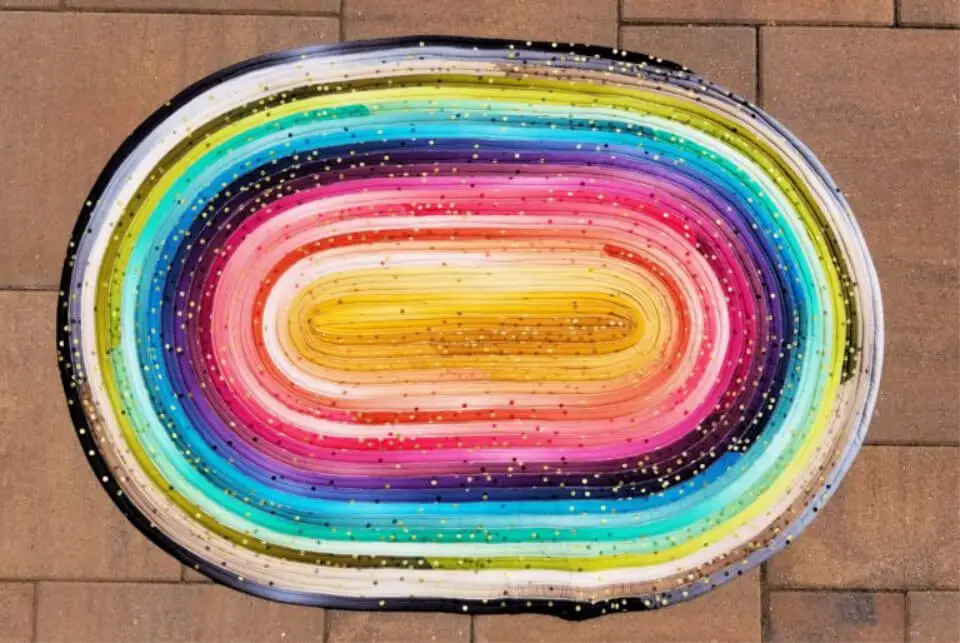
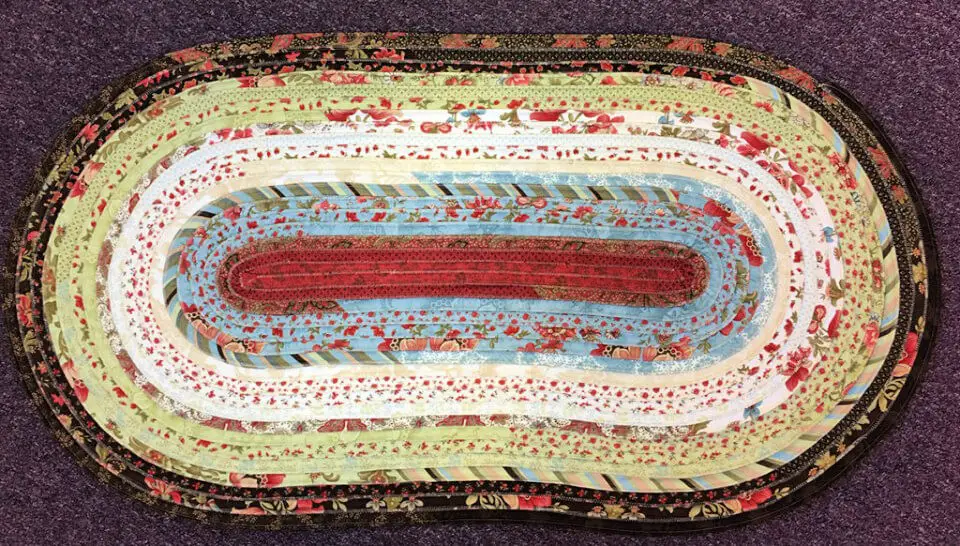
15 Free Jelly Roll Rug Patterns
Discover the art of crafting stunning Jelly Roll Rugs with ease, thanks to these 15 comprehensive and complimentary pattern guides. Each one features detailed, step-by-step instructions to help you create a breathtaking rug for your home.
How to Make a Jelly Roll Rug
Transform your vision of creating a Jelly-Roll Rug into a delightful DIY experience by unlocking the secrets to making it a reality. This guide will walk you through the fundamental steps, from selecting the ideal jelly-roll fabric to mastering the zig-zag stitch, providing the necessary confidence and knowledge to craft a unique handmade masterpiece. With a step-by-step tutorial that’s easy to follow and packed with valuable advice, you’ll be well on your way to creating a one-of-a-kind treasure. For additional creative insights and inspiration, visit Andrea Suzanne’s Quilts for a comprehensive look at the world of quilting.
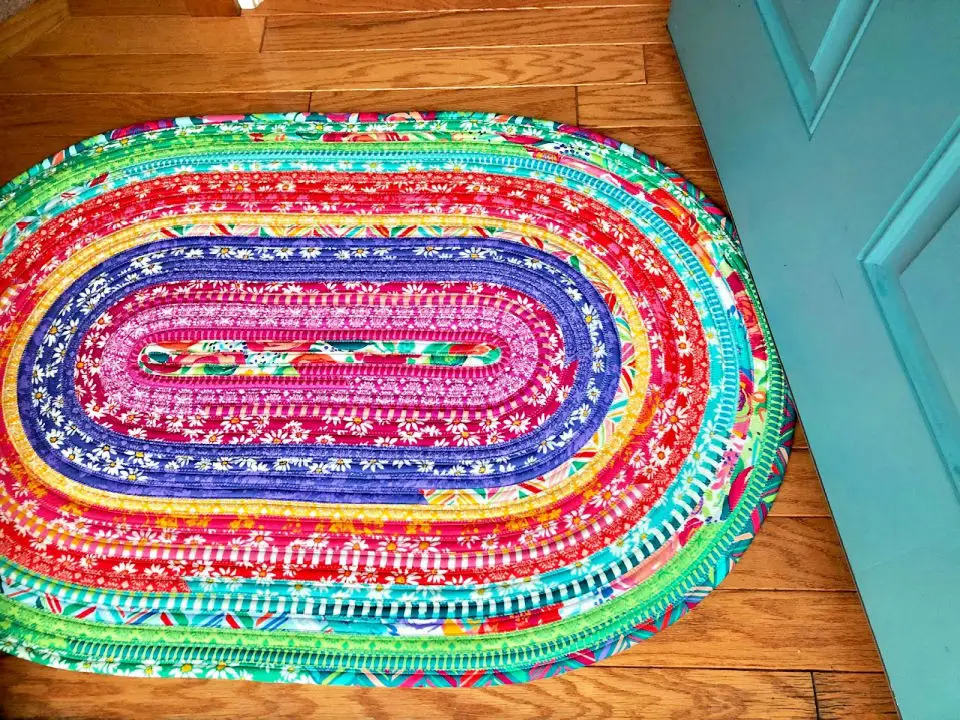
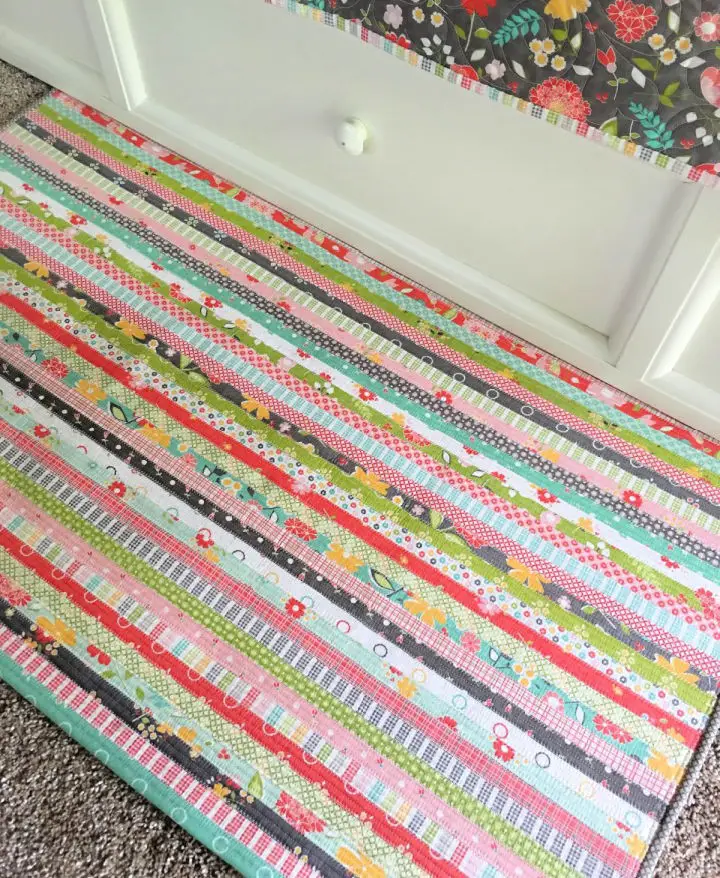
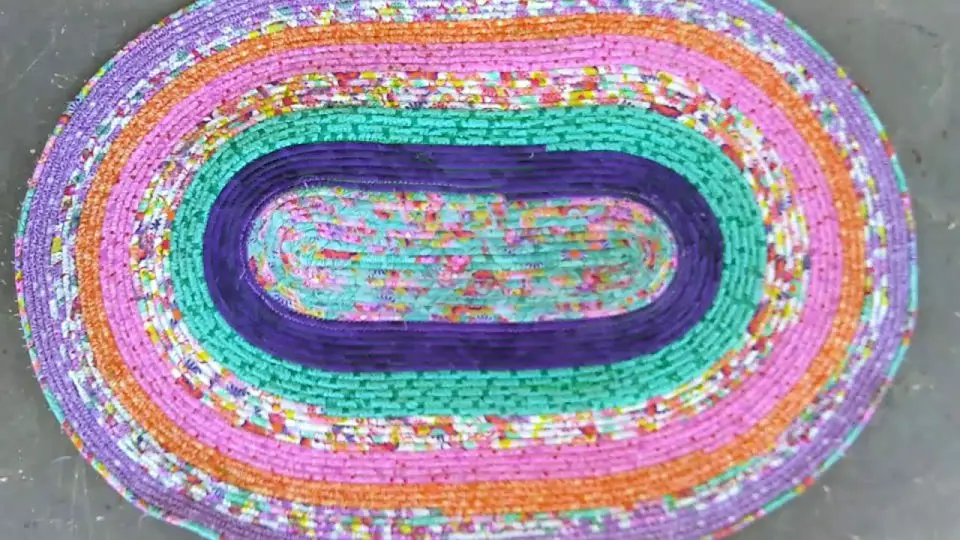
Sew Your Own Rectangle Jelly Roll Rug
Discover the thrill of crafting a unique jelly roll rug that reflects your personal style! At Make Whimsy, we’ll guide you through a simple process to create a colorful and cozy addition to any room using your existing fabric strips and batting. Whether you’re aiming for an oval or rectangular design, our step-by-step instructions will help you bring your vision to life. Plus, learn how to ensure your rug stays flat and washable for long-lasting enjoyment. Transform your space with a personal touch by diving into this engaging project today!
DIY Jelly Roll Rug – Step by Step Instructions
Get ready to add a personal touch to any room with Quilt Jane’s comprehensive guide on creating a one-of-a-kind Jelly Roll Rug. By following Romaquilts’ pattern, you’ll have a cozy and durable rug that showcases your creativity. Jane walks you through the process of selecting materials – including vibrant jelly rolls, batting, and thread – to ensure a beautiful and long-lasting final product. Her expert tips on sewing and finishing touches, such as adding a decorative border, make the project smooth sailing. Whether you’re a seasoned sewer or just starting out, this DIY endeavor is the perfect way to create a unique piece for your home while enjoying the journey.
Make Your Own Jelly Roll Rug
Embarking on a creative adventure, the Dizzy Quilter guides you through the captivating process of crafting your own Jelly Roll Rug. The journey begins with selecting vibrant fabrics that will bring out the rug’s unique charm. As you navigate the steps, from cutting batting strips to piecing together jelly roll strips, and then transforming them into a decorative ‘rope’, anticipation and excitement build. Despite the challenges, the assembly process is surprisingly quick and rewarding, leaving you with a sense of accomplishment and pride in your handiwork. Whether it’s a personalized touch for your home or a thoughtful gift, this project invites you to tap into your creativity and bring joy to those around you.
How to Sew a Jelly Roll Rug

Transform a humble jelly roll into a stunning home decor piece with the Jelly Roll Rug tutorial from Said With Love. This comprehensive guide takes you on a creative sewing journey, offering practical tips and personal anecdotes along the way. From starching corners for a smooth finish to bringing your own handmade rug to life, this project is as rewarding to make as it is to display in any room.
How to Make Your Own Jelly Roll Rug
Embark on a vibrant adventure in quilting by following this straightforward 9-step guide to creating a stunning jelly roll rug. Not only do these rugs add a touch of elegance to any room, but they also serve as a practical and easy-to-clean addition to your space. With just a few essential supplies like fabric jelly rolls, batting strips, a denim needle, and cotton thread, you can craft a one-of-a-kind piece that brings warmth and personality to your home. From selecting the perfect fabric strips to carefully joining and stitching them together, our comprehensive guide simplifies each step, ensuring a successful project outcome. For more inspiration and guidance, visit Quilting Daily to begin your rug-making journey today!
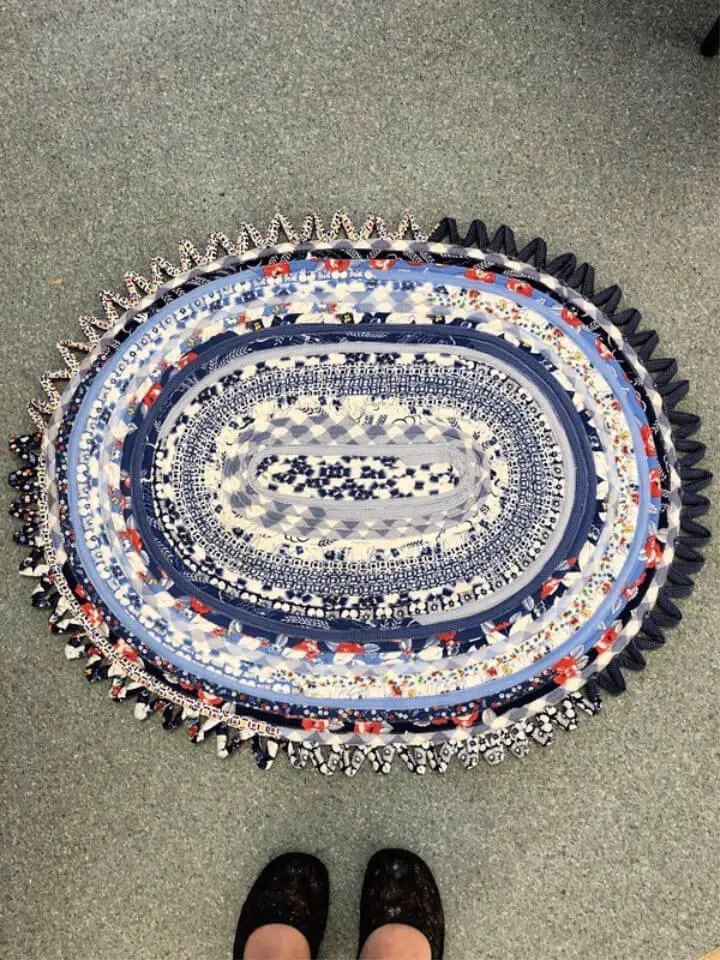
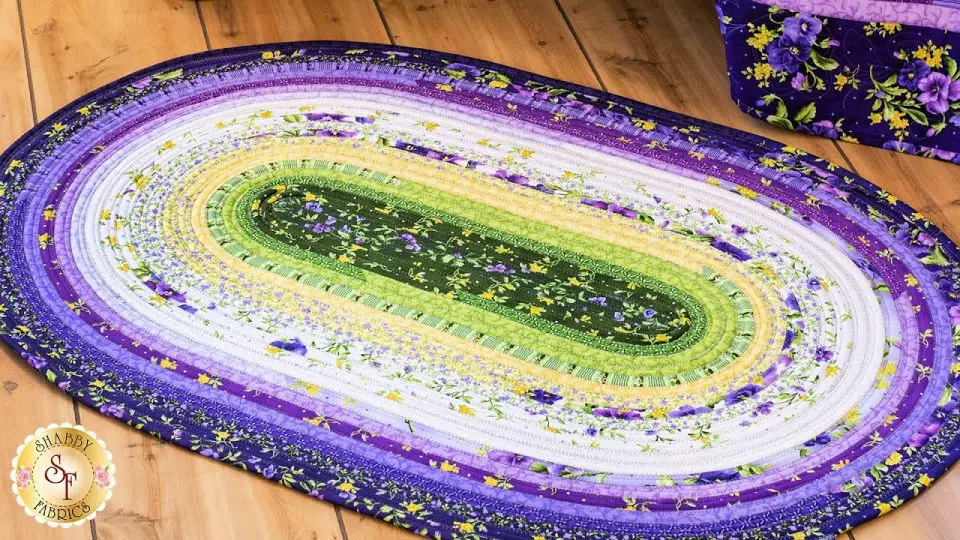
Homemade Jelly Roll Rug
Transform traditional quilting with the unbridled creativity of a jelly roll rug, an exciting project that seamlessly blends fun and functionality! Under the expert guidance of Roma Lambson from R. J. Designs, you’ll discover how to craft either an oval or rectangular rug, effortlessly navigating the simple instructions to ensure your success. With just a few basic supplies, including a jelly roll, batting, and some additional materials readily available at Carried Away Quilting, you can create a vibrant addition to any room or a thoughtful gift that’s sure to delight.
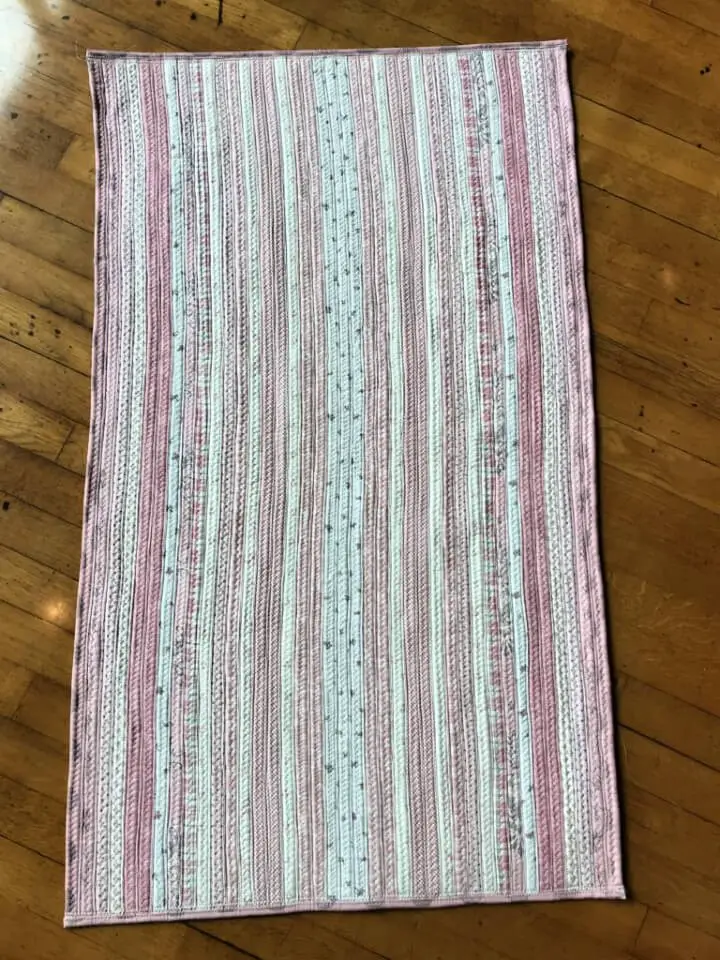
Easy DIY Rectangular Jelly Roll Rug
Transform your space with a personalized and cozy rectangular jelly roll rug, effortlessly crafted using this simplified tutorial. Starting from selecting the perfect fabric strips, this comprehensive guide breaks down each step into manageable parts, leading you through the process from start to finish. Whether you’re an experienced sewer or just looking for a unique home decor piece, this project is sure to delight and provide a sense of accomplishment as you add your own personal touch to any room.
DIY Jelly Roll Rug at Home
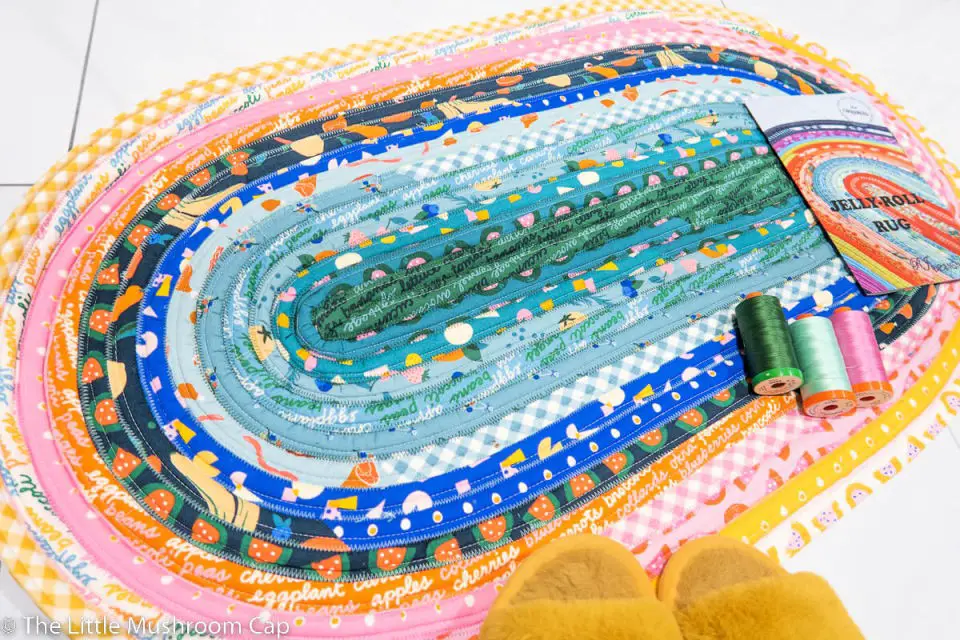
Add a pop of color and texture to your home with a handcrafted Jelly Roll Rug, a perfect project for upcycling leftover batting. This eco-friendly DIY endeavor is both charming and easy to make, thanks to The Little Mushroom Cap’s comprehensive guide. Whether you’re working with precut batting or scraps, the step-by-step instructions ensure a smooth and enjoyable crafting experience. Not only will you create a stunning home décor piece, but you’ll also be reducing waste and giving new life to materials. Start your Jelly Roll Rug adventure today and bring warmth and style to any room! The process is straightforward, making it an ideal activity for crafty individuals of all skill levels.
Quick and Easy Jelly Roll Rug
Transform your crafting experience with a game-changing tool that streamlines the process of creating Jelly Roll Rugs. This comprehensive guide on SaidWithLove takes you by the hand, breaking down the project into manageable steps. Whether you’re seeking to boost efficiency without compromising quality or simply looking for a unique way to add handmade charm to your home, this innovative solution is here to help. By combining cutting-edge tools with easy-to-follow instructions, you’ll be amazed at how quickly and effortlessly colorful jelly roll strips can be transformed into cozy rugs that exude warmth and personality.
Handmade Jelly Roll Rug Tutorial
Discover the versatility of jelly rolls as you transform them into a breathtakingly durable Jelly Roll Rug with Shabby Fabrics’ comprehensive sewing tutorial. This stunning piece is not only perfect for adding warmth to any room, but its machine washable nature and built-to-last design ensure it remains a treasured possession for years to come. With step-by-step instructions available on Shabby Fabrics, this project caters to sewers of all skill levels, offering an enjoyable and rewarding experience as you unleash the true potential of your jelly rolls and create a rug that harmoniously complements your home’s décor.
Make a Jelly Roll Rug
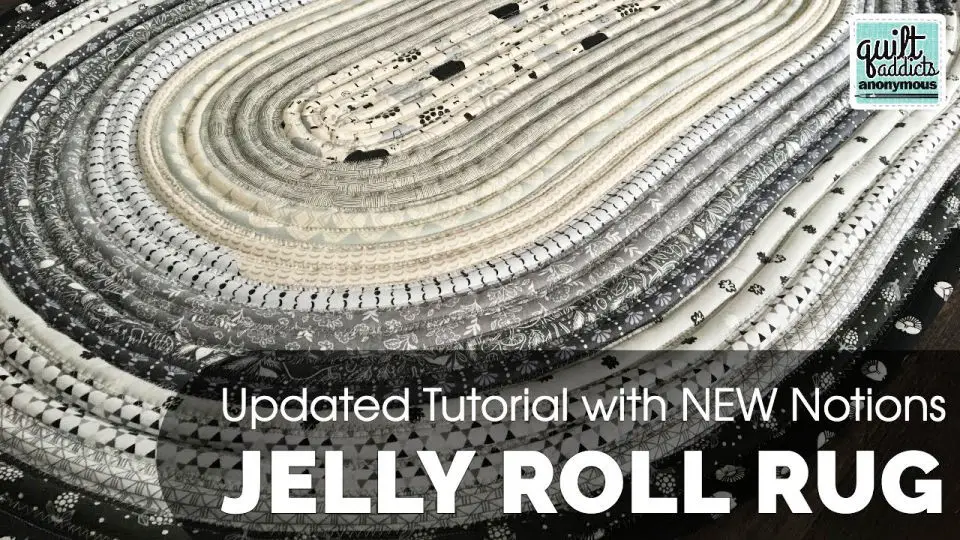
Unleash the secret to creating a flawlessly flat Jelly Roll Rug without breaking out the iron! Our comprehensive tutorial at Quilt Addicts Anonymous reveals game-changing techniques and expert-approved tools to simplify your project. From choosing the ideal materials to mastering stitching methods, this video guide guarantees a rug that remains smooth over time, making it a stunning addition to any home. Designed specifically for crafters who relish intricate projects, this instructive, practical, and captivating guide is sure to elevate your crafting skills and yield breathtaking results.
RJ Designs’ Jelly Roll Rug Ideas
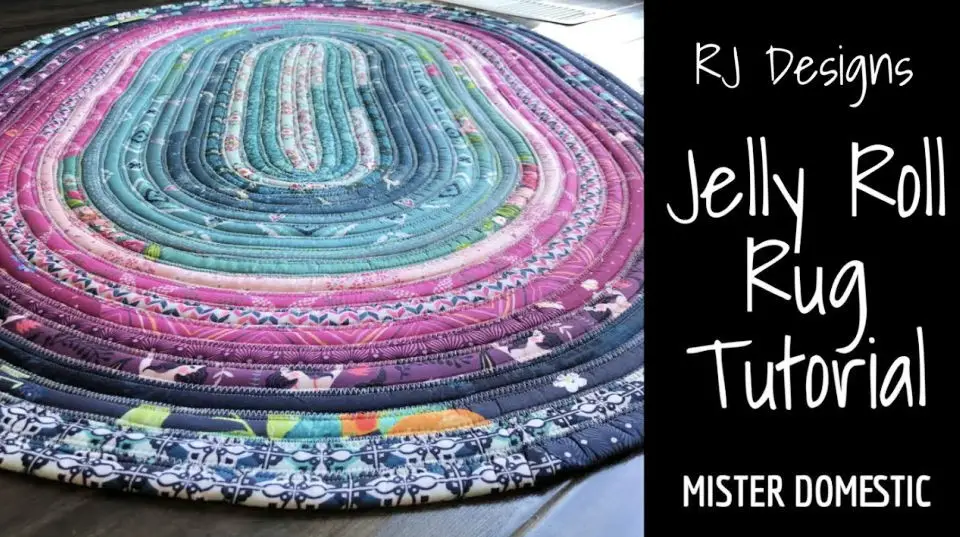
Unleash your creativity by embarking on a comprehensive journey of crafting the RJ Designs Jelly Roll Rug with Mx Domestic as your guide. This in-depth tutorial provides unparalleled insight, arming you with expert tips and tricks to navigate the process with ease and confidence. Every aspect, from fabric selection to the final stitch, is meticulously detailed to guarantee a stunning outcome. The video places special emphasis on pattern mastery, recognizing its pivotal role in achieving a flawless execution. As a treasure trove of knowledge for crafting enthusiasts seeking to infuse their decor with a personal touch, this tutorial is an absolute must-watch. Experience the vibrant world of jelly roll rug making by exploring the full tutorial here.
Simple DIY Jelly Roll Rug
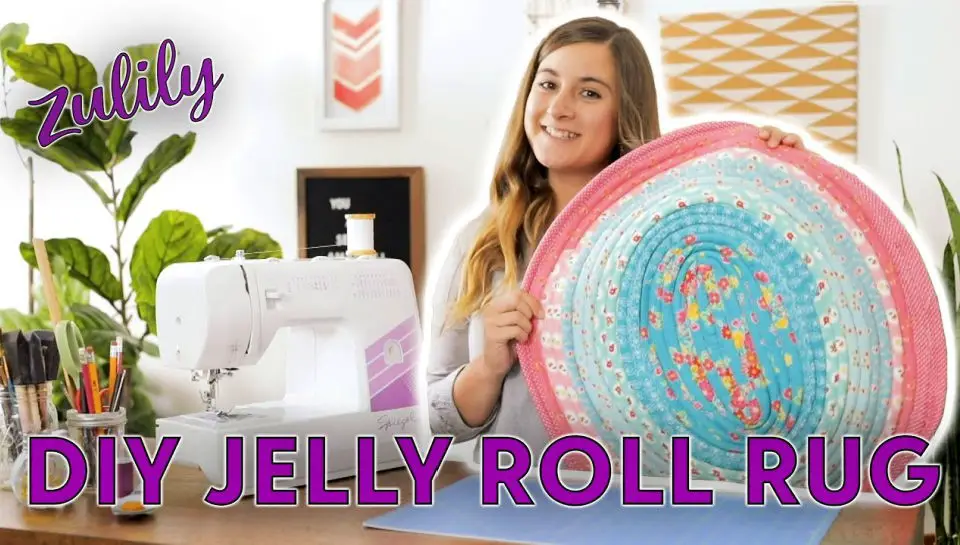
Embark on a creative journey by following a captivating Jelly Roll Rug tutorial! This engaging project is ideal for adding a personal touch to any room, thanks to the convenience of pre-sewn Riley Blake designs. By joining Zulily’s YouTube Channel, you’ll be guided through each step with clarity and enthusiasm. From carefully aligning felt batting to mastering the zig-zag stitch, this rug-making adventure promises to bring joy and satisfaction to crafters of all skill levels.
Making a Jelly Roll Clothesline Rug
Transform any room with the cozy charm of a handmade Jelly Roll ‘Clothesline Rug.’ This easy-to-follow DIY project turns simple materials into a stunning and functional piece of home decor. By following our step-by-step guide, you’ll learn how to wrap, sew, and configure your rug for a unique finish that’s both attractive and durable. If you’re ready to get creative, check out Olmzara’s Calm for a detailed video tutorial. This project is perfect for crafters who love to add personal touches to their living space.
Conclusion
As you wrap up this creative endeavour, remember that crafting a jelly roll rug is a truly enriching experience. It’s a project that harmoniously blends creativity with practicality, allowing you to create something both functional and unique for your space. With these 15 free patterns at your disposal, you’re well-equipped to embark on an adventure that not only enhances your home decor but also expands your crafting skills. Each stitch is a testament to the beauty of handmade craftsmanship, whether it’s selecting the ideal jelly roll or navigating the intricacies of construction. As you work through each phase of this project, you’ll discover opportunities to learn, grow, and develop your own distinct style. So, gather those fabrics and get ready to craft something truly special – a one-of-a-kind home decor piece that reflects your personality!
