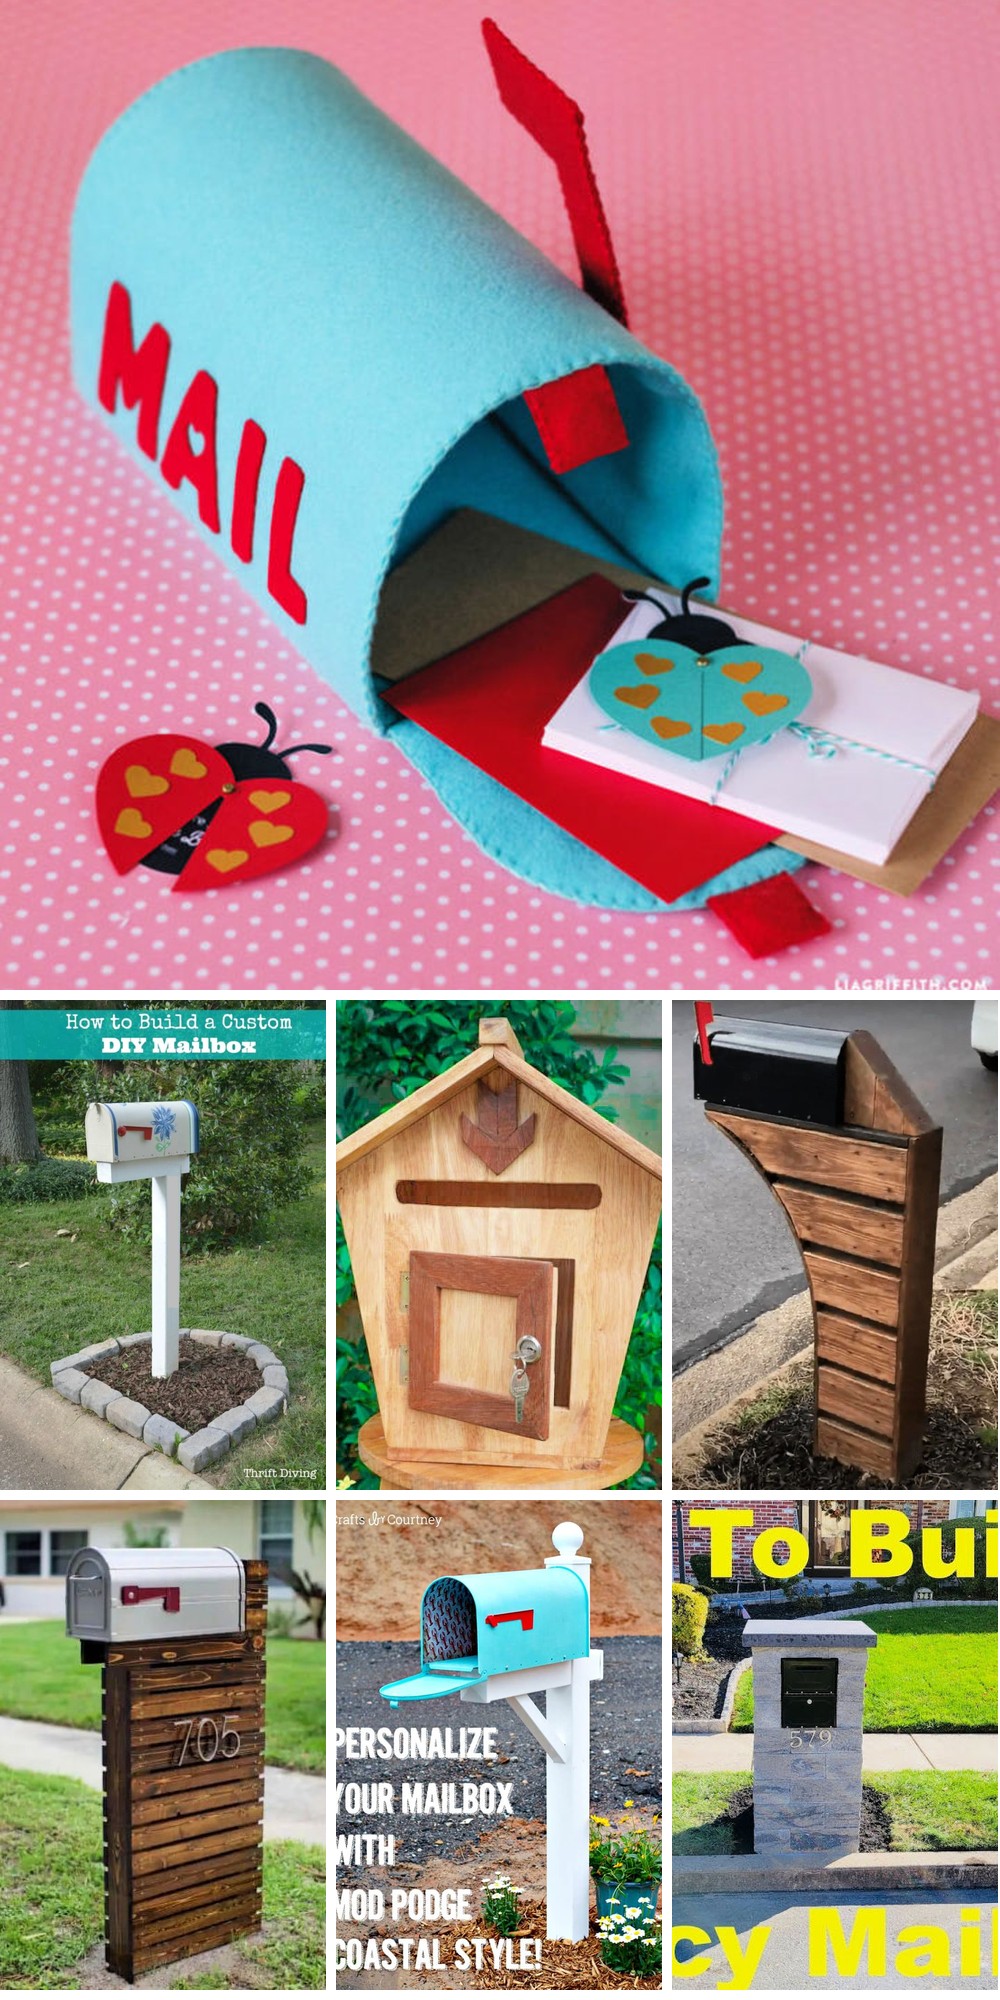
Crafting a personalized mailbox is a fulfilling DIY endeavor that not only boosts your home’s exterior appeal but also reflects your individual style. With an abundance of 25 creative plans and ideas, you’ll discover a wealth of options to suit every skill level and design preference, ranging from classic to modern designs. These tailored guides will empower you to construct a mailbox that truly stands out, catering to your unique needs and tastes.
By embarking on this DIY project, you’ll have the opportunity to exercise your creativity and woodworking skills, ultimately producing a one-of-a-kind, functional piece for your home. A comprehensive step-by-step guide, covering everything from initiation to finishing touches, ensures that you’re equipped with all the necessary information to successfully complete your project.
Let’s delve deeper into how you can build a mailbox that serves as both a practical tool and a conversation starter.
Why Build Your Own Mailbox?
When it comes to building your own mailbox, the benefits are multifaceted and cater to both your creative inclinations and practical requirements. On one hand, you’ll have the opportunity to infuse your personal style and make a statement about your home’s unique character. On the other, you’ll be able to save money by repurposing materials or using cost-effective methods. This DIY project also offers a chance to develop new skills, whether it’s woodworking, painting, or stonework, which can translate to other creative pursuits. Furthermore, customizing your mailbox allows for precise tailoring to fit your specific needs, whether that means adding extra storage, incorporating design elements that match your home’s aesthetic, or simply creating a size and shape that suits your taste. The sense of satisfaction that comes from creating something with your own hands is unparalleled, and the possibility of sparking conversations with neighbors about your creative endeavor can even foster a sense of community connection. Ultimately, building your own mailbox is not just about constructing a receptacle for your mail; it’s about crafting an integral part of your home’s identity.
How to Make a Mailbox – Step by Step
Discover the joy of crafting your own mailbox from the ground up. With our comprehensive, easy-to-follow instructions, you can elevate your home’s exterior and add a personal touch to your front yard. Let us walk you through the process, and get ready to take pride in your new DIY creation!
Getting Started
When embarking on a mailbox renovation project, it’s essential to begin by evaluating the current state of your existing mailbox. Assess its condition and identify the specific changes you wish to implement. This crucial step will help determine whether a new mailbox installation is required or if improvements can be made to the existing one, ultimately guiding the direction of your modernization efforts.
Planning and Preparation
When planning the design of your mailbox installation, consider the overall dimensions and placement within your yard. Aim for a height between 41 and 45 inches above grade level and position it about 6 to 8 inches back from the curb to comply with standard regulations. This will not only ensure a secure installation but also maintain visual appeal.To get started, gather essential materials such as concrete for the base, rebar for added strength, cedar wood for the exterior finish, a modern mailbox design, and address numbers. For the construction process, you’ll need a variety of tools including shovels, saws, levels, drills, and possibly a circular or track saw for precise cutting.Before pouring the concrete base, prepare a mold that suits your specific needs. If using a 2×8 lumber, rip it down to a more manageable size. For example, if you’re building a 24×12 inch base, cut two long pieces to 24 inches and two short pieces to 15 inches. Assemble the mold, taking into account the thickness of your material for a seamless installation.
Building the Base
To begin, excavate a hole that matches the dimensions of your mold. Ensure the base is level and stable by adding paver base if necessary. Next, insert rebar into the mold to provide concrete reinforcement. Pour in quick-setting concrete, taking care to fill the entire mold. Finally, smooth out the surface using a trowel, achieving a precise and even finish.
Installing the Post and Mailbox
After the concrete has fully set, carefully position the 4×4 post in its base. The height of the back post will depend on your design specifications, so take this opportunity to plan and determine the optimal level. Once you’ve settled on a height, secure the post firmly into place.Next, prepare your mailbox for installation by attaching a wooden base to the bottom. This will provide a solid foundation for attaching the mailbox to the 4×4 post.To give your mailbox its exterior finish, cut and sand cedar pieces to create the desired shape. Secure these pieces around the post, leaving small gaps between each section to achieve a sleek, modern aesthetic. Use playing cards as a guide to ensure even spacing throughout.
Landscaping and Finishing Touches
To elevate the curb appeal of your home, start by updating the address visibility. This can be achieved by incorporating modern numbering on your mailbox. For optimal alignment, consider utilizing a laser level to ensure precise placement. Additionally, create a visually appealing surrounding landscape by planting suitable flora or arranging decorative rocks around the mailbox. These small touches can significantly enhance the overall design and curb appeal of your property. If you desire to extend the visibility of your house numbers beyond daylight hours, consider installing solar-powered lighting above the address numerals. This feature not only provides added illumination but also serves as an eco-friendly solution.
Maintenance Tips
When reviewing your post and mailbox, be sure to inspect them regularly for any visual cues of wear or damage. It’s equally important to treat the cedar wood components every year to preserve their natural beauty and longevity.
Video Tutorial
To further enhance your understanding, I recommend watching this video tutorial on YouTube that provides a step-by-step guide to creating a modern mailbox. The visual clarity it offers complements the written instructions found here, offering an alternative perspective for better comprehension.
Crafting a modern mailbox can have a profound impact on the curb appeal of your home, transforming it from ordinary to extraordinary. This project not only serves a functional purpose but also allows you to express your personal style. With the right tools, materials, and creative flair, you can create a unique feature that showcases your home’s exterior in the best possible light.
FAQS On DIY Mailbox Plans and Ideas
Embarking on a DIY mailbox project can be an enjoyable and fulfilling endeavor. To assist you in creating a one-of-a-kind mailbox, I’ve compiled a list of frequently asked questions that address common concerns and provide valuable insights to set you on the right path.
What materials do I need to build a DIY mailbox?
When embarking on a mailbox-building project, it’s essential to gather the right materials. The specific items needed will depend on the type of mailbox you’re creating. Some common materials include wood – cedar is a popular choice due to its durability and visual appeal – as well as concrete for the base, rebar or metal posts for added support, and paint or sealant for weatherproofing. Additionally, having a set of tools such as saws, drills, screws, and hammers on hand will ensure your project runs smoothly.
How do I ensure my DIY mailbox complies with postal regulations?
To guarantee compliance with postal regulations, it’s essential to consider three key factors when positioning your mailbox. Firstly, ensure it is situated between 41 and 45 inches above the ground level. Secondly, position it a safe distance of 6 to 8 inches from the curb to prevent damage or obstruction. Thirdly, select a size that can comfortably accommodate your daily mail volume without becoming too cluttered or overwhelming. Additionally, don’t forget to check with your local post office for any specific regulations that may apply in your area, as these can vary depending on location and jurisdiction.
Can I use recycled materials to build a mailbox?
When it comes to creating an eco-friendly mailbox, one of the most effective ways to get started is by utilizing recycled materials. Old pallets, scrap wood, and even metal scraps can be transformed into a stunning mailbox that not only saves you money but also reduces waste. Just remember to select materials that are sturdy enough to withstand the harsh outdoor conditions, ensuring your mailbox remains functional and aesthetically pleasing for years to come.
How can I personalize my DIY mailbox?
Transforming your mailbox from a mundane to a magnificent feature is easier than you think. You can do this by injecting personality into its design through various means, such as boldly painting it in vibrant colors or intricate patterns. Alternatively, add decorative elements like ornate metalwork or mosaic tiles to give it an artistic flair. For those who prefer a more rustic look, carving or etching unique designs onto the wood is also a great option. Additionally, you can express your personal touch by attaching house numbers or name plates in creative ways that reflect your style.
What are some maintenance tips for my DIY mailbox?
To maintain the visual appeal of your mailbox, it’s essential to perform routine maintenance tasks. Start by inspecting it for any signs of damage, such as cracks or dents, and make the necessary repairs to prevent further deterioration. Next, apply a fresh coat of paint or sealant to protect the mailbox from the elements. This will not only enhance its appearance but also help extend its lifespan. Additionally, ensure that all screws and hardware are tightened securely to prevent them from coming loose over time. Finally, establish a cleaning routine to regularly remove dirt and grime, keeping your mailbox looking great for years to come.
How can I make my mailbox stand out?
To elevate your mailbox’s visual appeal and make it truly eye-catching, consider implementing a few simple yet effective tweaks. For instance, you can utilize bold, contrasting colors to create a striking visual display. Additionally, incorporate solar-powered lights to illuminate your mailbox at night, making it stand out even in the dark. Further, consider landscaping around the mailbox with vibrant flowers or decorative stones that complement its design. Finally, opt for a unique mailbox design that reflects your personality or the style of your home, adding an extra layer of visual interest.
Is building a DIY mailbox a good project for beginners?
Building a DIY mailbox can be an excellent introduction to DIY projects for those just starting out. Many designs are straightforward, requiring only basic tools and skills. This type of project allows you to develop your DIY abilities while enhancing your home’s curb appeal. Begin with a simple design and gradually move on to more complex projects as you gain confidence and expertise. By answering these frequently asked questions, you’re now prepared to start your own DIY mailbox project. The key is to have fun and allow your creativity to shine through in the final product.
How to Build a Mailbox With Solar Light
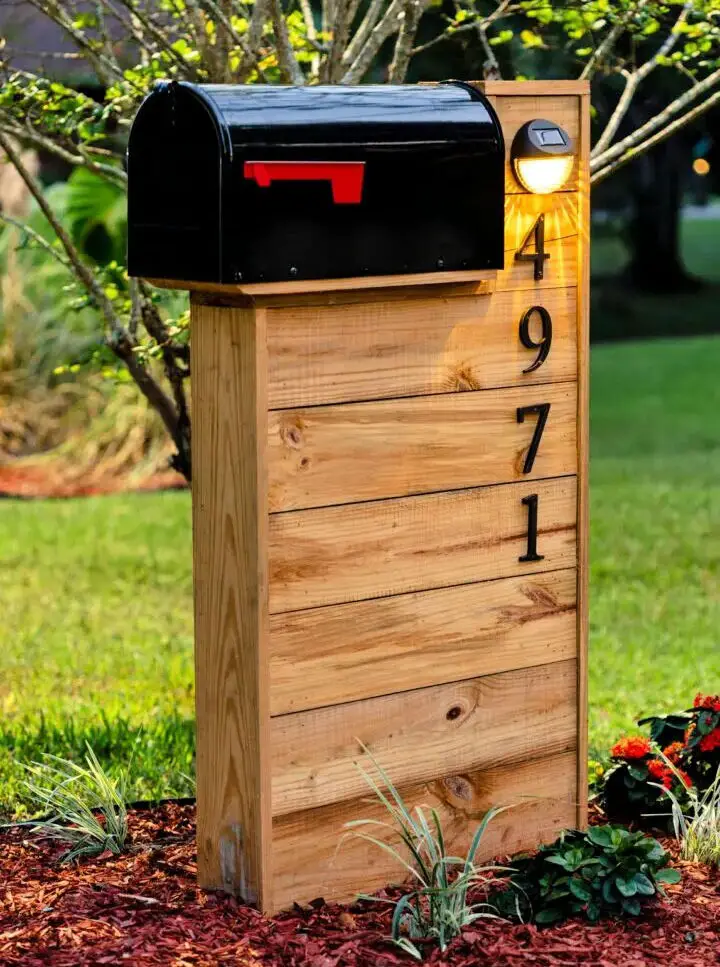
Transform the exterior of your home by crafting a one-of-a-kind DIY mailbox that harmoniously blends form and function. By selecting a wood tone that complements your outdoor decor, you can create a cohesive look that enhances your property’s curb appeal. To add a modern touch, incorporate a sleek solar light that provides ambiance and functionality. The process of building this unique mailbox is easier than you think, thanks to detailed guidance on the ideal height and secure fastening with concrete. If you’re ready to embark on this creative adventure, head over to Kippi at Home for an in-depth tutorial that will turn your ordinary mailbox into a striking feature that showcases your personal style.
Making Your Own Santa Mailbox
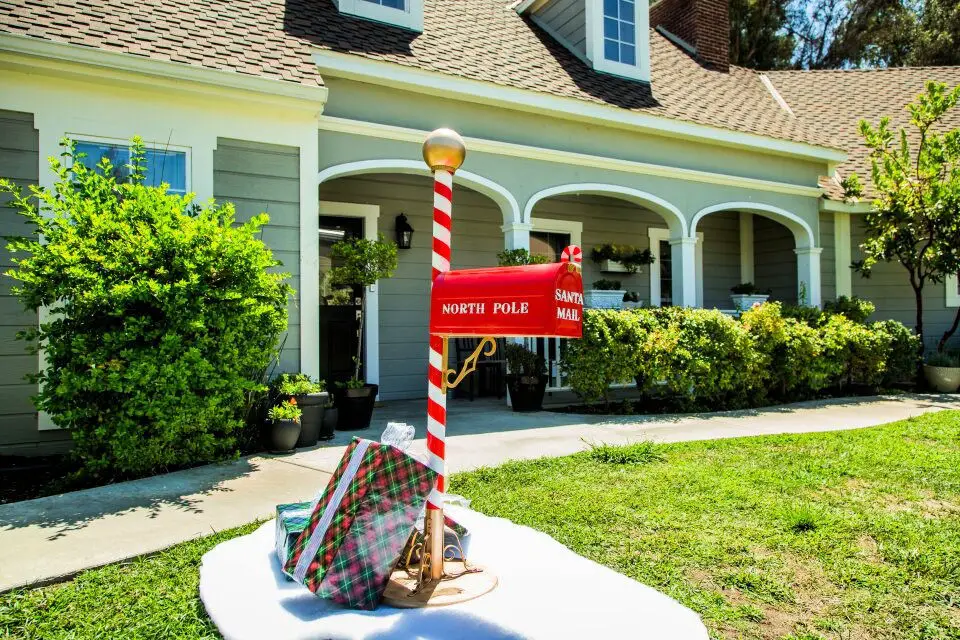
This holiday season, bring the magic of Christmas to your home by crafting a DIY Santa Mailbox with Paige Hemmis’ step-by-step guide. A fun project for families to work on together, this craft combines simple materials like PVC pipe, plywood, and paint to create a festive mailbox perfect for sending letters to Santa. The end result is not only a functional keepsake but also a unique addition to your holiday decor. With its ease of construction and personalized touch, this DIY project is sure to bring joy and cheer to the entire family.
DIY Lattice Mailbox – Step by Step Instructions
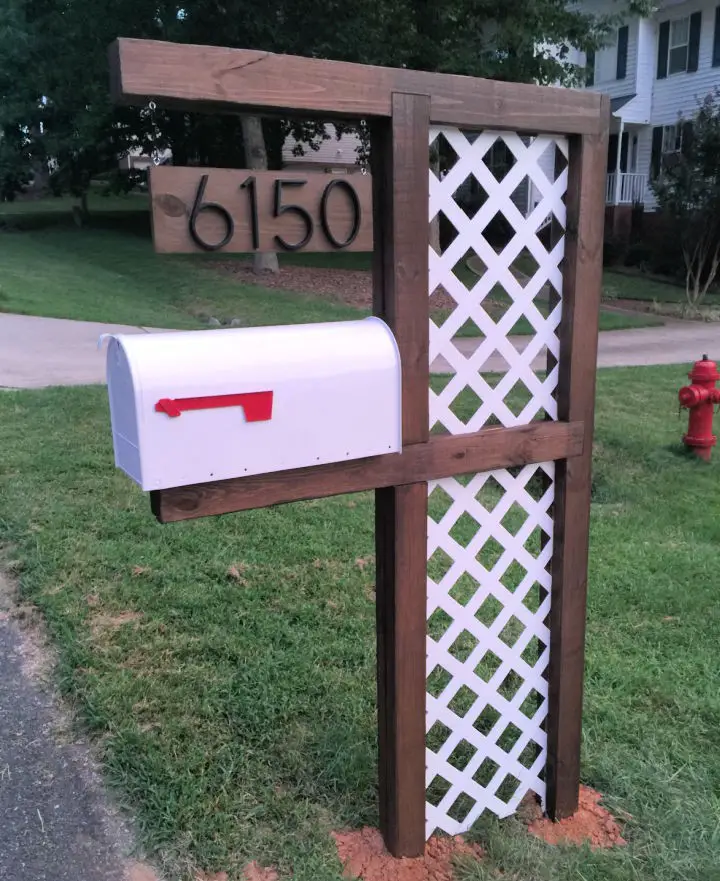
Transform your mailbox into a beautiful focal point that harmonizes with your home’s style by embarking on our DIY Lattice Mailbox adventure at MyAccentProneLife.com. This comprehensive guide takes you through the process of crafting a contemporary yet timeless mailbox that seamlessly blends modern flair with your existing lattice fence’s classic charm. A detailed materials list, essential tools, and easy-to-follow step-by-step instructions come together to guarantee a functional and visually stunning addition to your home’s exterior.
How to Make a Custom Mailbox
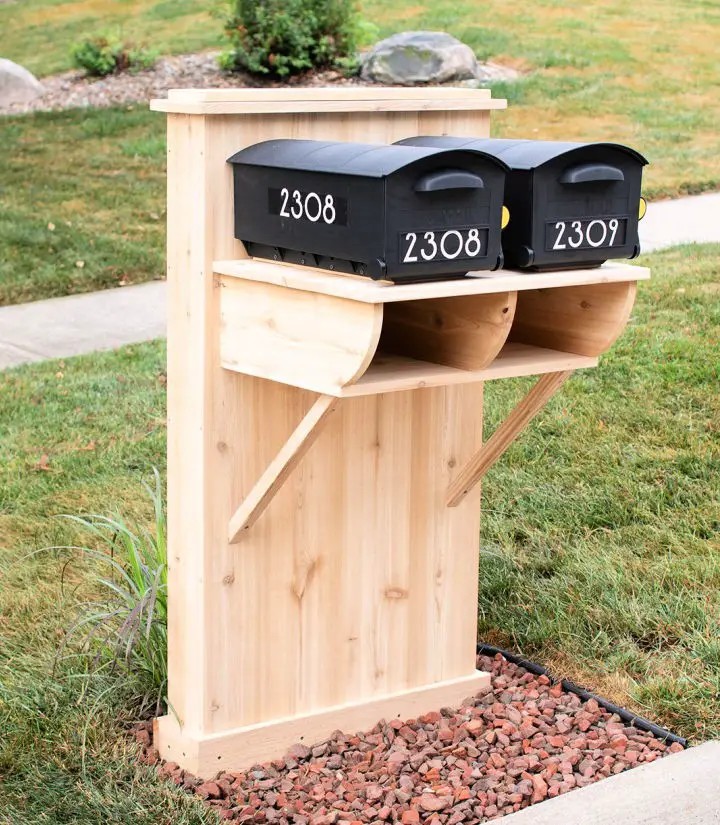
Elevate your curb appeal without breaking a sweat with this DIY-friendly mailbox design. By incorporating a dual-mailbox setup with a convenient newspaper slot, you’ll not only add a touch of style but also boost practicality. Begin by excavating a hole that’s no deeper than two feet if you don’t already have a post in place. Position your mailbox just 6 to 8 inches from the curb, ensuring the door panel sits at an ideal height of 41 to 45 inches. Don’t forget to add clear and legible address numbers on the front of the box, measuring at least 1 inch tall for maximum visibility. For a comprehensive guide on crafting a stylish mailbox station, head over to Better Homes & Gardens and discover how you can make a lasting first impression.
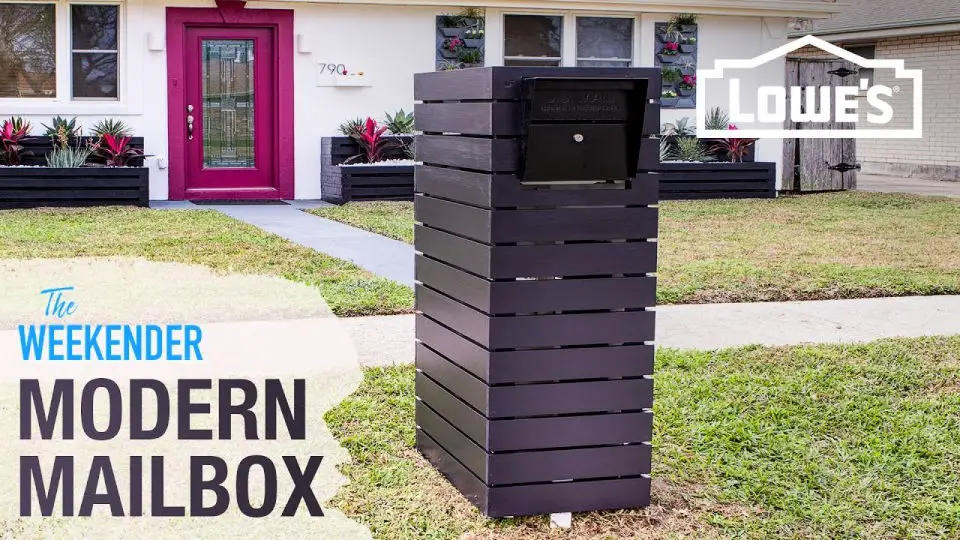
Modern DIY Wood Mailbox With Concrete Slab
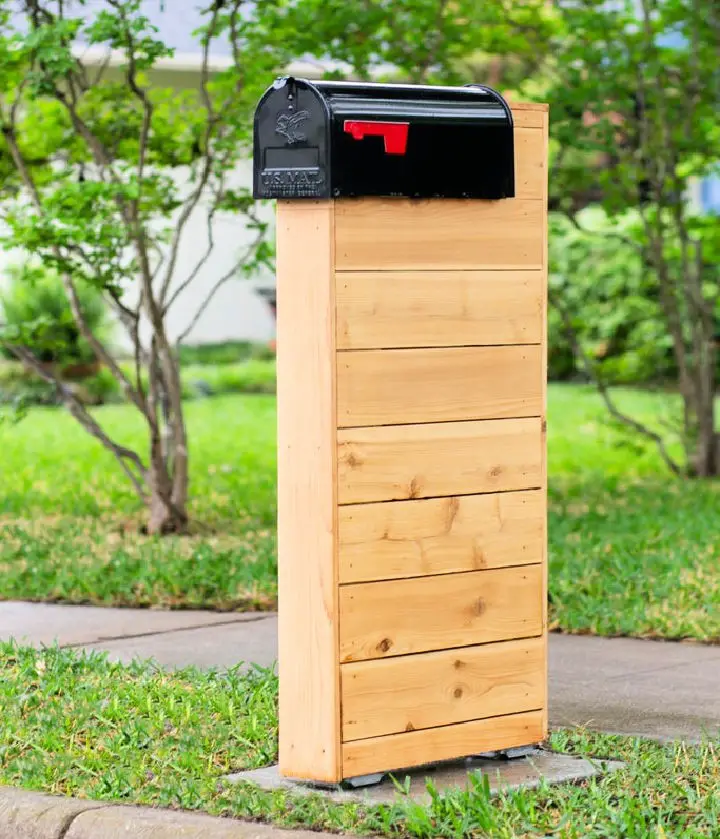
Transform your home’s exterior with a custom-built modern mailbox that combines functionality with style. Begin by crafting a solid foundation using concrete, then utilize durable cedar wood to create a one-of-a-kind piece that will withstand the elements and add curb appeal to your property.
As you navigate the construction process, from setting post anchors in freshly poured concrete to attaching elegant cedar slats for a sleek finish, each step ensures a final product that exudes sophistication. To top it off, apply a protective coating to preserve the natural beauty of the wood and extend its lifespan. With the right tools and materials at your disposal, you’ll be able to create a modern masterpiece that will elevate your home’s exterior and serve as a testament to your DIY skills.
To get started on your mailbox-building journey, head over to Instructables for a comprehensive guide and video tutorial that will walk you through the process with ease.
How to Make Your Own Mailbox
Transform the exterior of your home with a stylish mailbox that exudes curb appeal. Our comprehensive guide takes you through each stage of construction, from selecting the perfect materials to applying the final coat of paint. With step-by-step instructions and expert tips on techniques like precision cutting, gluing, and clamping, you’ll be able to create a sturdy and attractive mailbox that’s sure to impress your neighbors. To ensure a flawless finish, we’ve also included valuable advice on removing excess glue and making pocket holes. As you add personalized trim and apply the finishing touches, you’ll be proud of the end result. Ready to elevate your home’s exterior? Dive into our in-depth tutorial and get started today!
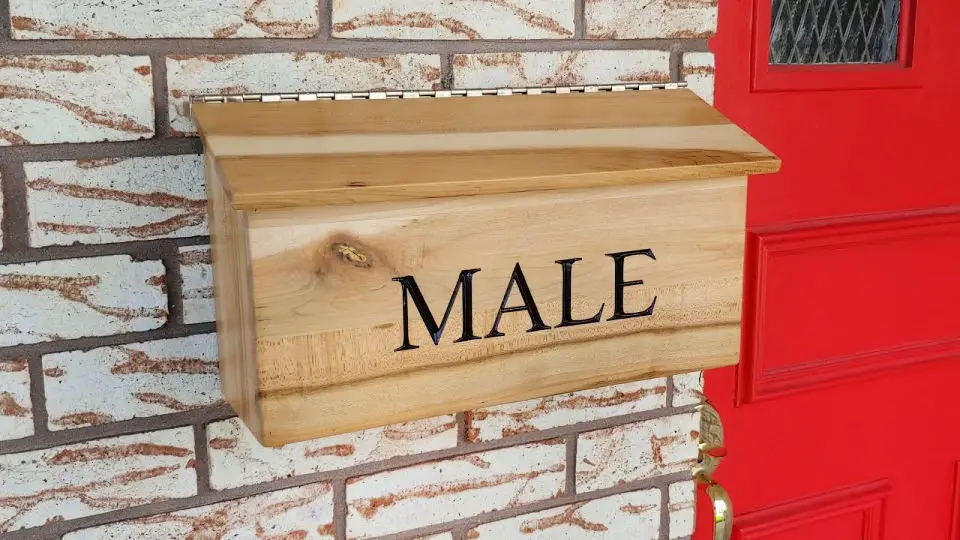
Easy DIY Wooden Mailbox
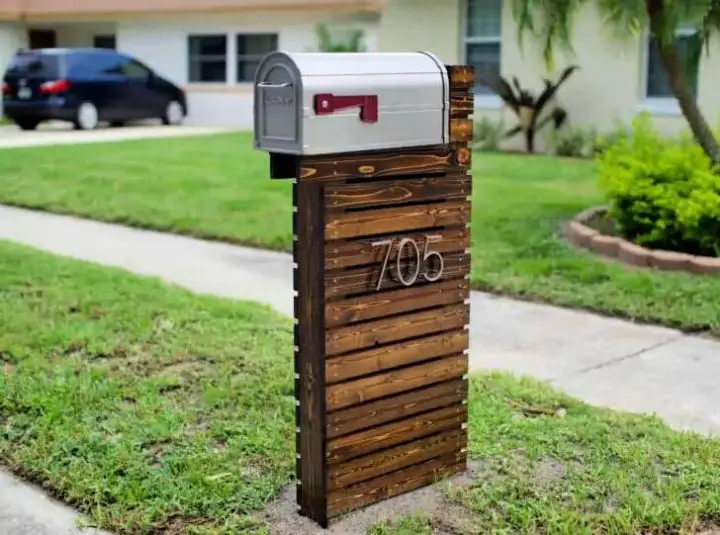
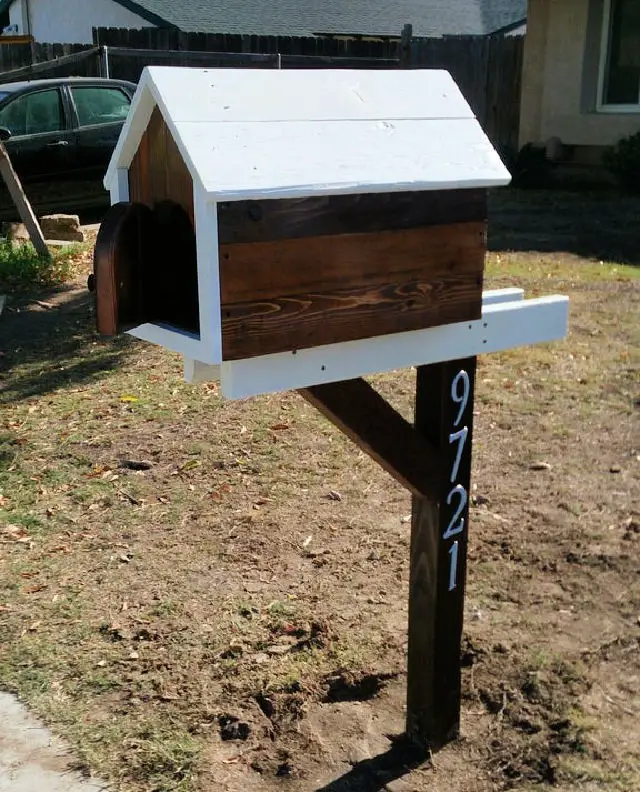
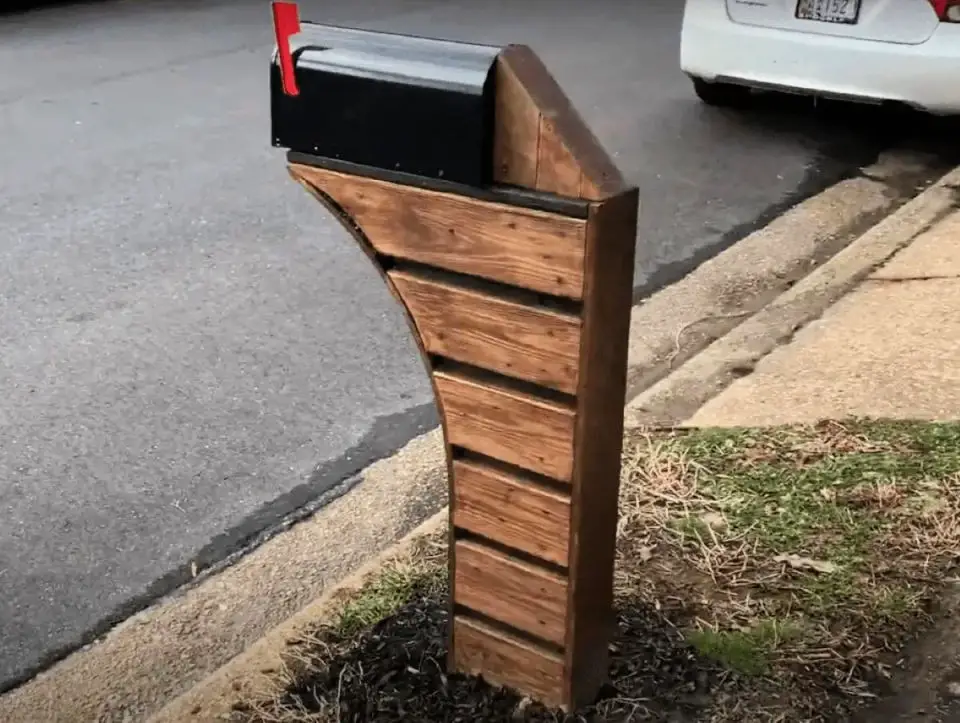
Transform your home’s exterior with a charming DIY wooden mailbox that exudes rustic charm. This straightforward guide takes you through the process of crafting a beautiful mailbox using cedar wood and fence posts, perfect for those with limited woodworking experience. Start by cutting your wood to size and sanding it down to create a smooth surface. Next, add a rich walnut finish by applying stain, followed by assembling the pieces into a sturdy construction. Give your creation a personal touch by adding stylish house numbers, securing them in place with post spikes. For the complete tutorial, visit 1001 Gardens for an engaging and accessible project that’s sure to elevate your home’s curb appeal.
Building Your Own Pallet Mailbox
Discover the art of transforming your entrance with a one-of-a-kind rustic flair! By following our comprehensive step-by-step guide on Instructables, you can effortlessly build a pallet mailbox that not only enhances your home’s curb appeal but also proudly showcases your DIY prowess. Our engaging tutorial is designed to lead you through the process of repurposing pallet wood into a charming mailbox, complete with simple instructions, helpful tips, and expert guidance. With this rewarding project, you’ll be able to create a personalized mailbox that stands out from the crowd, reflecting your unique style and creativity.
Simple DIY Custom Mailbox
Transforming your home’s exterior into a stunning feature, building a custom mailbox offers a unique opportunity to express your personal style and get creative with your hands. This DIY project not only allows you to add a touch of individuality to your outdoor space but also results in a functional piece that will undoubtedly capture the attention of passersby. With an array of materials at your disposal, you’re free to design a mailbox that perfectly complements your home’s architecture and aesthetic. For a comprehensive guide on how to bring your custom mailbox vision to life, head over to Storables.com for inspiration and guidance.
Pallet Farmhouse Mailbox Building Plan
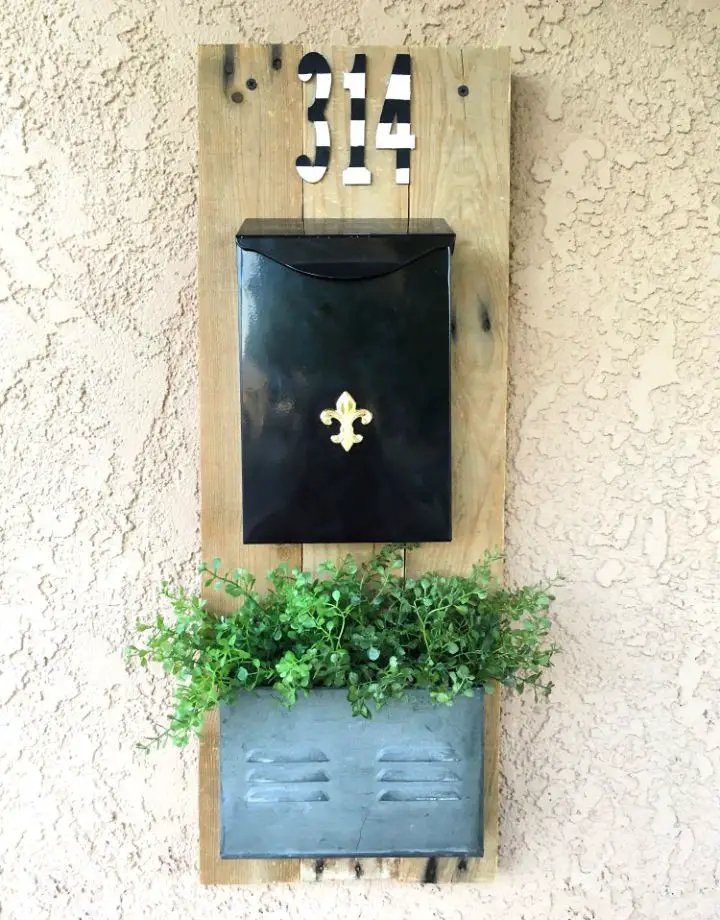
Give your mailbox a rustic makeover with the enchanting DIY pallet farmhouse mailbox guide from Six Clever Sisters. Perfect for those seeking to add a touch of charm to their outdoor space, this project is ideal for enhancing your home’s curb appeal without making permanent changes.
Follow a series of simple steps using easily accessible materials like pallet wood, a mailbox from Amazon, metal tin, greenery, and wooden numbers. Add a personal touch by customizing with acrylic paint for a unique finish that reflects your personal style.
This project is perfect for sprucing up with seasonal greenery without worrying about making long-term changes to your mailbox. Dive into this engaging and creative guide to transform your mailbox from drab to fab.
DIY Mailbox With Finger Joints
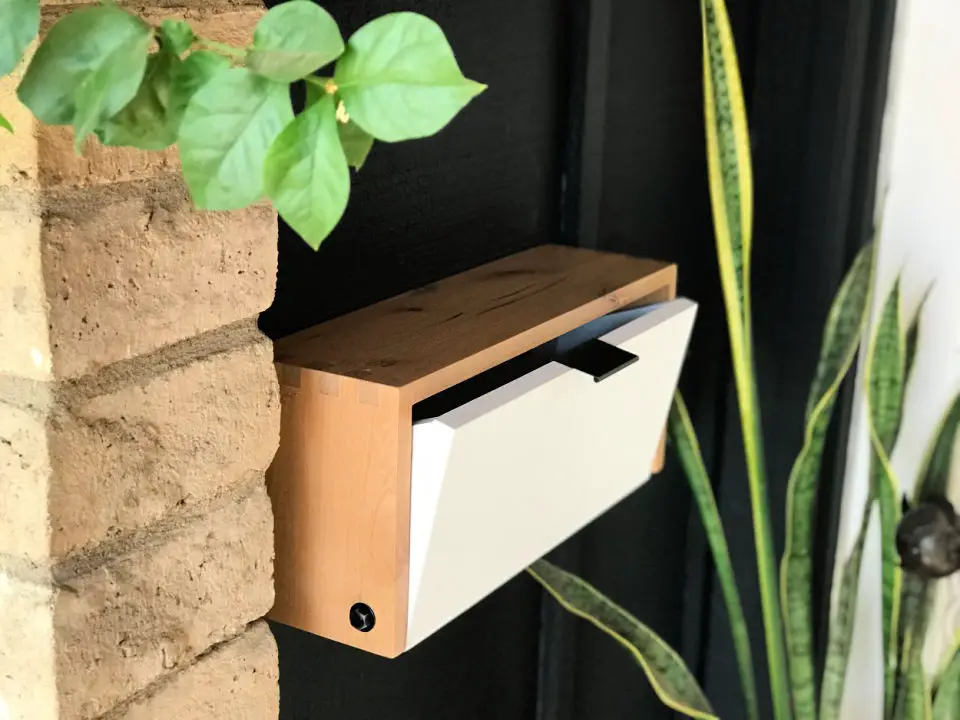
Transform your home’s exterior with a DIY modern mailbox project that exudes sleek sophistication. By mastering finger joints in woodworking, you’ll create a stylish mailbox that seamlessly integrates with your modern aesthetic. This comprehensive guide takes you through every step, from carefully selecting the perfect wood to expertly assembling the frame, ensuring a rewarding and functional addition to your entryway. Perfect for homeowners seeking to elevate their curb appeal while showcasing their woodworking prowess.
How to Do You Make a Stucco Mailbox
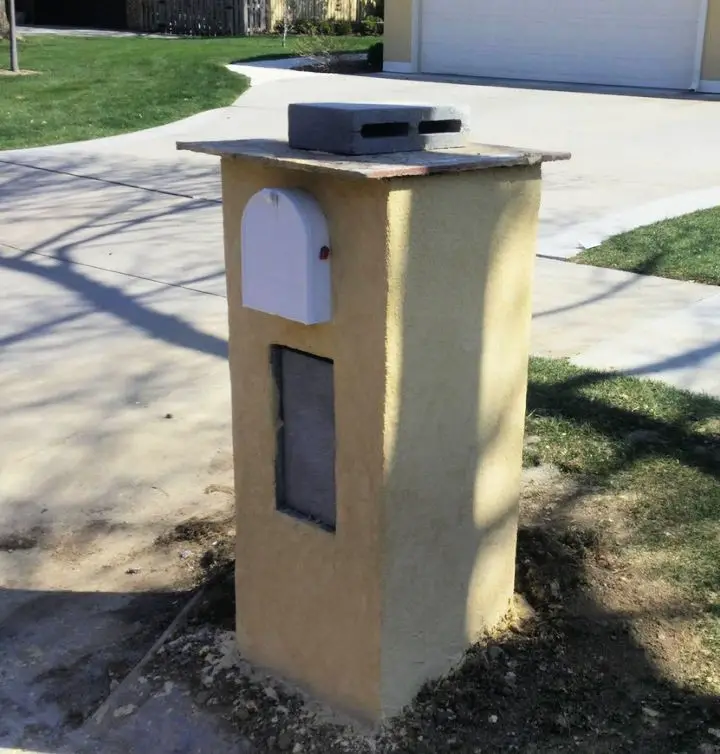
Transforming your home’s exterior with a unique touch has never been easier. One creative project that can elevate curb appeal and showcase your personal style is building a stucco mailbox. This DIY endeavor requires minimal expertise, yet yields impressive results. By following our comprehensive guide, you’ll learn the fundamentals of crafting a durable, charming mailbox that reflects your individuality. Whether you’re looking to add a pop of color or create a statement piece, this guide will walk you through selecting materials, assembling the structure, and adding the finishing touches. With a stucco mailbox, you’ll not only enhance your property’s aesthetic but also create a sense of pride in your home.
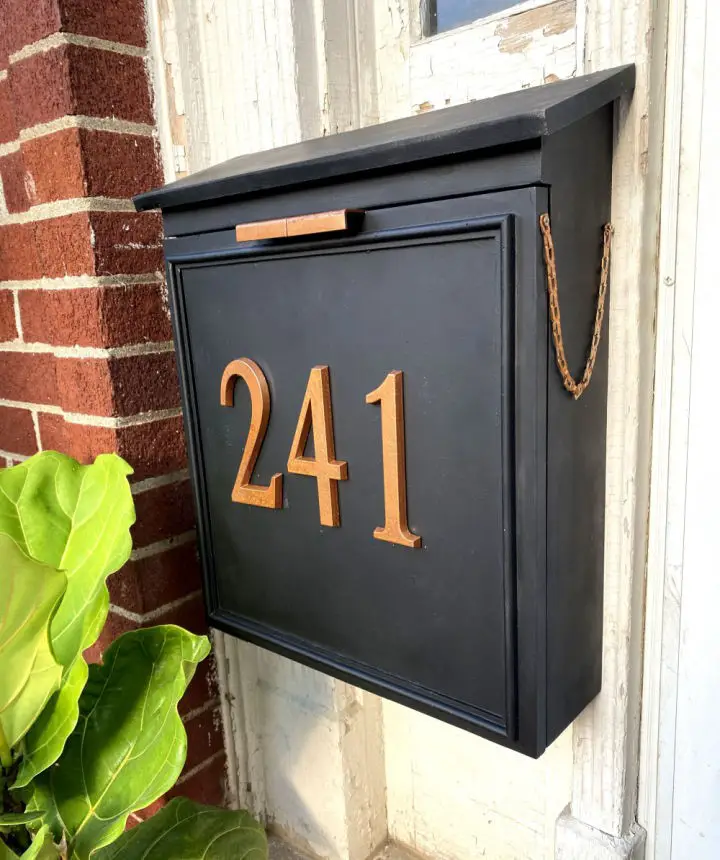
DIY Farmhouse Mailbox at Home
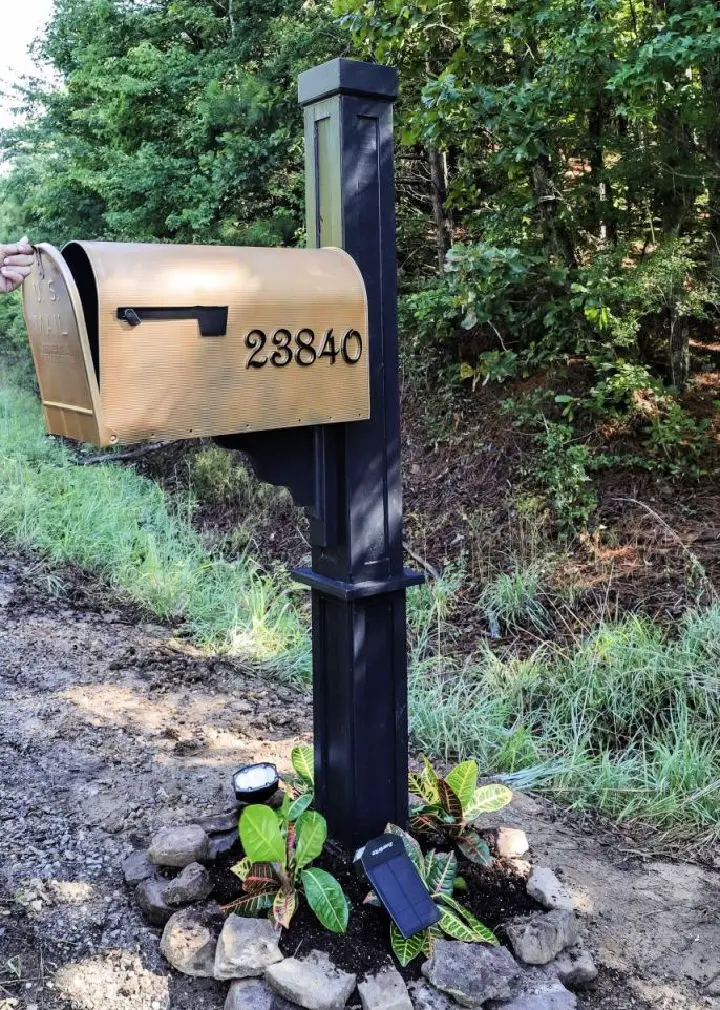
Elevate your home’s exterior appeal with this straightforward yet impressive DIY Modern Farmhouse Mailbox renovation. By breathing new life into an existing post or crafting a fresh one, you can create a stunning focal point that boosts your property’s curb charm without putting a dent in your wallet. With the help of WORKPRO Tools, the process is streamlined for maximum efficiency. This makeover features a chic black and copper color scheme, complemented by a touch of personalized flair with faux metal house numbers. For a comprehensive guide and budget breakdown, visit Southern Yankee DIY to get started on enhancing your home’s first impression without breaking the bank.
How to Make a Mailbox Makeover

Transform your home’s exterior into a stunning showcase by giving its mailbox a much-needed facelift. A worn-out mailbox can significantly detract from your property’s curb appeal, but with some imagination and elbow grease, you can turn it into a charming focal point that showcases your home’s unique charm. Achieve this by pairing an easy installation of a cast stone mailbox post with a modern mailbox and reflective house numbers. This simple yet impactful makeover will not only elevate the look of your home but also boost its curb appeal. For a detailed guide on how to breathe new life into your mailbox, visit Beneath My Heart.
Build Your Own Custom Mailbox
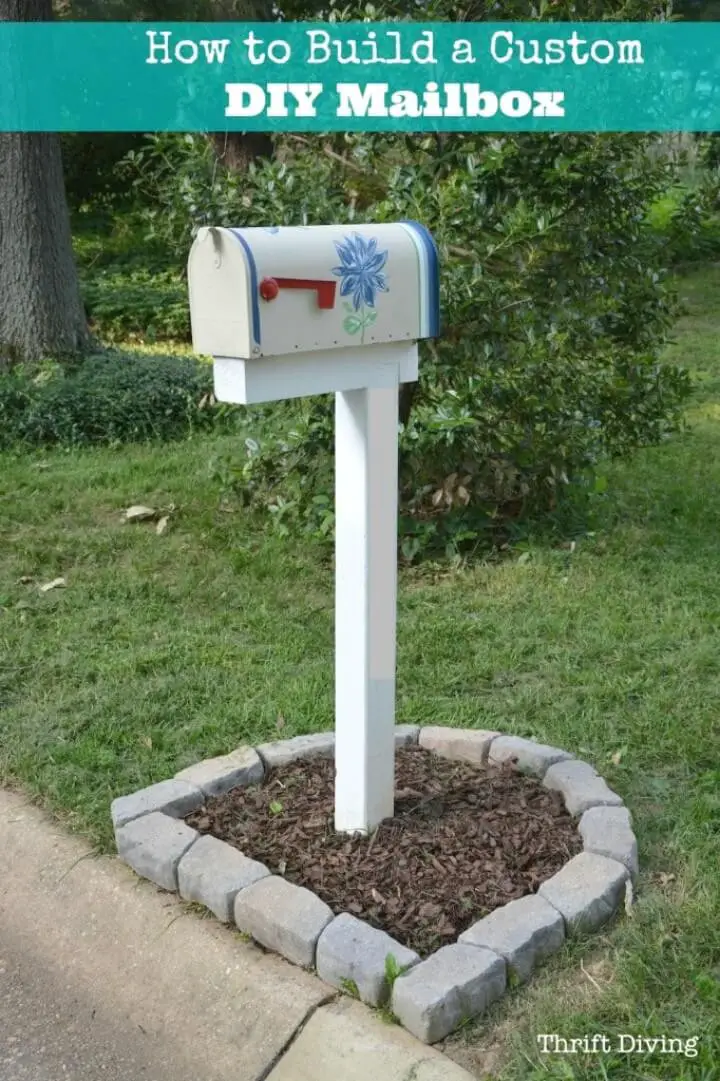
Transform your curb appeal with a personal flair! Our comprehensive guide at Thrift Diving walks you through the process of designing, painting, and installing a one-of-a-kind DIY mailbox. From sidestepping common pitfalls to achieving a showroom-quality finish, we’ve got you covered. Join us on this creative adventure as we explore the journey from start to finish, embracing mistakes as valuable learning experiences along the way. With our step-by-step approach, you’ll be able to craft a mailbox that perfectly reflects your personality and DIY prowess, adding a unique touch to your home’s entrance.
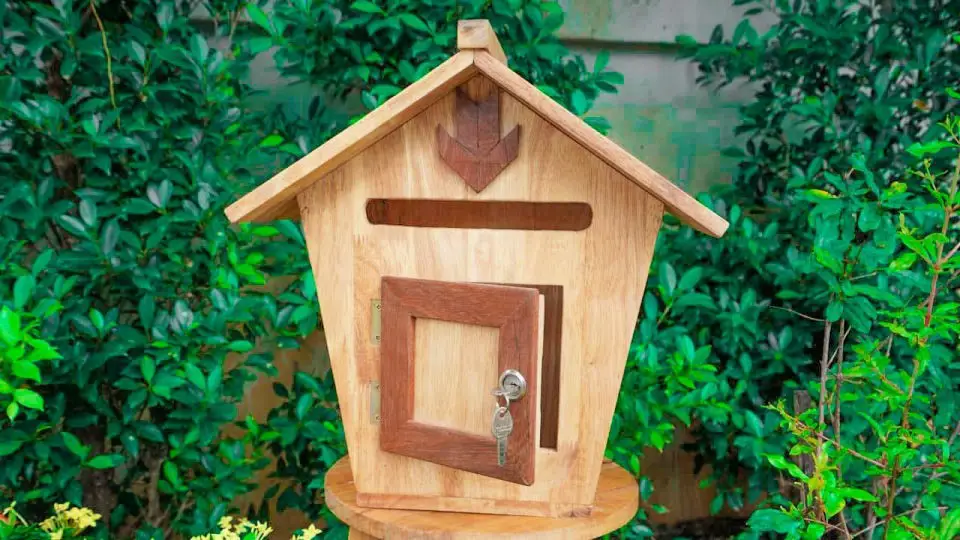
Best DIY House Shaped Mailbox
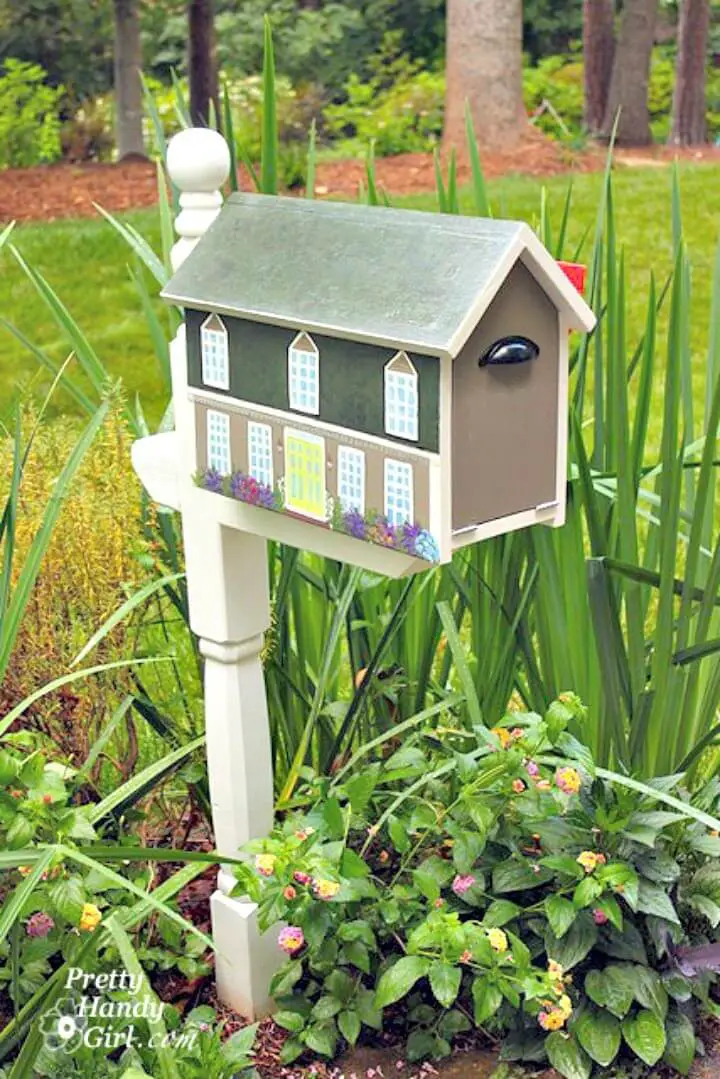
Elevate the exterior of your home by transforming its curb appeal with a one-of-a-kind, house-shaped mailbox inspired by Lowe’s creative idea. This unique project not only mirrors your home’s design but also adheres to postal regulations. Follow clear instructions and a comprehensive list of materials to bring this DIY mailbox to life. Perfect for homeowners seeking to enhance their property’s frontage, this creative endeavor is easily accessible through Pretty Handy Girl’s step-by-step guide. Prepare to take your curb appeal to new heights with this innovative mailbox project.
Make a Coastal Mailbox Makeover
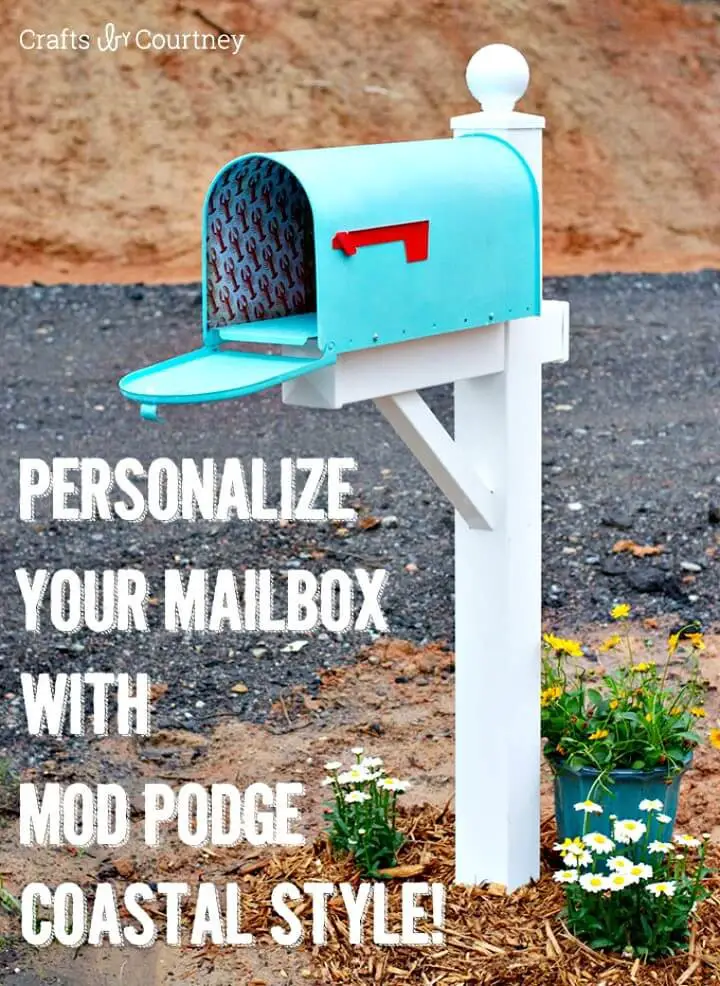
Boost your home’s curb appeal with a touch of coastal elegance! With just a few simple materials like outdoor spray paint, Mod Podge, and your go-to scrapbook paper, you can give your mailbox a show-stopping makeover that will leave passersby impressed. This beginner-friendly project is the perfect way to express your creativity and pay homage to your love for the coast. By following our step-by-step guide and tips on achieving a flawless finish, you’ll transform your humble mailbox into a statement piece that exudes warmth and invites guests in with style.
Mailbox Makeover With Duck Tape and Paint
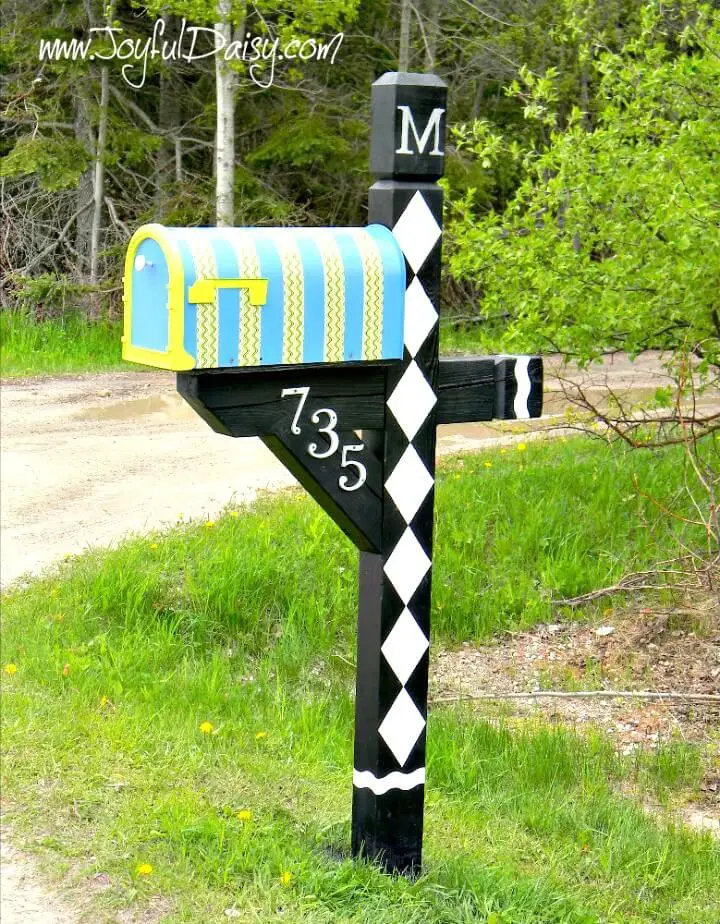
Transforming the humble mailbox into a vibrant focal point is a task that’s both fun and easy. At Joyful Daisy, we’ve undertaken this creative endeavor with enthusiasm and excitement, and we’re delighted to guide you through the process. By combining the versatility of duct tape and the magic of paint, you can elevate your mailbox from drab to fab in no time. This straightforward tutorial provides a clear step-by-step approach for creating a postal masterpiece that’s sure to brighten up any street. As you explore the possibilities, you’ll be inspired to give your mailbox the makeover it deserves, transforming it into a joyful statement piece that brings a smile to everyone’s face.
Inexpensive DIY Cardboard Mailbox
Transform your home into a creative haven by upcycling cardboard boxes with your kids. Building a DIY cardboard mailbox is an excellent way to encourage imaginative play, all while giving old materials a new life. With just a few basic supplies like craft paint, glue, and a craft knife, you can create a one-of-a-kind mailbox that will delight your little mail carrier. For a step-by-step guide, complete with expert tips and a comprehensive supply list, head to Little Red Window. This fun-filled crafting adventure promises to deliver less than two hours of creative excitement and an outcome that will bring joy to young hearts.
Making a Felt Mailbox for Kids
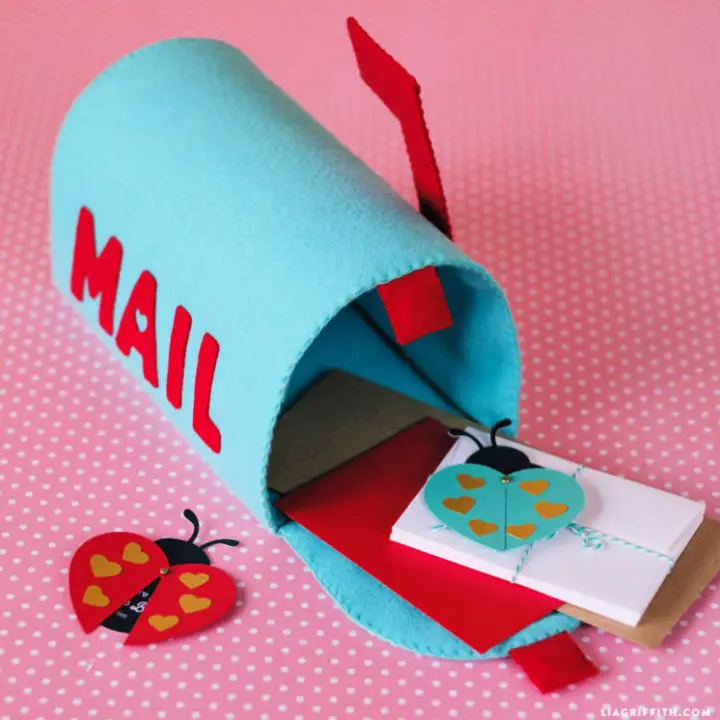
Discover a delightful way to ignite your child’s creativity and imagination through a fun and interactive DIY project! Our Felt Mailbox tutorial provides an excellent opportunity for kids to take the reins and craft their own mailbox, perfect for Valentine’s Day or everyday playtime. With just felt, scissors, and fabric mesh, you’re all set to begin this engaging and educational experience.
As you follow our simple and easy-to-understand instructions, your child will not only develop their fine motor skills but also nurture their imagination and creativity. Our crafting community is always ready with more inspiring DIYs and printable valentines for you and your little ones to enjoy.
Modern DIY Mailbox Using Wood
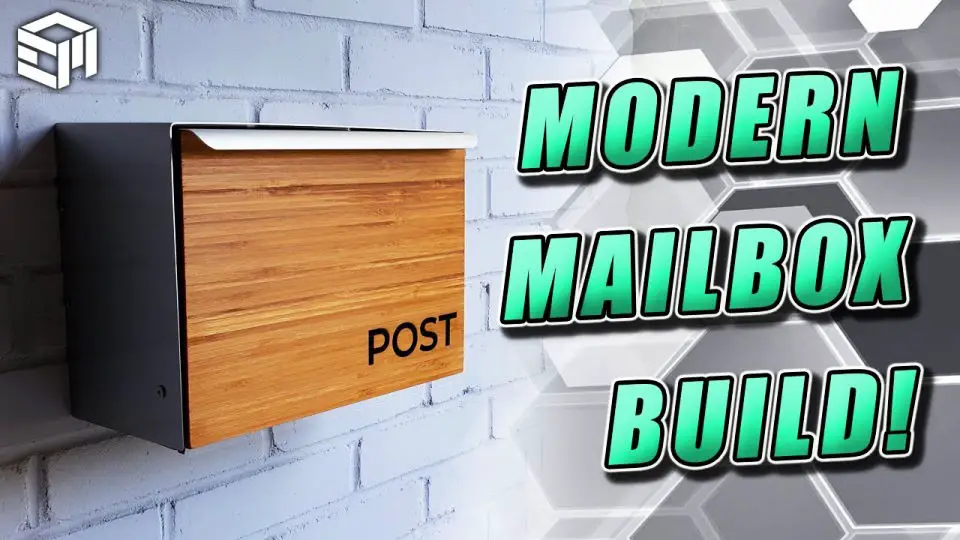
Transforming your curb appeal just got a whole lot cooler with the ‘maker’s mailbox’ DIY project. This unique endeavor might be the perfect catalyst for you to expand your toolset, incorporating innovative tools like 3D printers and metal bending brakes. With clear, step-by-step guidance, you’ll turn simple wooden panels and metal sheets into an impressive, long-lasting work of art that not only securely holds your mail but also proudly displays your craftsmanship. For a comprehensive guide and the necessary tools to bring this project to life, head over to EmbraceMaking. Ready to embark on this modern mailbox makeover? Your creative journey starts now!
Build a Mail Box From Old Pallets
Discover the joy of DIY craftsmanship by building your own unique mailbox. This comprehensive tutorial takes you on a step-by-step journey from scavenging for free pallet wood to applying a durable polyurethane finish. You’ll learn how to prepare, cut, assemble, and detail your custom mailbox using basic tools and straightforward techniques. Whether you’re a seasoned DIY enthusiast or a weekend warrior looking for a fun project, this guide will walk you through the process of creating a functional and personalized mailbox that adds character to your home’s exterior.
DIY Mailbox With Details Instructions
Transform your home’s exterior with a one-of-a-kind DIY mailbox that serves as a stunning focal point in your front yard. To achieve this, you can rely on Lowe’s Home Improvement guide, which provides a straightforward approach to crafting a unique and eye-catching entryway feature using pre-primed wood. Begin by cutting the wood to size, then assemble it into a protective casing and secure it with a painted fence post. This project is ideal for anyone seeking to add a touch of sophistication to their home’s entrance.
Homemade Stone Pillar Mailbox
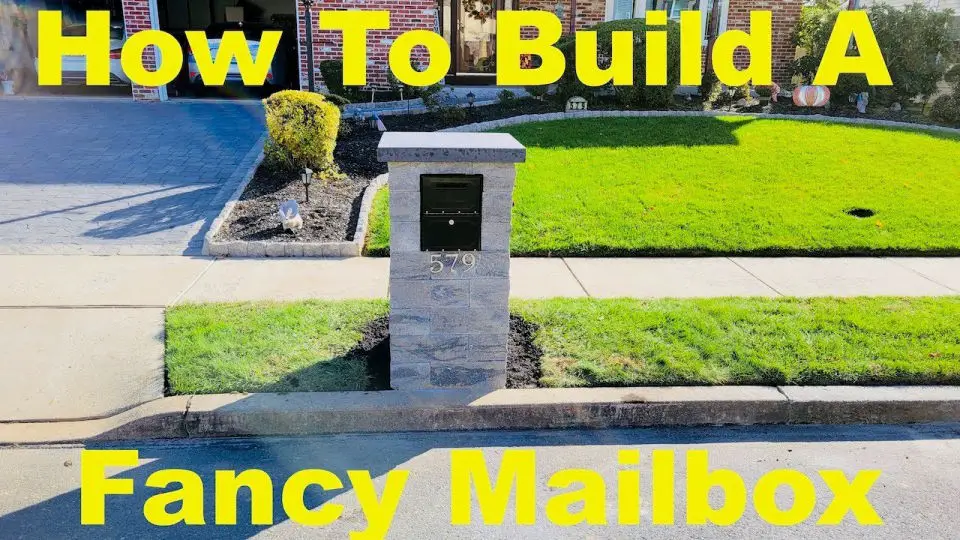
Discover the key to building a long-lasting Stone Pillar Mailbox with ease by following Sean Markee of SRM Contracting’s comprehensive tutorial. This step-by-step guide takes you through the crucial stages of selecting materials, excavation, base preparation, leveling, and integrating your custom mailbox, guaranteeing a seamless DIY experience. Whether you’re looking to elevate your home’s curb appeal through manual labor or simply create a unique entrance feature, this robust and stylish mailbox pillar is the perfect solution.
Sample Mailbox From Recycle Pallets and Plywood
Transform your outdoor space with a unique wooden mailbox project that’s both easy to make and visually appealing. Using reclaimed pallets and plywood, you can create a charming addition to your home, apartment, or villa. This DIY endeavour is perfect for beginners with basic woodworking tools. To get started, follow our step-by-step guide here. We’re eager to see how you put your creative spin on this project – share your creations and innovative ideas with us! As we build our mailboxes together, let’s make them truly one-of-a-kind.
Conclusion:
With the completion of your own custom mailbox from our 25 DIY plans and ideas, you’ll experience a sense of accomplishment and creativity that extends beyond just enhancing your home’s curb appeal. This personal project allows for self-expression, as you select materials, add unique touches, and ensure compliance with postal regulations. Each step contributes to creating a functional and attractive piece that proudly stands outside your home. Our DIY plans are designed to guide you effortlessly through the process, guaranteeing a successful outcome. Regular maintenance will keep your mailbox looking great for years to come. Why not start today by adding a personal touch to your home’s exterior with one of these engaging DIY mailbox plans? The possibilities are endless and the satisfaction is well worth the effort.
