Crafting your own DIY rings is a creative outlet that allows you to express your unique style while enjoying the satisfaction of creating something truly one-of-a-kind. With 25 innovative ring designs to explore, this guide provides a comprehensive resource for jewelry enthusiasts of all skill levels. From selecting materials to finalizing the details, each step is designed to be accessible and rewarding, making it an ideal project for those who enjoy crafting and DIY projects. By making your own rings, you’ll not only have the pleasure of wearing something that reflects your personality but also experience the joy of the creative process itself. This section focuses on creating easy wire rings, covering the essential materials needed and providing step-by-step instructions to ensure a smooth and enjoyable experience. As you delve into the world of homemade ring creation, you’ll discover just how simple and fulfilling it can be to bring your jewelry visions to life.
Why Make Your Own DIY Rings?
When you choose to make your own DIY rings, you’re not just creating a piece of jewelry – you’re also gaining a range of benefits that make it a worthwhile pursuit. For starters, crafting your own rings allows for unparalleled personalization. With the freedom to select materials, colors, and designs that reflect your unique style, each creation is a true representation of yourself. Additionally, making your own jewelry can be a cost-effective way to acquire accessories, as you can produce several high-quality pieces using just a few affordable materials. Moreover, handmade rings make for thoughtful gifts that recipients will cherish. The process of creating itself has therapeutic benefits, allowing you to unwind and express yourself while improving fine motor skills. Furthermore, DIY ring making provides the opportunity to work with eco-friendly materials, reducing waste and giving new life to items that might otherwise be discarded. And let’s not forget the sense of satisfaction and pride that comes from creating something beautiful with your own hands – a unique piece that no one else will have. In short, DIY ring making is an accessible, rewarding, and versatile hobby that empowers creativity while producing meaningful, cost-effective, and one-of-a-kind accessories.
How to Make Easy Wire Rings
If budget isn’t a concern but creativity is, making your own wire rings is an excellent DIY project. With minimal investment in materials and tools, you can create unique, personalized jewelry that reflects your personal style. Here’s a straightforward guide on how to craft easy wire rings, perfect for those looking to add some flair to their accessory collection.
Materials Needed
To create a beautiful beaded design, you’ll need some essential tools and materials. Start by gathering the following: a spool of 21 gauge brass wire, though feel free to use whatever thickness suits your beads best. Select a variety of beads that fit comfortably through the hole, taking care to ensure they’re compatible with the wire gauge. For shaping and manipulating the wire, you’ll need both round nose pliers and flat nose pliers. A wire cutter will also come in handy for trimming excess wire as needed.
Step 1: Preparing Your Wire
To begin creating your ring, start by measuring your finger to determine the length of wire required for the main part of the ring. A good starting point is 20 centimeters (approximately 8 inches) of wire. Then, fold this piece in half and use round nose pliers to form a small loop in the center. This loop will serve as the foundation of your ring design.
Step 2: Starting the Wrap
To complete the wrapping process, take another 10-centimeter (4-inch) length of wire and place it at the center of the folded wire, ensuring it’s aligned with the recently formed loop. Wrap this shorter piece around the folded wire a few times to secure it firmly, then carefully trim any excess wire from the ends of the wrap. With the short wire in place, gently spread the two longer wire ends apart, preparing them for the addition of beads.
Step 3: Adding Beads
To begin the design process, start by sliding a single bead onto the central wire, positioning it near the wrapped section. Next, grasp one of the long wire strands and gently bend it over the central wire, right next to the newly added bead. Then, take the other long strand and weave it underneath the central wire, securing the bead in place with a firm hold. As you add each subsequent bead, alternate the sides to create a visually appealing pattern.
Step 4: Continuing the Pattern
As you continue crafting your piece, alternate between wire wrapping techniques from Step 3 to add more beads to your design. With each addition, gently bend the left wire over the central wire and the right wire behind it, ensuring a secure hold for each bead. To maintain the integrity of your creation, keep the beads snugly in place, preventing any movement that could compromise the overall appearance.
Step 5: Closing the Ring
To complete the ring, take the two wire ends and twist them together several times until they are securely joined. Next, use a wire cutter to trim away any excess wire, leaving a neat and tidy finish. Finally, use flat-nose pliers to tuck in any sharp edges, ensuring that the ring is comfortable against the skin.
Step 6: Shaping the Ring
To create a wire ring, start by wrapping the wire around an object that mimics the circumference of your finger. A mascara bottle, pen or pencil holder, or other cylindrical item serves as an excellent reference point. As you shape the wire, make any necessary adjustments to ensure a comfortable fit on your finger. This step helps form the wire into a smooth ring shape.
Step 7: Finishing Touches
To secure the design’s loop from Step 1, insert a small stick or the end of a brush through it. Next, bend the very tip of the wire around this tool to form a neat closure. Trim any excess wire and make sure all ends are either smoothed or tucked away for a clean finish.
Video Tutorial
To take your crafting skills to the next level, pair this DIY easy wire rings guide with our accompanying step-by-step video tutorial. The combination of written and visual instructions provides an intuitive learning experience that’s hard to beat. With the ability to customize each piece to suit your personal style, you’ll discover endless possibilities in creating unique accessories that reflect your individuality. Whether you’re drawn to understated simplicity or intricate details, crafting wire rings is a fun and creative outlet that will keep you engaged.
FAQs About DIY Ring Making
Embarking on a DIY ring-making journey can be an incredibly fulfilling experience. As you begin this creative adventure, it’s natural to have queries about the process. This comprehensive guide aims to address the most frequently asked questions, spanning topics from essential materials and tools to expert techniques, providing a solid foundation for your handmade ring creations.
What materials do I need to start making DIY rings?
To start creating your own custom rings, you’ll need a few essential tools. These include wire – choose from copper, silver, or gold-plated options depending on your personal preference and budget – as well as beads or stones if you want to add some extra flair. For shaping the wire into the desired form, you’ll also require round nose pliers, flat nose pliers, and wire cutters for trimming the wire to size. Finally, a ring mandrel or a cylindrical object will help you achieve the perfect shape for your ring.
Can I make a ring without any metalworking tools?
While it’s true that intricate metalwork requires specialized tools, you can still craft simple yet charming ring designs without investing in elaborate equipment. Simple wire-wrapping techniques or projects that combine buttons with adjustable bases can be accomplished with basic pliers and a trusty adhesive. However, if your design aspirations venture into more complex realms, having the right metalworking tools will undoubtedly enhance the process.
How do I determine the size of the ring I want to make?
When it comes to determining your ring size, there are two effective methods: using a professional ring sizer or taking a DIY approach. For the latter, wrap a piece of string around the finger you plan to wear the ring on, making sure it’s snug but not too tight. Mark where the string overlaps and measure that length against a ruler. You can then consult online charts to convert this measurement into an equivalent ring size. If you’re looking for a more precise method, consider visiting a jewelry supply store to purchase a ring sizer, which provides accurate results with minimal effort.
Can DIY rings be durable?
When it comes to creating DIY rings, durability is often a concern. By utilizing high-quality materials and adhering to tried-and-true crafting techniques, however, you can create pieces that stand the test of time. For instance, opting for sturdy components like high-gauge wire and ensuring all parts are securely attached will help minimize the risk of damage or breakage. While it’s true that DIY rings may not be quite as resilient as professionally crafted jewelry, with proper care and handling, they can still remain a stylish and long-lasting addition to your accessories.
How do I prevent my wire-wrapped rings from unwrapping or losing shape?
To maintain the integrity of wire-wrapped rings, it’s crucial to follow a few simple yet effective steps. First and foremost, opt for a suitable gauge wire – thicker wires tend to hold their shape more effectively. Next, ensure that you wrap the wire snugly and securely around the base wire or ring mandrel. This will help prevent any unwanted unraveling or distortion of the ring’s shape. To further reinforce your work, use flat nose pliers to press down any stray ends, eliminating any potential weak points. Additionally, a small application of clear jewelry adhesive to the wraps can provide an extra layer of security, guaranteeing that your wire-wrapped rings remain intact and beautiful for years to come.
What can I do if my DIY ring doesn’t fit?
When DIY ring creations don’t fit as expected, there are several adjustments you can make to get a comfortable and stylish result. For wire-wrapped rings, gently stretching the metal by placing it back on the ring mandrel and carefully pulling it up to a larger size is an effective solution. Conversely, if the ring is too large, adding more wraps of wire can help shrink it down to a more suitable size. Alternatively, for rings featuring adjustable bases, simply adjust the band to make it tighter or looser to achieve the perfect fit.
How do I add beads or stones to my DIY rings?
To incorporate beads or stones into your handmade rings, follow these steps:
Select beads or stones featuring holes that can accommodate your wire.
Place the bead or stone onto the wire at the desired position.
Securely wrap the wire around the bead or stone to prevent movement and ensure a snug fit. For stones without holes, you can utilize metal settings and fasten them with either wire or adhesive.
Is it possible to make a ring without using any wire?
While traditional wire-based ring making is a classic approach, there are many alternative materials that can be used to create unique and creative rings. One option is polymer clay, which can be molded into various shapes and then baked to harden. This allows for a high degree of customization and detail in the final product. Another option is resin, which can be poured into molds to create clear or colored rings with intricate designs. Additionally, upcycled materials like buttons, fabric, or even old jewelry parts can be attached to ring bases to give them a personalized touch. Ultimately, the key to successful DIY ring making is embracing creativity and experimentation – don’t be afraid to try new techniques and materials to see what works best for you.
DIY Rings: 25 Homemade DIY Ring Ideas to Make
Unleash your creativity and transform your style with 25 innovative DIY ring ideas that can be crafted in the comfort of your own home. From elegant and sophisticated to playful and whimsical, these unique jewelry pieces are sure to make a statement. Follow our easy-to-follow tutorials and learn how to create one-of-a-kind accessories that reflect your personality.
Make Your Own DIY Enamelled Rings

Transform your personal statement into a masterpiece of sophistication using Fall For DIY’s enameled rings tutorial. This comprehensive guide walks you through the process of creating rings that exude luxury and glamour, offering three distinct methods for achieving a radiant golden glow: the application of gold leaf, gold spray paint, or gold enamel paint. With only basic materials required, including epoxy putty and wire, this DIY project is perfect for those who crave unique, handcrafted jewelry pieces. By following step-by-step instructions to shape the putty into a natural stone-like form and incorporate the wire to create the ring band, you’ll be able to add the finishing touches – including the golden accents and an agate effect to give your creation an extra touch of sparkle.
How to Make Button Rings
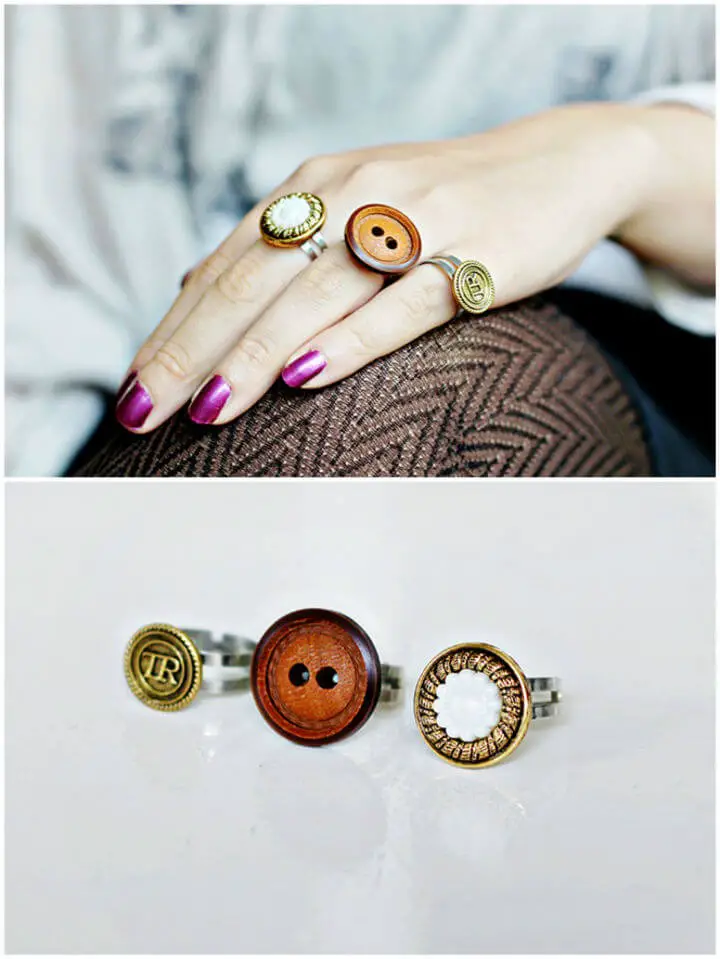
Transform spare buttons into charming accessories by crafting unique button rings with Lana Red Studio’s DIY guide. The process is surprisingly simple, requiring just a few materials: buttons, adjustable ring bases, super glue, and pliers. Begin by removing the button shank, then apply a small amount of glue to the ring base and carefully attach your chosen button. With this project, you can upcycle old buttons into personalized jewelry pieces in under five minutes. Perfect for creative enthusiasts and those looking to add a touch of personality to their accessories, these custom rings are sure to be a hit.
DIY Metal Stamped Rings
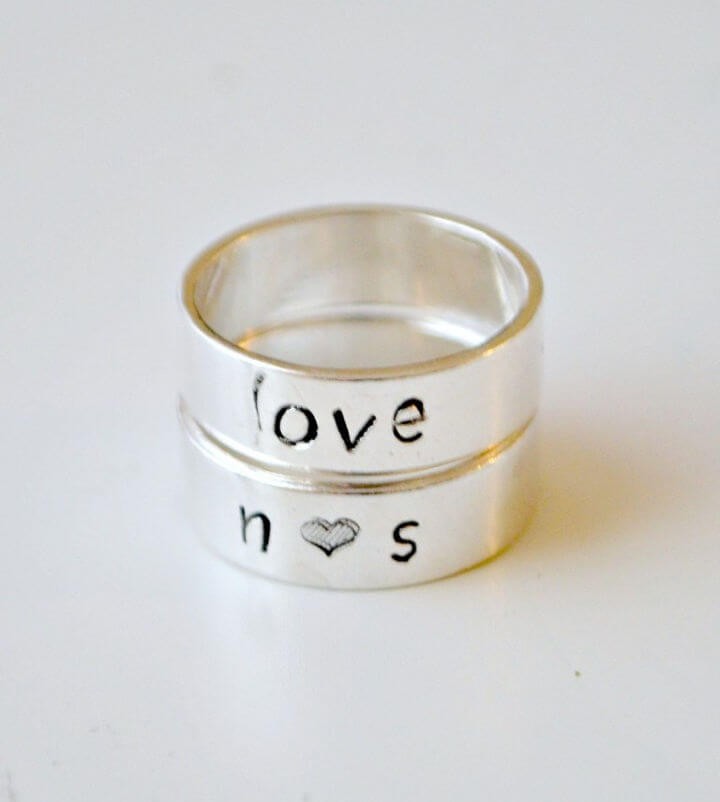
Unleash your creativity by crafting custom metal stamped rings with Amy Latta Creations’ comprehensive guide. This method allows for personalized expressions through names, phrases, or symbols, making it perfect for creating one-of-a-kind gifts that hold sentimental value. The tutorial is meticulously crafted to ensure a seamless learning experience, guiding you through the process of transforming a plain ring blank into a treasured piece of jewelry. With a metal stamping hammer, alphabet stamps, a steel ring mandrel, and stamp enamel at your disposal, you’ll gain the skills needed to secure the ring on a mandrel, expertly stamp your design, and apply enamel for a polished finish. Embark on this creative journey and create something truly special.
DIY Felted Wool Ball Ring
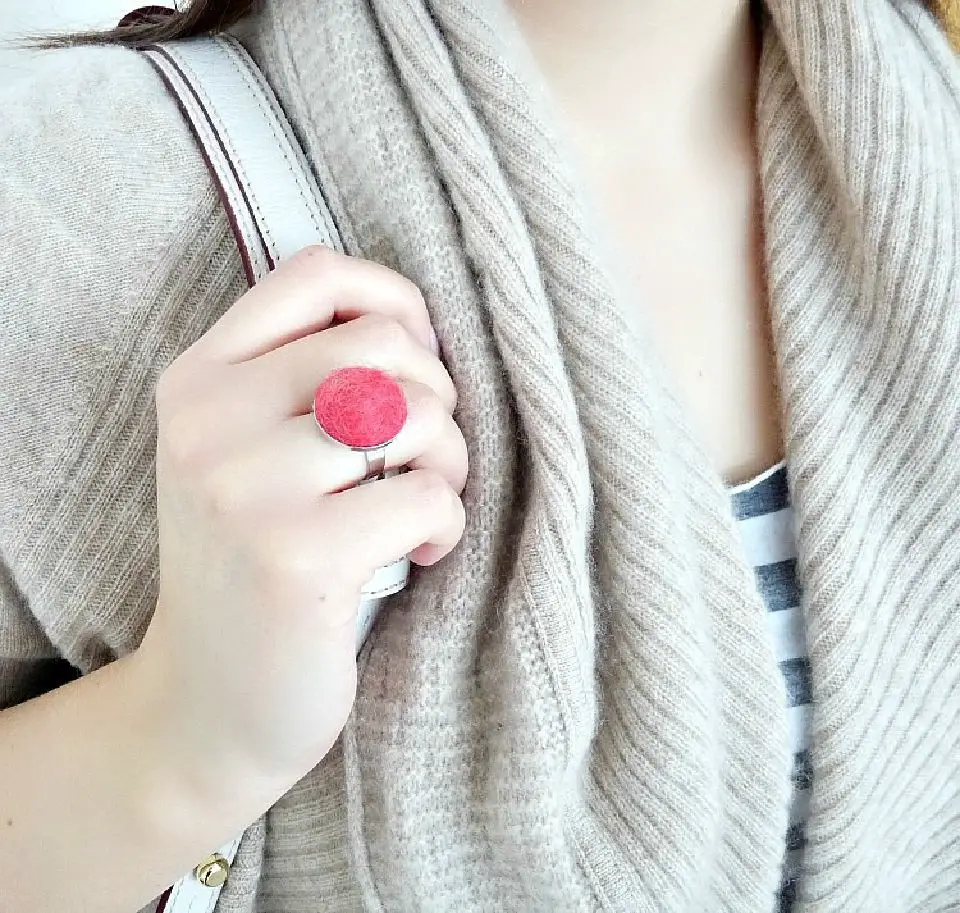
Embrace the tactile charm of DIY felted wool ball rings with this easy-to-follow guide. By combining modern flair with the warmth of wool, you can create one-of-a-kind jewelry that exudes personality. To get started, gather a selection of wool rovings, bowls of water, soap, ring shanks, and epoxy. With crystal-clear instructions, you’ll learn to shape a vibrant wool ball, halve it, and secure it to a ring shank for a distinctive piece of handmade adornment. This project is perfect for crafty enthusiasts seeking a fun and engaging activity that yields unique results. As you explore this creative venture, you’ll discover tips for achieving the ideal size and caring for your new wool ball ring, allowing you to add a splash of joy to your accessories.
Make Stone and Wire Wrapped Rings

If you’re looking to unleash your creativity and create one-of-a-kind jewelry pieces, look no further than our comprehensive guide on making stone and wire wrapped rings. This DIY tutorial is specifically designed for individuals who appreciate hands-on projects and want to craft unique accessories that reflect their personal style. With a straightforward, step-by-step approach, you’ll be able to create beautiful, customized rings in under an hour. The tutorial also provides valuable tips on using a ring mandrel for sizing and securing the wire for a comfortable fit. Furthermore, the versatility of the design allows you to incorporate various stones and colors, ensuring endless possibilities for creativity. To get started, make sure you have the necessary supplies and be prepared to elevate your accessory collection with handcrafted rings that are sure to turn heads.
Beautiful Flower Blossom Homemade Ring
Transform your creativity into a stunning DIY flower blossom ring with ease. This charming accessory is made possible by Lia Griffith’s step-by-step guide, utilizing simple materials such as shrink film and art markers. The perfect project for jewelry enthusiasts or teens looking to express themselves creatively, this tutorial invites personal touches through the selection of bead and marker colors. To shape the petals, carefully follow the oven instructions, employing tools like craft scissors and a toothpick for precision. With clear guidance and a downloadable template at your disposal, you’ll turn shrink film into a beautiful flower ring that’s sure to impress. For access to this unique crafting project and others, visit Lia Griffith.
Pretty DIY Glitter Ring
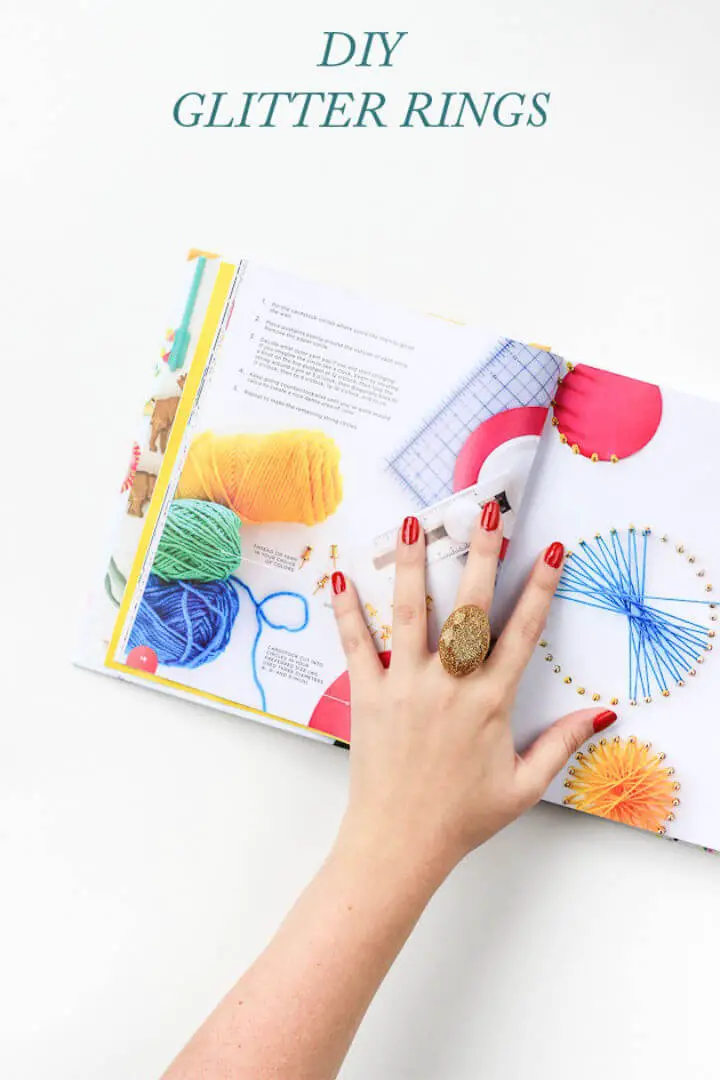
Elevate your statement jewelry game with The Crafted Life’s effortless DIY glitter rings! By combining resin and a pinch of sparkle, you can create a mess-free, dazzling accessory that’s perfect for holiday celebrations. Simply mix your ingredients, pour into a mold, let it set, and then attach the ring back for a one-of-a-kind piece. With just 15 minutes of crafting time and some patience for drying, you can craft a stunning ring that shines without leaving a trail of glitter behind. For a chic addition to your jewelry collection, get creative and indulge in this fun DIY project!
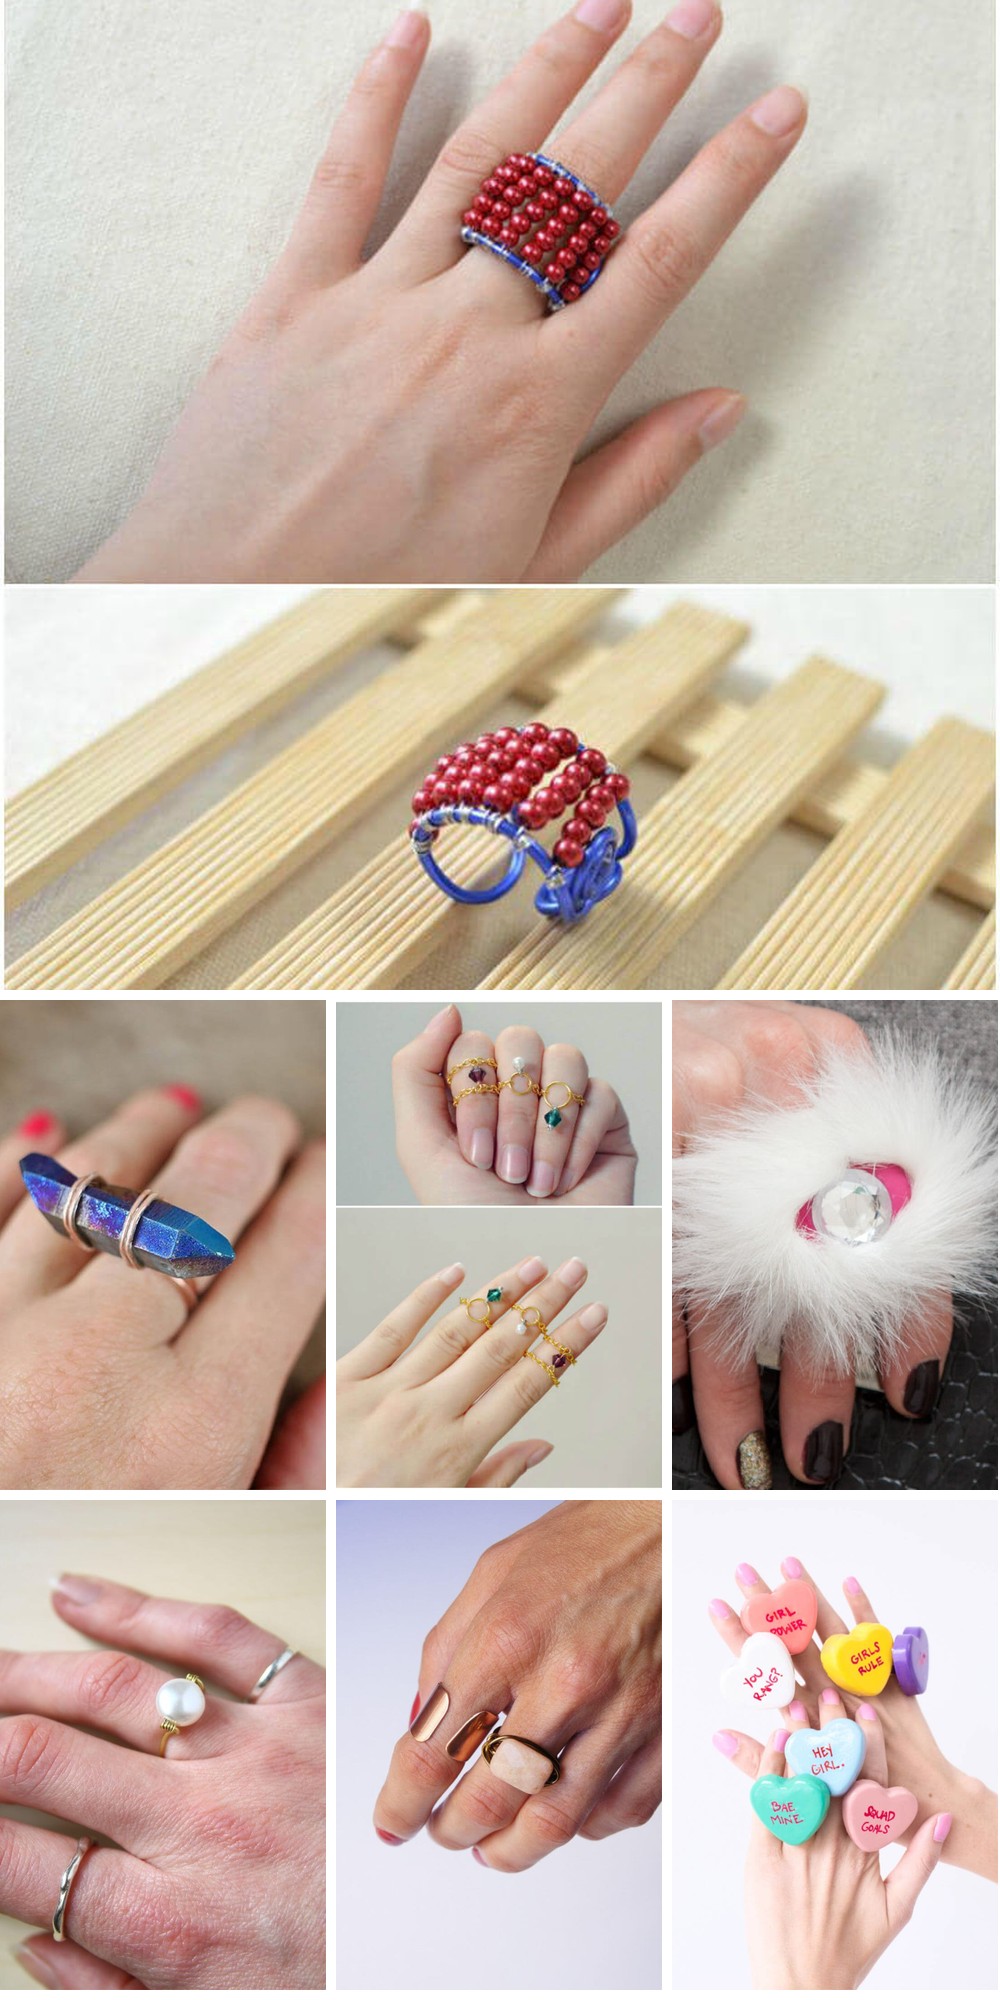
Making a Wire-Wrapped Ring at Home
Transforming everyday materials into a meaningful piece of jewelry is an empowering experience that yields beautiful, one-of-a-kind creations. By following our step-by-step guide, you’ll discover how to craft a wire-wrapped family ring that honors your loved ones and adds a touch of sophistication to any outfit. In just two simple steps, you’ll learn to shape the foundation of the ring and then embellish it with vibrant beads, creating a truly personalized treasure.
Handmade Faux Fur Fimo Clay Ring
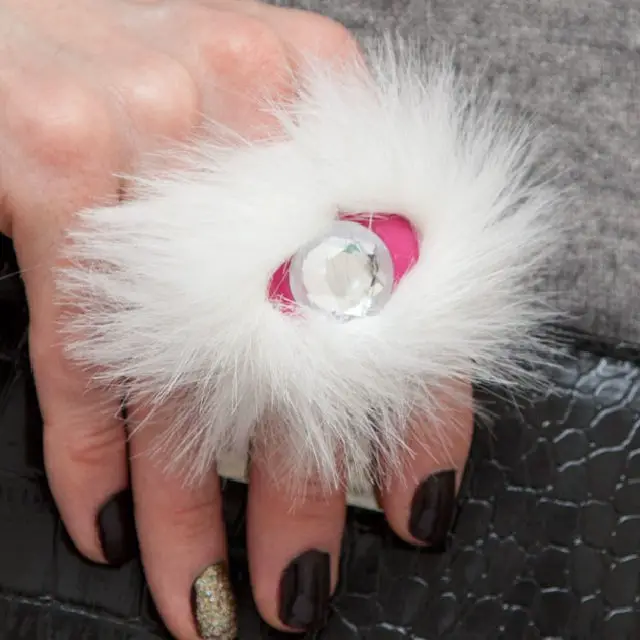
Transform a simple DIY project into a luxurious faux fur ring that effortlessly adds sophistication to your home decor and personal style. This craft is perfect for beginners, requiring only basic materials like a circular base, faux fur fabric, scissors, and strong adhesive. Simply measure and cut the fur to wrap around the base, then secure it with glue, ensuring a seamless finish. The result is an exquisite, one-of-a-kind accessory that can be used as a napkin ring, curtain embellishment, or even worn as a bracelet. As you craft this piece, remember that the joy of making something beautiful often rivals the pleasure of showcasing your creation.
DIY Wrapped Crystal Ring
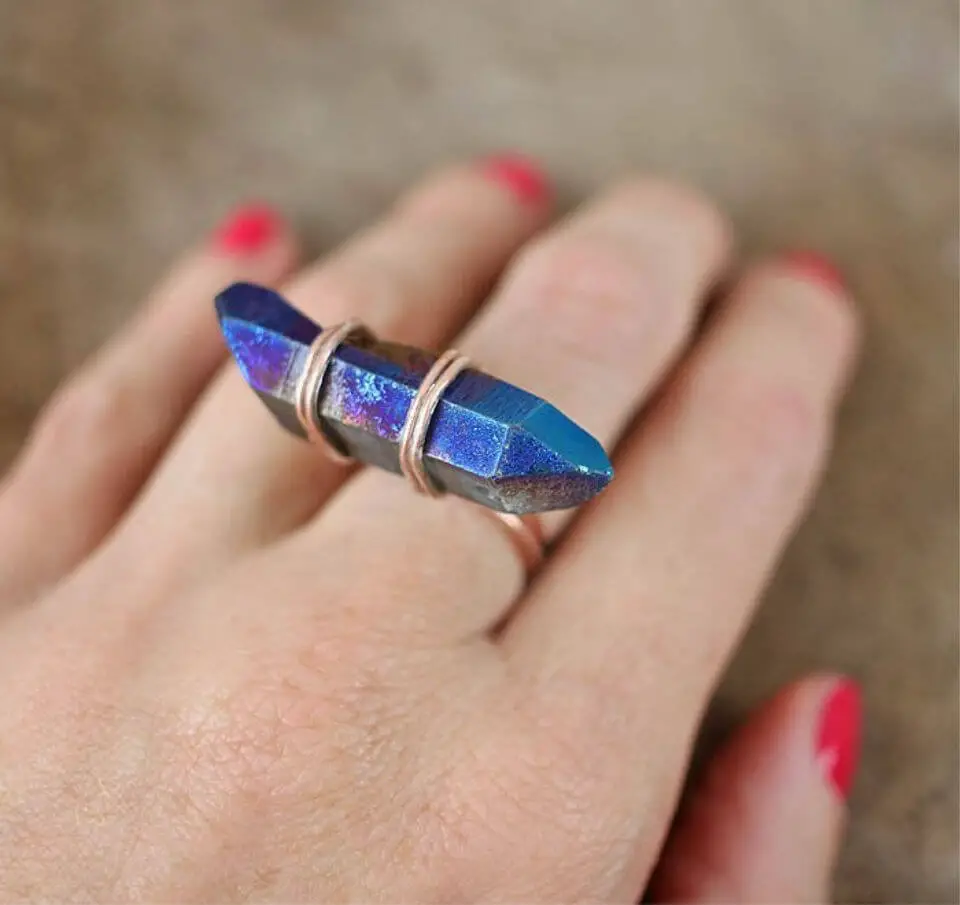
Craft a captivating piece of jewelry with the DIY Wrapped Crystal Ring tutorial, where Gina Michele walks you through the simple yet elegant process of transforming a stunning crystal into a unique ring using wire-wrapping techniques. With just five minutes of your time, you can create a minimalist and chic accessory that showcases your chosen crystal. The best part? This DIY project is not only easy to follow but also budget-friendly and perfect for those looking to personalize their jewelry collection. All you’ll need are a few essential tools: a ring mandrel, luster stone nugget, bendable jewelry wire, some glue, and jewelry pliers. Follow the step-by-step instructions carefully, and secure your crystal in place to create a one-of-a-kind ring that’s sure to turn heads.
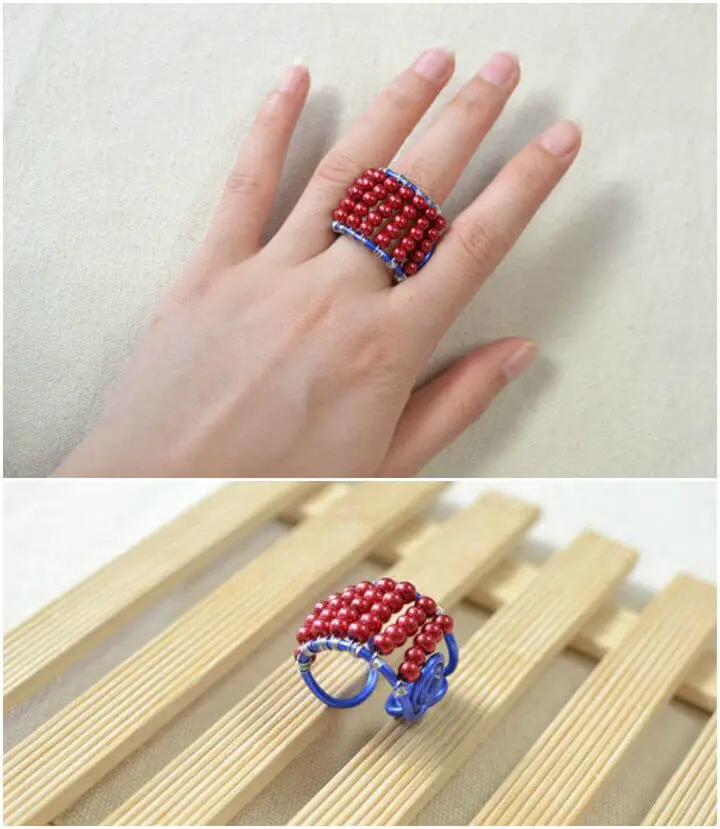
Homemade Mini Beaded Rings

Create a set of stunning DIY mini beaded rings with Fall For DIY’s straightforward guide, perfect for crafting enthusiasts and jewelry aficionados alike. The instructions will walk you through selecting vibrant wooden beads and shaping thin wire into stylish accessories that exude your personal flair. With just a few essential materials, including 1.5mm and 0.5mm wire, along with a set of trusty jewelry pliers, you’ll be well on your way to crafting unique rings that showcase your creativity and attention to detail. As you work through this relaxing and low-pressure project, you’ll discover how easily you can mix and match colors to create one-of-a-kind pieces that are sure to impress – whether you’re wearing them yourself or giving them as thoughtful gifts.
Make Beaded Stackable Rings
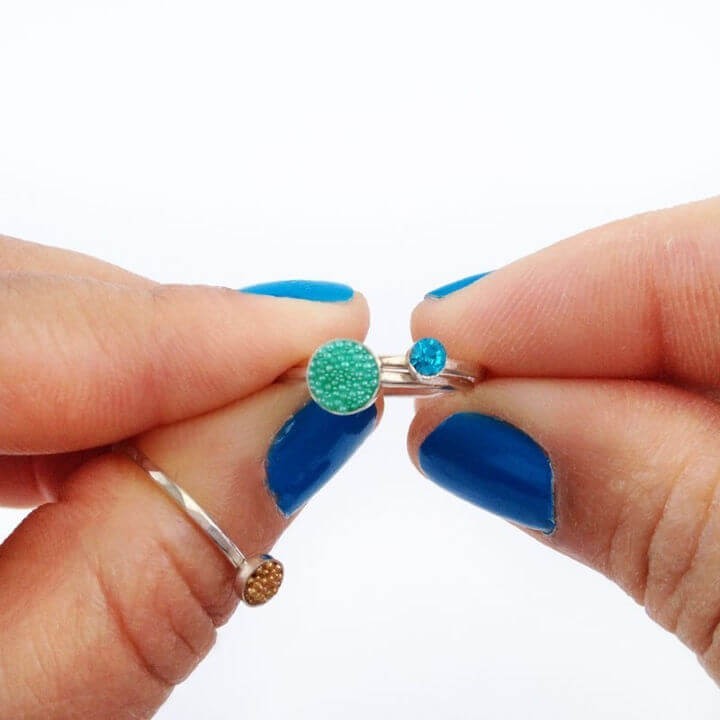
Handmade jewelry enthusiasts will find inspiration in Maritza Lisa’s concise guide to creating beaded stackable rings. By combining ring blanks, microbeads, clear glue, and Mod Podge Sealer, crafters can produce these charming accessories in a few easy steps. Simply apply the glue, sprinkle your preferred beads, and seal them for a radiant finish. This versatile project allows for personalized color combinations to create unique pieces or thoughtful gifts. For more creative crafting ideas, explore Maritza Lisa’s DIY Jewelry projects.
Wrapped Peach Aventurine Ring
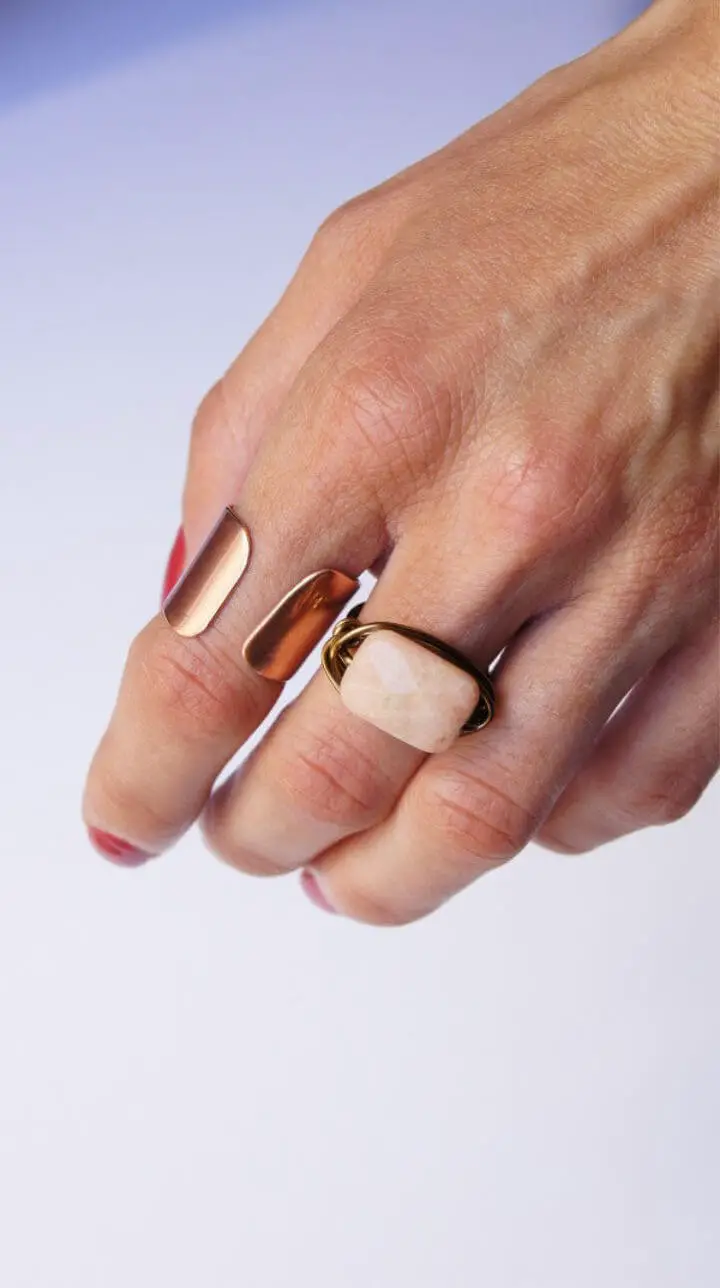
Transform your accessory collection with Bettina Johnson’s accessible DIY guide to creating a stunning Wrapped Peach Aventurine Ring. This straightforward tutorial is ideal for jewelry enthusiasts and aspiring designers seeking to infuse their pieces with personal flair. With step-by-step instructions and crisp visuals, you’ll learn how to craft a one-of-a-kind, comfortable ring utilizing just a few materials. Not only will this process satisfy your creative urges, but it also yields a breathtaking piece of handmade jewelry that’s sure to elevate your everyday look. For more inspiring jewelry projects and expert advice from a seasoned metal smith, visit Bettina’s blog today.
Quick DIY Button Rings
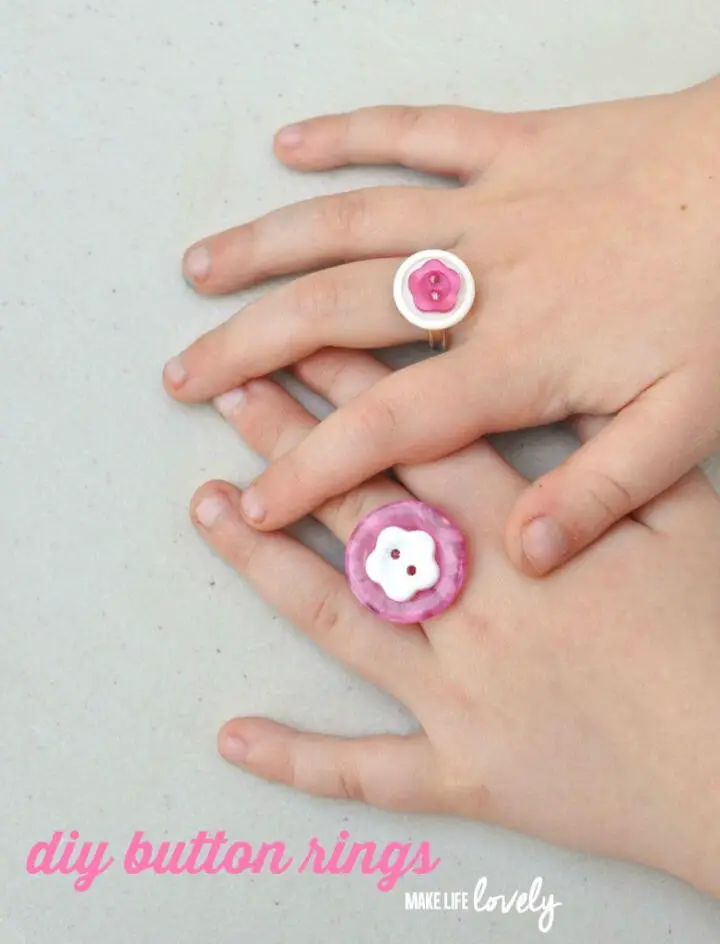
Transform a simple DIY project into a delightful custom button ring in just 5 minutes with Make Life Lovely’s creative guide. Perfect for crafting with kids, this activity requires minimal materials: buttons, strong adhesive like Aleene’s Fast Grab Tacky Glue, and adjustable ring blanks. Begin by carefully selecting and stacking various sized and colored buttons to create an eye-catching design.
Next, use the glue to bond the buttons together, then attach them securely to the ring blanks. Allow the adhesive to dry completely before admiring your handiwork – you’ve successfully crafted one-of-a-kind, adjustable rings that make perfect gifts or party favors. Join in on this fun activity and enjoy wearing your personalized creations.
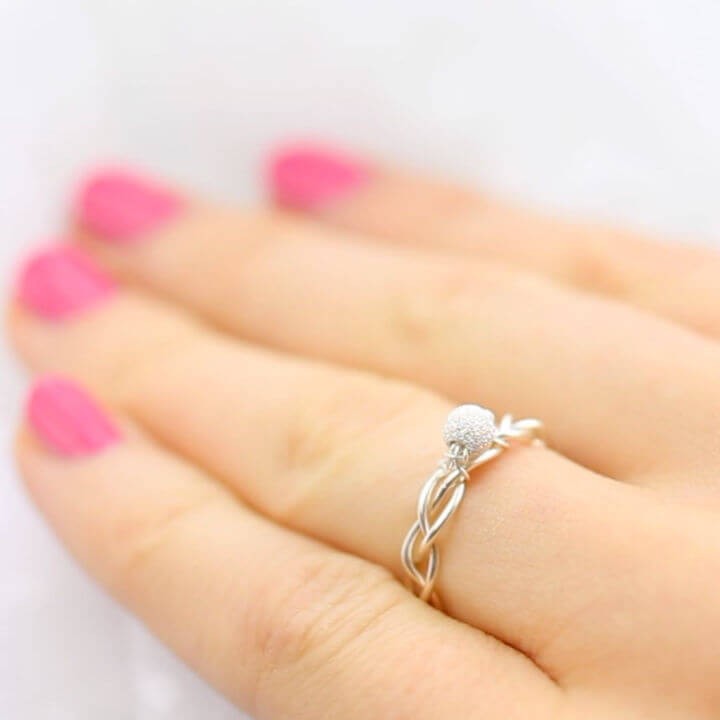
DIY Wire Wrapped Pearl Ring
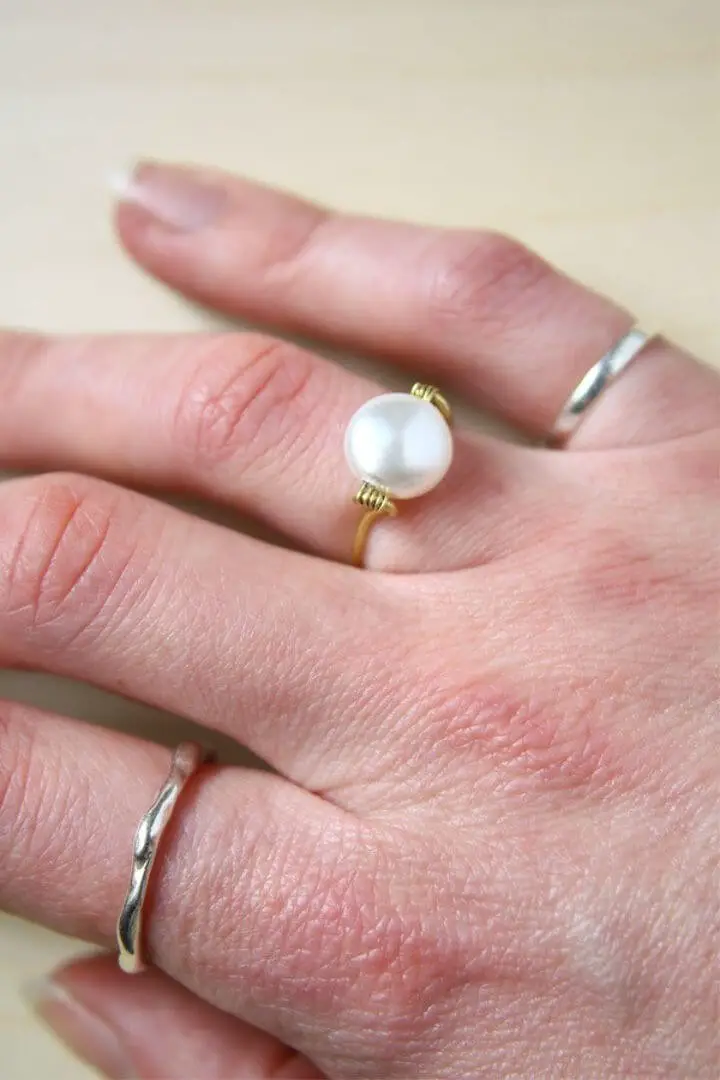
Crafting a wire-wrapped ring featuring a Swarovski coin pearl is an excellent way to add sophistication to your DIY jewelry collection. This comprehensive guide will walk you through the step-by-step process of creating a delicate ring that showcases the bead rather than the wire. To get started, gather 1mm and 0.4mm wires, a 10mm Swarovski pearl, and basic jewelry-making tools such as round nose pliers, chain nose pliers, and flush cutters. A ring mandrel or a thick marker can serve as a shaping tool, allowing you to shape the wire to perfection. Begin by cutting and shaping the wire, then carefully secure and wrap the bead, ensuring a snug fit. The finished product is a stylish accessory that’s perfect for personal wear or as a thoughtful gift. For a detailed visual representation and additional information, visit the original tutorial page where you can explore the intricacies of wire wrapping and refine your jewelry-making skills.
How to Make a Braided Ring
Handcrafting jewelry can be a truly rewarding experience. For those looking to create unique pieces without breaking out the specialized tools, Instructables offers an engaging tutorial that guides you through crafting five distinctive braided DIY rings. This hands-on project is designed to be completed in just minutes, making it the perfect way to spend some time creating something beautiful and meaningful.
The tutorial takes you on a step-by-step journey, from intertwining copper wires to embellishing with beads and crystals. Each process is explained clearly, ensuring that even those new to jewelry-making can follow along and achieve success. Whether you’re looking to create personal adornments or heartfelt gifts, these rings are sure to be a charming addition to any jewelry collection.
So why not grab some wire, a few beads, and get ready to twist and shape your way to stunning handmade accessories? With Instructables’ guidance, the possibilities are endless.
How to Make Chain Rings
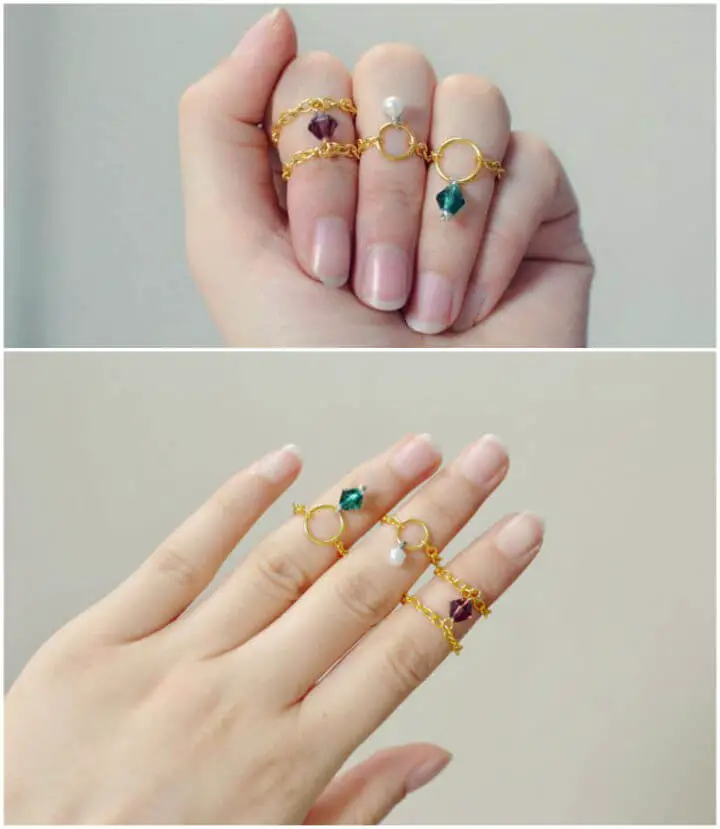
Transform your jewelry collection by crafting unique chain rings with glass beads and pearls. Our straightforward guide empowers you to create fashionable accessories that slide effortlessly onto your knuckles. With just a few essential tools – pliers, copper wire, and an assortment of beads – you’ll unlock the art of DIY chain ring making and add a personalized touch to your style. Let your creativity shine by exploring more innovative ring design ideas on our Pandahall.
Awesome Ribbon Wrapped Ring
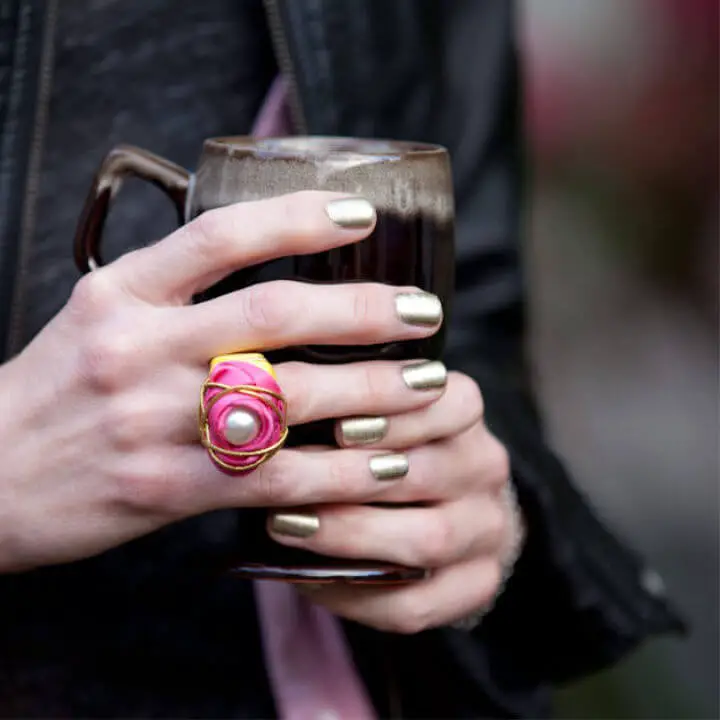
Transform any outfit with a statement-making Ribbon Wrapped Ring crafted from everyday materials. Trinkets in Bloom’s DIY guide simplifies the process of creating a vibrant accessory using a hose clamp and an array of colorful ribbons. This step-by-step tutorial is designed to bring out your inner creativity, guiding you through the transformation of ordinary supplies into a fashion-forward piece that exudes personality. With hot glue at your disposal, you’ll be able to elevate your summer wardrobe or add a touch of flair to casual looks with this engaging project that’s sure to become a delightful addition to your jewelry collection.
DIY Wooden Rings

Transforming everyday tools into wearable art, The Merrythought’s DIY guide empowers enthusiasts to craft unique wooden rings from scrap hardwoods like cedar, cherry, and mahogany. This engaging tutorial demystifies the process, providing a straightforward path to creating beautiful, personalized accessories with just a drill, scroll saw, belt sander, and chosen finish. By following these steps, even novice craftsmen can achieve a polished result without requiring a professional workshop. Whether making a thoughtful gift or adding a touch of natural elegance to your own collection, this guide invites you to explore the world of handmade jewelry.
DIY Rose Shaped Wire Ring
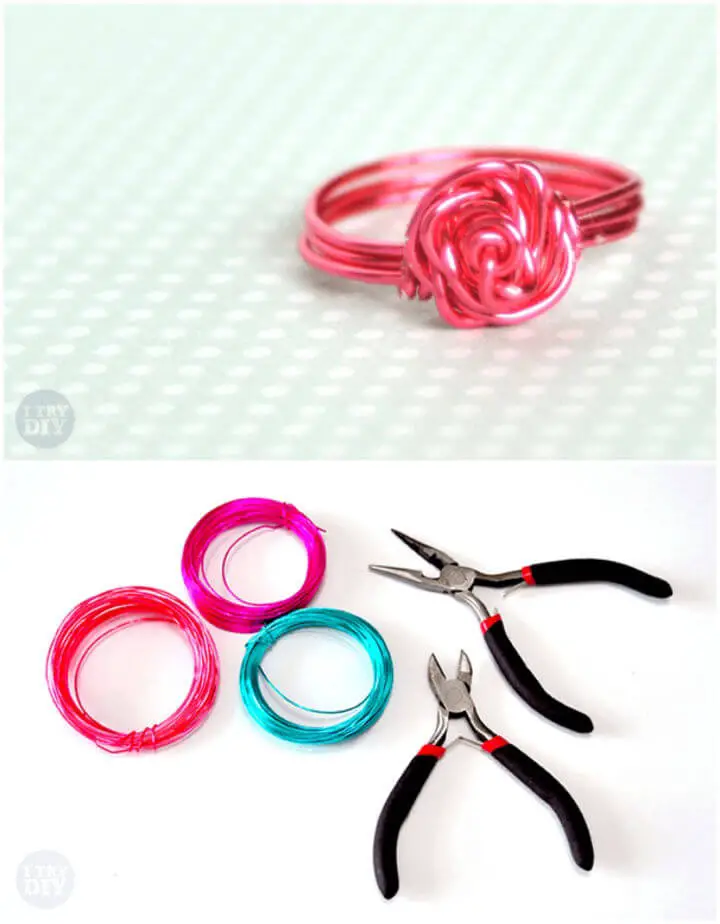
Create a captivating rose-shaped wire ring with this effortless DIY guide. This charming accessory is perfect for adding a personal touch to your outfit, requiring only minimal tools: wire, pliers, and wire cutters. Begin by using 18 gauge silver-plated wire to craft a flexible yet durable piece of jewelry. The process involves shaping the wire around a ring shaper, twisting it to form a beautiful rose, and securing the ends for a comfortable fit. Feel free to customize the color with nail polish if desired, and soon you’ll have a unique handmade ring to wear or gift. As you craft this piece of jewelry, let your personal style shine through!
Simple DIY Penny Ring
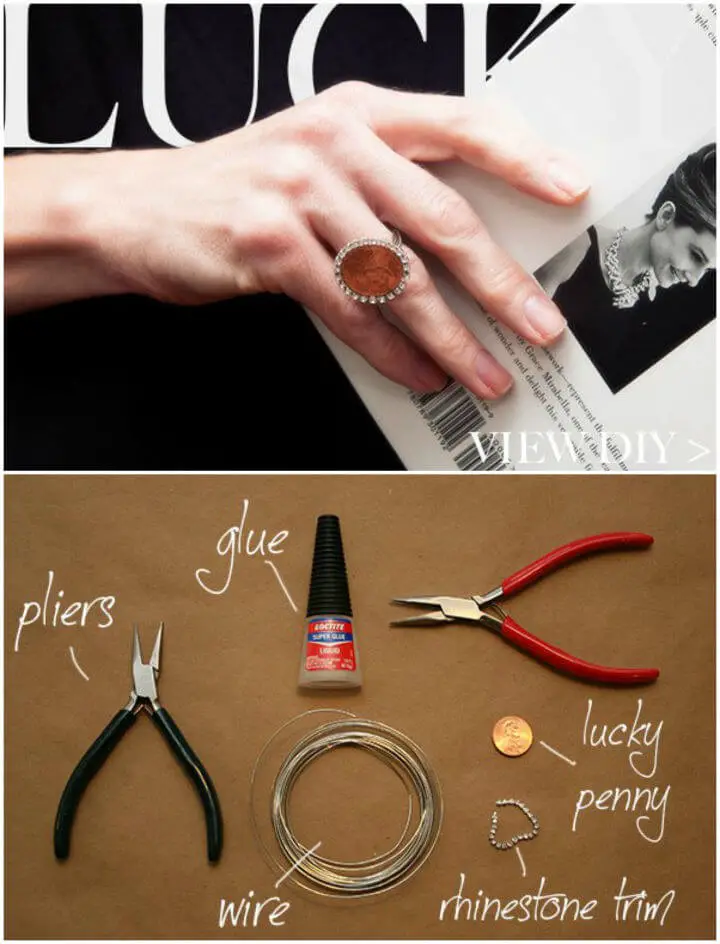
Transform a humble penny into a one-of-a-kind piece of jewelry with Trinkets in Bloom’s easy-to-follow DIY guide. This comprehensive tutorial is perfect for crafting enthusiasts and those looking to create a unique accessory that holds sentimental value. By combining the significance of a personalized penny with the sparkle of rhinestones, you’ll craft a charming ring that exudes simplicity and creativity. With this delightful DIY project, you’ll fashion a meaningful piece of jewelry that’s as special as it is stylish.
Make Your Own Giant Gem Rings
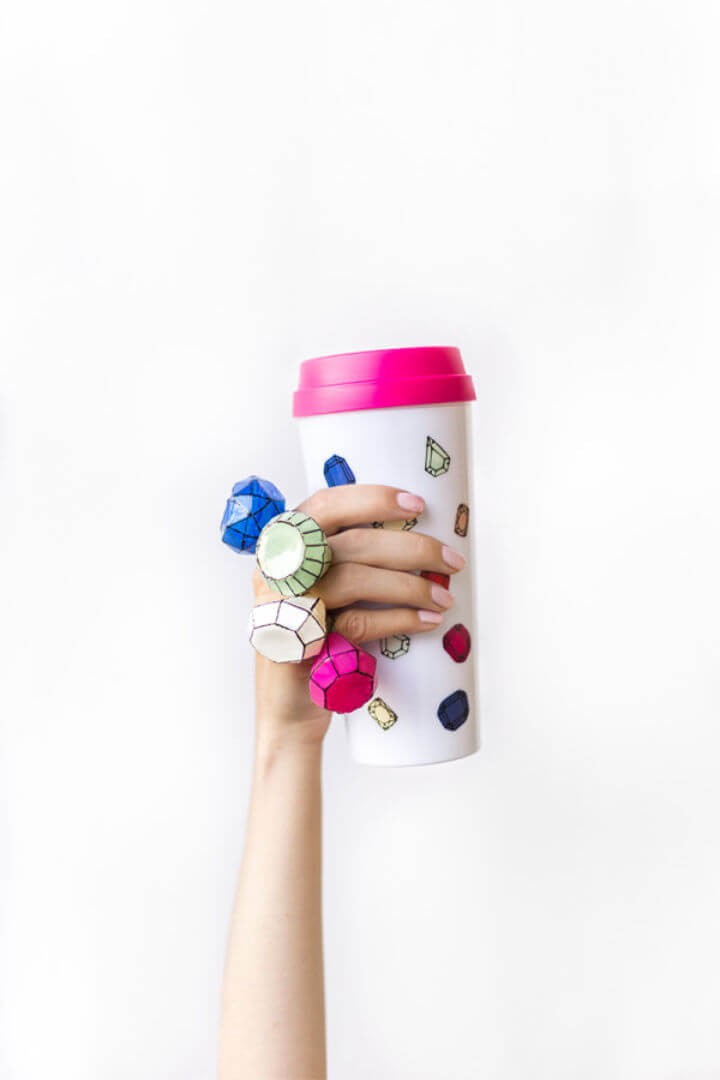
Create a show-stopping statement piece with DIY flair by transforming ice cube molds into oversized gem rings. Studio DIY’s innovative tutorial harnesses the power of hot glue and everyday items like nail polish, ring blanks, and your imagination to craft one-of-a-kind accessories that add a touch of whimsy and personality to any outfit or occasion. With step-by-step guidance, you can confidently bring these eye-catching rings to life at home, whether it’s for a costume, party, or just to brighten up your day. Let the creative process unfold as you work with simple materials and unleash your inner artist.
How to Make a Swirl Ring
Indulge in the creative allure of handmade jewelry by crafting your own Swirl Ring with Bettina Johnson’s comprehensive DIY guide. This interactive tutorial empowers you to shape a unique piece of artistry, mastering fundamental techniques like wire bending and hammering. To elevate your creation, learn how to integrate a captivating moonstone element. Perfect for those who cherish personalized accessories or seek a meaningful gift. With Bettina’s meticulous step-by-step instructions, transform a simple wire into a breathtaking swirl ring that reflects your personal style.
Make Your Own Tube Rings
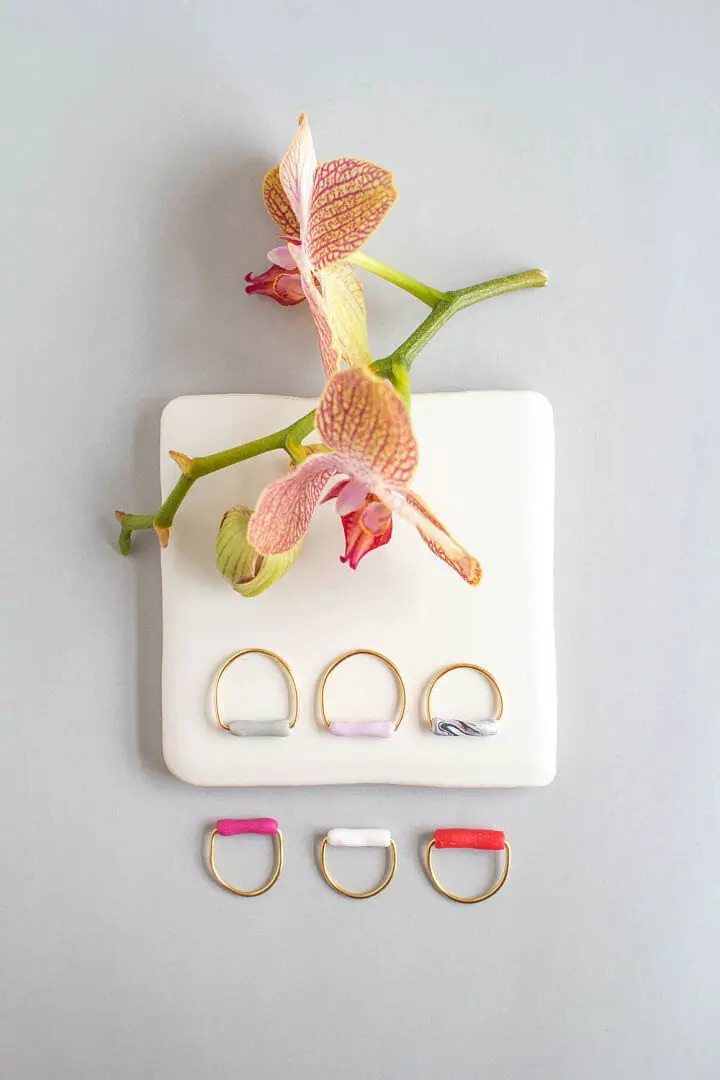
Transform your jewelry collection with the DIY Tube Rings tutorial on Fall For DIY. This straightforward project invites crafty individuals to unleash their creativity, creating one-of-a-kind accessories that reflect their personal style. By combining polymer clay, wire, and a ring mandrel, you can craft a unique collection of rings, perfect for personal adornment or thoughtful gifting. Simply shape the clay, freeze it, form the wire, combine the two, and bake – a process that’s both easy to follow and rewarding to execute. Let your creativity shine as you bring forth something truly special today.
DIY Conversation Heart Rings
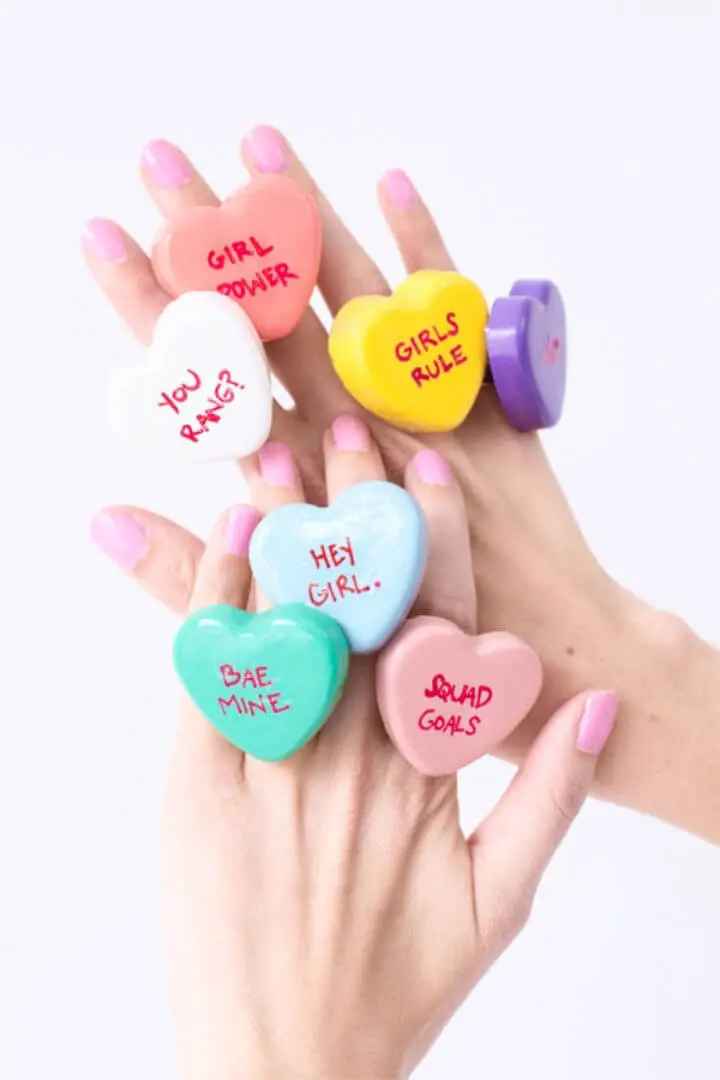
Embrace the whimsy of DIY crafting with these delightful Conversation Heart Rings, perfect for Valentine’s Day or any occasion that calls for a touch of love. By combining the versatility of hot glue with a dash of creativity, you can create one-of-a-kind, personalized accessories that exude charm and warmth. To get started, gather your supplies: a silicone heart mold, a trusty glue gun and sticks, a variety of nail polishes to add pops of color, a red nail art pen for added flair, and ring blanks to serve as the foundation for your creations. Fill the mold with hot glue, allowing it to set before painting and inscribing sweet messages or sentiments on each heart. Once your hearts are adorned, secure them to the ring blanks using more hot glue. The result is a delightful accessory that’s not only a thoughtful gift but also an excellent activity for a fun craft night or get-together with friends.
Conclusion
As you’ve explored the world of DIY rings, you’ve unlocked a treasure trove of creative possibilities, allowing you to craft one-of-a-kind jewelry pieces in the comfort of your own space. Our collection of 25 homemade DIY ring ideas has not only guided you through the process but also imparted valuable tips on how to enhance their durability and aesthetic appeal. With every ring you create, you’re not just crafting a beautiful accessory, but also expressing your unique style and creativity. So, gather your materials and let your imagination run wild, as the possibilities for stunning, handmade rings are endless. Whether you’re looking to expand your personal jewelry collection or gift a special piece to someone meaningful, these DIY ring ideas serve as the perfect starting point for unleashing your creative potential with just a little time and inspiration.
