Why Make Your Own DIY Headboard?
Creating a DIY headboard not only yields a satisfying result but also provides numerous benefits. For instance, it’s a cost-effective solution compared to purchasing a store-bought one, allowing you to allocate funds elsewhere in your home. Moreover, crafting your own headboard grants you the freedom to personalize it according to your style, color palette, and material preferences, ultimately reflecting your unique personality in your bedroom. Additionally, DIY projects like this one provide an opportunity to develop valuable skills such as woodworking, upholstering, and creative design, which can be applied to future home improvement endeavors. Furthermore, choosing a DIY approach enables you to repurpose materials or upcycle old furniture, reducing waste and contributing to a more environmentally friendly lifestyle. Finally, the sense of accomplishment that comes with completing a DIY project is unmatched, providing a constant reminder of your creativity and hard work. Overall, making your own headboard is a practical, enjoyable, and rewarding experience that can enhance your bedroom without breaking the bank.
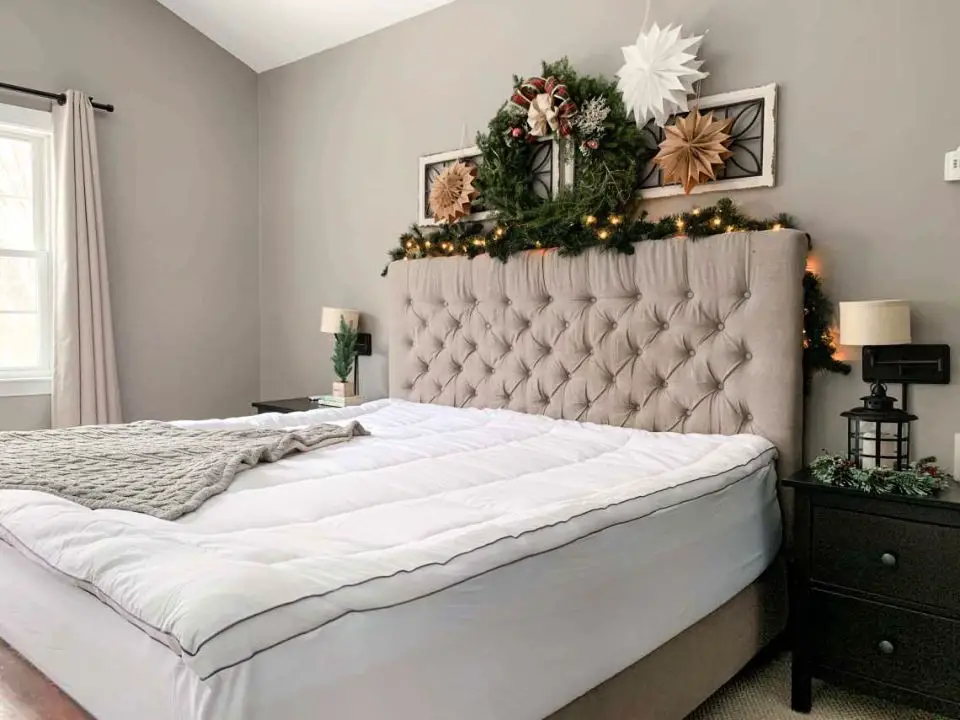
How to Make a Channel Tufted Headboard
Transforming your bedroom into a cozy retreat without breaking the bank is achievable with a luxurious channel tufted headboard, a DIY project that can be tailored to fit your bed size and style preferences. This cost-effective approach allows you to add a touch of sophistication to your space while keeping it budget-friendly. To get started, let’s dive into the steps required to create your own unique channel tufted headboard.
Materials You’ll Need:
To create your upholstered headboard, you’ll need a few essential materials. Start with the upholstery fabric, which should be cut into panels that are 14 inches wide by 47 inches long each. Next, prepare foam strips, cutting them to match the size of your wooden planks. For the batting, add an extra two inches around each plank to ensure proper coverage. The wooden planks themselves will need to be sized according to the width of your bed. You’ll also require a spray adhesive for securing the fabric in place, as well as a staple gun – pneumatic models can make the process easier and more efficient. Additionally, you’ll need screws and a drill for attaching the headboard to the wall. Finally, don’t forget fabric for the back of the headboard itself.
Step 1: Prepare Your Fabric and Foam
To begin constructing your custom headboard, start by cutting your fabric panels to precise measurements that align with the dimensions of your wooden frame. For added accuracy, utilize a reliable tool like an X-Acto knife to ensure clean cuts. In tandem, cut your foam strips to match the size of your wooden planks, guaranteeing a seamless integration. This meticulous attention to detail will lay the groundwork for a beautifully crafted headboard that perfectly complements your bedroom’s unique aesthetic.
Step 2: Attach the Foam to the Planks
Secure the foam strips to the planks by applying a thin layer of spray adhesive and meticulously aligning the edges to prevent any laps. This ensures a seamless bond between the foam and wood, guaranteeing a professional-looking finish.
Step 3: Add Batting
To achieve a seamless finish, carefully trim the batting to exceed the plank edges by approximately two inches on all sides. Next, secure the batting to the planks by wrapping it snugly and applying staples, making sure to cover any exposed areas to prevent gaps from forming.
Step 4: Staple the Fabric
To secure the fabric on the foam-covered plank, begin by fastening it at the midpoint of one edge using your preferred method for attaching fabric (such as staples). Draw the material taut and attach it again at the opposite edge’s center, ensuring a smooth, even surface. Repeat this process, alternating edges to guarantee a straight and level finish that won’t slant or become misshapen.
Step 5: Neaten the Edges
When completing your DIY wooden project, it’s essential to tidy up any excess fabric at the ends of the planks by trimming them down to approximately one inch in length. Next, fold this trimmed edge over and secure it with staples on the inside end of the plank, ensuring a seamless finish. To achieve crisp edges, ensure the fabric is pulled taut as you staple it in place.
Step 6: Build the Frame
To construct the skeletal framework of your headboard’s rear, start by measuring and cutting wooden planks into pieces for the top, bottom, and sides. These components should fit snugly within the perimeter of your headboard’s back edge. Next, use screws to assemble the frame, ensuring it is secure and sturdy. Finally, attach this structure to the back of your upholstered panels, effectively forming the foundation of your bespoke headboard design.
Step 7: Attach Panels to Frame
Begin by arranging the panels face-down in the desired sequence for your headboard. Next, secure each panel to the frame using screws, making sure they are firmly compressed and locked into place.
Step 8: Cover the Back
When it comes to selecting a fabric for the back of your headboard, durability is key. Opt for a sturdy material that can withstand regular use. Measure and cut the chosen fabric to fit the frame’s dimensions, ensuring you have enough excess material (about an inch and a half) to fold inward before securing it with staples. This attention to detail will result in a clean and professional-looking finish.
Finishing Touches
With the panelling secured and the backing fabric properly aligned, your channel tufted headboard is now complete. To ensure its structural integrity, attach it to your bed frame or position it carefully between your bed and the wall to prevent any unwanted movement.
Video Tutorial
For those who learn better through visual aids, I recommend watching the YouTube video tutorial on creating a channel tufted headboard. The accompanying written guide provides additional insight into the process, making it easy to follow along. But why stop at just saving money? Making your own headboard is also an excellent opportunity to tailor the design to your unique style and preferences. With these steps, you can create a truly one-of-a-kind piece that perfectly complements your bedroom’s aesthetic.
DIY Headboard Ideas and Plans FAQ
Transforming your bedroom without breaking the bank is achievable by crafting your own headboard. To ensure a successful DIY endeavour, consider these commonly raised queries: What design approach should I take? How do I choose the perfect fabric and materials? Which construction methods will yield the desired outcome?
What materials do I need to make a DIY headboard?
When it comes to crafting your ideal headboard, you’ll need to gather various materials. The specific requirements will depend on the type of design you’re aiming for, but common staples include wood or plywood for the frame, foam padding for cushioning and support, and fabric or leather for upholstery. To smooth out any wrinkles or imperfections, batting is a must-have addition. You’ll also need a staple gun and staples to secure everything in place, as well as screws and a drill for assembling the different components. If you want to add an extra touch of elegance, consider incorporating decorative nails or buttons for tufting purposes.
Can I make a headboard without woodworking skills?
For those new to DIY headboard crafting, the good news is that many projects cater specifically to beginners. This means you don’t need to possess advanced woodworking skills to get started. Instead, look for designs that utilize straightforward materials like fabric, foam, and a fundamental wooden frame. These simple yet effective approaches provide an excellent foundation for building your confidence and honing your DIY skills.
How can I attach my DIY headboard to the bed?
When it comes to attaching a DIY headboard to your bed, you have several options to consider. One approach is to mount it directly to the wall behind the bed, providing a sturdy foundation for your creation. Alternatively, you can attach it to the bed frame itself using bolts or screws, ensuring a secure fit that won’t shift around during the night. For heavier headboards that don’t require additional support, freestanding between the wall and bed is a viable option, as long as it’s stable enough to remain upright on its own.
How do I choose the right size for my DIY headboard?
When it comes to selecting a headboard, one crucial consideration is its width in relation to the bed. A good rule of thumb is to choose a headboard that mirrors or slightly surpasses the width of your mattress. As for the height, this is where personal taste and design aesthetic come into play. Consider what level of drama and visual interest you want to bring to the space, as taller headboards can create a sense of grandeur while shorter ones can provide a more understated look.
What is the easiest type of headboard to DIY?
A DIY-friendly option for creating a stylish focal point in your bedroom, a simple upholstered headboard offers an accessible entry point into upholstery projects. With minimal equipment and supplies needed, you’re free to choose the perfect fabric that harmonizes with your personal style, allowing for a seamless integration of form and function.
How can I make my DIY headboard more comfortable?
For those who prefer sitting up in bed, one simple way to enhance comfort is by introducing additional foam cushioning or opting for thicker, high-density foam. A clever hack involves layering batting material on top of the foam prior to upholstering, which can significantly soften the surface and create a more inviting atmosphere.
Can I repurpose materials for my headboard project?
Incorporating reclaimed materials, such as aged wood, vintage doors, or refurbished headboard frames, brings a unique charm to your project while promoting eco-friendliness. Think outside the box and explore how to breathe new life into discarded items, transforming them into functional masterpieces that tell a story.
What if I make a mistake during my DIY headboard project?
DIY projects are inherently imperfect, and mistakes are an inevitable part of the learning process. Fortunately, many errors can be easily corrected by simply removing staples or screws and readjusting as needed. The beauty of DIY lies in its ability to accommodate imperfections, allowing you to create a piece that’s uniquely yours. It’s not just about saving money; it’s also an opportunity to infuse your personal style into your bedroom. By combining creativity with effort, you can craft a functional headboard that reflects your unique taste and adds a touch of personality to your space.
30 Cheap DIY Headboard Ideas and Plans
Elevate your bedroom decor without breaking the bank by creating a one-of-a-kind headboard using affordable materials. From rustic wood designs to elegant fabric creations, explore 30 budget-friendly DIY headboard ideas and plans that will guide you in crafting a showstopping piece of furniture.
Mid-Century Modern Inspired DIY Wood Headboard
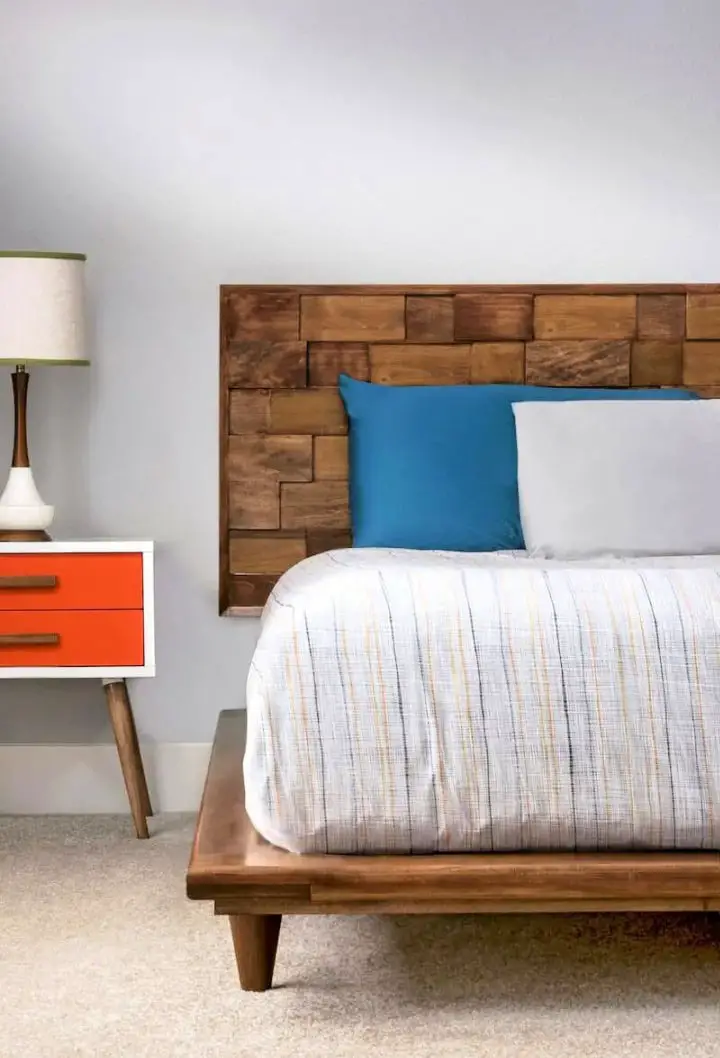
Get ready to craft a show-stopping mid-century modern-inspired wood headboard with this comprehensive DIY guide. Perfect for intermediate woodworking enthusiasts, this tutorial takes you by the hand through every step, from measuring and cutting to assembling your one-of-a-kind king-sized (or adjustable) masterpiece. Not only will you gain the satisfaction of creating a bespoke piece that reflects your personal style, but you’ll also enjoy the thrill of building something truly unique at a fraction of the cost of purchasing it pre-made.
Making a Leather Upholstered Headboard
Crafting a leather upholstered headboard imbues any bedroom with an air of sophistication and coziness, as demonstrated by Jaime Costiglio’s accessible guide. By transforming a wood headboard into a stunning masterpiece adorned with brass nailhead details, you’ll be able to create a show-stopping piece that exudes elegance. The process begins with the selection of premium Montana buckskin leather, followed by the precise attachment of trim and nailheads. This comprehensive tutorial covers every step, from selecting the finest materials to adding the finishing touches, ensuring your DIY project turns out exceptional. Whether you’re redesigning your own bedroom or crafting a special gift for someone dear, this guide will empower you with the skills to produce an one-of-a-kind headboard that’s sure to captivate.
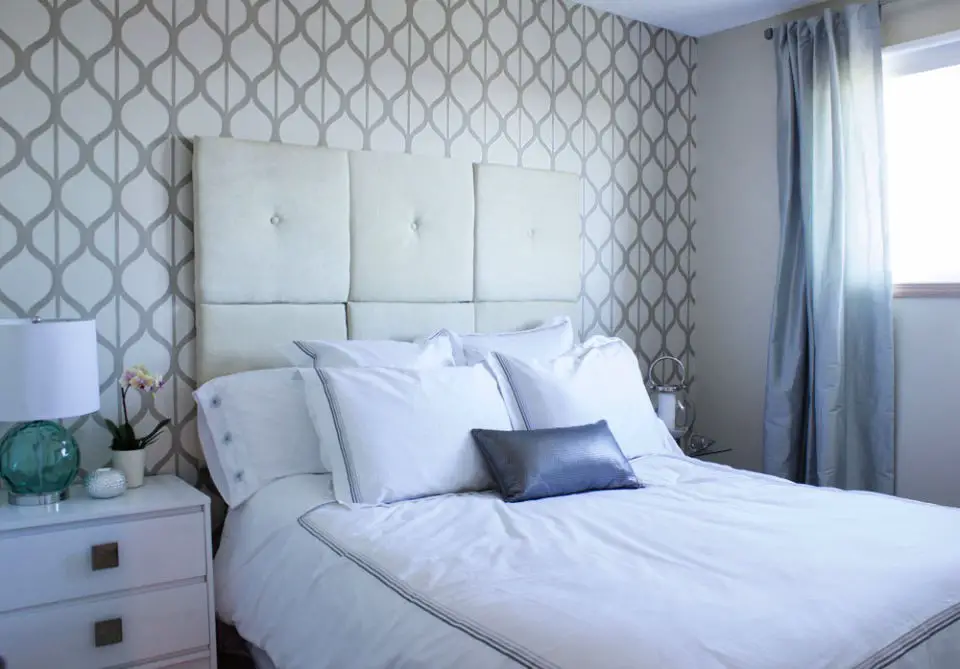
How to Make a Tufted Headboard
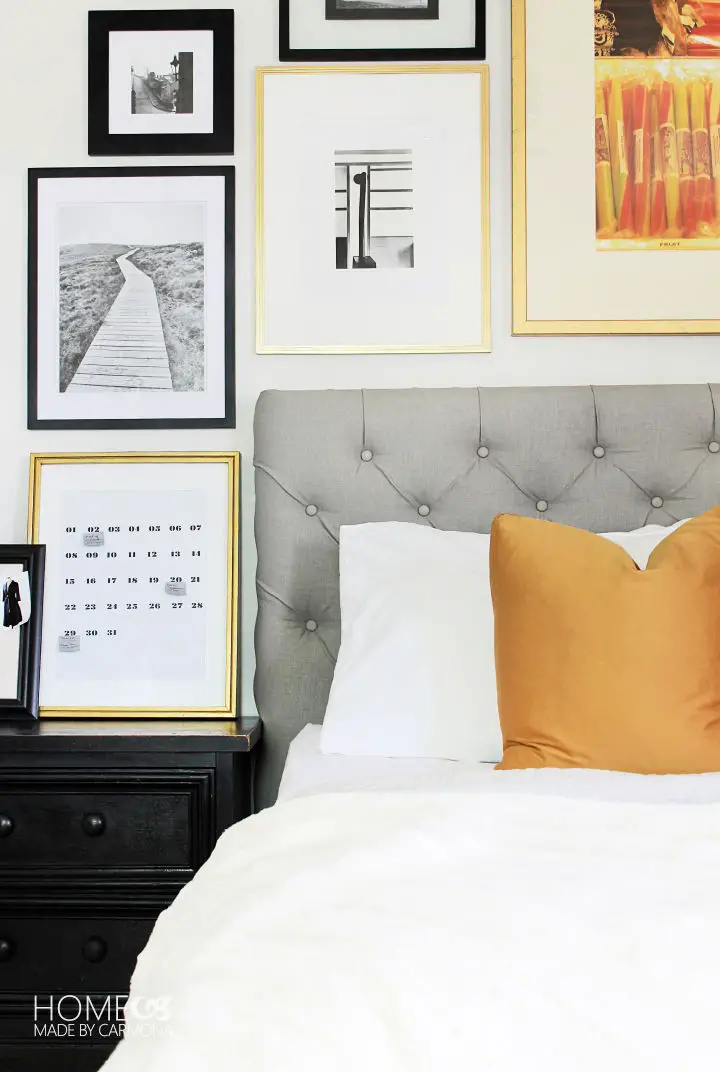
Transform your bedroom with a DIY diamond tufted headboard, a budget-friendly and fulfilling project that combines elegance with practicality. By following a step-by-step guide, even those new to DIY upholstery can achieve professional-looking results. Repurpose materials like an old headboard frame or egg crate foam mattress topper for under $50, and personalize your creation with your choice of fabric and buttons. The process is detailed yet straightforward, involving tasks such as drilling holes for the tufting and securing the fabric for a polished finish. With confidence, embark on this craft project and get ready to revitalize your space with a stunning headboard that showcases your style and craftsmanship.
Build a Headboard for a King-Size Bed
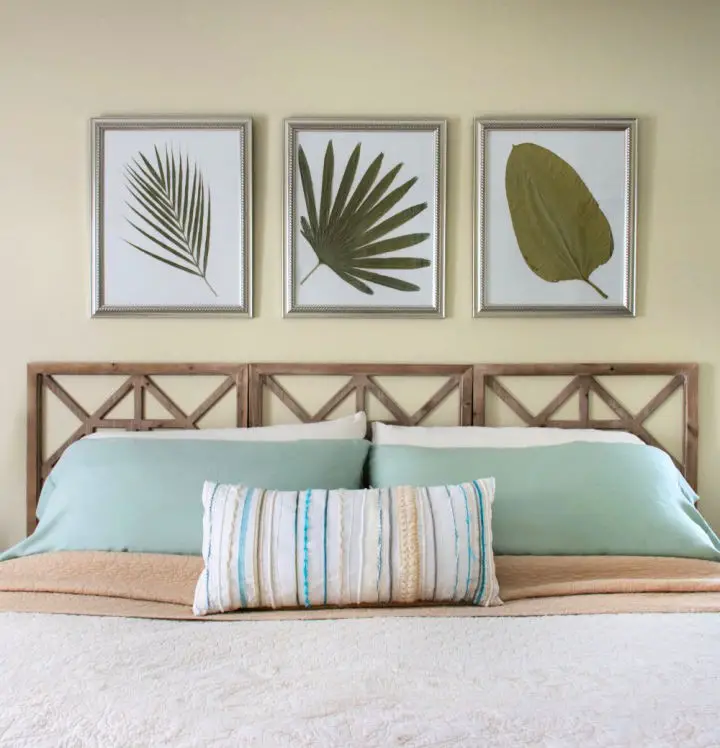
Transform your bedroom into a chic oasis by crafting a one-of-a-kind DIY headboard using decorative wall panels. With Scratch and Stitch’s straightforward guide, you can turn your bed’s backdrop into a stunning focal point in under an hour. Simply measure out the space, select your preferred panel design, and gather basic tools like a drill and level to elevate the ambiance of your master suite. This budget-friendly project not only adds a touch of sophistication but also showcases your creative skills and dedication to enhancing your personal space.
Rustic DIY Headboard Out of Shiplap
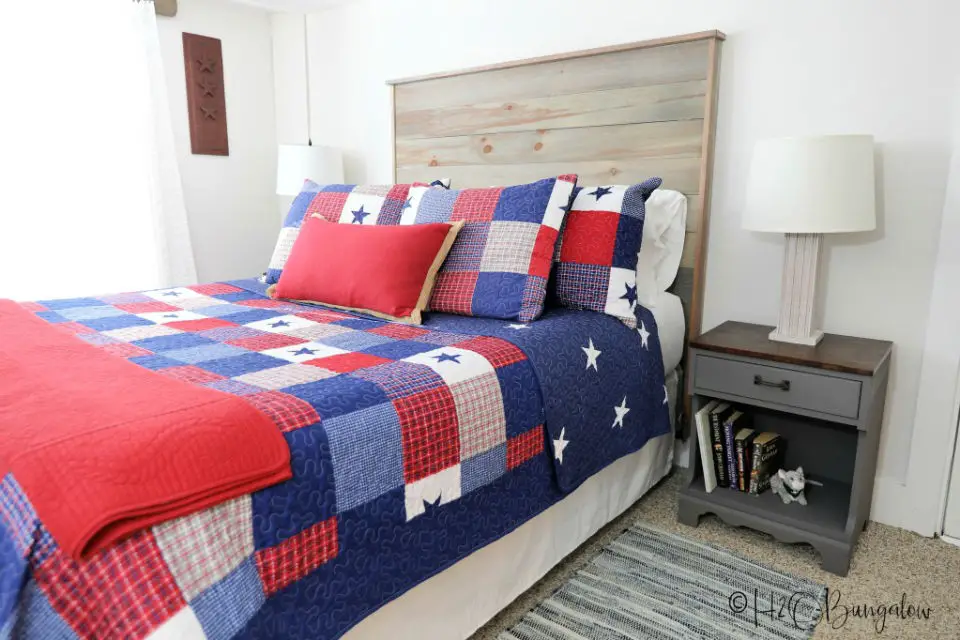
Transform your bedroom into a cozy retreat with a rustic headboard made from shiplap, inspired by H2OBungalow’s DIY tutorial. Wendi Wachtel’s clear guidance and accompanying video make it effortless to create this charming piece, even for those with limited woodworking experience. With a budget-friendly price tag of under $50, you can enjoy the modern rustic look that complements any bed size. The detailed instructions provide valuable tips and a comprehensive list of materials, empowering you to bring your creative vision to life. As you embark on this engaging project, you’ll breathe new life into your room with a personalized touch that reflects your unique style.
Make Your Own Headboard With Lights
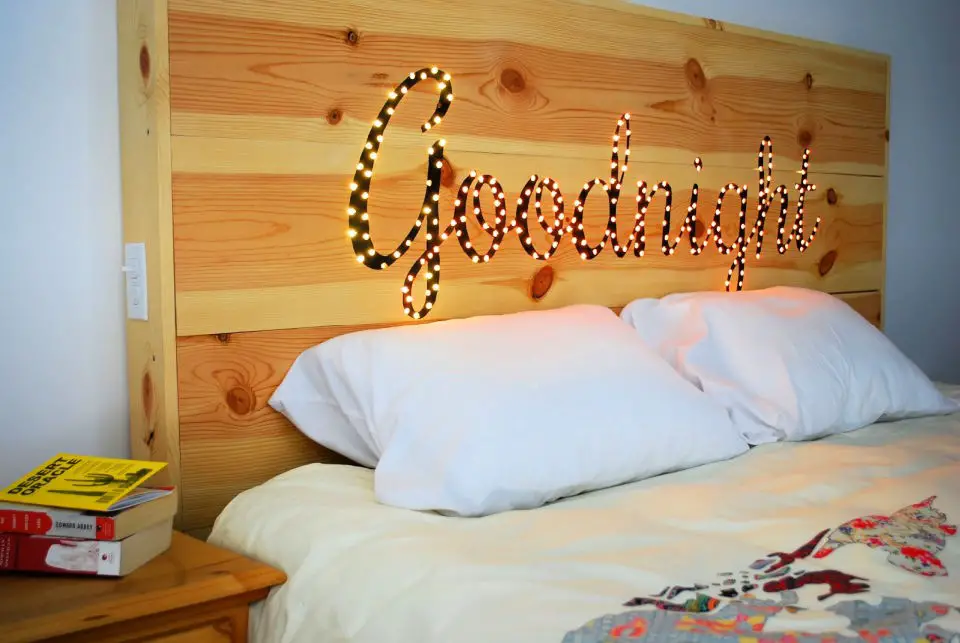
Transform your bedroom into a serene oasis by creating a unique DIY ‘good night’ headboard inspired by Shelterness. This innovative project turns the area surrounding your bed into a radiant retreat, eliminating the need for bedside lamps. To bring this charming piece to life, you’ll need alder boards, screws, wood for bracing, paint, and a light switch with a faceplate. Additionally, gather white lights and an extension cord to illuminate your creation. The construction process is straightforward: secure the boards, then follow a step-by-step tutorial to add a personal touch to your sleeping space. This project not only adds warmth and ambiance but also serves as a striking statement piece that’s sure to leave a lasting impression.
How to Make a Storage Headboard
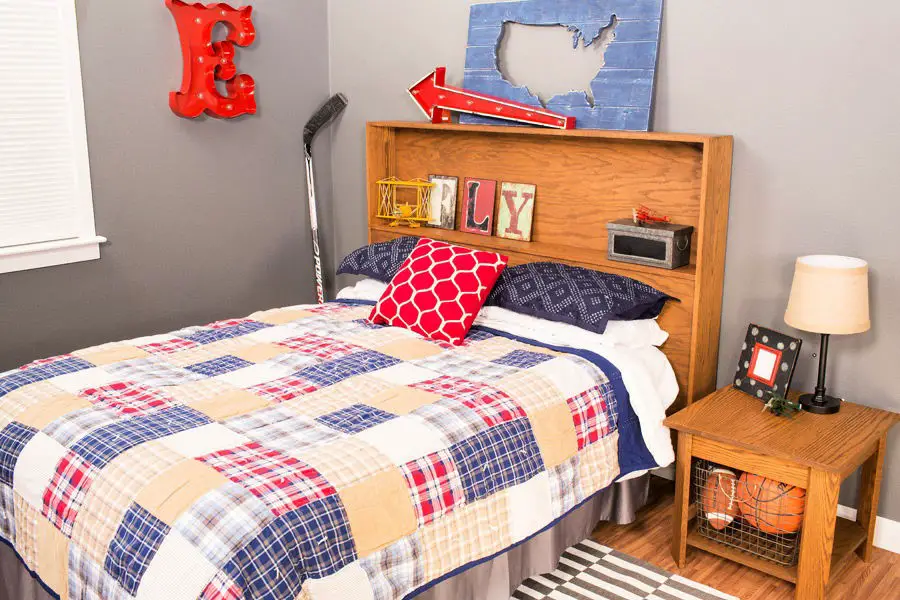
Transform your bedroom sanctuary with the versatile storage headboard from Kreg Tool. This clever design boasts two shelves, perfect for storing must-have items within arm’s reach while you unwind. The 7-piece construction makes the build process a breeze, even for those new to DIY projects.
Select the wood and finish that harmonize with your bedroom’s aesthetic – traditional or modern styles are easily accommodated. Follow the straightforward instructions to assemble the headboard, then add a personal touch with stain or paint. Once complete, effortlessly attach it to your bed frame, basking in the pride of having crafted a functional and stylish storage solution.
DIY Live Edge Wood Headboard
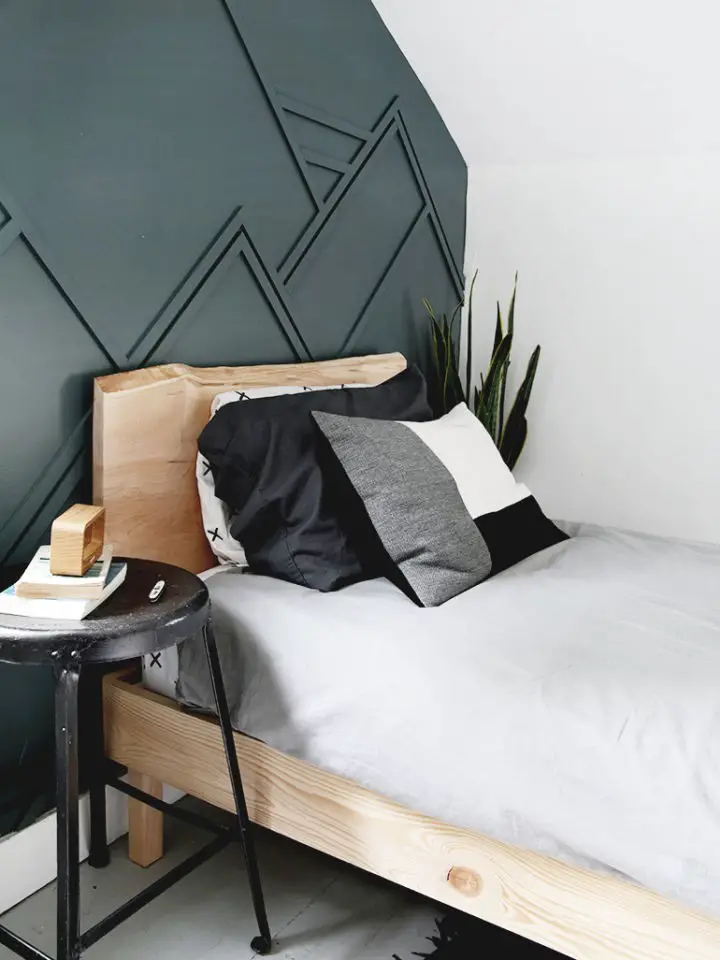
Crafting a DIY live edge wood bed is an excellent way to infuse your bedroom with rustic charm while indulging in the satisfaction of creating a one-of-a-kind piece of furniture. Our comprehensive guide takes you through the process of building a modern bed frame, featuring a striking live edge headboard, providing both novice and experienced DIY enthusiasts with the necessary tools and guidance to achieve a stunning outcome. With a detailed materials list and step-by-step instructions, this tutorial empowers you to construct a show-stopping centerpiece for your bedroom, combining the natural beauty of wood with a touch of elegance. To ensure a professional finish, we also cover essential sanding and finishing techniques, guaranteeing a lasting result that will make you proud to have built it yourself.
How to Upholster a Headboard for Beginners
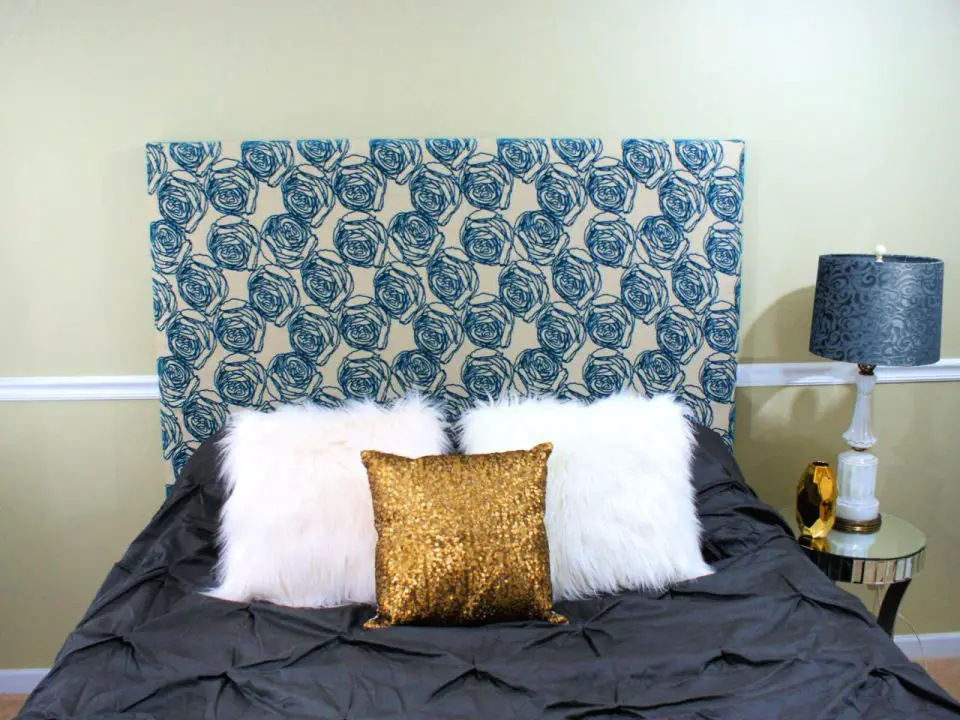
Creating an upholstered headboard is a DIY endeavor that can bring a unique touch to your bedroom. This project requires no prior experience, as HGTV’s comprehensive guide takes you through the process with ease. The tutorial begins by establishing a foundation on a simple plywood base, after which it covers crucial aspects such as sizing, cutting, framing, and fabric selection. With a clear understanding of each step and readily accessible materials, this project is perfect for tackling over a weekend. By following these instructions, you’ll be able to design a headboard that reflects your personal style and adds a touch of elegance to your bedroom.
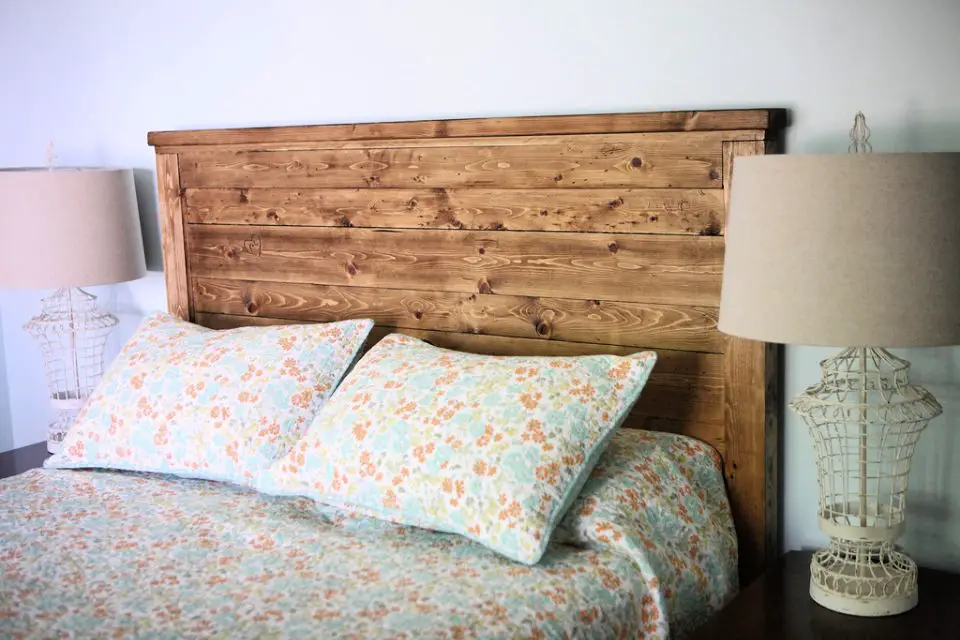
Fantastic DIY Wooden Headboard
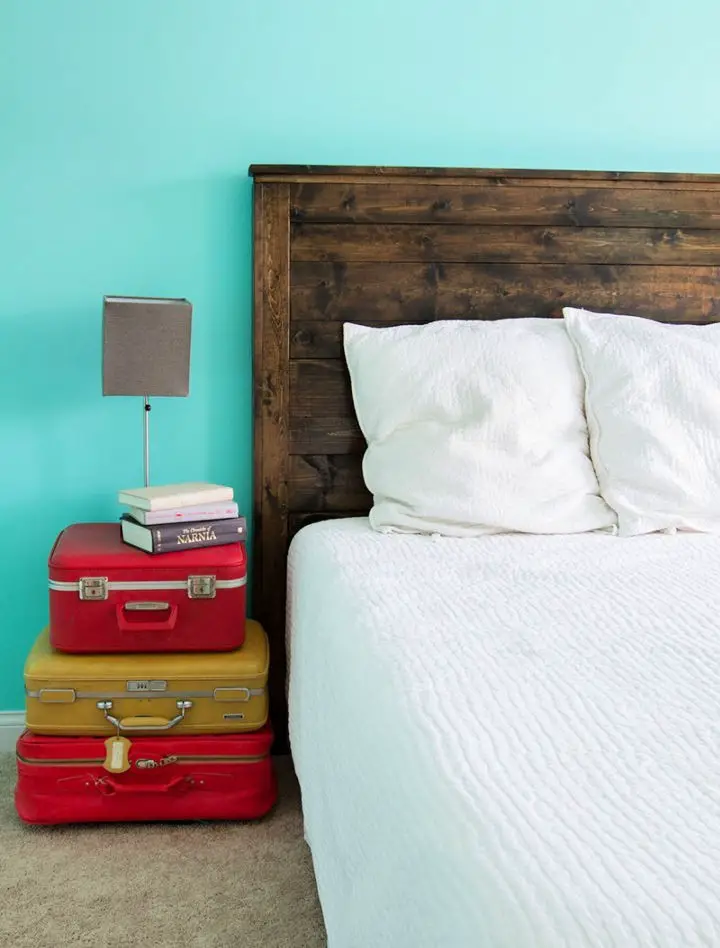
Want to infuse your bedroom with rustic charm? Look no further than Andrea’s Notebook’s comprehensive DIY guide to crafting a one-of-a-kind headboard. This straightforward project requires minimal tools and no prior woodworking expertise, making it an accessible option for anyone looking to add a touch of whimsy to their sleep sanctuary. By following clear, step-by-step instructions, you’ll learn how to select the perfect wood, apply rich stain, and assemble your masterpiece with ease. As an added bonus, you’ll also discover the secret to pairing your new headboard with the ultimate Yogabed™ mattress for a cozy bedroom makeover that’s sure to impress.
Build a Barn Door Headboard for $50
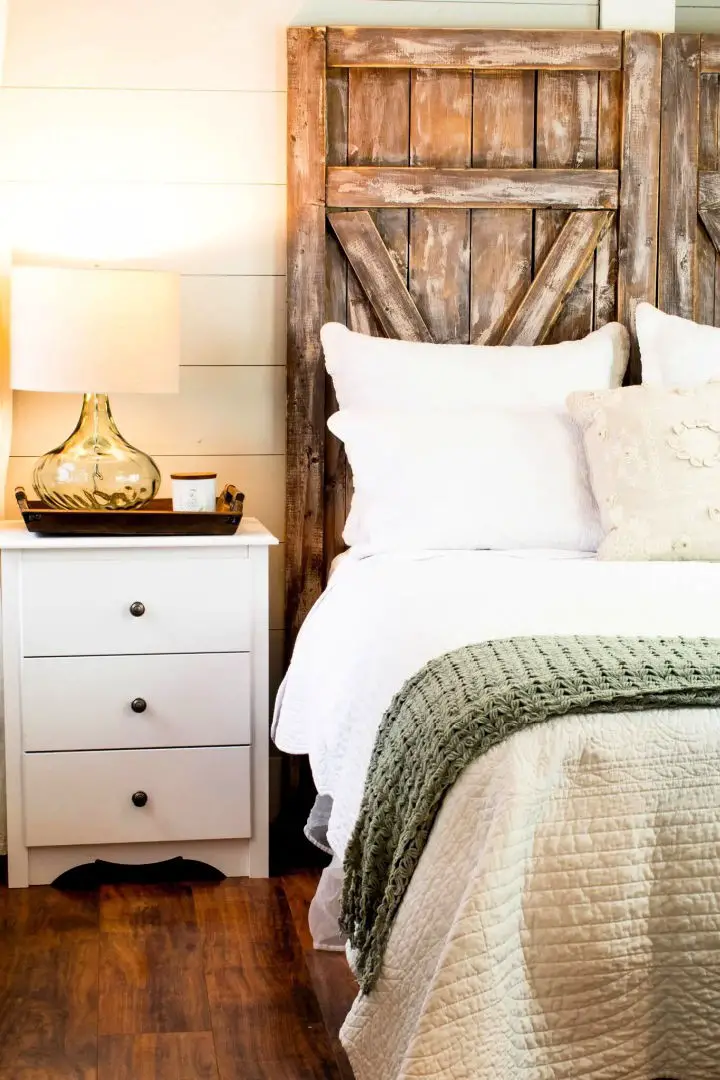
A rustic farmhouse-style barn door headboard can effortlessly bring a charming country vibe to any bedroom. Fortunately, Little Yellow Wheelbarrow offers a user-friendly guide that enables you to create this look for just $50. The comprehensive tutorial provides step-by-step instructions and a detailed list of materials and tools needed to transform wooden planks into a stylish headboard within a single weekend. To achieve the coveted weathered aesthetic, the project includes expert tips on cutting, assembling, and finishing the wood. This engaging DIY guide is ideal for anyone seeking to add a touch of country charm to their space without sacrificing their budget.
DIY Girls Twin Size Headboard
Transforming your child’s bedroom into a cozy retreat is now possible with a budget-friendly DIY twin headboard. Inspired by The Creative Mom, Natalie Dalpias, this project embodies simplicity and sweetness while staying within a$20 budget. With accessible materials and a step-by-step guide available on BuildSomething.com, you can create a customized headboard that adds a personal touch to your home. This easy-to-follow DIY process promises a rewarding experience, allowing you to craft a unique piece of furniture that elevates the décor of any room.
How to Build a Kid’s Headboard
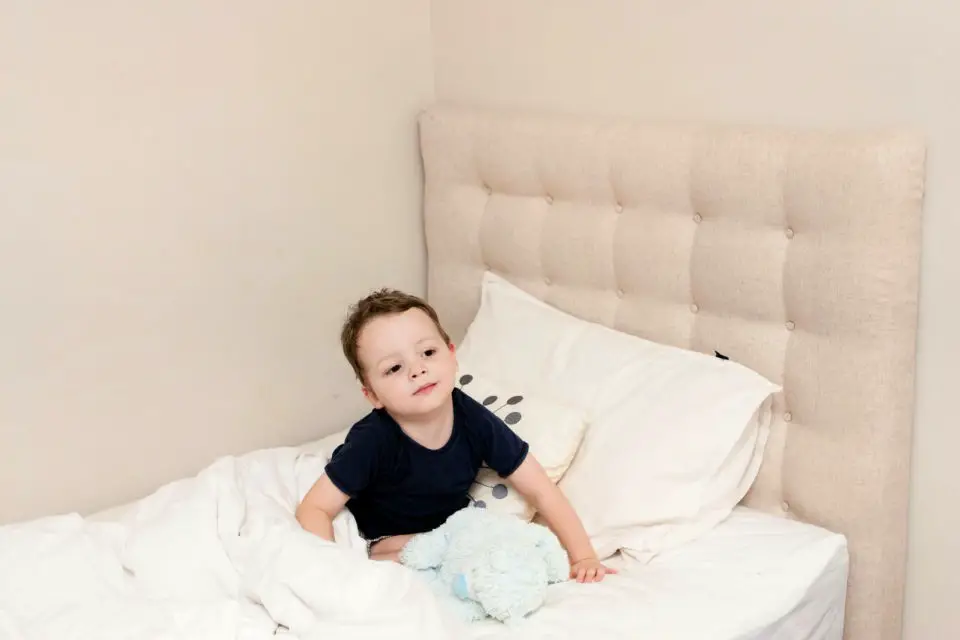
Give your bedroom a fresh makeover with a DIY headboard and bed transformation that’s sure to wow. Our comprehensive guide from Max and Me takes you through the process of revamping an old bed into a stylish, tufted masterpiece with a renewed base. To get started, we’ll walk you through the essential materials and tools needed, as well as provide a step-by-step approach that makes it easy for beginners to follow along. Learn how to achieve that luxurious tufted look by covering buttons and discover tips on securing fabric to various surfaces. Perfect for adding a personal touch to your bedroom, our instructions will guide you through the process, ensuring a rewarding project that elevates your sleeping space into a cozy retreat.
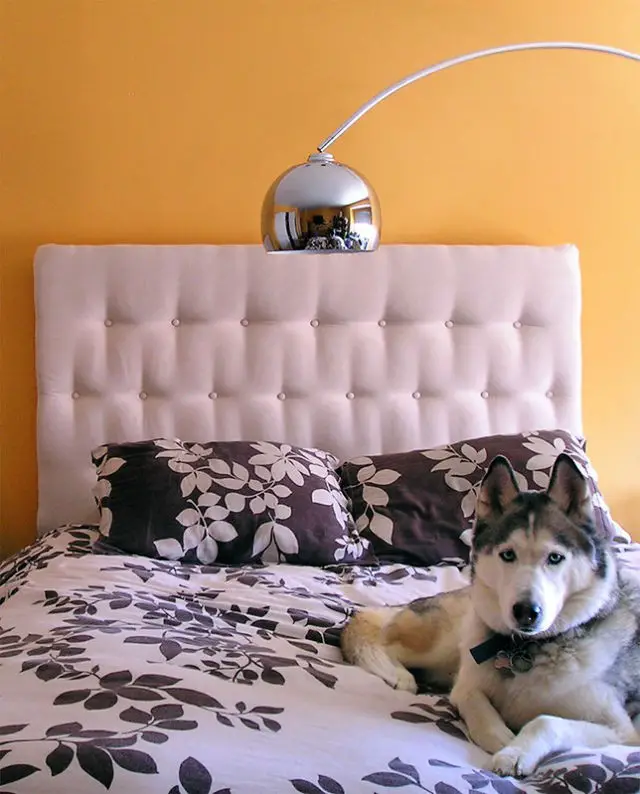
Simple DIY Tufted Headboard
Transforming your bedroom into a serene oasis, a DIY diamond tufted headboard is an innovative way to infuse elegance and personal style. By following our comprehensive guide, you’ll learn how to create this luxurious focal point from scratch, using materials such as plywood, foam, and fabric. With a total cost of approximately $150, this project allows you to enjoy the satisfaction of crafting your own unique headboard while achieving a sophisticated look that rivals high-end retailers. As you embark on this DIY adventure, get ready to experience the joy of creating a cozy retreat that embodies comfort and refinement.
Make a Vintage Shutter Head Board
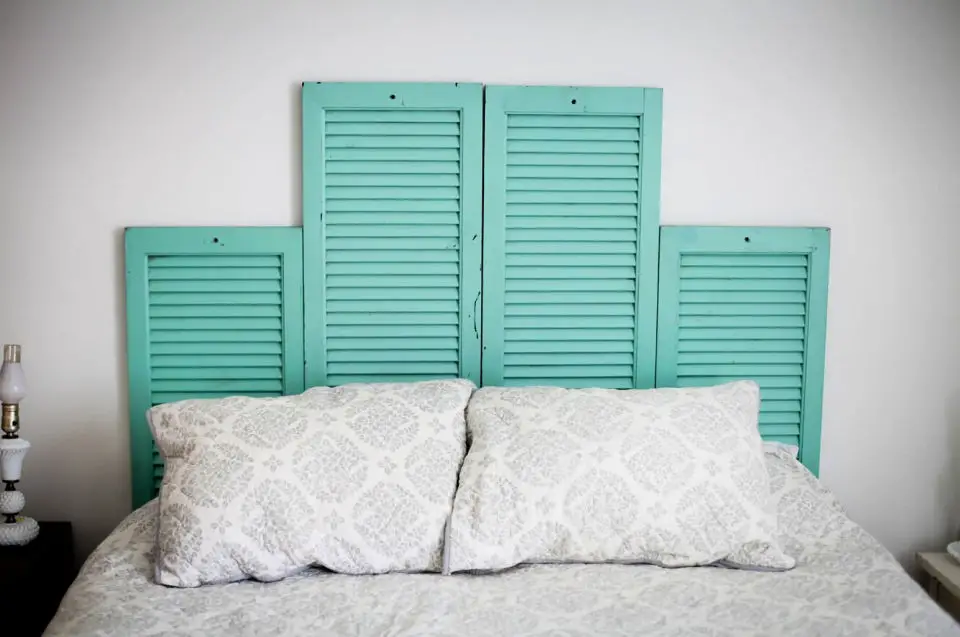
Transforming old shutters into a one-of-a-kind headboard adds a dash of rustic charm to any bedroom. With the right tools and creative vision, you can breathe new life into antique shutters and give your space a unique, personalized touch. Samantha Elizabeth’s step-by-step guide provides everything you need to know to upcycle vintage shutters into a stunning headboard, from start to finish. Whether you’re an avid DIY enthusiast or just looking for a fresh take on interior design, this project is sure to inspire and delight. With Samantha’s expertise guiding the way, you’ll be able to reclaim old shutters and infuse your bedroom with a touch of vintage elegance.
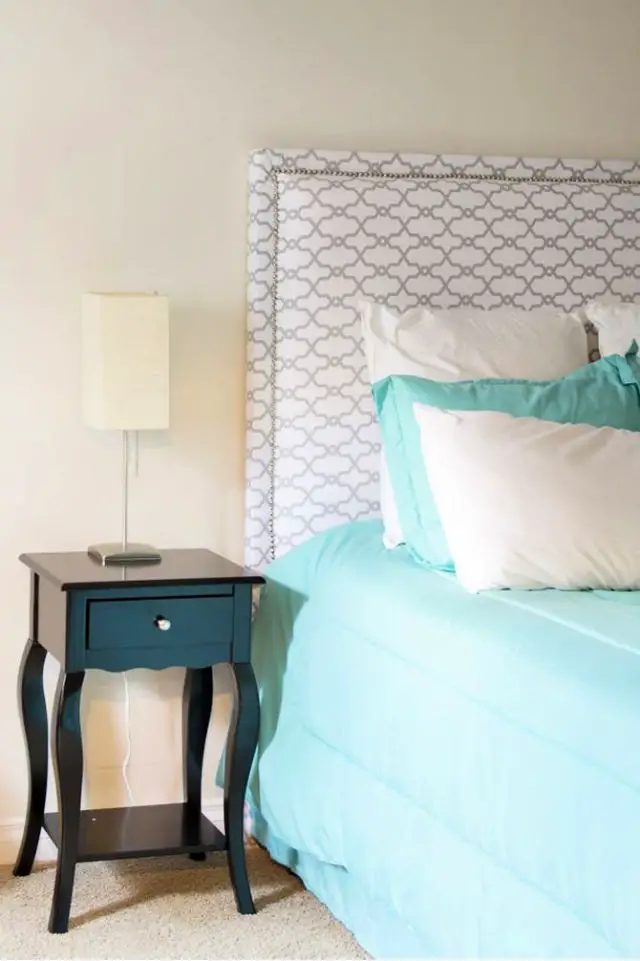
Wingback Headboard With Free Pattern
Want to elevate your master bedroom with a unique DIY touch? All Things Thrifty presents a comprehensive, step-by-step guide to crafting a striking wingback headboard, ideal for adding an air of sophistication to your sanctuary. This project is perfect for crafty enthusiasts seeking a weekend challenge, as it outlines a 24-hour timeline from start to finish.
The tutorial includes a complimentary pattern PDF and provides meticulous instructions on cutting, sanding, assembling, and upholstering the headboard. By emphasizing the use of visual aids, the guide aims to make the process crystal clear and accessible. With practical tips and a helpful approach, you’ll be able to create a one-of-a-kind headboard that reflects your personal style.
Minimalist DIY Plywood Shelf Headboard
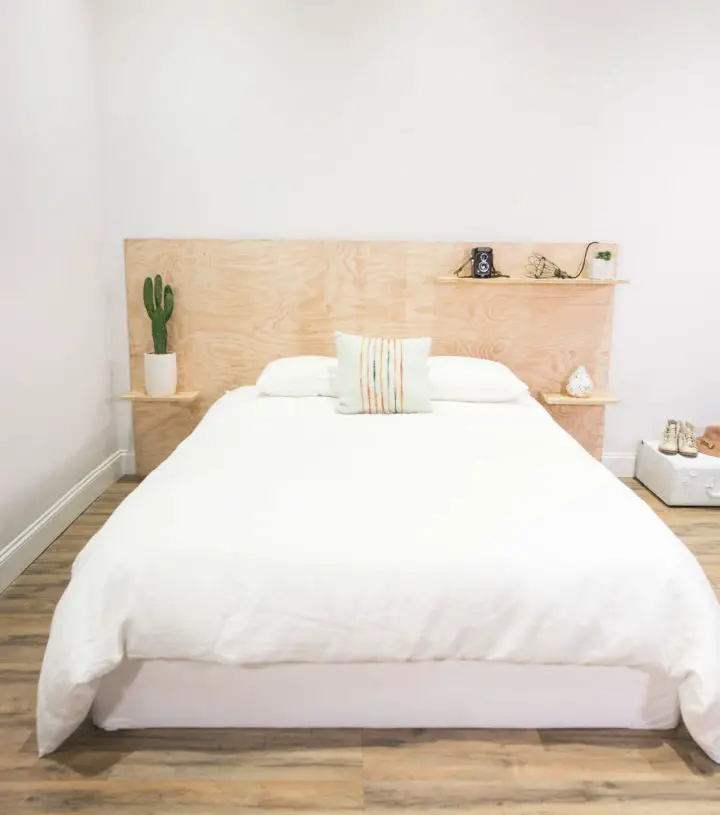
Transform your bedroom into a chic and modern sanctuary with a DIY plywood shelf headboard, courtesy of Mr. Kate. This project is perfect for adding an organic, industrial touch without requiring extensive DIY expertise. With just a 4’x8′ board, structural wood screws, a power drill, and an optional power saw, you can precision-cut shelves to your desired size, securing them with screws for a functional and stylish addition to your room.
DIY Malcolm’s Wood and Marble Headboard
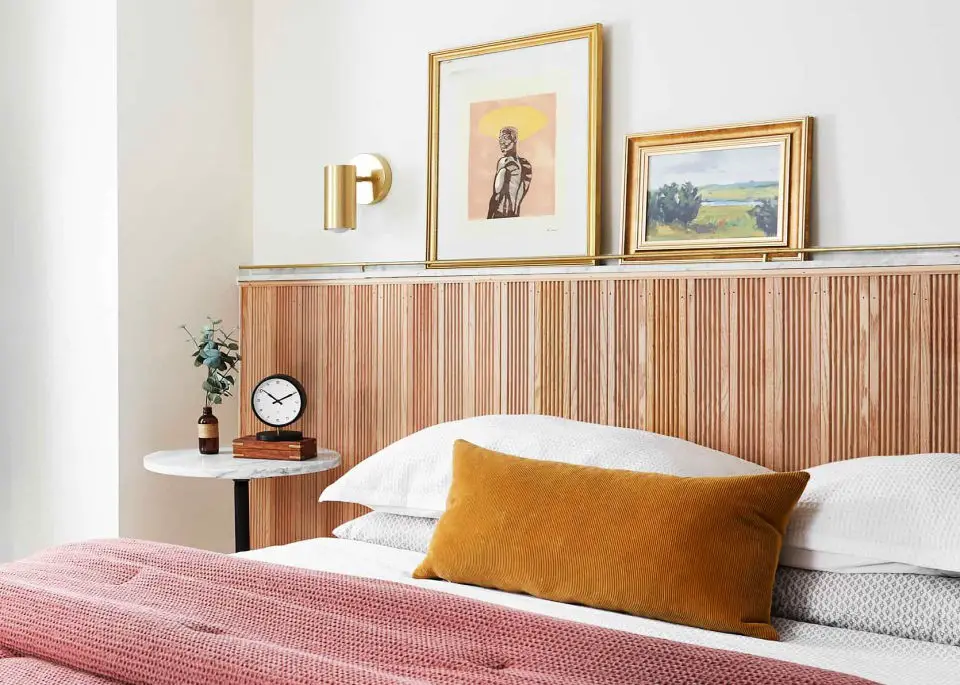
Emily Henderson’s malcolm’s wood and marble DIY headboard tutorial offers a comprehensive guide to creating a sophisticated statement piece for your bedroom. This engaging and practical tutorial takes you through the process of crafting a timeless design featuring fluted wood, chic marble, and elegant brass details. With clear instructions, even DIY beginners can confidently measure, cut, and assemble their own headboard, transforming their bedroom into a bespoke retreat. For those seeking to elevate their space with a touch of sophistication, this tutorial is an excellent resource for achieving stunning results.
How to Make a Metal Headboard
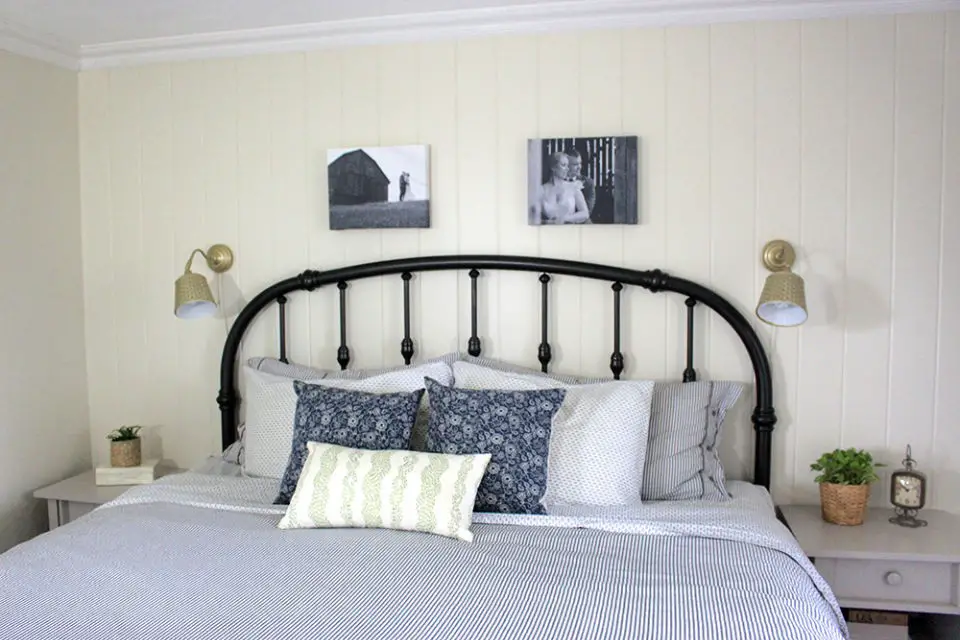
Give your master bedroom a luxurious makeover without breaking the bank by upcycling an old brass headboard into a stunning oil-rubbed bronze masterpiece. This budget-friendly DIY project, courtesy of Life at Cloverhill, proves that you don’t need to spend a fortune to achieve a high-end look. With just a few coats of Rustoleum Universal Metallic Paint and some creative problem-solving using PVC pipe and zip ties, you can securely attach the headboard to your bed frame while protecting your walls with felt furniture stickers. Follow along with Life at Cloverhill’s detailed tutorial to transform your bedroom’s aesthetic and turn it into a cozy retreat that reflects your personal style.
The Ultimate DIY Panel Headboard
Transform your bedroom sanctuary by embarking on a DIY adventure with Simple Home | Simple Life’s comprehensive guide to crafting the ultimate headboard. This treasure trove of inspiration and step-by-step instructions caters to both your creative flair and practical expertise, guiding you through projects that range from revamping an existing headboard for an eco-friendly and budget-conscious makeover to designing a bespoke corner headboard that embodies a cozy daybed ambiance. As you engage with the art of DIY projects, you’ll create a personalized space that exudes warmth and invitation. The guide’s clear directions, accompanied by helpful visuals, ensure your project is both enjoyable and successful, setting the stage for elevating your home’s style.
Making a Foam Headboard
Transform the ambiance of your bedroom without exceeding your budget by crafting a stunning tufted headboard. Following Remodelaholic’s comprehensive DIY guide, you’ll learn how to gather essential materials like plywood, foam, and upholstery fabric, before assembling and finishing your custom piece. This hands-on project offers valuable insights on finding affordable supplies and mastering the art of tufting, ensuring your handmade headboard exudes a luxurious, high-end quality that rivals professionally made designs.
DIY Wooden Plank Headboard
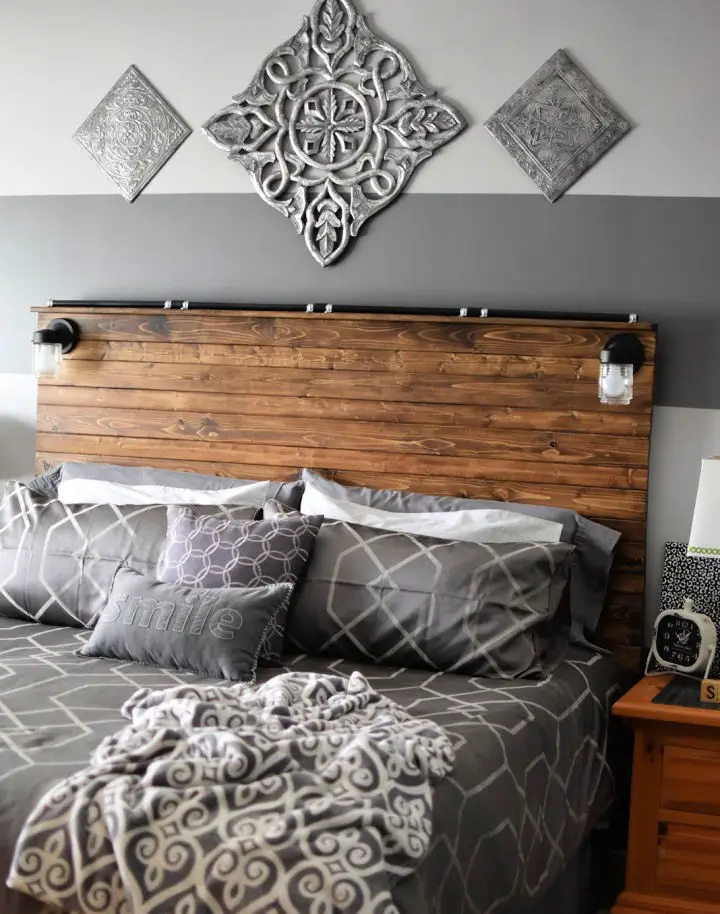
If you’re looking to infuse your bedroom with a personal touch, why not try your hand at crafting a unique wooden plank headboard? With the help of Itsy Bitsy Paper’s comprehensive guide, you’ll learn how to select the perfect wood, create pocket holes for a seamless fit, and use braces to ensure a sturdy structure. Once you’ve got the basics down, you can take it up a notch by adding a pop of color with some stained wooden planks or incorporating industrial elements like black-painted pipes. And when it comes time to hang your masterpiece, don’t be discouraged if it takes a little patience and precision – the end result will be well worth the effort. To really make your headboard shine, consider adding some rewired jelly jar lights for an instant touch of chic. With this DIY project, you’ll be able to create a one-of-a-kind backdrop that’s sure to elevate your bedroom from ordinary to extraordinary.
Make a Cane Headboard – IKEA Hack
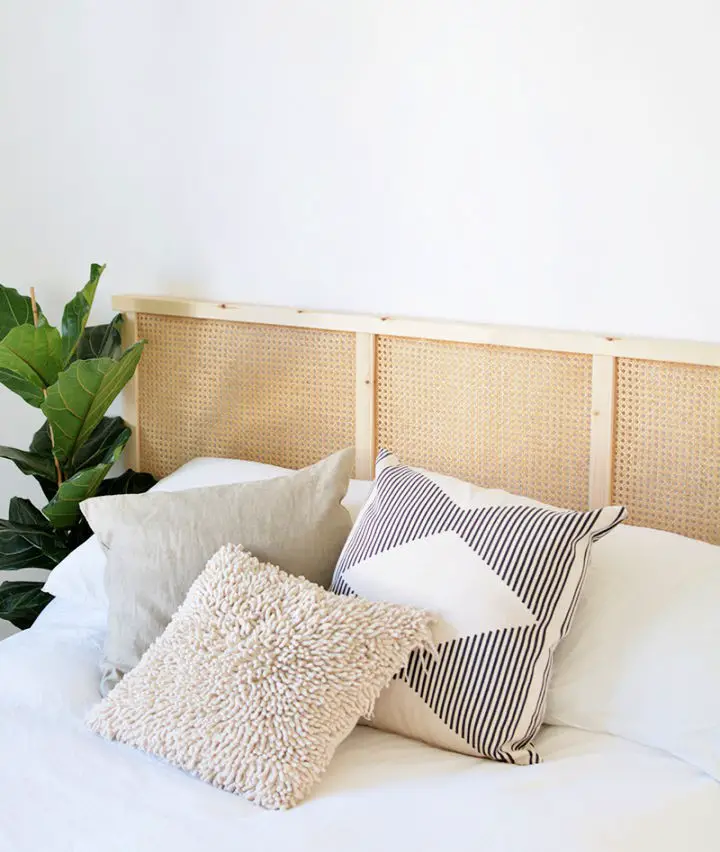
Elevate your bedroom’s ambiance by transforming it with a chic DIY cane headboard, effortlessly achieved through a simple yet clever IKEA hack. As you create a focal point in your personal sanctuary, let the bohemian vibes of rattan elements wash over you. For a surprisingly easy tutorial that can become the highlight of your weekend project, look no further than Hunker’s comprehensive guide. With just a few essential materials, including cane webbing, you’ll be able to create a stylish headboard without breaking the bank. Start by visiting IKEA for the necessary supplies and get ready to infuse your space with a touch of refined elegance through this creative and budget-friendly DIY endeavor.
Reclaimed Wood Queen Size Headboard
For those seeking to infuse their bedroom with a rustic charm through DIY means, Ana-White.com offers a straightforward plan for constructing a wooden headboard adaptable to any mattress size. By leveraging simple materials like pine boards or furring strips and basic tools such as a saw and nails, even novices in woodworking can successfully complete this project. The site’s step-by-step guide ensures that you can create a sturdy and visually appealing headboard on a budget of approximately $50. With a few hours of dedication, gathering the necessary materials, and carefully sanding your creation, your handmade headboard will become the focal point of your bedroom, transforming its ambiance with ease.
How to Make Padded Headboard
Transforming your guest room into a cozy retreat is easier than you think, thanks to the power of creativity and DIY know-how. By crafting a one-of-a-kind fabric headboard, inspired by Jennifer Meyering’s expertise, you’ll not only add a touch of personality to your space but also gain valuable insight into bringing a professional-looking finish to this budget-friendly project. With every step carefully guided, from selecting the perfect plywood and fabric to assembling and attaching the finished product, you’ll be amazed at how seamlessly the process unfolds. And as an added bonus, Jennifer Meyering’s guide offers practical tips on how to make your DIY dreams a reality, ensuring that your guest room’s aesthetic is elevated in no time.
DIY Mirrored Headboard
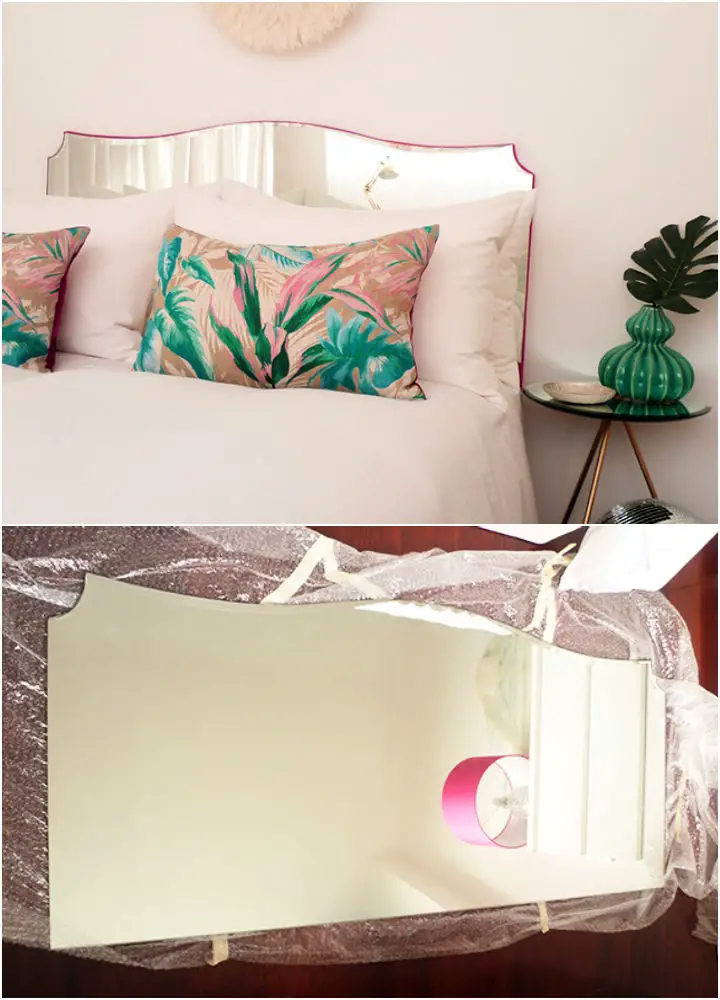
Transforming a bedroom with a DIY mirror headboard is a creative way to add a touch of elegance without breaking the bank. According to Nadia from Preciously me, creating a one-of-a-kind headboard using a second-hand mirror is not only cost-effective but also a fun and rewarding project. With her detailed guide, you’ll learn how to prepare a sturdy wooden base, securely attach the mirror, and add stylish details like velvet fabric for a truly bespoke piece that reflects your personal style.
How to Build a Farmhouse Headboard
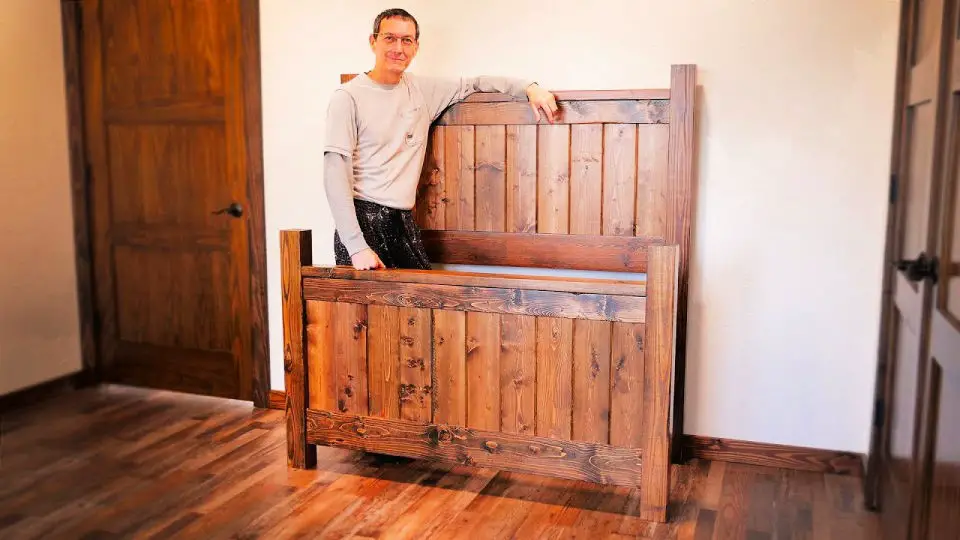
Transform your bedroom’s ambiance with a handcrafted farmhouse headboard, blending rustic charm with skilled craftsmanship. This project combines 4×4 posts, 2×4 rails, and tongue-and-groove planks to create a sturdy and stylish piece that prioritizes comfort and durability.
Designed for versatility, this headboard is perfect for pairing with various bed frames, including those featuring under-bed storage, and can be customized to fit any mattress size. The step-by-step guide covers every aspect of the process, from cutting and assembling to sanding and staining, ensuring a polished finish.
As a unique addition to your sleeping space, this DIY headboard infuses your bedroom with a personalized touch, creating an inviting atmosphere that’s perfect for relaxation.
DIY Cushion Headboard
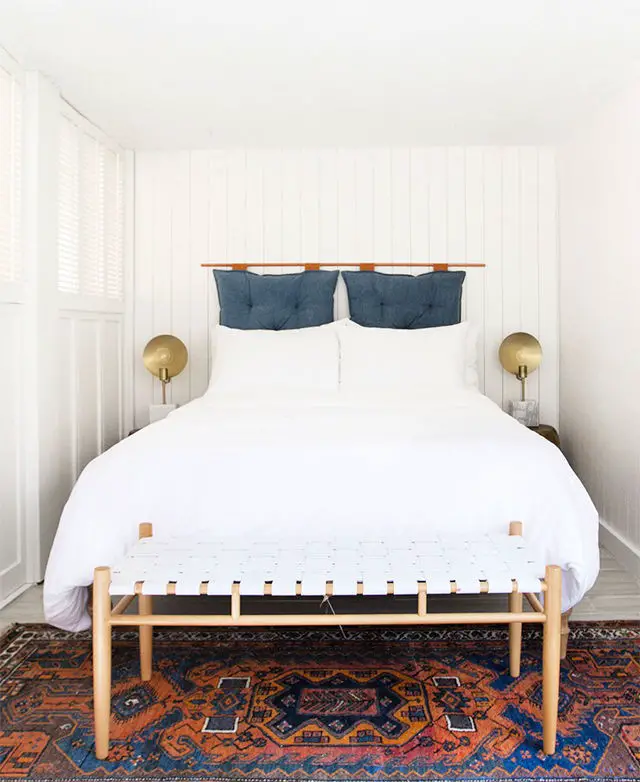
Transform your bedroom’s ambiance by embracing DIY creativity, as exemplified in Sarah Sherman Samuel’s inspiring guide on crafting a stylish headboard using floor cushions and copper pipes. This modern, chic design not only adds visual appeal but also functionality to the space. The step-by-step instructions are straightforward, allowing you to achieve a professional-looking outcome without exceeding your budget. Moreover, Sarah’s bedroom makeover doesn’t stop at the headboard; she shares a captivating before-and-after tour showcasing how subtle changes like paint, tile flooring, and minimalist furniture can revitalize a previously dark and dated A-frame cabin guest room. For practical and creative solutions to elevate your bedroom’s aesthetic, visit Sarah Sherman Samuel’s site for inspiration.
DIY Wood Dowel Headboard
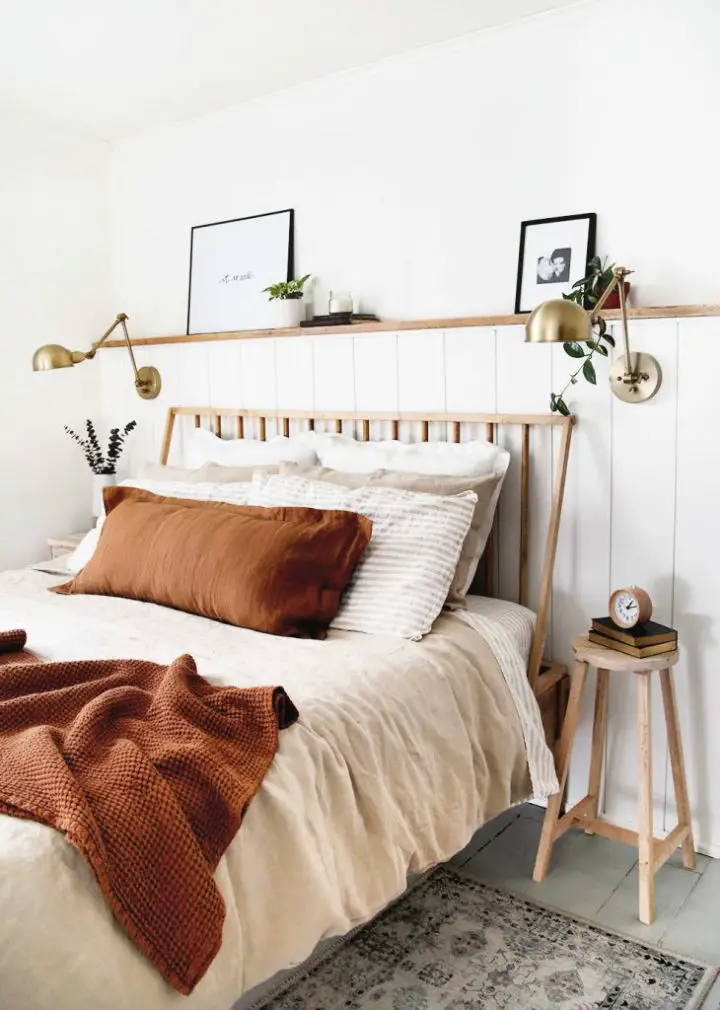
Elevate your bedroom’s ambiance by creating a modern simplicity-inspired DIY wood dowel headboard that seamlessly attaches to most bed frames. The Merrythought’s comprehensive tutorial ensures a sleek and sturdy headboard, ideal for those who appreciate woodworking. This hands-on guide provides step-by-step instructions, a list of required supplies, and expert advice on achieving the perfect stain finish, allowing you to craft a custom piece that harmoniously blends contemporary design with timeless appeal.
DIY Floating Headboard From One Sheet of Plywood
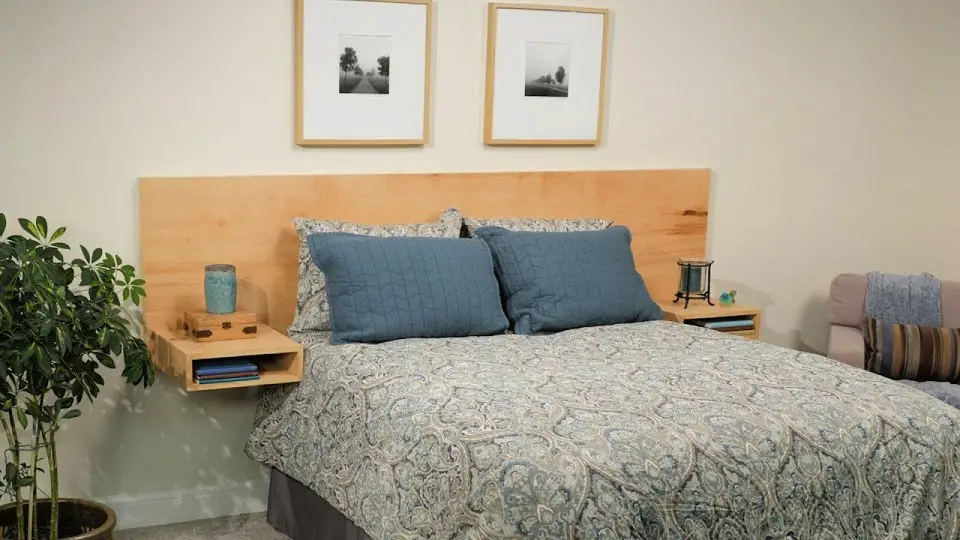
Transform your bedroom’s ambiance by creating a modern floating headboard using a single sheet of plywood. This DIY project simplifies the woodworking process, walking you through the steps of cutting cleats and struts to construct sleek cubbies with added functionality. Start by roughly cutting the pieces, then seamlessly join them using tape before attaching them to the headboard frame. A smooth finish is achieved through edge banding, giving your creation a polished look that rivals store-bought alternatives. Secure the cleat to your wall for a floating effect that dramatically changes the space’s aesthetic. This cost-effective and stylish headboard not only enhances room decor but also offers a personal touch and practical storage solutions.
How do you make a wood plank headboard?
Create a unique and charming rustic headboard by combining reclaimed wood and new lumber. Begin by cutting the boards to size, then screw them together to form the base of the headboard. Add a touch of elegance with some carefully placed trim before finishing the piece with a coat of paint or stain. This DIY project is perfect for a weekend endeavor, requiring minimal time and effort while yielding a one-of-a-kind result that adds character to any bedroom.
How do you make an upholstered headboard?
Transforming a plain bedroom into a cozy retreat is just a DIY project away. One such endeavor is creating a stunning headboard that adds a pop of color and pattern. To start, you’ll need to cut out the shape of your desired headboard from plywood or MDF. Next, lay down a layer of batting for comfort and stability. Then, carefully stretch and secure fabric of your choice over the batting using staples or upholstery tacks. Once the fabric is in place, trim away any excess material and finally attach the headboard to the wall with screws or brackets.
How to make a headboard out of pallets?
Transform a vintage touch into your bedroom with this one-of-a-kind pallet headboard. To create this unique piece, start by dismantling a wooden pallet and trimming the planks to the desired dimensions. Next, assemble the boards together using screws, ensuring a sturdy frame for your new headboard. Finally, complete the look by sanding down any rough edges and applying a stain that suits your personal style.
How do you make a headboard with lights?
Crafting a cozy reading haven in bed requires more than just a plush pillow or a soft blanket. A thoughtfully designed headboard can elevate the experience to new heights. To create this masterpiece, begin by cutting out the design from plywood. Next, upholster it with batting and fabric, securing the material with staples. The pièce de résistance is adding LED lights to the headboard, carefully stapling the wires in place to ensure a seamless integration. Finally, trim away any excess fabric and secure the headboard to the wall, ready to cradle your reading habits.
How do you make a tufted headboard?
Elevate your bedroom’s ambiance with a bespoke tufted headboard. To craft this indulgent feature, begin by creating a template from plywood, tailored to your desired shape. Next, wrap batting and luxurious fabric around the wooden core, securing the latter with staples. The pièce de résistance involves adding buttons at regular intervals, which are then expertly tufted into place. Finally, tidy up any excess fabric and firmly attach the headboard to the wall, completing a transformation that’s sure to render your bedroom a serene retreat.
How do you make a simple headboard?
Transforming your bedroom into a sanctuary has never been easier! With a dash of imagination and some basic materials, you can craft a one-of-a-kind headboard that reflects your personal style. Here are some innovative ideas to get you started:Draw inspiration from the world of fabric and create a soft, textured headboard using a quilt or a large piece of material. The possibilities are endless!Unleash your inner artist and bring paint into the mix. Use stencils or freehand designs to add a unique touch to your headboard. The result will be a truly bespoke piece that’s all yours.Illumination can make a big impact! Add some subtle lighting, such as fairy lights or string lights, to create a warm, cozy ambiance that invites relaxation.Take wallpaper to new heights by turning it into a stylish and unique headboard. You can even incorporate wall decals for an added layer of creativity. The possibilities are endless!With these ideas, you’ll be well on your way to creating a DIY headboard that’s as unique as you are. So why not get creative and start envisioning the perfect headboard for your bedroom today?
How do you make a good headboard?
When it comes to crafting a unique headboard, there’s no one-size-fits-all approach. The key lies in understanding your personal style and the aesthetic you’re trying to achieve in your bedroom. Start by envisioning the look you want: rustic and charming or modern and sleek? Once you have a clear direction, you can begin exploring different options and materials.For a rustic headboard, consider repurposing reclaimed wood or an antique door for a distressed, vintage vibe. If modernity is more your thing, metal or mirrored panels offer a sleek, contemporary look. Don’t be afraid to think outside the box when it comes to upholstery – velvet, leather, and other materials can add texture and depth to your design.As you settle on the materials that resonate with you, turn your attention to the design itself. If you’re crafty, take the DIY route and create a headboard from scratch. Alternatively, seek inspiration online or in home decor publications for ideas and guidance. Remember, the headboard is a crucial element in creating a harmonious bedroom space – it’s what brings everything together. So take your time, be adventurous, and have fun with the process!
How can I make my bed look good without a headboard?
When it comes to updating your bedroom on a budget, one of the most effective ways to do so is by crafting a DIY headboard. Not only are store-bought options often pricey, but with a little creativity and some basic materials, you can create a unique and eye-catching piece that reflects your personal style without breaking the bank.
One simple yet effective approach is to repurpose reclaimed wood for a rustic, earthy look. You can source this type of material at most hardware stores or online marketplaces. Once you have it in hand, you can stain or paint it to match your bedroom’s aesthetic. For a more modern take, consider incorporating metal or PVC pipes into your design.
If you want to add some personality and flair to your headboard, fabric is the way to go. You can either sew, glue, or staple it to the headboard depending on the look you’re going for. The key is to be creative and experiment with different materials and techniques until you find a combination that works for you.
With these DIY headboard ideas, you’ll have everything you need to create a one-of-a-kind piece that adds style and sophistication to your bedroom without putting a dent in your wallet.
Is it OK to not have a headboard?
When it comes to bedroom decor, having a statement headboard can make all the difference. But, let’s face it – buying a new one can be a significant investment. Not to mention, store-bought options might lack that personal touch you’re craving. That’s why we’ve curated a list of creative DIY headboard ideas to help you skip the hefty price tag and instead, add some unique flair to your bedroom sanctuary.
What is the purpose of a headboard on a bed?
A bed’s crowning glory is often overlooked until it’s time to give the bedroom a makeover. The humble headboard can transform a space with its versatility – serving as both a design statement and a functional element. By incorporating one, you can elevate your bedroom’s style and enhance the sleeping experience. If you’re eager to inject some personality into your sanctuary, consider crafting your own unique headboard.
The beauty of DIY headboards lies in their adaptability. You can salvage old furniture, repurpose creative scraps or start from scratch with new materials. Whichever route you take, be assured that a plethora of inspiring ideas await discovery.
To guide your search for the perfect headboard concept, we’ve curated a diverse collection of DIY masterpieces. Spanning various styles and skill levels, these creations are sure to spark inspiration for your own bedroom renovation.
What is a free-standing headboard?
A freestanding headboard is an excellent way to merge aesthetic appeal with practical functionality in your bedroom. Not only do they exude a sense of elegance, but they can also significantly enhance the comfort of your bed. The best approach will depend on one’s personal style and preferences. With numerous ideas available for creating your own free-standing headboard, you’re sure to find a solution that perfectly complements your unique taste.
Can you get a free-standing headboard?
For those looking for an effortless way to create a free-standing headboard, purchasing one from a retailer can be a convenient option. Many stores offer a range of styles and colors, allowing you to choose a design that suits your personal taste. That being said, making your own headboard can be a rewarding experience. With the right materials and some basic DIY skills, you can create a custom piece that perfectly complements your bedroom’s decor.
There are a number of different ways that you can make your own DIY headboard.
When it comes to creating a DIY headboard, repurposing old doors or windows can be an innovative approach. You can leave these items untouched for a rustic touch or give them a fresh coat of paint to match your bedroom’s aesthetic. Another creative route is to upcycle vintage furniture pieces like dressers or nightstands. These can often be found at thrift stores or garage sales, waiting to be transformed into unique headboards. Simply sand down the surface, add a new layer of color with paint or stain, and top it off with plush cushions or pillows for a cozy and stylish statement piece.
Creative and Unique DIY Headboard Ideas
Cork tiles offer an exciting alternative for creating a one-of-a-kind headboard. This natural material boasts durability and visual appeal, making it an attractive option for DIY enthusiasts. Find cork tiles at most home improvement stores and follow these simple steps to bring your design to life: glue the tiles onto a plywood or MDF base, then cut them to fit your desired shape. Leave the tiles as-is for a rustic look or paint them to match your bedroom’s aesthetic. Regardless of the style you choose, take precise measurements of both the bed and wall space beforehand to ensure a seamless installation. Don’t forget to consider mattress thickness when selecting a headboard, as this can impact its overall appearance and functionality. With careful planning and creativity, you can craft a stunning DIY headboard that will elevate your bedroom into a haven of comfort and style.
Can I attach a headboard to any bed?
Before attempting to attach a headboard to an existing bed frame, it’s essential to check with the manufacturer for specific guidance. However, most standard headboards can be secured using basic hardware. If you’re looking for a custom or unique solution, consider exploring our extensive collection of DIY headboard ideas that can be adapted to suit almost any bed configuration.
How do you convert a headboard to free-standing?
To create a free-standing headboard, there are several approaches you can take. One option is to affix it directly to the wall using robust nails or screws. Another method involves constructing a frame around the headboard using materials like wood or metal. Alternatively, you could attach legs to the headboard itself, which will grant it a more stable and imposing appearance. Regardless of the approach you choose, it’s crucial that you ensure the headboard is properly secured so as to prevent it from toppling over or falling.
Can you put a bed in front of a window?
When placing a bed in front of a window, consider the following factors to ensure a harmonious and functional space.
Firstly, maintain a comfortable distance between the bed and the window to allow for natural light to enter the room without being blocked. This also allows for ease of opening and closing curtains or blinds. Additionally, keep in mind that you’ll want some clearance around the bed so you can easily reach the window in case of an emergency. Furthermore, a moderate distance ensures a smooth exit from bed and a pleasant view of the outside.
How do I keep my pillow from falling behind without a headboard?
Transform your bedroom with a creative solution to keep your pillows from slipping behind the bed – without breaking the bank! A simple DIY headboard can be just what you need, requiring minimal materials and some imagination. Instead of searching for expensive solutions, follow our list of affordable DIY headboard ideas that not only keep your pillow in place but also add a touch of personal style to your bedroom.
What are beds without headboards called?
In many cases, unmade or incomplete headboards can be a letdown. On one hand, they offer practical benefits such as providing a comfortable backrest for reading or watching TV while seated in bed. Additionally, they help to define the space around your bed and contribute to a more polished, put-together look. In some instances, these headboards may even provide storage for personal items, adding an extra layer of functionality. However, modern wood headboards can be pricey, and sometimes their design may not mesh with the overall aesthetic you’re aiming for in your bedroom. This is where DIY headboards come into play, offering a budget-friendly solution that allows you to create a piece that perfectly complements your space.
What is Bedboard?
At the pinnacle of a bed lies an essential yet understated component – the bed board. Functioning as a sturdy base for pillows and mattresses alike, this humble piece of wood or other material can significantly elevate the aesthetic appeal of any bedroom. While often overlooked, headboards can be crafted from an eclectic array of materials, ranging from natural woods to metals, upholstery, and even eco-friendly recycled materials, offering homeowners an unparalleled level of creative freedom.
How do you use a pillow as a headboard?
Want to give your bedroom a stylish makeover without breaking a sweat? Look no further than crafting your own pillow headboard! This creative solution adds an extra layer of comfort and sophistication to your sleeping space, all while requiring just a few hours of your time. To get started, find a plush pillow that catches your eye – whether it’s a soft bed pillow or a decorative accent piece that matches your room’s aesthetic. Next, measure the width of your bed and adjust the pillowcase accordingly, taking care to sew any raw edges if you’re working with a decorative pillow. Place the fitted fabric over the pillow and secure it against the headboard using push pins or small nails. And just like that, you’ll have a one-of-a-kind pillow headboard that’s equal parts cozy and chic!
Should you put a headboard in front of a window?
When it comes to placing a headboard, it’s generally recommended to avoid positioning it directly in front of a window. This is because doing so can hinder the flow of natural light into the room, ultimately making the space feel smaller and less inviting. To maximize the benefits of your room’s layout, consider situating the headboard against a wall or corner instead. If you do choose to place the headboard in front of a window, be mindful of leaving some breathing room between the two – this will ensure that natural light can still enter the room and create a more well-lit atmosphere.
How do you secure a free-standing headboard to the wall?
To ensure a sturdy and secure headboard installation, you’ll need to anchor it to the wall using screws or nails. Aim for at least two fasteners per foot of headboard length, with a priority on securing it to studs whenever possible. If studs aren’t available, drywall anchors can be used as an alternative. Before attaching the headboard, make sure it’s properly leveled to prevent any visual imperfections. To achieve this, predrill holes for the fasteners and consider using washers for added stability.
Do you have to attach the headboard to the bed frame?
When it comes to attaching a headboard, there are several options to consider. For those that come with screws or hooks, simply following the manufacturer’s instructions should suffice. However, some headboards are free-standing, while others require special brackets for wall attachment. In either case, consulting the provided guidance is crucial for a secure and proper installation.When securing a headboard to a bed frame, it’s essential to use the appropriate fasteners. If unsure about the type of screws or hooks required, consult both the headboard and bed frame instructions. As a general rule, opting for screws over nails ensures a more robust attachment.For wall-mounted headboards, specialized brackets are necessary. These can usually be found at hardware stores, along with accompanying instructions to follow. With some basic effort, you can successfully attach your headboard to either the bed frame or the wall, thereby enhancing both the aesthetic and functional aspects of your bedroom.
How do you build a wall mounted headboard?
To construct your wall-mounted headboard, you’ll need the following materials: 1×4 lumber, construction adhesive, cordless drill, 1-inch hole saw, paint or wood stain, and polyurethane. Begin by cutting the lumber into four equal pieces for the uprights using a miter saw. Apply construction adhesive to the back of each piece and position them on the wall, ensuring they’re evenly spaced and level. Allow the adhesive to set for at least an hour before proceeding.Once the adhesive has set, drill pilot holes through the uprights and into the wall, followed by cutting 1-inch holes in the uprights using a hole saw. You can then paint or stain the uprights as desired, and apply multiple coats of polyurethane for protection. Allow the polyurethane to dry completely before moving on.Next, cut foam board or upholstery batting to fit the back of the headboard, and staple it in place. Cut your fabric to size and staple it to the back of the headboard, ensuring it’s taut and wrinkle-free.With these steps complete, you’ll have a stylish and functional wall-mounted headboard that adds a unique touch to your bedroom. If building your own headboard seems daunting, consider purchasing one pre-made. However, where’s the fun in that? DIY headboards offer a sense of accomplishment and personal flair, making them a worthwhile DIY project.
Bed with No Headboard Ideas
If you’re looking to give your bedroom a fresh new look without breaking the bank, consider ditching the headboard altogether. A bed sans headboard can still exude style and sophistication, all while allowing you to allocate funds elsewhere in your decor overhaul.
To achieve this sleek, streamlined aesthetic, try one (or more!) of these 10 innovative headboard-free ideas:
1. Transform a tapestry, scarf, or swatch of fabric into a show-stopping backdrop behind your bed.
2. Install curtain rods and drape curtains or fabric from them for a soft, romantic ambiance.
3. Prop up a large mirror or piece of art against the wall, letting its reflection add depth to the space.
4. Incorporate shelving above your bed and use it to display treasured trinkets, verdant plants, or favorite tomes.
5. Lean a ladder against the wall and drape a plush blanket or quilt over its rungs for a cozy, inviting feel.
6. Hang string lights or fairy lights around or above your bed for a whimsical touch.
7. Line up a row of mirrors behind your bed to create a glamorous, reflective surface.
8. Stack cinder blocks and drape a piece of fabric or moss over them for an eclectic, bohemian vibe.
9. Install sconces on either side of your bed for a modern, streamlined look.
10. Unleash your creativity with wall decals and apply them directly to the wall behind your bed for a unique, personalized touch.
How to decorate a headboard?
To give your headboard a fresh new look, consider incorporating fabric through sewing or gluing. This simple yet effective approach allows you to introduce colour and pattern to the design. Alternatively, you could opt for adding trim around the edges of the headboard using glue or a needle and thread. This will add visual interest and create a unique focal point. If you’re feeling adventurous, why not try painting your headboard? With either a brush or spray paint, you can effortlessly inject a pop of colour into the space. For added flair, consider adding stencils or decals to further enhance the overall aesthetic.
Conclusion
Our journey through 30 affordable DIY headboard ideas and blueprints has provided you with the creative spark and practical guidance necessary to revamp your bedroom on a limited budget. By embracing innovation, ease, and personalization, these concepts cater to diverse preferences and skill levels. Keep in mind that crafting your own headboard not only brings a touch of individuality to your space but also serves as a testament to your DIY skills. We hope our advice and tutorials empower you to tackle your headboard-making project with enthusiasm and confidence, encouraging you to continue exploring and relishing the process of turning your ideas into reality.
