Why Make Your Own Bookmarks?
Creating handmade bookmarks offers a multitude of rewards. Not only do you get to personalize the design, color scheme, and theme to suit your taste or gift someone’s preferences, but it also allows you to tap into various advantages that benefit both yourself and others.
One significant perk is the ability to repurpose materials you already have lying around, such as scrap paper, fabric, or old paint chips. This not only saves you money but also promotes a more sustainable lifestyle by reducing waste and encouraging eco-friendliness.
The process of crafting itself can be a therapeutic activity, serving as a mindful exercise that diverts your attention away from daily pressures and provides a sense of relaxation and stress relief.
Furthermore, creating handmade bookmarks enhances your creativity. Experimenting with different materials and designs can spark new ideas, inspire innovative thinking, and enrich your artistic skills.
Lastly, a personalized bookmark makes for a thoughtful gift that shows you care about the recipient. Whether it’s a teacher, friend, or family member, this unique creation adds a personal touch that’s hard to replicate with mass-produced products.
Ultimately, making your own bookmarks not only yields a one-of-a-kind product but also provides a range of benefits that can positively impact your life and those around you.
Essential Techniques for Making DIY Bookmarks
Crafting DIY bookmarks offers a unique opportunity to infuse personal flair into the reading experience. This straightforward guide aims to equip both novice and experienced crafters with fundamental techniques to elevate their projects. With these simple yet effective methods, you’ll be well on your way to creating one-of-a-kind bookmarks that reflect your personality.
Choosing the Right Materials
When crafting bookmarks, it’s essential to select materials that will withstand the test of time. For paper-based creations, sturdy options like cardstock or craft paper are ideal. This durability ensures your bookmark will remain intact despite repeated use.If you prefer fabric bookmarks, consider using scraps of cotton or felt. These materials offer a firm texture and are easy to handle, making them perfect for creating functional and aesthetically pleasing bookmarks.To add an extra layer of charm, embellishments can be used. Buttons, ribbons, and stickers are all great options, but it’s crucial to ensure they’re securely attached to prevent them from falling off or becoming detached during use.
Basic Crafting Skills
Mastering the fundamentals of origami bookmark creation begins with developing essential skills. The ability to cut straight and precise lines is crucial, and having a reliable pair of scissors or craft knife can make a significant impact on the overall quality of your work. To take it to the next level, incorporate techniques for creating sharp folds. Utilizing tools such as bone folders or the back of a knife can help you achieve crisp creases that add depth and dimensionality to your creations. Finally, selecting the appropriate adhesive is vital. Different materials require distinct bonding agents, so having a repertoire of options at your disposal – including stick glue, glue sticks, fabric glue, and hot glue guns – allows you to adapt to various projects with ease.
Decoration Techniques
To give your bookmark a personalized touch, consider incorporating colors that resonate with you. You can use markers, crayons, or paints depending on the material at hand. For added durability and longevity, think about laminating your bookmark – especially if it’s paper-based. If you don’t have access to a laminator, clear packing tape makes for a suitable alternative. Additionally, you can enhance the visual appeal of your bookmark by attaching tassels or beads to its top. Just be sure they’re securely fastened in place.
Personalization Tips
When crafting your DIY bookmarks, consider incorporating themes that hold significance for you or the individual you’re creating it for. This could be their favorite color, character, or quote. To add an extra layer of personalization, include names, initials, or special dates through various techniques such as stamping, hand lettering, or printing. For a more environmentally friendly approach, consider repurposing recycled materials or scraps from other projects to create unique and eco-conscious bookmarks. Once you’ve got your creative juices flowing, proceed to the next section for a step-by-step guide designed specifically for beginners.
How to Make a Bookmark – Step by Step
Transforming a mundane reading experience into a unique and personalized one is now possible with the simplicity of creating your own origami bookmark corner. This beginner-friendly DIY project not only adds a touch of creativity to your daily routine but also makes marking your place in any book a delightful task. To bring this idea to life, follow these straightforward steps:
What You Will Need:
Start by selecting a square piece of paper that measures 15 centimeters by 15 centimeters. While this specific dimension is recommended, feel free to use any size that suits your needs and creativity. The key is to have a uniform starting point for your design.
Step-by-Step Guide:
To craft a unique bookmark, start by preparing your square paper. Hold it at an angle, creating a diamond shape. This step sets the foundation for your design.Next, create the initial fold by gently lifting the lower corner and aligning it with the top corner. Press along the crease to form a triangle. This will be the basis of your bookmark’s structure.Build upon this foundation by folding the left and right corners upwards towards the top, ensuring crisp folds that will add depth to your design. The key to a successful bookmark is maintaining clean creases throughout the process.To open up the final layer, carefully unfold the last two folds you made, revealing a square with two layers of paper on each side. Pull the top layer of one side down towards the triangle’s base, creating a pocket.Take the outer corners of this layer and fold them over, tucking them into the newly created pocket. Repeat this step for both sides to complete the basic bookmark structure.From here, you can personalize your bookmark with creative decorations that match the theme of your current read or reflect your personal style.
Troubleshooting Tips:
To give your bookmark a polished appearance and optimal functionality, ensure that your folds are precise and even. A well-folded bookmark not only adds visual appeal but also helps it securely remain in place. If you notice your bookmark slipping or feeling loose, revisit your folding technique to make any necessary adjustments, as this will greatly impact the overall performance of your bookmark.
Video Tutorial
To enhance your understanding of the origami bookmark corner-making process, I recommend watching a step-by-step YouTube video tutorial that provides a comprehensive visual guide. The video seamlessly complements this written guide by offering a clear and engaging walkthrough of each technique, making it an ideal resource for both visual learners and those who require additional clarification. With its straightforward approach, the video is sure to provide valuable support as you create your own origami bookmark corner.
How to Choose the Perfect DIY Bookmark Project
Discovering the perfect DIY bookmark project is akin to finding your next great read – an experience filled with excitement and possibility. With an abundance of creative options at your fingertips, deciding which one to choose can be a thrilling adventure. As you embark on this journey, it’s essential to consider what resonates with your personal style and meets your needs. By taking the time to thoughtfully explore the possibilities, you’ll not only create something unique and meaningful but also cultivate a deeper connection with the stories that bring you joy.
Consider Your Skill Level
Before diving into crafting, take the time to reflect on your skills and interests. Are you new to creative pursuits and looking for an accessible project, or are you an experienced crafter eager to take on something more complex? For those just starting out, simple yet effective options like origami corner bookmarks or paint chip bookmarks offer a great introduction. These projects require minimal materials and straightforward instructions, making them perfect for beginners. On the other hand, crafty veterans may prefer more challenging endeavors like sewing fabric bookmarks or creating confetti shaker bookmarks, which provide ample opportunities for customization and experimentation.
Think About Materials Available
When embarking on a new craft project, it’s essential to first survey the materials you have readily available. This not only fosters cost-effectiveness but also promotes sustainability. For instance, if you possess a stash of scrap fabric, consider upcycling it into unique bookmarks. Similarly, if you’ve accumulated an assortment of buttons with distinct personalities, use them to create bespoke button bookmarks. By repurposing materials you already have on hand, you’ll infuse your crafting experience with a sense of personal accomplishment and satisfaction.
Reflect on the Purpose
When selecting a bookmark design, it’s essential to consider its intended purpose. Are you keeping it for personal use, or planning to present it as a gift? For self-use, opt for a design that reflects your unique style or pays tribute to your favorite literary character. If the bookmark is meant to be given away, think about the recipient’s interests and preferences. A customized bookmark with initials, special dates, or meaningful quotes can make a thoughtful and treasured gift, as it shows you’ve taken the time to tailor it to their tastes.
Evaluate the Durability
When selecting a project, individuals who prefer to read on-the-go often prioritize durability. Options like laminated paper bookmarks or fabric-based ones tend to be more resilient and better equipped to withstand the rigors of travel. Projects that incorporate lamination or sewing techniques may be particularly appealing if longevity is a key consideration.
Unleash Your Creativity
Allow your imagination to flourish by selecting a DIY bookmark project that resonates with you. Consider the intersection of your skill level, available materials, and the purpose of the bookmark. Will it be a durable keepsake or a whimsical touch for a special book? Whatever your vision may be, choose a project that sparks joy and invites your creative expression to shine through. By doing so, you’ll not only add a personal touch to your reading experience but also elevate its overall impact. Embrace the excitement of crafting and let your artistic flair take center stage.
FAQs on DIY Bookmarks
Crafting personal bookmarks can be a fulfilling hobby. To better equip you for this creative endeavor, we’ve compiled a comprehensive Q&A section addressing frequently asked questions.
What materials do I need to start making DIY bookmarks?
To get creative, you’ll need a solid foundation of fundamental supplies. These essentials include a range of papers, such as construction paper, cardstock, and craft paper, which provide the perfect canvas for your artistic endeavors. In addition to this, you’ll require scissors, the trusty sidekick that helps shape and trim your designs. Glue or tape is also essential, serving as the bond that holds your creations together. To add some extra flair, don’t forget about coloring tools like markers, crayons, and paint, which allow you to bring your artwork to life. Finally, embellishments such as stickers, ribbons, and buttons offer a wealth of opportunities for adding an extra layer of personality and dimension to your projects.
Can I make bookmarks without any crafting experience?
For those looking to embark on a DIY bookmark project, there’s no need to worry about being overwhelmed by complex instructions. Many projects cater specifically to beginners, providing clear and concise step-by-step guides that make the process accessible to all. A perfect starting point is exploring origami bookmarks or paint chip bookmarks, which are not only fun but also offer a great introduction to the world of DIY bookmark crafting.
How can I make my bookmarks durable?
To enhance the durability of your bookmarks, consider laminating them. Alternatively, if you don’t have access to a laminator, clear packing tape or contact paper can be used as effective substitutes.
Are there eco-friendly options for DIY bookmarks?
Eco-friendly alternatives abound, offering creative ways to reduce waste and promote sustainability. For instance, consider repurposing materials that would otherwise go to waste, such as old book pages, fabric scraps, or used gift wrap. Alternatively, biodegradable decorations like pressed flowers or leaves can add a touch of natural elegance to your celebrations. Additionally, recycling paper products like paint chips or cardboard can help minimize the environmental impact of your festivities.
What are some creative ideas for DIY bookmarks?
Among the many creative ways to keep track of your reading journey, a well-designed bookmark can be a simple yet effective solution. From traditional origami corner bookmarks that add a touch of elegance to your reading experience, to tassel bookmarks that add a playful and whimsical touch, there’s a type of bookmark out there to suit every reader’s taste. For those who prefer a more practical approach, magnetic bookmarks provide an easy way to keep your place without damaging the pages. If you’re looking for a way to make your reading experience even more personal, consider using bookmarks with quotes or personalized messages that can serve as a reminder of why you started reading in the first place. Alternatively, felt animal or character bookmarks can add a fun and playful touch to your reading routine.
How can I make my bookmarks personalized?
Elevate the personality of your bookmarks by infusing them with meaningful elements that reflect your interests and values. You can add a pop of color using themes or hues that resonate with you, making each bookmark a miniature representation of your unique style. Consider incorporating personalized touches such as initials, names, or special dates that hold sentimental value. Furthermore, decorate your bookmarks with quotes, images, or symbols that evoke memories of beloved books, movies, or people. Finally, include unique materials or items that carry significance, transforming your bookmarks into tiny works of art that tell a story about you.
Can DIY bookmarks be used as gifts?
Handcrafted DIY bookmarks have a unique appeal that makes them an ideal gift option. By putting thought into the design and materials, you can create a personalized token that resonates with the recipient’s interests or personality. Whether it’s for a bookworm, educator, friend, or family member, these thoughtful gifts are suitable for any occasion.
Where can I find inspiration for bookmark designs?
The spark of inspiration can strike at any moment, and it’s often fueled by the things we surround ourselves with. For crafting enthusiasts, this might include online blogs and websites dedicated to the art of making, social media platforms like Pinterest or Instagram where creative ideas abound, books and magazines that showcase the latest trends and techniques in crafting, or even nature itself – the intricate patterns on a leaf or the vibrant colors of a sunset can be all the motivation needed to start creating. And then there are the everyday objects that catch our eye, whether it’s a unique shape or an interesting texture. These moments of inspiration can lead to some truly remarkable creations, like DIY bookmarks that not only serve as a personal touch for one’s own reading experience but also make thoughtful gifts for friends and loved ones. With just a little creativity and some basic supplies, crafting these bookmarks is a simple yet enjoyable endeavor that yields results that are both beautiful and functional.
25 Homemade DIY Bookmarks to Make
To unleash your creativity, learn the simple process of crafting personalized DIY bookmarks. With a few straightforward steps, you can create one-of-a-kind handmade bookmarks that reflect your personality.
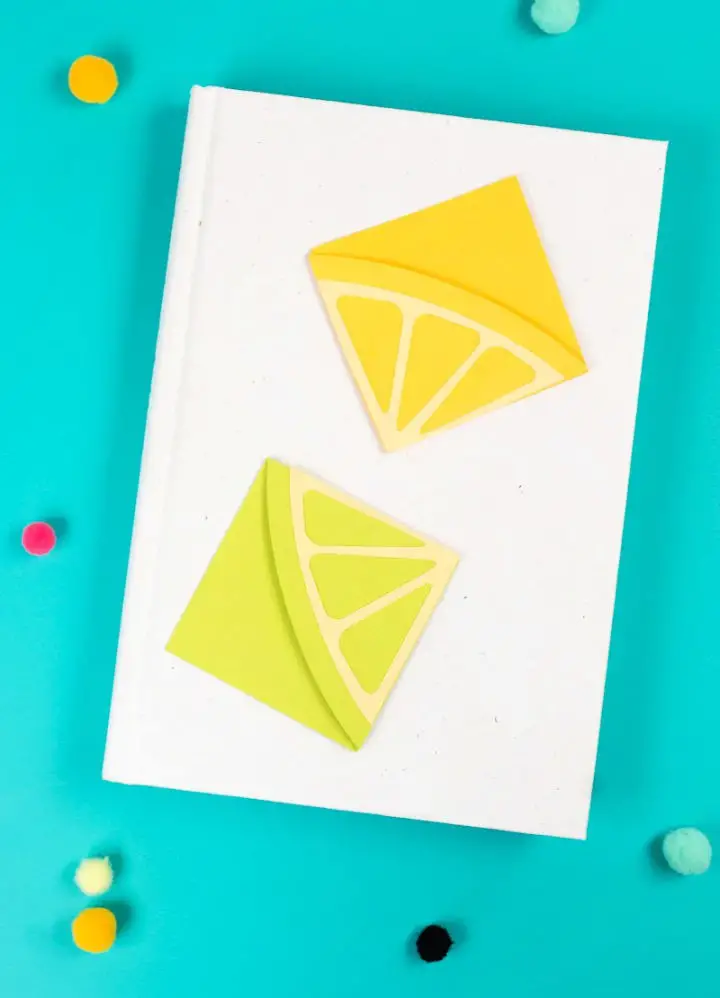
How to Make Fruit Slice Corner Bookmarks
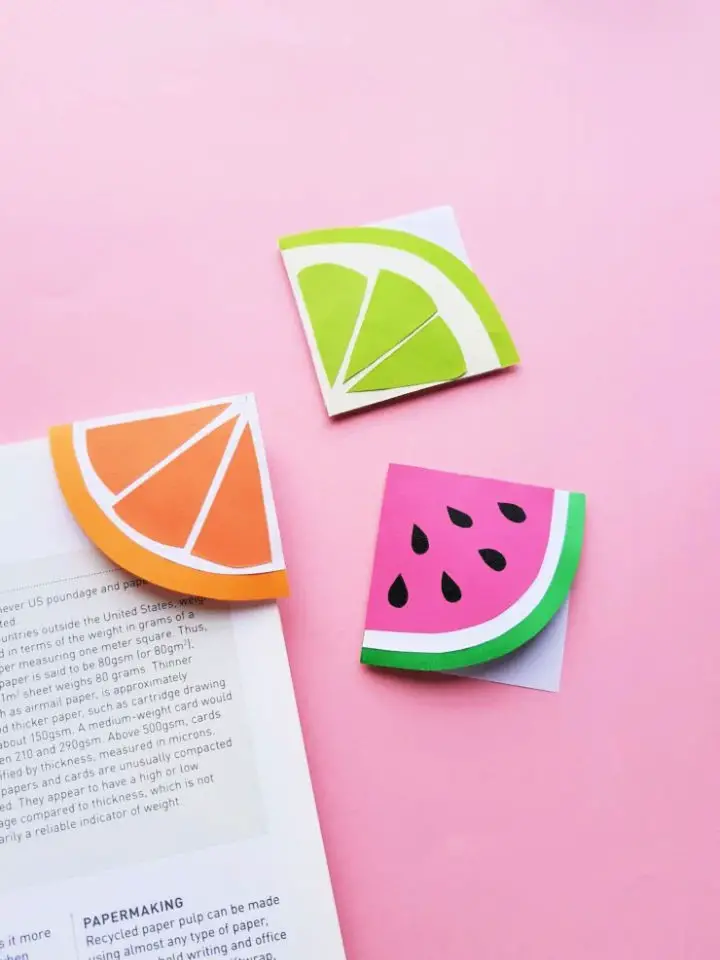
For bookworms seeking a unique way to personalize their reading experience, we’re thrilled to share a delightful DIY project: fruit slice corner bookmarks! These charming creations combine the joy of origami with the simplicity of crafting, allowing you to add a pop of color and whimsy to your pages. By combining basic materials like colored paper, scissors, glue, and imagination, you can craft a medley of colorful fruits – from succulent watermelon slices to vibrant citrus wedges – that snugly fit into the corner of a page. With our easy-to-follow steps, even the most novice crafter can create these delightful bookmarks, making them perfect for enhancing your summer reading or gifting to fellow book enthusiasts.
DIY Button Bookmarks for Kids
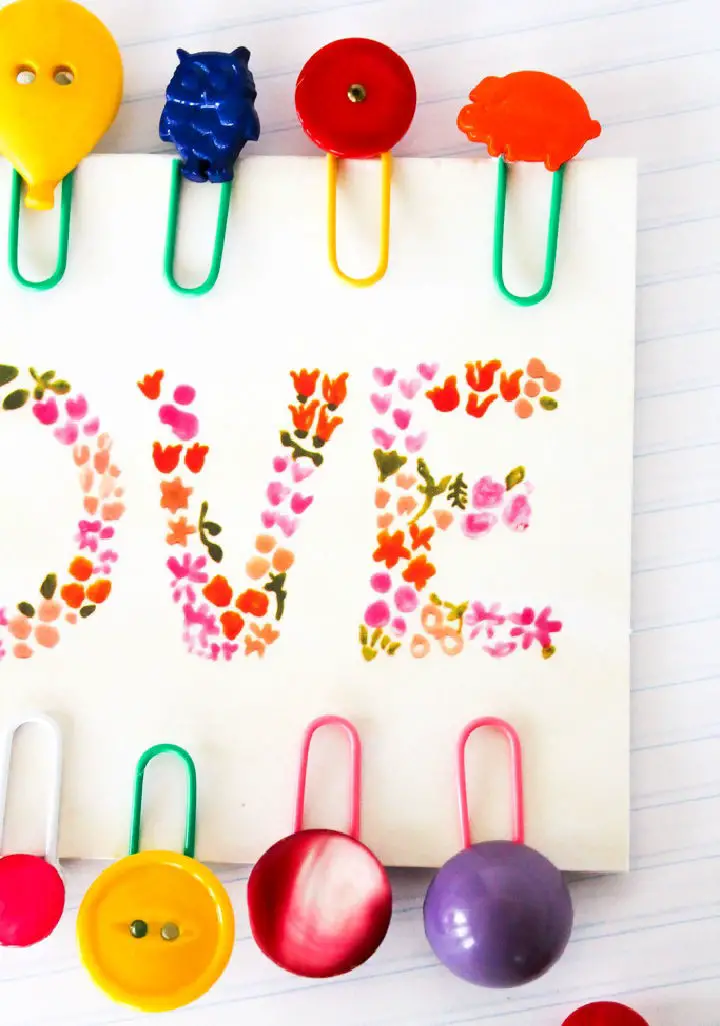
Rediscover the joy of crafting with Domestically Blissful’s guide to creating enchanting button bookmarks for kids. These charming bookmarks not only foster a child’s love for reading but also offer a fun and interactive way to engage young readers. With just a few simple materials, including buttons, paper clips, hot glue, and scrap fabric, you can effortlessly craft personalized bookmarks that are both functional and adorable. By attaching a button to a paper clip and adding a touch of fabric flair, you’ll create a one-of-a-kind treasure that kids will love to use and collect. These handmade bookmarks make perfect companions for reading time, encouraging children to keep their pages and develop a lifelong love for books.
Spring Flower Paint Chip Bookmark Tutorial
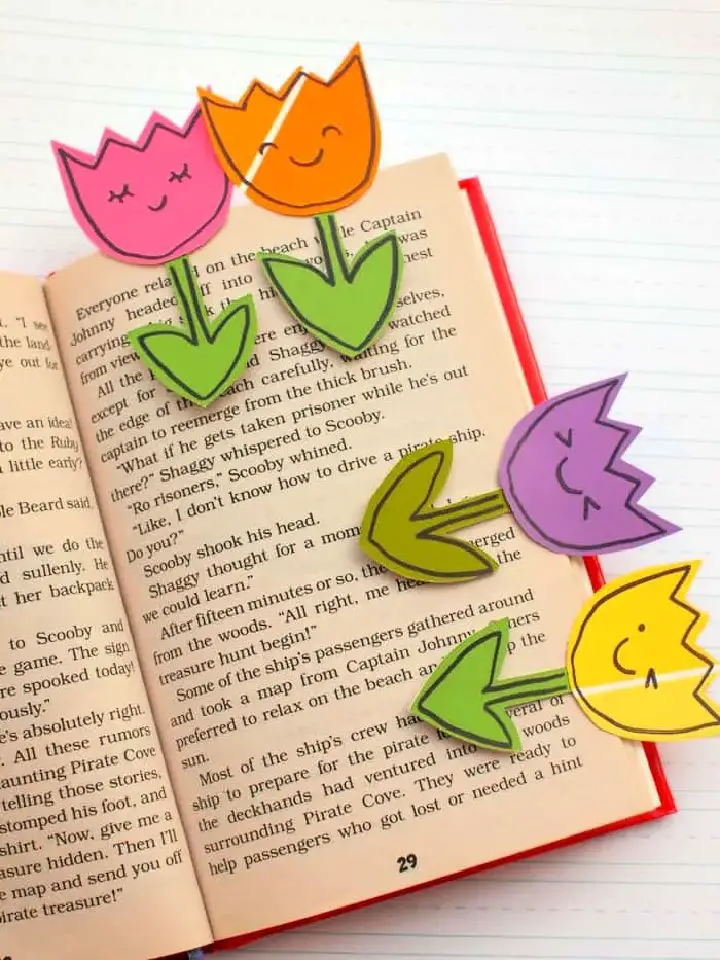
Bring the charm of spring into your bookworm’s world with these easy DIY bookmarks shaped like tulips. This fun and eco-friendly project is perfect for kids and adults alike, requiring minimal crafting experience and only a few basic materials. By repurposing leftover paint chip samples, scissors, a pen, tape, a craft knife, and Sharpie markers, you can create personalized bookmarks that are both functional and visually appealing. Simply cut out tulip shapes, craft a green stem, and assemble the pieces to create your unique design. To add an extra touch of personality, let your little ones get creative with markers and add faces or designs to their bookmarks. Whether it’s for springtime, Earth Day, or just because, this activity is sure to bring joy to any book lover.
How to Do Burlap Bookmarks in 10 Minutes
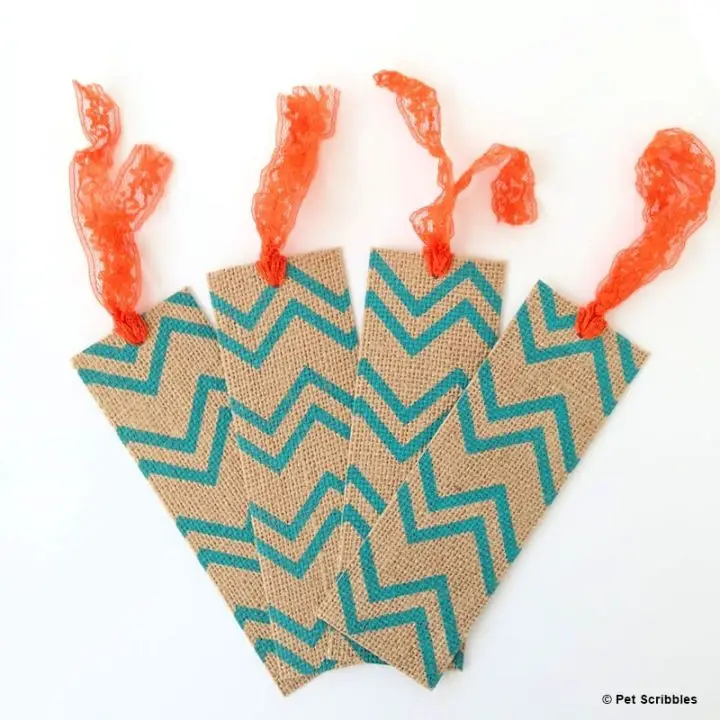
Get ready to unwind and unleash your creativity with Garden Sanity by Pet Scribbles’ delightful burlap bookmark project! In just 10 minutes, you can transform printed burlap squares into charming page markers adorned with vintage lace or your preferred ribbon. This accessible craft is perfect for crafters of all skill levels, as Laura walks you through each easy step from cutting the burlap to attaching the ribbon. Whether you’re looking to add a personal touch to gifts or simply elevate your reading experience, this project’s clear and engaging instructions ensure an enjoyable and stress-free crafting session.
DIY Lace Cut Summer Reading Bookmarks
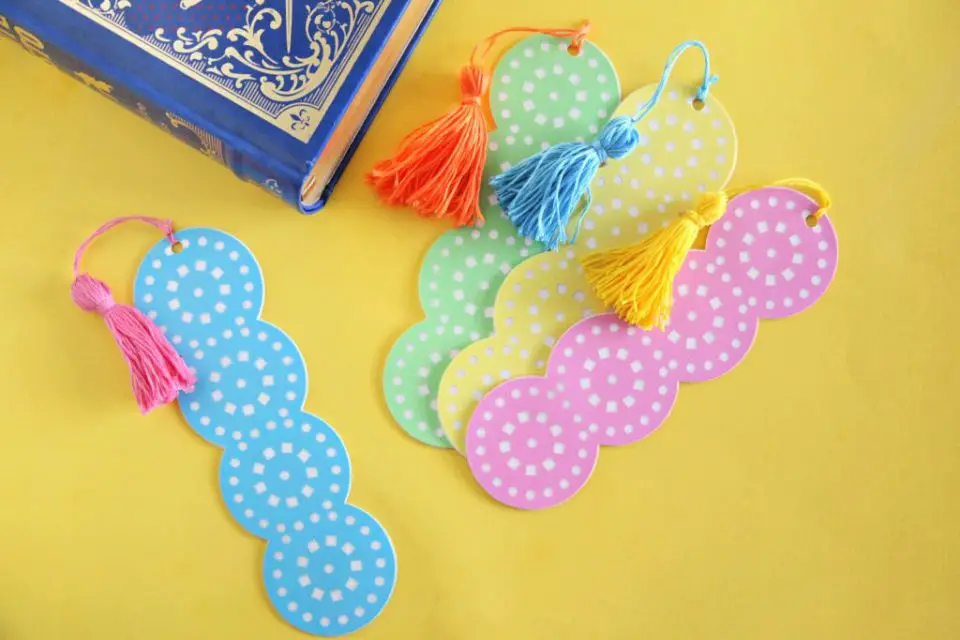
Elevate your reading experience with a touch of elegance by creating charming handmade bookmark ideas. The Pretty Life Girls’ Lace-Cut Summer Reading Bookmarks offer a simple yet creative way to personalize your collection. With a clear step-by-step guide, you’ll learn how to craft these beautiful bookmarks using a cutting machine, cardstock, and embroidery floss. Not only do they serve as a chic placeholder, but the added tassel gives it a personal touch. Perfect for keeping your place in summer novels, these bookmarks are a fun project for readers of all ages. For added durability, laminating them is an optional step. Enjoy crafting and happy reading!
How to Make Confetti Shaker Bookmarks
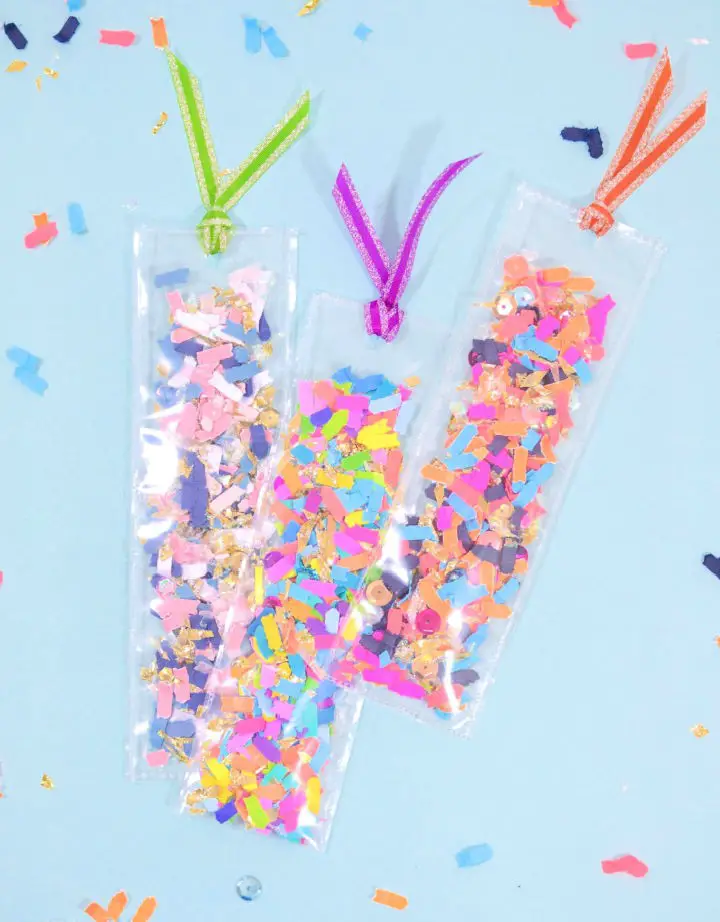
Transform your reading experience with one-of-a-kind bookmark creations. By following The Confetti Bar’s step-by-step DIY guide, you’ll craft whimsical confetti shaker bookmarks that are as much fun to make as they are to use. Perfect for personal enjoyment or as thoughtful gifts, these bookmarks bring a touch of playfulness to any reading session. With just clear sheet protectors, your favorite confetti, and a few simple tools like a fuse tool or sewing machine, you’ll be well on your way to creating custom masterpieces. Add a dash of personality with stickers, markers, and ribbons, experimenting with shapes and sizes to match your unique style. Not only do these bookmarks provide endless entertainment, but they also serve as a creative way to keep track of your place in your latest read. So why not give it a try? Let the magic of confetti bring a splash of color and joy to your book collection today.
Make Your Own Pug Bookmarks
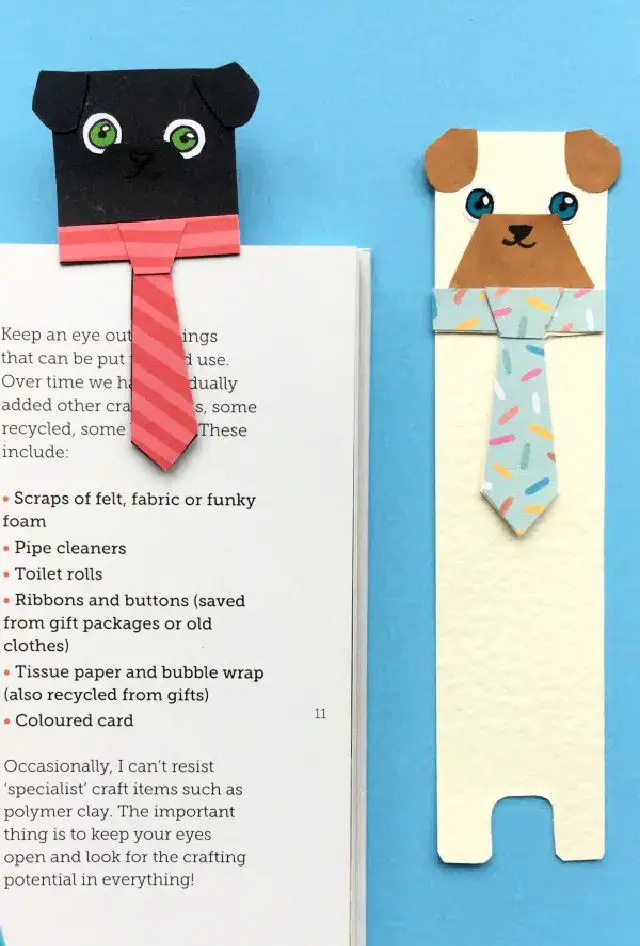
Transform any book collection into a charming haven with the delightful Hug a Book Pug Bookmark. This DIY project is perfect for Father’s Day or as a thoughtful gift for dog enthusiasts alike. With its endearing pug design and tie, this bookmark exudes personality. To get started, simply follow the easy-to-follow step-by-step video tutorial from Red Ted Art – Kids Crafts. Alternatively, utilize the printable templates to expedite your crafting experience. Collect light cardstock, scissors, pens, and glue as your essential materials. As you craft these adorable paper pugs, infuse your reading time with an added touch of whimsy and cuteness.
How to Sew Fabric Bookmarks
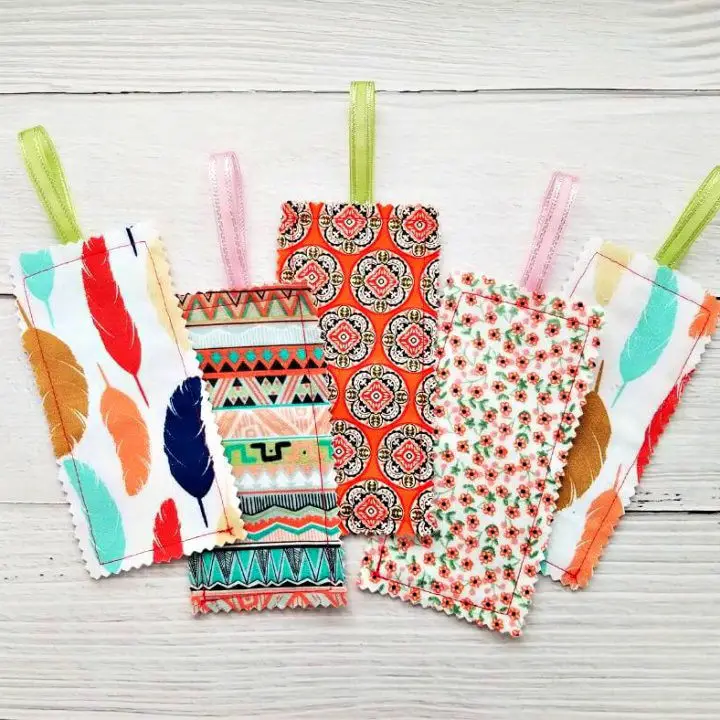
Transform your fabric scraps into charming, functional bookmarks with ease! This DIY project is perfect for sewing enthusiasts and book lovers alike. By repurposing leftover cotton fabric, fusible interfacing, and adding a touch of ribbon or twine, you can create a personalized bookmark in no time. The best part? It’s incredibly easy to make, even for beginners. Simply follow this step-by-step guide, which includes clear instructions and a list of required tools. To ensure your bookmarks remain sturdy and stylish, be sure to use pinking shears to avoid fraying. Take it to the next level by adding embellishments like tassels or pompoms for a unique touch. With this guide, you’ll have all the know-how to craft a collection of bespoke bookmarks that will keep your place in style.
Stick Pencil Bookmarks Craft
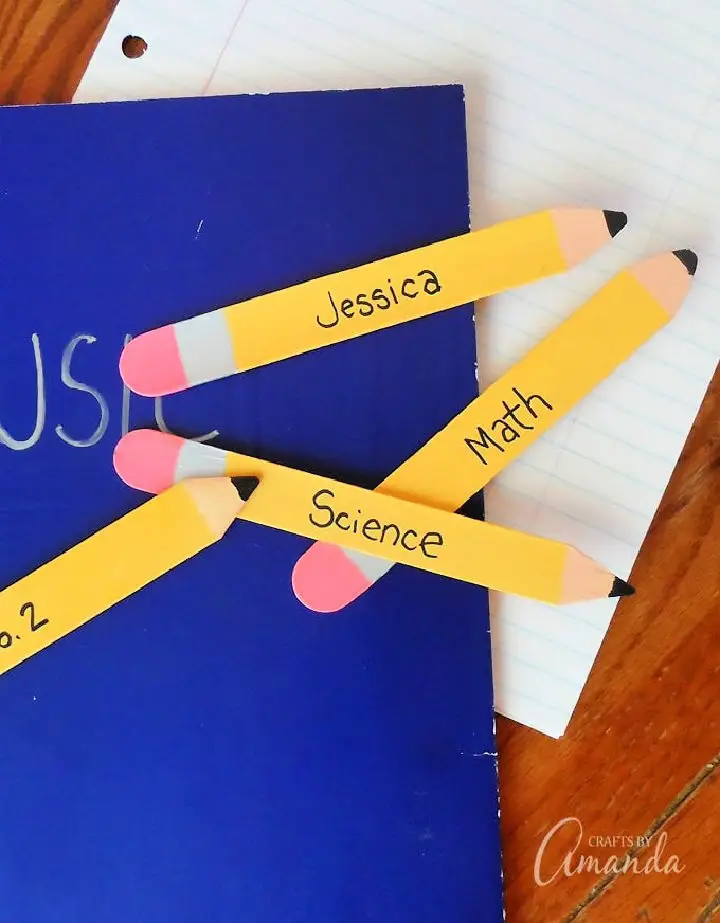
Get creative with Crafts by Amanda’s step-by-step tutorials on making bookmarks. Perfect for the new school season, this project is an excellent way for kids and parents to bond while creating functional and personalized accessories. With just a few simple materials like jumbo craft sticks, paint, and a fine-tip marker, you can customize your bookmarks with names, subjects, or playful designs. For younger children, opt for rounded tips for added safety. This fun activity not only encourages creativity but also develops organization and reading habits in kids. So gather your supplies and let’s dive into a fun-filled school year!
DIY Stick Harry Potter Bookmarks
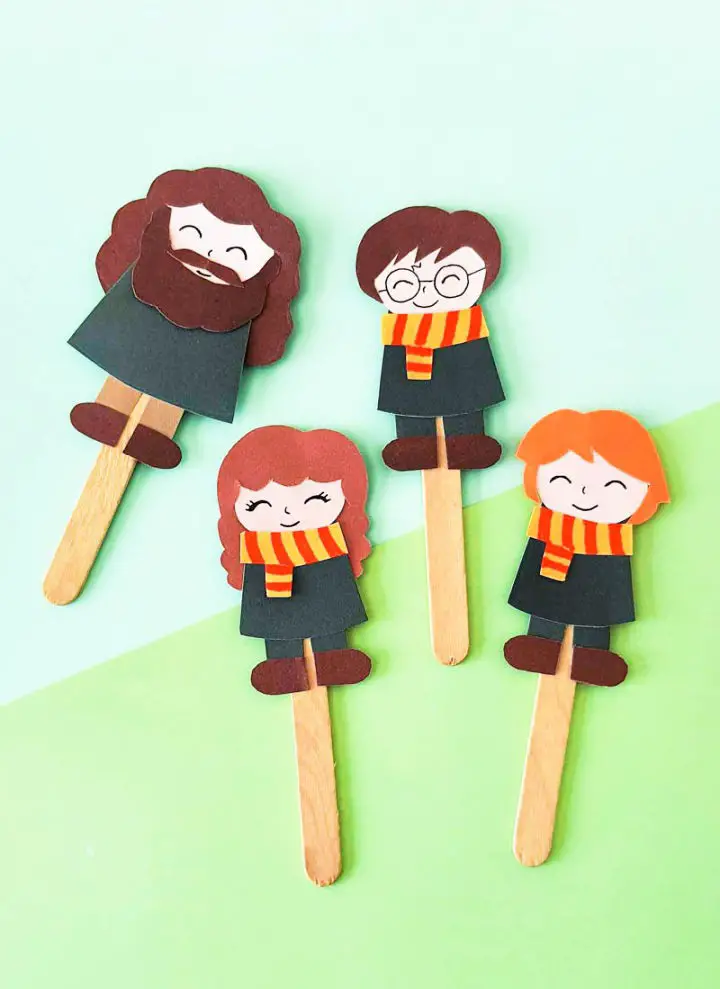
Immerse young readers in the magical world of Harry Potter by crafting their own unique bookmarks. This enchanting activity combines the joy of reading with the magic of J.K. Rowling’s beloved series. Using simple materials such as craft sticks, colored papers, markers, scissors, and glue, students can bring beloved characters like Harry, Hermione, Ron, and Hagrid to life on a bookmark. Perfect for kids and fans of the series alike, this DIY project is an excellent way to encourage reading while fostering creativity and imagination. By following easy steps, students can create bookmarks that not only mark their page but also become playful puppets for their own storytelling adventures.
How to Make Unicorn Bookmark
Imagine embarking on a whimsical adventure with Big Family Blessings DIY Unicorn Bookmark Craft, an enchanting project that brings together kids of all ages who are captivated by the magic of unicorns. This delightful craft transforms scraps of cardstock and colored papers into one-of-a-kind unicorn bookmarks that wrap around your favorite books, making reading time a truly unique experience. With basic supplies like scissors, glue, and a black marker, follow a simple step-by-step guide to cut, paste, and design your very own unicorn companion. This creative activity not only fosters a love for art but also encourages kids to develop their reading skills while adding a personal touch to their book collections.
DIY Mickey and Minnie Mouse Bookmarks
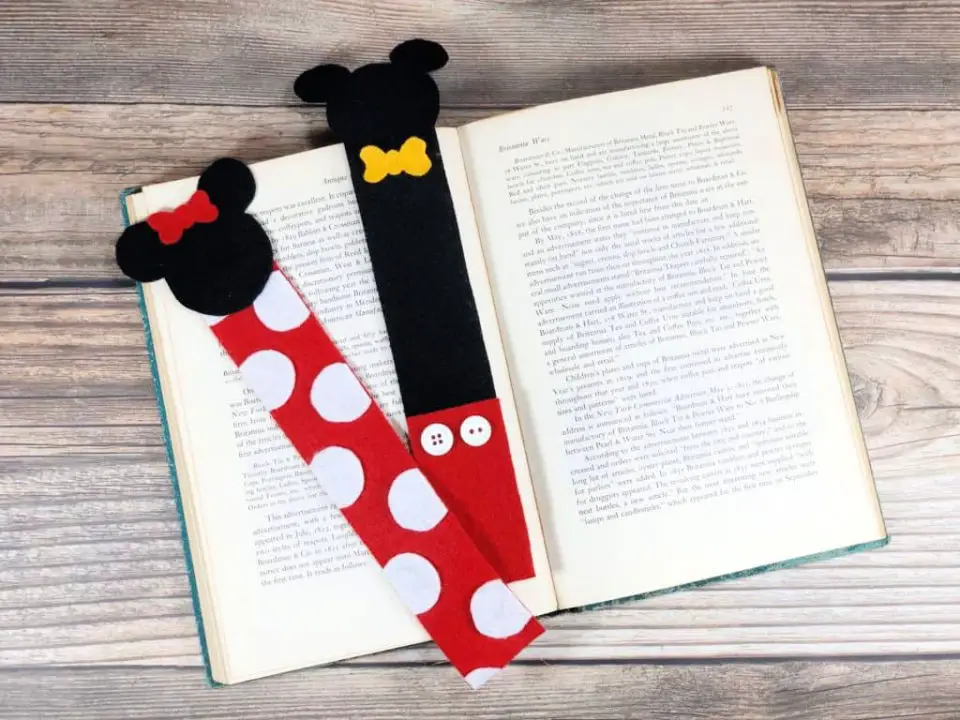
For those who cherish crafting and have a soft spot for Disney magic, Hispana Global has a delightful DIY project that brings Mickey and Minnie Mouse to life in the form of charming bookmarks. These simple yet endearing creations are designed to infuse your reading experience with a touch of whimsy. With just a few basic materials and clear, step-by-step guidance, you can effortlessly shape these beloved characters from felt. Whether you’re looking for a fun way to foster a love of reading within your family or seeking a thoughtful gift for the Disney enthusiast in your life, this craft is sure to delight. Gather your scissors, felt, and glue, and let’s get started on crafting these irresistible bookmarks today!
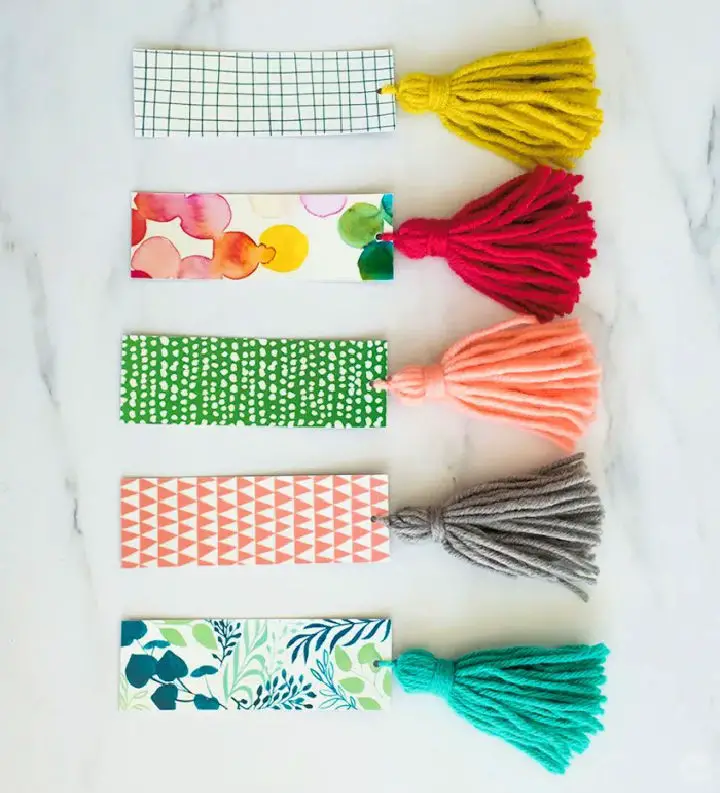
Paint Chip Bookmarks Step-by-Step Guide
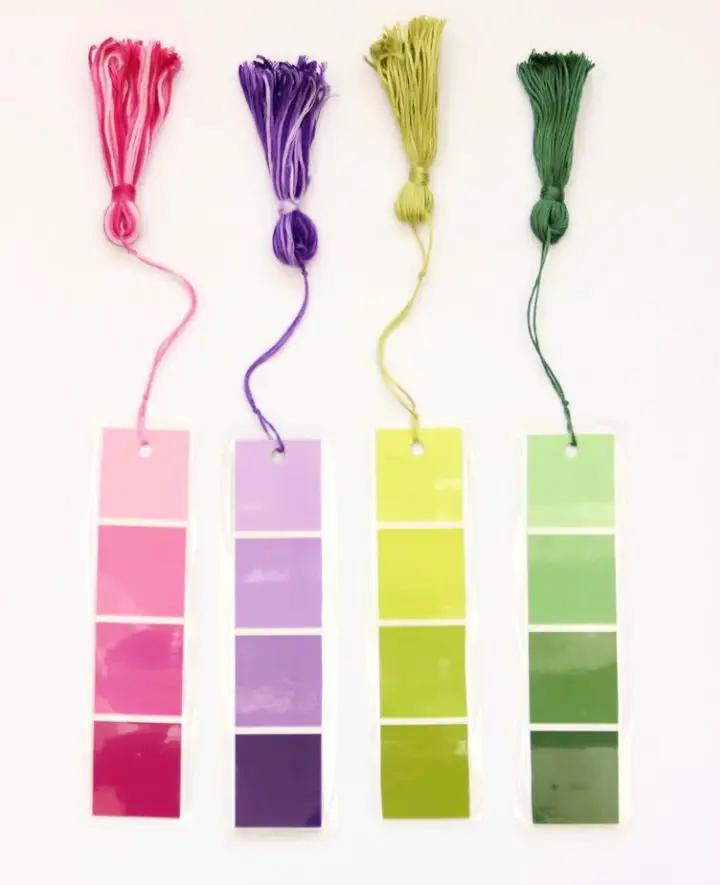
Transform your reading experience with a personalized paint chip bookmark that’s both functional and visually appealing. By upcycling discarded paint chips, you can create a unique collection of bookmarks that reflect your personality. The process is surprisingly straightforward, requiring just a few basic materials like paint chips, embroidery floss, and simple crafting tools. With step-by-step instructions guiding you through the process, from cutting the chips to adding a handmade tassel, you’ll be able to design a one-of-a-kind bookmark that adds a touch of elegance to your favorite books. This DIY project is perfect for craft enthusiasts looking for a quick and delightful activity, or anyone seeking to add a personal touch to their reading routine.
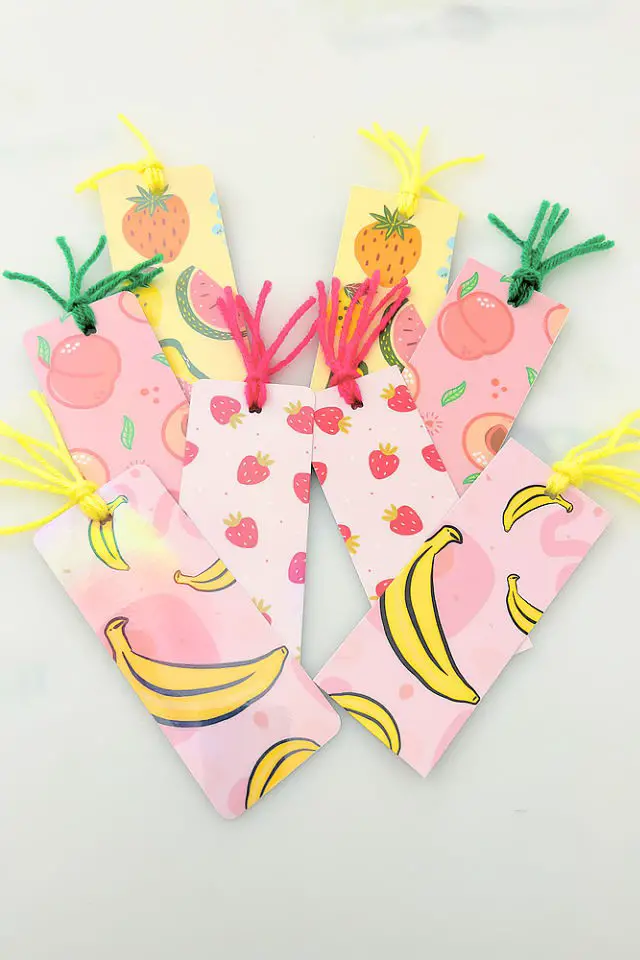
Simple DIY Fruit Bookmarks
Get ready to bring a burst of summer fun to your reading routine! Introducing a creative DIY project that turns your love for fruits into delightful bookmarks, perfect for marking your place in any beach read or novel. With simple and easy-to-follow instructions, you’ll learn how to craft colorful bookmarks shaped like lemons, limes, grapefruits, watermelons, kiwis, and strawberries using a Cricut machine. The design cleverly reveals the main bookmark color through cut-outs, creating a seamless effect without the hassle of gluing tiny pieces together. To make these eye-catching page savers, you’ll need colored cardstock, a Cricut with a scoring stylus, and some basic craft supplies. Whether you’re lounging by the pool or cozied up in your favorite reading spot, these fruity bookmarks are perfect for keeping your pages marked while adding a touch of cheer to your day.
Making Your Own Tassel Bookmarks
Start crafting charming DIY bookmarks that add a personal touch to your reading experience. With the free printable design from Think. Make. Share, you can create delightful tassel bookmarks that are perfect for celebrating National Booklovers Day on August 9 or any day of the year. This project requires just a few simple materials: card stock, spray mount, a durable material like fabric for backing, yarn, and some basic tools. Follow the easy steps to cut and craft a one-of-a-kind bookmark, complete with a hand-made tassel that adds a special touch. Not only will you be engaging with literature in style, but you can also share your creation as a thoughtful gift for fellow book lovers.
Tweety Felt Bird Bookmarks Tutorial
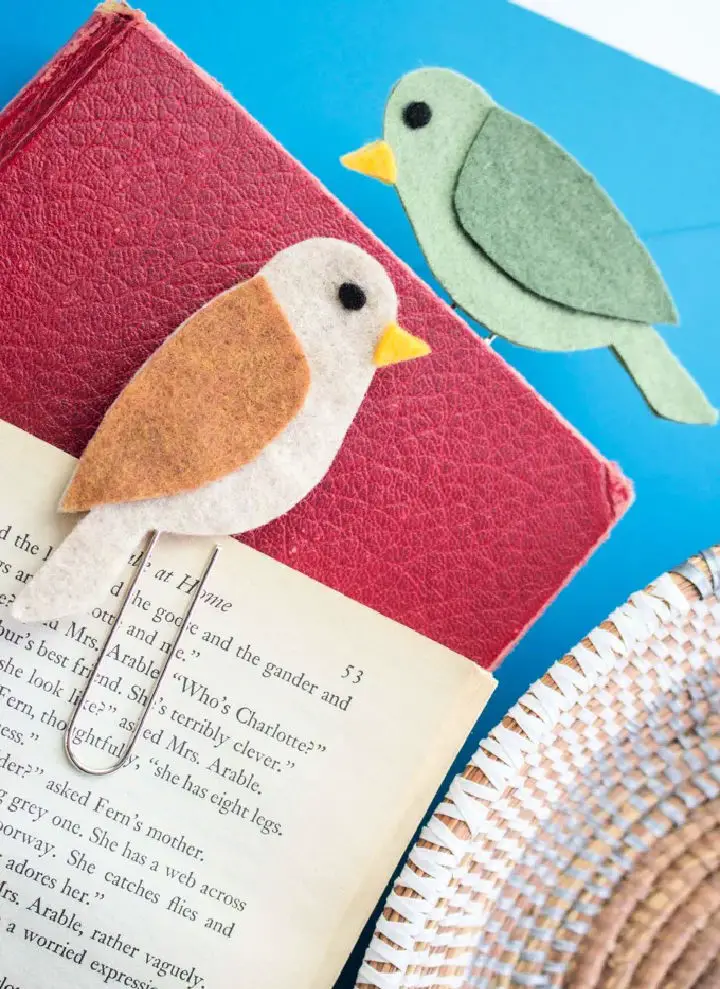
Elevate your reading routine with a dash of handmade flair courtesy of these charming felt bird DIY bookmarks. By following Sustain My Craft Habit’s engaging project, you’ll turn scraps of felt into one-of-a-kind page markers that are perfect for personal use or as thoughtful gifts for fellow book lovers. This no-sew crafting activity is accessible to crafters of all ages and skill levels, requiring only a few basic supplies like felt, a paperclip, and some imagination.
Monster Bookmarks Instructions
Transform ordinary reading time into an extraordinary adventure with DIY monster bookmarks, a delightful project inspired by I Heart Crafty Things. This charming craft is perfect for kids and craft enthusiasts alike, infusing any book with a splash of color and creativity. To get started, gather some vibrant colored cardstock, playful googly eyes, and basic crafting tools. The easy-to-follow template and instructions make this project accessible to all ages, ensuring a fun and engaging experience. As you customize your monsters with unique eye, tooth, and texture combinations, each one will develop its own personality, adding an extra layer of excitement to reading time. Beyond enhancing the joy of reading, these bookmarks also make for a delightful crafting session during holidays like Halloween, allowing you to create a collection of friendly page savers that bring whimsy to your reading experience.
Quick DIY Wire Flower Bookmarks
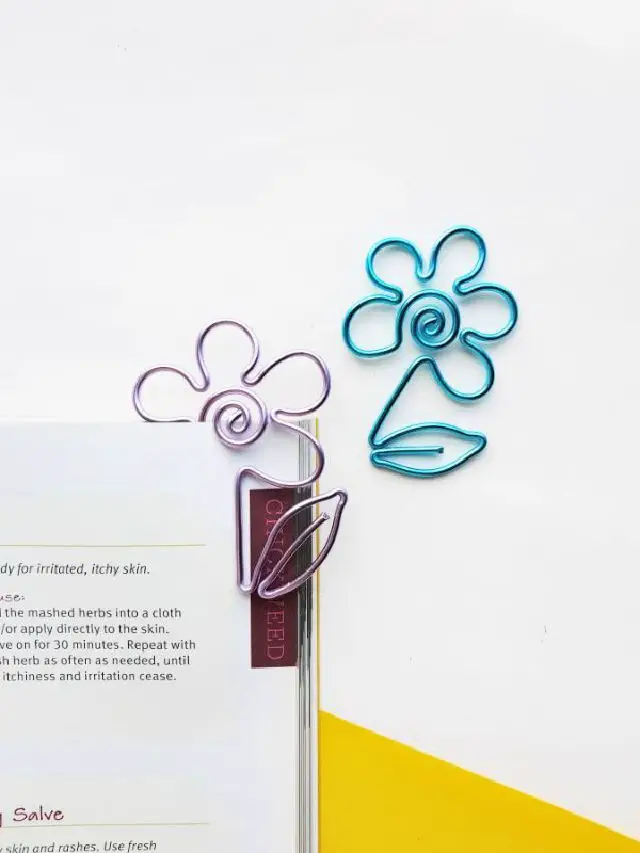
Elevate the art of bookmarking with unique ideas that make perfect gifts for readers. For those who combine their love of reading and crafting, creating a DIY Wire Flower Bookmark is an ideal fusion of both passions. A comprehensive guide by Wondermom Wannabe provides a step-by-step walkthrough to fashioning this charming project. With only basic supplies such as craft wire and standard pliers required, this activity offers a delightful blend of simplicity and creativity. The included printable template simplifies the process, ensuring that anyone can achieve beautiful results with ease. Not only does this craft serve as a functional page marker, but it also adds a personal touch to one’s reading routine and makes for a thoughtful, handmade gift for fellow book enthusiasts.
Handmade Silhouette Bookmarks
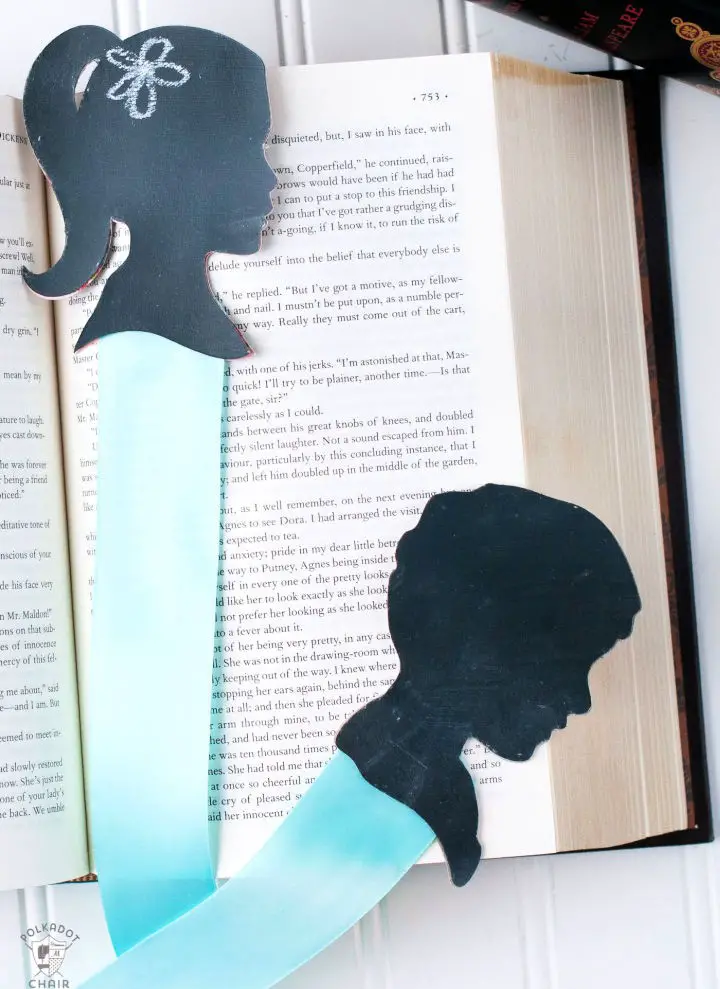
Transform your reading experience with charming, personalized chalkboard silhouette bookmarks. With this easy-to-follow guide from The Polka Dot Chair, you’ll be creating unique keepsakes in no time. By combining the durability of chipboard with the versatility of chalkboard paint and patterned paper, these bookmarks offer a thoughtful way to mark your place while adding a personal touch to each page. To get started, simply cut out your design using a cutting machine like a Cricut or Silhouette Cameo, apply a light coat of chalkboard paint, and adhere the patterned paper to the reverse side for a delightful, handcrafted bookmark. With these special keepsakes, every marked page can hold a meaningful message or handwritten note, making reading an even more enjoyable experience.
No Sew DIY Fabric Bookmark
Transform fabric scraps and craft sticks into delightful bookmarks without sewing a single stitch. This straightforward project from Swoodson Says is perfect for all ages, offering a creative way to repurpose odd strips of fabric while producing a practical item that avid readers will adore. To get started, you’ll need just a few simple supplies: Mod Podge, craft sticks, and some knit fabric. The process is remarkably easy: apply glue to the stick, press it onto the fabric, and trim the excess. Next, drill a small hole for the tassel and thread embroidery floss through, bringing your handmade bookmark to life. This engaging and accessible craft yields a one-of-a-kind creation that will keep your place in style.
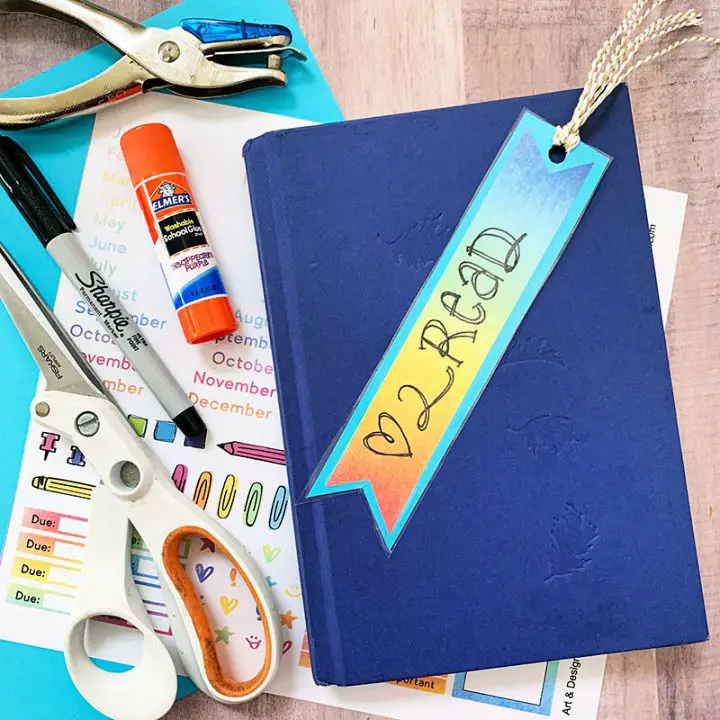
How to Make Your Own Bookmarks Without Cutting Machine
Delve into the world of crafting with Michelle’s Party Plan-It’s effortless DIY bookmark tutorial. This comprehensive guide makes it easy for book enthusiasts and crafting novices alike to create their own laminated bookmarks, using basic supplies such as a printer, laminator, and glossy paper. A free printable template is available to get started, ensuring a stress-free crafting experience.These customizable bookmarks are perfect for personal use, party favors, or classroom gifts. Add a touch of sophistication with a holographic finish or keep it simple with transparent lamination. By engaging in this creative activity, you’ll not only enhance your reading experience but also gain a sense of accomplishment and satisfaction from creating something unique.
Easy DIY Resin Coated Fabric Bookmarks
Embark on a creative journey to craft one-of-a-kind homemade bookmarks that reflect your personal style. By combining fabric scraps with a clever resin coating technique, you’ll create bookmarks that are both flexible and long-lasting. On the Resin Crafts Blog, Kelli Stradling shares a simple and easy-to-follow process for making Resin Coated Fabric Bookmarks that resist fraying. With just a few basic supplies like EnviroTex Lite Pour on Epoxy, fabric pieces, and some essential crafting tools, you’ll be able to transform your cherished fabrics into unique page markers with a personal touch. This practical project is ideal for book lovers and DIY enthusiasts seeking a functional yet stylish craft that’s sure to impress friends and family.
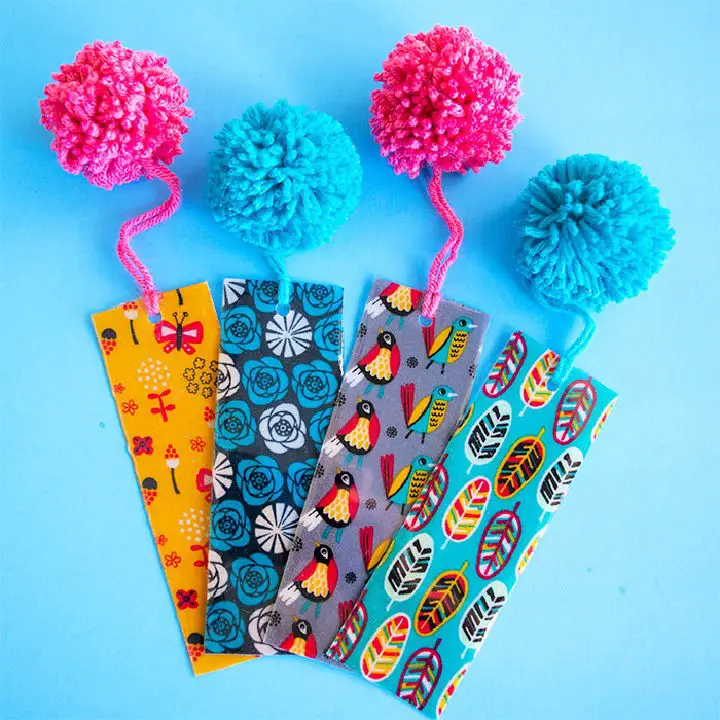
Homemade Rainbow Bookmark With Tassel
Transform any ordinary bookmark into a one-of-a-kind treasure with Jen Goode’s DIY guide on Angie Holden’s The Country Chic Cottage. This delightful project is sure to captivate bookworms and planner enthusiasts alike, requiring only basic materials like a printer, paper or cardstock, scissors, and a dash of creativity. By upcycling a printable planner sticker sheet into a personalized placeholder, you’ll be creating a charming memento that reflects your unique style. Add a touch of durability with packing tape, some flair with a tassel, and voila! You’ve crafted a truly special bookmark that’s perfect for sharing with friends, family, or colleagues – making it an excellent activity for classrooms, scouting events, or even group gatherings.
Making a Felt Birdhouse Bookmark
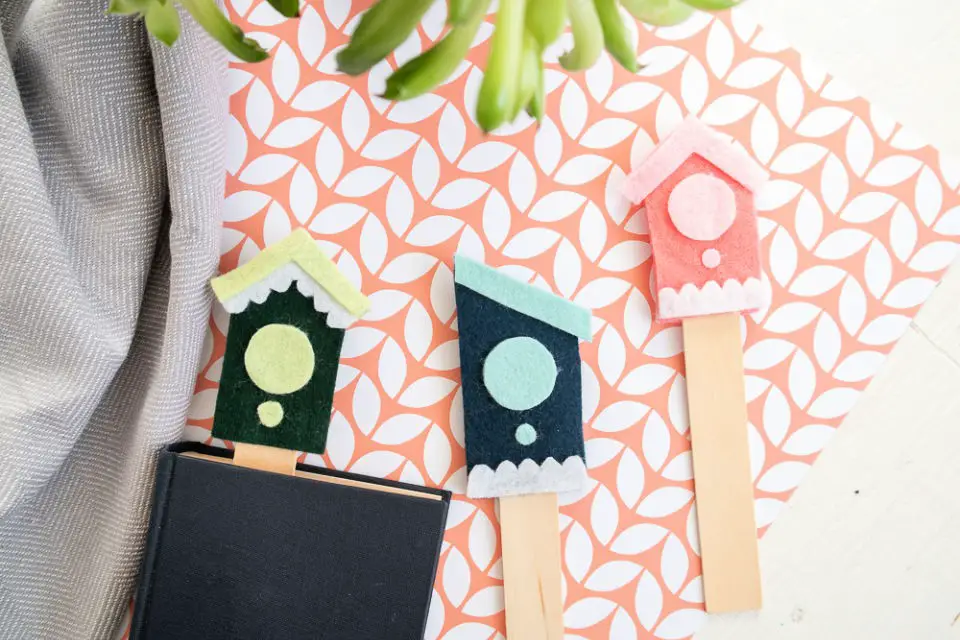
Indulge in the delightful process of creating bespoke felt birdhouse bookmarks with Busy Being Jennifer’s guidance. This project not only sparks joy but also yields a practical tool for book lovers to track their page progress. The steps are uncomplicated, requiring minimal materials such as felt scraps, wooden craft sticks, fabric scissors, and a glue gun. By utilizing a printable birdhouse template, even novice crafters can produce these charming bookmarks. This DIY tutorial presents an informative, captivating, and easy-to-follow approach, making it ideal for gifting or adding a personal touch to your reading experience.
DIY Bookmarks With Liquid Polymer Clay
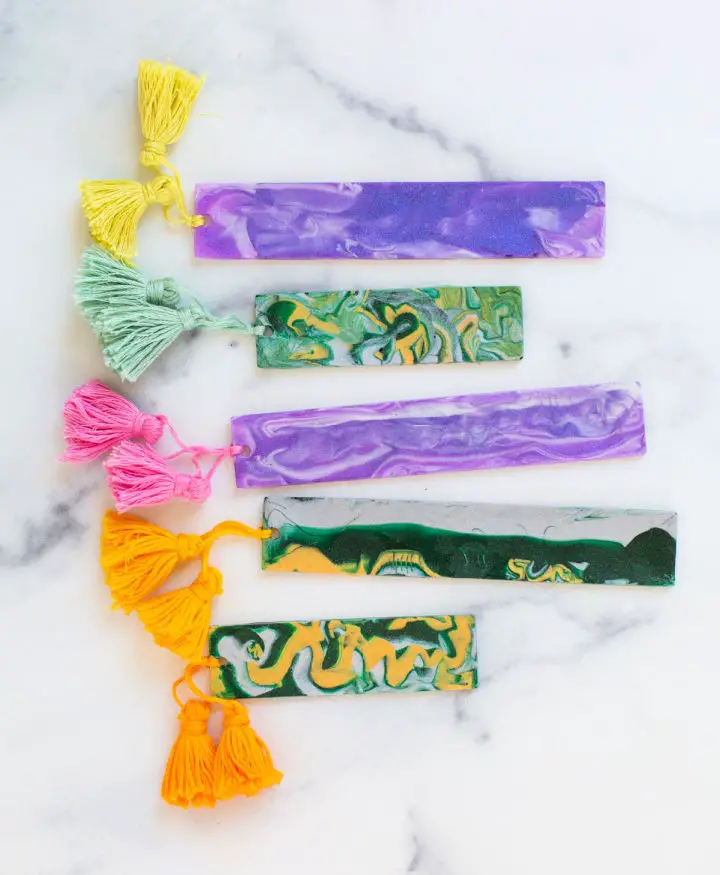
When you’re in need of a bookmark at short notice, having a few quick and easy ideas up your sleeve can be a lifesaver. One such idea is to craft a unique and personalized bookmark using liquid polymer clay. By following Lovely Indeed’s DIY tutorial, you can create a one-of-a-kind accessory that allows you to blend colors and add decorative elements like tassels or pompoms for a truly custom look. With the versatility of baked liquid polymer clay, you’ll be able to produce multiple bookmarks in batches, making them perfect for gifting to avid readers, teachers, or friends. The beauty of this project lies not only in its ease of execution but also in the durability and flexibility that ensures your creation will withstand the test of time. Get creative with liquid polymer clay and bring your personal style to the page, all while keeping your place in your favorite books.
Conclusion:
While wrapping up this project, it’s clear that creating 25 homemade DIY bookmarks is not only an entertaining and creative pursuit but also a valuable endeavor that elevates your reading experience. This comprehensive guide has provided the essential steps to making a bookmark, covering everything from gathering materials to the final touches, ensuring you have all the necessary guidance at your disposal. Notably, these handmade bookmarks not only serve as meaningful personal mementos but also make thoughtful presents for fellow book enthusiasts. With this project, you’re encouraged to unleash your creativity and start crafting distinctive bookmarks today. Remember, each DIY bookmark you create brings you closer to a more personalized and enjoyable reading adventure.
