Why DIY Notebook Covers?
When it comes to personalizing notebooks, creating DIY covers is an incredibly rewarding experience that offers numerous benefits for people of all ages. Not only does it allow you to express your creativity, but it also provides an opportunity to make your stationery truly unique and reflective of your style and interests.
By putting together your own notebook covers, you’re not only exercising your creative muscles but also reusing materials you may already have at home. This approach is not only cost-effective but also eco-friendly, as it reduces waste and gives old notebooks a new lease on life.
Beyond the environmental benefits, DIY notebook cover-making has been shown to have a therapeutic effect, reducing stress and providing a sense of accomplishment. It’s an activity that can be enjoyed by people of all ages and skill levels, making it a perfect way to spend your free time.
And let’s not forget about the gift-giving potential! DIY notebook covers make thoughtful presents for friends and family, showing that you took the time to create something special just for them. For parents and teachers, this activity can also serve as an educational tool, encouraging kids to think creatively and learn about recycling and sustainability.
In conclusion, making your own notebook covers is a fun, creative, and practical activity that offers numerous benefits, from personalization and cost-effectiveness to eco-friendliness and therapeutic value. With its many advantages, it’s no wonder why DIY notebook cover-making has become such a popular hobby.
How to Make a Notebook Cover
Crafting a custom notebook cover can be a delightful DIY adventure, offering a chance to personalize your own stationery or gift one to someone special. With this versatile approach, you can choose from an array of materials, such as cork, leather, vinyl, or even wool, allowing for endless creative possibilities. This straightforward guide will walk you through the process of creating a unique notebook cover for a standard composition notebook or quilter’s planner, making it easy to get started and unleash your creativity.
Supplies Needed:
To embark on this creative journey, you’ll need a few essential tools and materials. Begin by gathering an 18×27 inch piece of fabric – feel free to choose from various materials like cork, leather, vinyl, wool, and more. Next, make sure you have a reliable sewing machine at your disposal. Additionally, having Adobe Reader installed will allow you to print out the template with precision. To keep everything in place, you’ll need some Scotch tape, as well as a trusty ruler for measuring purposes. For cutting through the fabric, opt for either fabric scissors or a rotary cutter. A Clover Chaco or suitable marking pen will come in handy for making precise markings. Finally, secure your fabric with Wonder clips or pins, and if working with cork, leather, or vinyl, consider investing in a Teflon foot or walking foot for your sewing machine to ensure smooth operation.
Preparation:
To get started with creating your notebook cover, begin by downloading and printing the template in Adobe Reader. Make sure to print it at actual size without any scaling adjustments. Double-check the accuracy of the template’s measurements by verifying the 1-inch square is the correct dimensions.
Once printed, cut along the left-hand margin on specific template pages as directed in the video tutorial. Then, use the triangular markings on the template to align and secure the pages together with tape. This will create a full-sized pattern that you’ll need to cut out from your chosen material. For your project, you only require one pattern piece – either the standard notebook or quilter’s planner design.
Cutting Your Fabric:
To begin creating your fabric cover, start by laying out your chosen fabric and tracing the pattern onto it using a white Clover Chaco or an appropriate marker for your material. Due to the larger size of the pattern, you’ll need to divide it in half and then flip the design along its center line to ensure a complete pattern on your fabric. Once traced, cut out your fabric along the lines. Next, prepare the lining by cutting two pieces according to the dimensions outlined in the video – be sure to adjust these measurements based on the type of notebook you’re planning to cover. On the wrong side of each lining piece, draw a line approximately 1/4 inch from one long edge. This guide will aid in attaching the linings to the main cover piece.
Assembling the Cover:
To attach the lining, align the short edge of the cut cover with the drawn line on each lining piece, leaving a small overhang on both sides. Secure in place using clips or pins. Repeat this process for the second lining piece. Then, sew around the entire cover using an 1/8-inch seam allowance to create a secure bond. Once completed, trim the excess lining material to ensure it’s flush with the edges of the cover. When working with materials like cork, leather, or vinyl, take extra care to achieve clean and even edges, as these will be visible in the final product. After sewing and trimming, insert your notebook by sliding the covers into the pockets formed by the lining pieces. With these simple steps, you’ll have successfully crafted a custom notebook cover.
Video Tutorial
To supplement your understanding of creating a notebook cover, I recommend pairing this written guide with a step-by-step video tutorial available on YouTube. The visual component offers an alternative learning experience for those who grasp concepts better through observation, providing a comprehensive overview that reinforces the techniques outlined here. By combining both the written and visual elements, you’ll gain a deeper understanding of the process and be confident in your ability to execute each step without missing any crucial details.
How to Decorate Your Notebook Covers
Unleash the creative potential in your notebooks by giving them a personal touch! A beautifully designed cover can spark inspiration and turn mundane note-taking into an enjoyable experience. To take it to the next level, consider these innovative ways to revamp your notebooks:
Materials to Get Started
Transform any surface into a unique canvas using a medley of creative materials. The first step is to incorporate washi tape’s bold colors and patterns for an instant splash of vibrancy. Next, upcycle old clothes into fabric scraps or purchase playful prints to add texture and depth. For a fully customized look, turn to paint – whether you prefer the vibrant hues of acrylic or the whimsical nature of watercolor. Stickers are another great way to express your interests and personality, with themed options available for every hobby or passion. Paper is also an essential component, offering a range of possibilities from construction paper to scrapbook paper, even vintage maps. Finally, bring it all together with markers, pens, and colored pencils, adding playful doodles or elegant lettering. To seal your designs and ensure they withstand the test of time, apply Mod Podge or clear glue for a professional finish.
Easy and Unique Decoration Ideas
Transform your notebook into a unique work of art by experimenting with various cover designs. Start by creating geometric patterns using colorful tape to create stripes, triangles, or abstract shapes. For a tactile experience, wrap fabric around your notebook and secure it with glue for a textured look. Make it personal by turning old magazines, photos, or ticket stubs into a collage that holds special meaning. Use lettering to turn your notebook into a motivational tool by adding inspiring quotes or your name in stylish fonts. Unleash your creativity by filling the cover with doodles and drawings – from simple sketches to full-blown illustrations. Alternatively, bring nature indoors by pressing leaves or flowers onto the cover and sealing them with Mod Podge. With these creative ideas, you can turn a plain notebook into a one-of-a-kind treasure that reflects your personality.
Tips for a Durable and Beautiful Finish
Before diving into the creative process, take some time to prepare your notebook cover for decoration. Start by giving it a thorough cleaning to remove any dust or oils that may affect the adhesion of your design elements. With a clean slate, you can then plan out your design on paper, sketching out ideas and avoiding potential mistakes.When it comes time to apply your decorations, layer them carefully, starting with the base layer and adding smaller elements in succession. This will help prevent any mishaps or misunderstandings that could ruin your design. Finally, seal your masterpiece with a coat of Mod Podge to protect it from wear and tear.With these steps complete, you’ll be well on your way to creating a truly one-of-a-kind notebook cover that reflects your personality and style. And who knows? Your imagination may just run wild with the possibilities! With a few simple materials and some creative flair, you can turn your notebooks into functional works of art that showcase your unique perspective.
FAQs on DIY Notebook Cover
When embarking on a DIY notebook cover project, it’s natural to have a few doubts or uncertainties. To alleviate these concerns and kick-start your creative adventure, here’s a collection of answers to frequently asked questions that will guide you through the process with clarity.
What materials do I need for a DIY notebook cover?
To embark on a DIY notebook cover project, you’ll typically require the following essential materials:
A high-quality notebook as the foundation of your creation.
For added visual appeal and personal touch, you’ll need paper – be it colored, patterned, or plain – or even fabric to craft your custom cover.
In addition to these basic components, a pair of scissors will come in handy for cutting your chosen material into the desired shape and size.
To secure your design elements in place, you’ll need a reliable adhesive like glue or Mod Podge. If you’re looking to take your project to the next level, consider incorporating optional decorative elements such as stickers, washi tape, paints, or any other creative embellishments that strike your fancy.
Can I use fabric for my notebook cover?
When it comes to crafting long-lasting and visually appealing notebook covers, fabric can be an excellent choice. Not only does it provide a sturdy base for your project, but it also offers endless possibilities in terms of texture and design. To ensure that your fabric cover remains securely attached to the notebook, you’ll need to use either fabric glue or a sewing machine. This will help prevent any unwanted shifts or detachments over time.
How can I protect my DIY notebook cover?
For added durability, consider shielding your DIY notebook cover from damage using transparent adhesive paper or applying a thin layer of Mod Podge. This extra layer provides a robust barrier against wear and tear, safeguarding your hard work and keeping it looking great for longer.
Are DIY notebook covers reusable?
When designing fabric notebook covers for reusability, consider creating them slightly larger than the actual notebook dimensions. This will provide enough room to secure the cover with a closure mechanism such as a button or elastic band. Unlike paper covers, which are typically glued directly onto the notebook, fabric covers can be designed to accommodate this extra room and ensure they remain in place.
Can I make a waterproof DIY notebook cover?
When it comes to protecting your book cover from water damage, consider using materials with natural resistance like oilcloth or laminated fabric. Alternatively, you can employ additional protective measures by applying a waterproof spray or attaching a clear, waterproof adhesive paper directly onto the finished cover. This will ensure that your hard work is preserved and remains intact even in wet environments.
How can I customize my DIY notebook cover for school?
When it comes to personalizing your notebook cover for school, there are several creative ways to make it truly unique. For instance, you could add a touch of personality by incorporating your name or initials into the design. Another option is to use school colors or incorporate them in some way, which can help show your team spirit and school pride. Additionally, adding subject-specific stickers or decals featuring your school’s mascot can be a fun way to make your notebook stand out. Finally, consider adding a timetable or planner on the inside cover to keep yourself organized and on track throughout the school year.
Is it possible to make a no-sew fabric notebook cover?
Crafting a no-sew fabric notebook cover is a straightforward process that requires minimal effort, but yields a unique and personalized result. By employing fabric glue or adhesive strips, you can seamlessly attach your chosen fabric to the notebook, eliminating the need for sewing. To achieve a professional finish, it’s essential to neatly fold and secure the edges of the fabric to prevent fraying, thus ensuring your cover remains intact and visually appealing.
How do I choose the right paper or fabric?
When selecting materials for your notebook, it’s essential to consider its intended purpose. If you’re looking for a durable option, opt for thicker paper or fabric that can withstand frequent use and potential scratches. On the other hand, if you’re aiming to create a decorative piece, choose materials that align with your personal style or the theme you want to convey. For instance, if you’re creating a notebook for a child, you may want to select colorful, playful materials that will appeal to their sense of creativity and imagination.
What if I make a mistake while crafting my notebook cover?
When embracing the creative process, it’s essential to recognize that mistakes are an inevitable part of the journey. Paper-based errors can be effortlessly corrected by gently peeling off the mistake, allowing you to try again with a fresh start. Similarly, fabric cover mishaps can be rectified using a seam ripper and re-sewing. The beauty lies in accepting these imperfections as they add character to your unique creations. By keeping this mindset, you’ll be well on your way to crafting beautiful, personalized notebook covers that truly reflect your personal style and needs.
15 Creative DIY Notebook Cover Design Ideas
Transform the look and feel of your notebooks by giving them a personalized touch with these 15 creative DIY notebook cover design ideas. From simple to intricate, we’ll show you how to elevate your writing experience with one-of-a-kind covers that reflect your personality.
Notebook Covers With Decoart
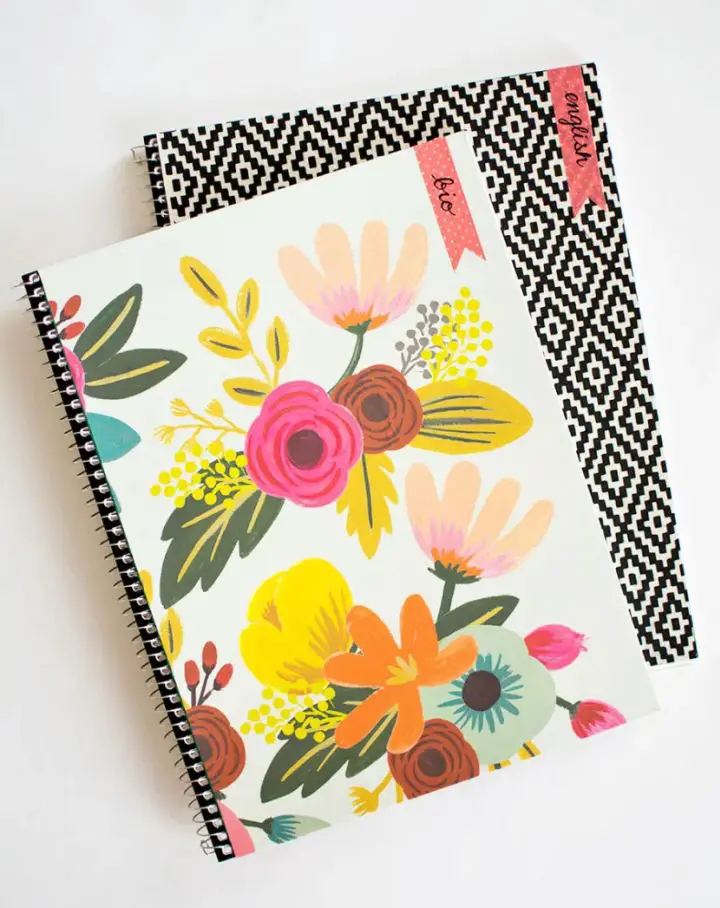
Add a dash of creativity to your school supplies with these delightful DIY notebook covers, courtesy of Fox + Hazel. This step-by-step guide will walk you through the process of creating custom designs using basic materials like paint, stencils, and spiral notebooks. The end result is a one-of-a-kind accessory that’s sure to set you apart from the rest. Inspired by pastel hues and desert landscapes, these cacti- and aloe vera-adorned covers are perfect for brightening up any classroom. With just a few simple tools like painter’s tape and cosmetic sponges at your disposal, you’ll be crafting unique notebooks in no time, ready to take on the new school year.
Easy DIY Notebook Covers With Cricut
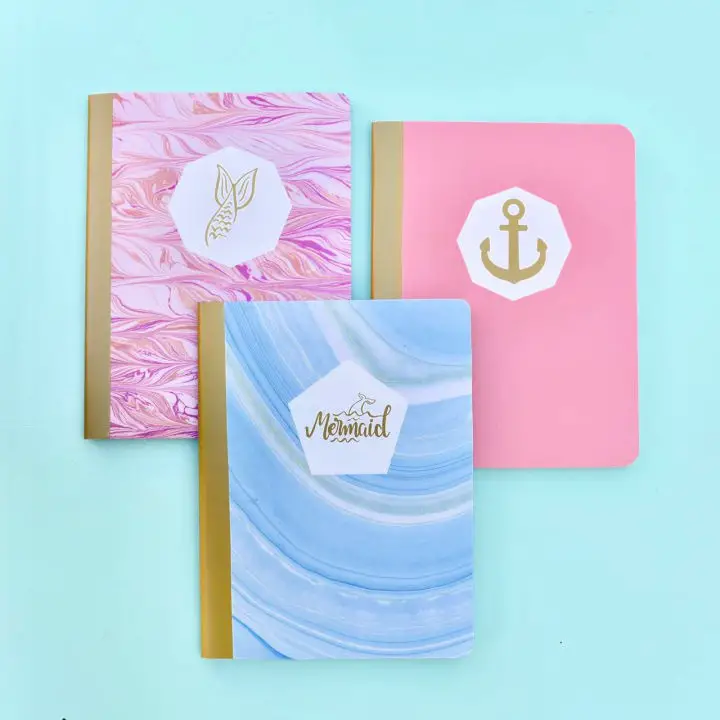
Elevate a plain notebook into a stunning ocean-inspired treasure with this easy DIY notebook cover tutorial. Perfect for crafting enthusiasts or anyone looking to add a personal touch to their stationery, this guide demonstrates how to use a Cricut machine to create a marbled vinyl cover adorned with mermaid accents. In just 10 minutes, you can transform a composition book into a stylish and custom piece that’s both functional and visually appealing. The process is straightforward: trace, cut, peel, and stick your way to a notebook that’s sure to garner compliments and spark creativity.
Make Your Own Notebook Cover
Transform your plain notebooks into personalized masterpieces with Cobberson & Co.’s DIY notebook cover projects! Perfect for crafters of all skill levels, these simple yet creative ideas use scrapbook paper, washi tape, and markers to elevate your journals. By incorporating hand-lettered quotes and Instax photos, you’ll breathe new life into your writing experience and spark your imagination. With easy-to-follow instructions, these helpful suggestions will guide you in crafting a notebook that truly reflects your unique style.
Handmade Notebook Cover
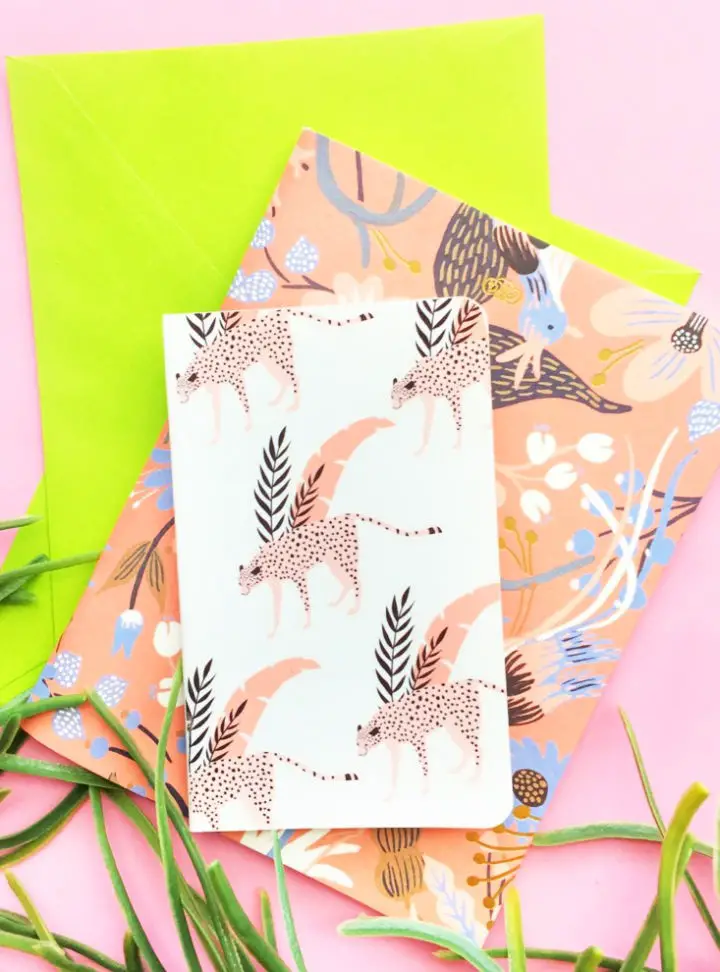
Elevate your note-taking game by transforming a standard notebook into a one-of-a-kind accessory. If you’re ready to unleash your creativity and give your stationery a wild twist, Maritza Lisa’s DIY Notebook Cover tutorial is the perfect starting point. This innovative project allows you to turn a simple white notebook cover into a vibrant jungle masterpiece using temporary tattoos and a few basic materials. The process is surprisingly straightforward, requiring just a printer, temporary tattoo paper, and a blank canvas – your notebook cover. Follow along with the step-by-step guide and learn how to customize your chosen jungle imagery using graphic software for an even more personalized look. By incorporating this craft project into your daily routine, you’ll be able to create a unique notebook cover that not only reflects your personality but also makes a statement.
DIY Notebooks With Stitched Covers
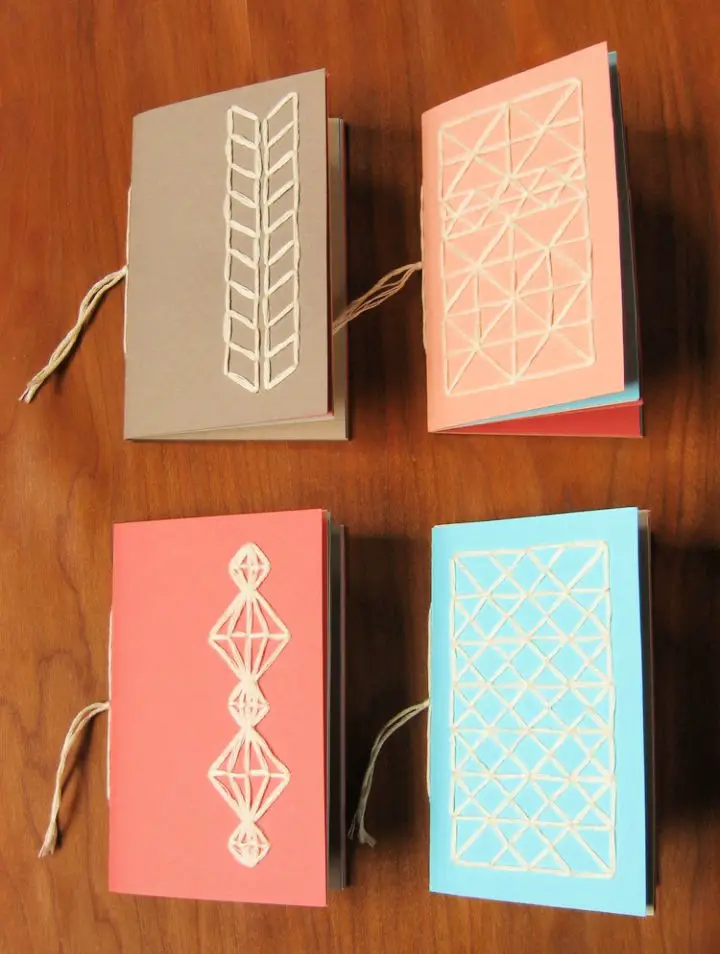
Transform your journals into one-of-a-kind masterpieces with our DIY notebook cover ideas. Join us on a journey of creative self-expression as we explore the world of Luxe DIY’s handcrafted notebooks with stitched covers. These charming books are the perfect vessel for storing treasures like leaves, feathers, or cherished stickers and doodles. To get started, gather your supplies: cardstock, embroidery floss, and basic crafting tools. Follow our step-by-step guide as we take you through the process of cutting, folding, and stitching to create a sturdy and personalized notebook that’s tailor-made for journaling enthusiasts and scrapbooking aficionados alike. With clear instructions and engaging guidance, this project is sure to provide a rewarding and enjoyable crafting experience.
How Do You Make a Notebook Cover
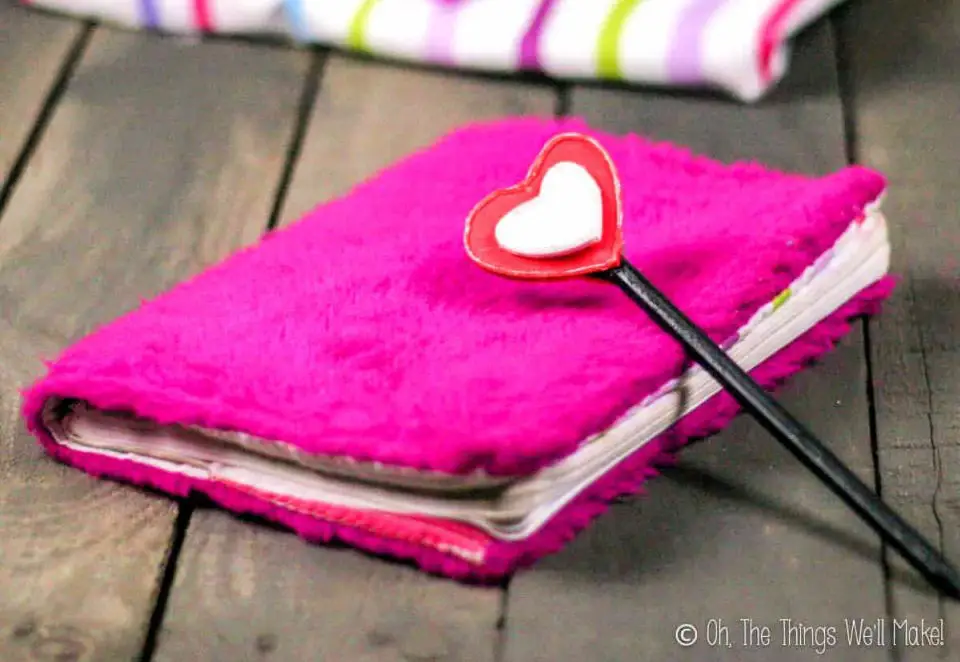
Transform your everyday notebooks into one-of-a-kind masterpieces with a dash of creativity! With Oh, The Things We’ll Make!’s straightforward DIY guide, you can effortlessly craft a personalized notebook cover using just a few basic fabric pieces and some simple sewing techniques. This tutorial is ideal for anyone seeking to elevate their stationery game and boasts the added benefit of reusable designs that will last as long as your creativity does. Follow the step-by-step instructions to measure, cut, and stitch your way to a unique, functional, and stylish notebook cover that’s uniquely yours.
Personalized Notebook Cover for Back to School
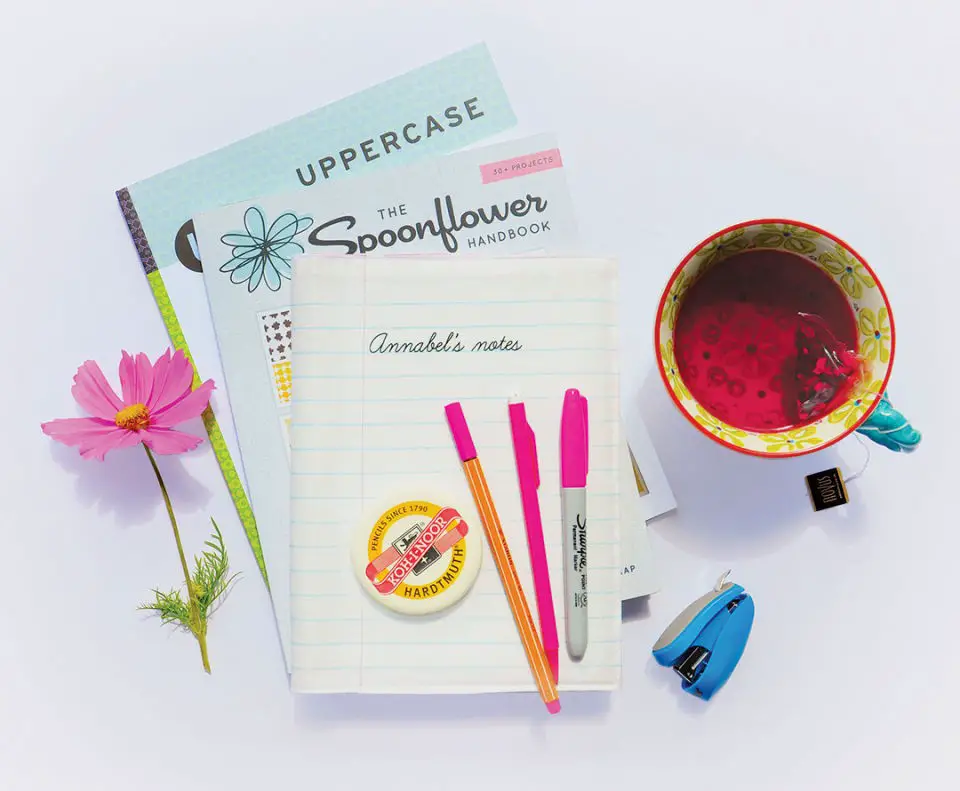
Transforming plain notebooks into elegant vessels of creativity is a breeze with this DIY tutorial. By incorporating personalized fabric designs and clever pocket placement, you can create a one-of-a-kind notebook cover that’s both practical and stylish. This project requires minimal materials and offers a fun way to showcase your favorite custom prints. With Ceri Staziker’s simple steps, measuring, cutting, and sewing are a snap, allowing you to craft a washable cover that fits any size notebook. Whether you’re looking to add a unique touch to your child’s school supplies or create thoughtful gifts, this tutorial has got you covered. Get ready to unleash your creativity and give your notebooks the makeover they deserve!
Cute DIY Traveler’s Notebook Cover
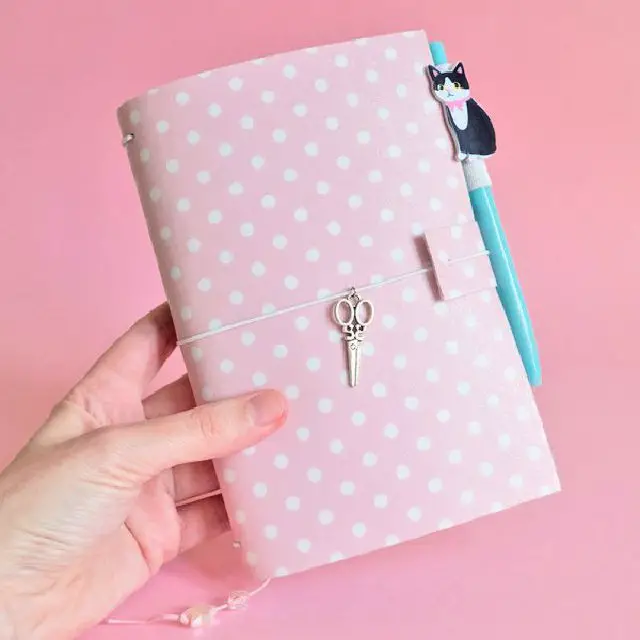
As you embark on a creative adventure with Super Cute Kawaii!!, Natasja takes us through her DIY Traveler’s Notebook cover crafting experience. Drawing inspiration from Bananafish Studio’s tutorial, she skillfully navigates the process using readily available materials and adds a personal touch with a charming pen loop and adorable charm. The comprehensive, step-by-step guidance ensures that even those who are struggling with migraine medications can easily follow along and complete the project. Not only does Natasja showcase the allure of her homemade cover, but she also shares practical tips for customizing the interior with functional decorations. With an approximate cost of €3 for the cover and €1.50 per notebook, this DIY venture offers a budget-friendly and rewarding experience for craft enthusiasts looking to personalize their note-taking style.
Making a Stylish Scrapbooking Notebook Cover

Transform a plain composition notebook into a one-of-a-kind DIY journal with minimal effort and expense. By following Megan Rutell’s straightforward guidance at Page Flutter, you can turn an ordinary notebook into a stylish and functional accessory tailored to your unique needs. With simple materials and practical tips on selecting papers, adhesives, and decorative elements, anyone can create a personalized notebook for journaling, planning, or sketching. The process is clear, accessible, and budget-friendly, allowing you to unleash your creativity and enjoy the satisfaction of crafting a journal that truly reflects your personality.
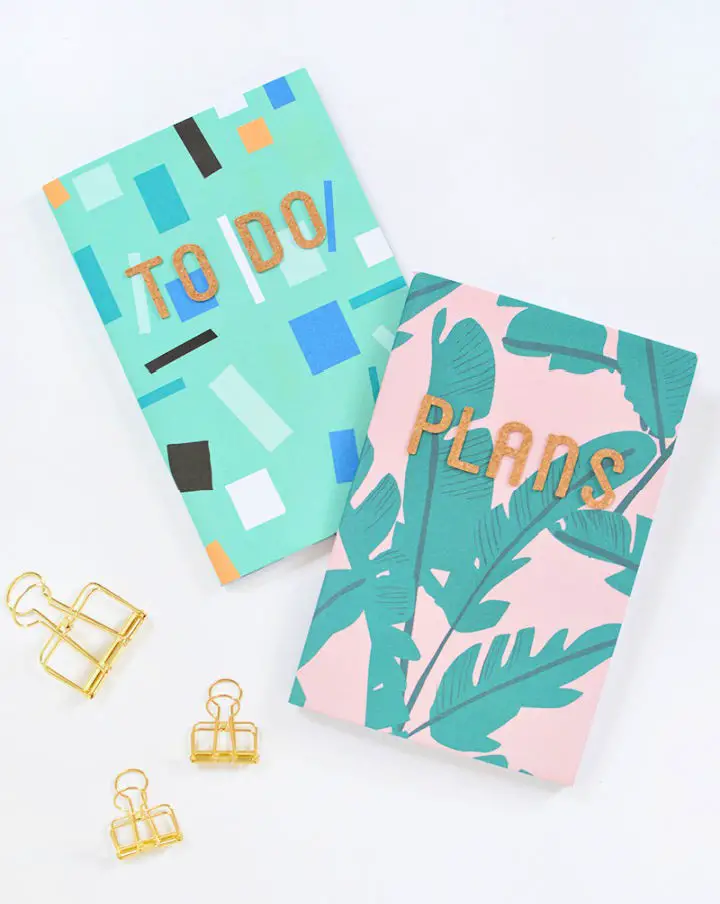
How to Do Customizable Notebook Cover
As the back-to-school season approaches, why not add a personal touch to students’ school supplies with Pottery Barn’s DIY customizable notebook guide? This straightforward and engaging process allows students to express their individuality by transforming plain notebooks into unique and stylish essentials.
With just a few simple materials like paper, Mod Podge, and Washi tape, you can create one-of-a-kind notebook covers that reflect your personality. The steps are easy to follow, making it perfect for crafting an organized and inspiring learning environment.
For even more creative ideas to complement your customized notebooks, visit Amy’s Homey Oh My! blog for a plethora of adorable DIY projects.
Free Printable Boss Lady Notebook Covers
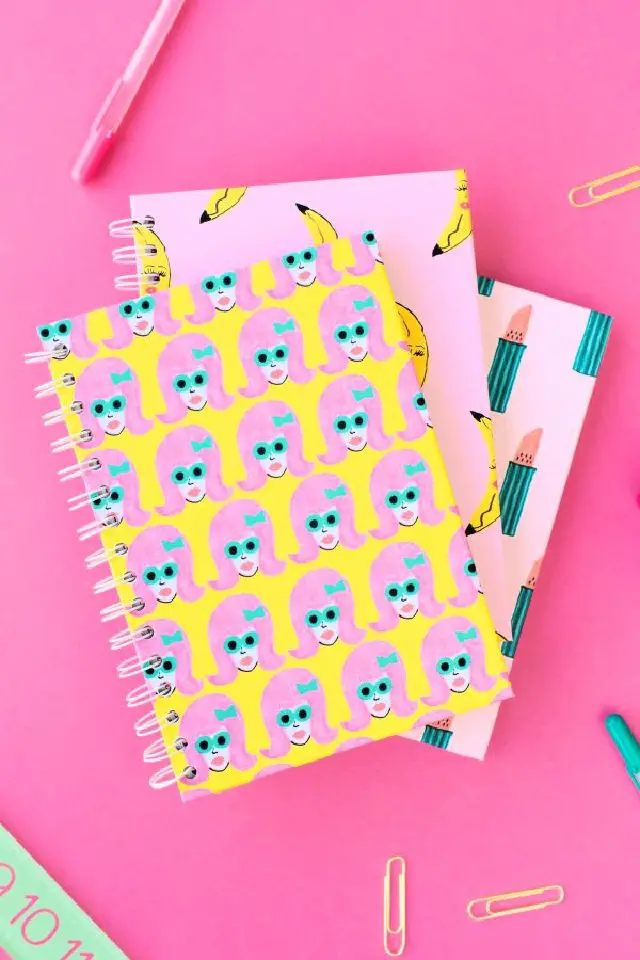
Give your workspace a personal touch with these charming notebook cover ideas that everyone will adore. Studio DIY offers free printable Boss Lady notebook covers designed by Kendra of Bouffants & Broken Hearts, perfect for those who crave style and inspiration in their daily tasks. These adorable covers not only breathe new life into an old notebook but also provide a unique way to express your personality. With just 30 minutes of effort, you can transform your notebooks with playful patterns like watermelon lipstick or bananas and add a protective layer using clear contact paper to ensure they remain vibrant despite a busy schedule. By following the step-by-step instructions, you’ll create a customized notebook that reflects your boss lady vibe and helps you organize your thoughts and tasks.
Simple DIY Gift Wrap Notebook Cover
Transform ordinary notebooks into one-of-a-kind stationery with this step-by-step DIY guide from Burkatron. With just a few basic materials like wrapping paper, glue, a ruler, and a craft knife, you can breathe new life into plain notebooks by giving them a unique and personalized look. The process is surprisingly straightforward: simply cut the paper to size, apply it seamlessly to the cover, and fold the edges over for a crisp finish. For an added touch of customization, consider incorporating self-adhesive letters into your design. This project is ideal for anyone who delights in infusing their personal style into everyday items and has a passion for crafting. By making something by hand that’s both functional and visually appealing, you’ll discover the joy of creating something truly special.
DIY Notebook Cover With Washi Tape
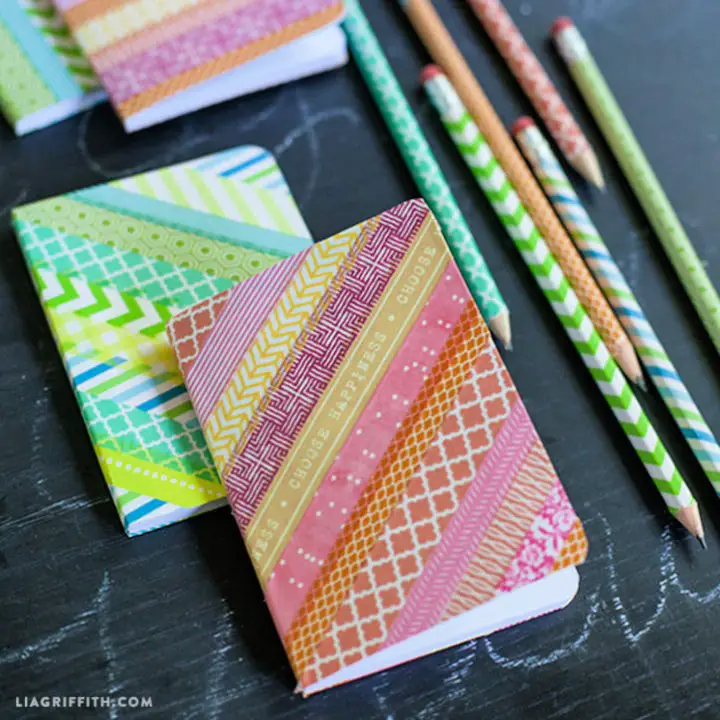
Unleash your creativity and transform ordinary stationery into a vibrant canvas with Lia Griffith’s comprehensive washi tape tutorial. By following her easy-to-master steps, you can turn dull pencils and notebooks into unique pieces that reflect your personality. With an extensive range of patterns and colors to choose from, the possibilities for customization are virtually limitless. Whether you’re a crafter looking to add a pop of color to your daily routine or simply seeking to elevate your stationery game, this fun and functional project is sure to inspire. So why not grab some washi tape and get creative?
How to Make Watercolor Notebook Covers
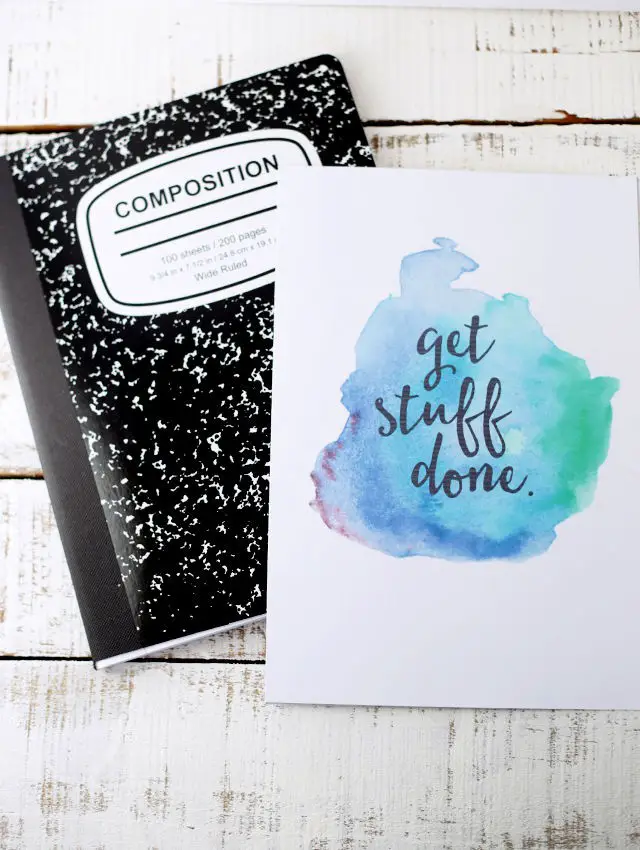
Bring a pop of creativity to your back-to-school essentials by transforming ordinary notebooks into one-of-a-kind masterpieces. The vibrant watercolor notebook covers from Eighteen25 offer a refreshing way to customize stationery and make thoughtful gifts. With just a few simple supplies, including a composition book, downloadable printables, scissors, Mod Podge, and optional washi tape, you can craft a unique accessory for the academic year. Simply follow the straightforward steps to align, adhere, and adorn your notebook, ensuring a seamless and wrinkle-free cover. This enjoyable DIY project is perfect for adding a splash of color to your studies and making them truly unforgettable.
Homemade Notebook Cover
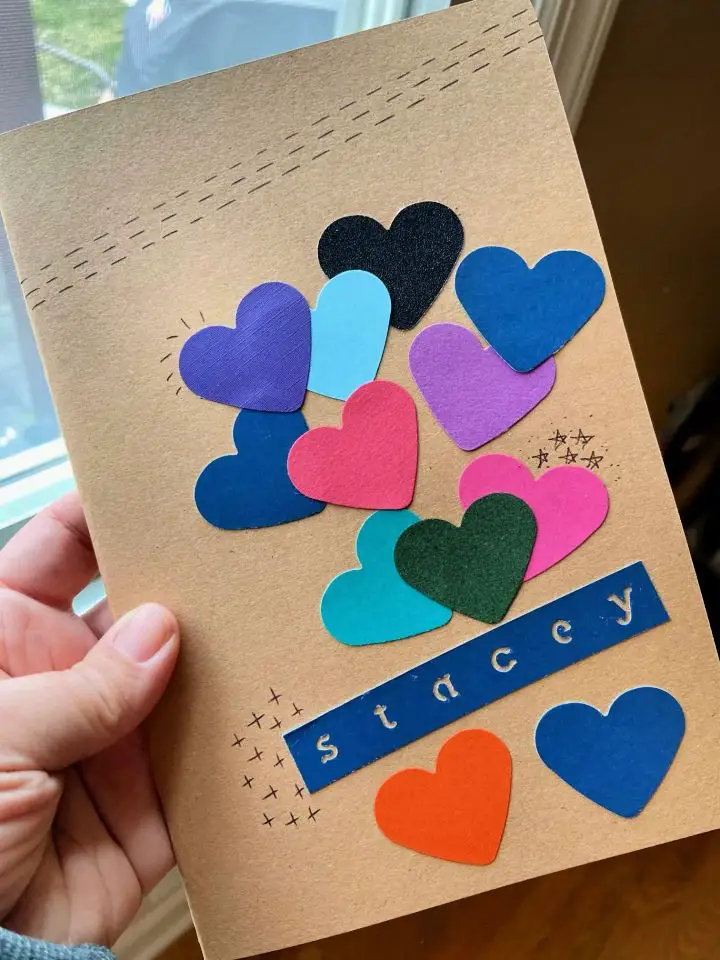
Want to take your notebook game to the next level? Look no further than these creative cover decoration ideas. For a unique twist on standard composition books, try Busy Being Jennifer’s DIY Notebook Cover tutorial. With just a few simple materials like fabric, batting, and a sewing machine, you can create a reusable cover that’s both stylish and functional.
The best part? The instructions are clear and easy to follow, guiding you through each step from cutting and ironing to sewing and personalizing with your initial. Whether you’re a student, teacher, or just someone who loves customizing their stationery, this project promises a fun and engaging crafting experience with a practical result that’s perfect for using or gifting.
So why settle for boring notebooks when you can make them truly one-of-a-kind? Dive into the details and discover how to take your notebook collection to new heights.
Conclusion:
As you conclude the process of crafting your DIY notebook covers, it’s clear that this activity transcends mere stationery personalization. It’s a unique opportunity to express yourself, showcasing your individuality and style. From selecting the perfect materials to assembling the finished product, this comprehensive guide provides everything needed to transform an ordinary notebook into a breathtaking masterpiece. The journey of creativity is just as fulfilling as the final result, making it an experience worth embarking upon. So, gather your supplies, unlock your imagination, and begin your own 15 creative DIY notebook cover design ideas project today.
