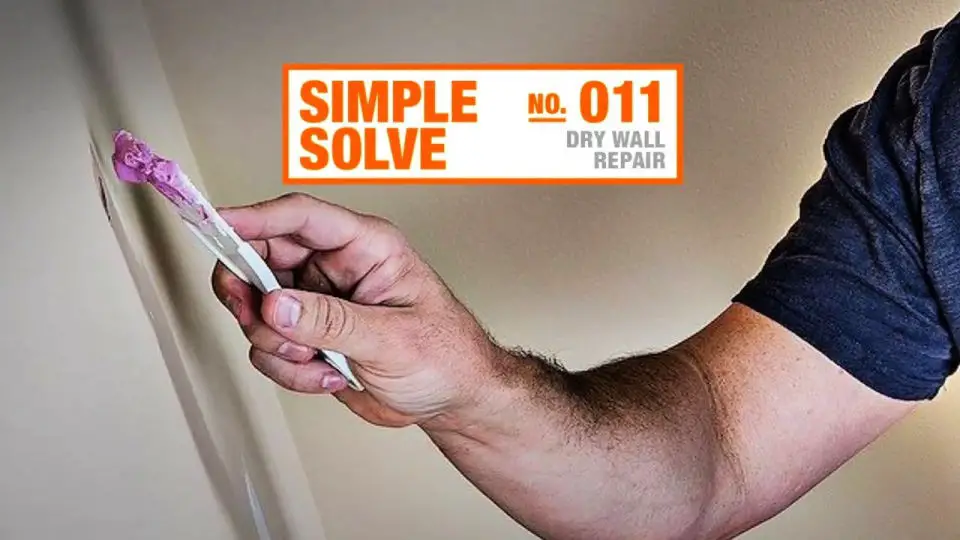
Why Repair Drywall Yourself?
While the thought of repairing drywall on your own might seem overwhelming at first, it’s a task that can be mastered with the right guidance and a dash of patience. In fact, there are several compelling reasons to take on this DIY project.For one, you’ll save money by avoiding professional labor costs. This makes it a more cost-effective option for homeowners looking to pinch pennies. Additionally, when you learn how to repair drywall yourself, you’ll have the ability to tackle minor damages as soon as they arise – no need to wait for a pro to become available.Moreover, acquiring drywall repair skills can be a valuable addition to your DIY repertoire, allowing you to take on future home maintenance tasks with confidence. And let’s not forget the sense of personal satisfaction that comes from fixing things in your own home. This experience can even turn into a rewarding hobby or a way to unwind after a long day.Before you get started, it’s essential to recognize that drywall repair requires patience and attention to detail – but don’t worry, this is not a task that demands extensive expertise. With the right tools at your disposal, including a drywall knife, sandpaper, and joint compound, you’ll be well-equipped to tackle most repairs.It’s also important to adopt a learning attitude when taking on this project. Mistakes will inevitably happen, but they’re an essential part of the learning process – each attempt will improve your skills and leave you feeling more confident in your abilities.Ultimately, choosing to repair drywall yourself is about embracing both a challenge and an opportunity to enhance your home with your own hands. As every expert was once a beginner, remember that with each patch and paint, you’re not just fixing walls – you’re building your capabilities.
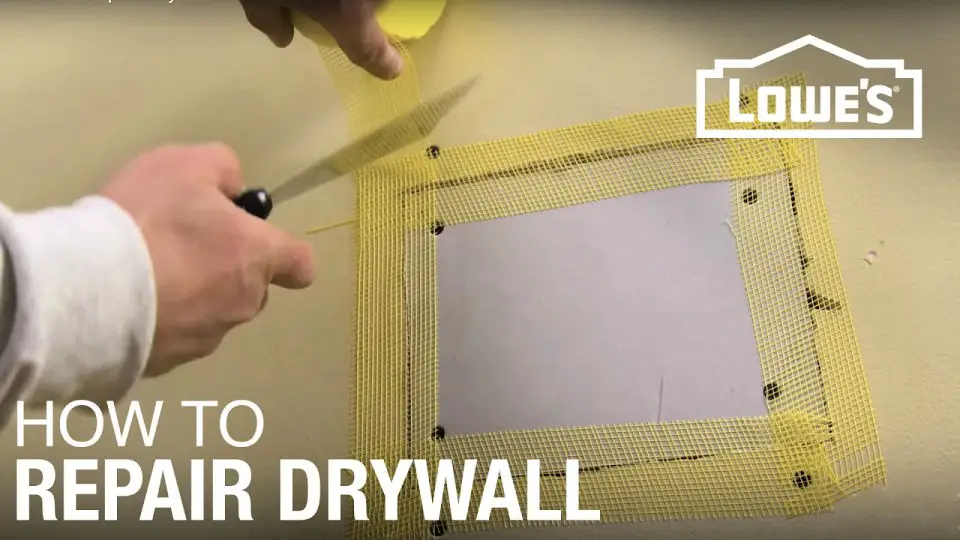
How to Repair Drywall – Step by Step
While many people may think that repairing drywall is a task best suited for professionals, it’s actually a feasible DIY project with the right tools and guidance. Whether you’re dealing with small imperfections or larger holes, this guide will provide a clear and comprehensive walkthrough of the repair process, helping you achieve a seamless finish.
Tools and Materials You Will Need
To tackle those pesky drywall imperfections, you’ll want to have the right tools at your disposal. Start by gathering a collection of essentials, including lightweight spackle or joint compound for filling in minor cracks and holes. For more significant gaps or tears, a drywall knife will be instrumental in scooping out excess material. Next, prepare to smooth out the surface with some sandpaper or a sanding block, carefully working away at any rough spots. When it comes to larger holes or damaged areas, a drywall saw will help you cut through the drywall with ease, allowing for a clean patch job. To secure those patches in place, don’t forget your trusty drywall screws. In cases where furring strips are required to stabilize the area around a large hole, these strips provide crucial support. For smaller holes or doorknob-sized imperfections, a patch kit can be used to create a seamless repair. And finally, for dinged corners that are in need of some TLC, corner bead provides the necessary reinforcement. Of course, no job is truly complete until you’ve applied a coat of primer and paint to finish off the look.
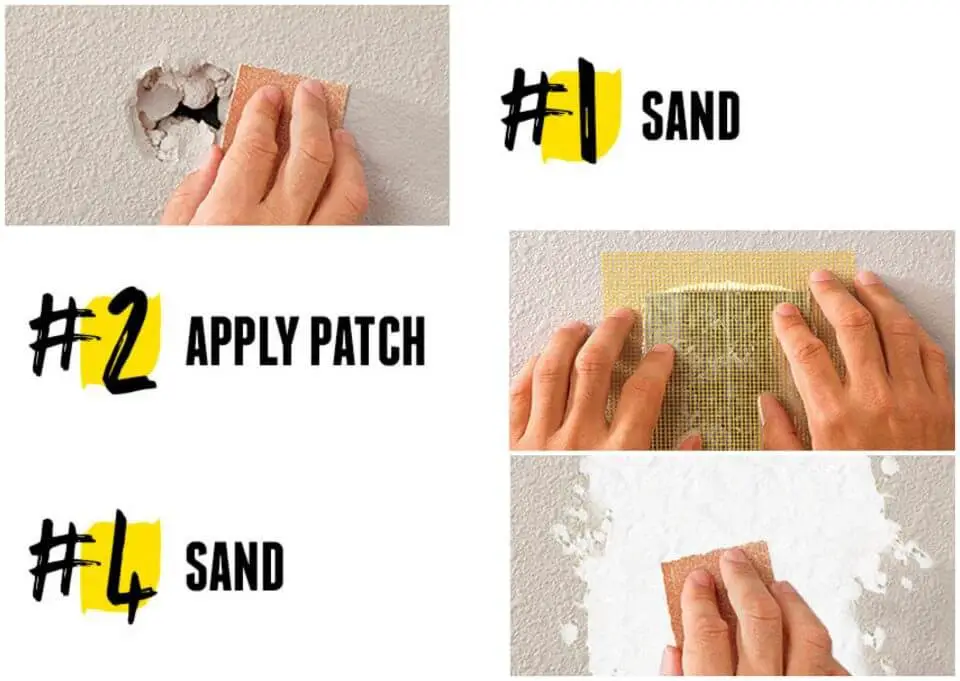
Step 1: Fix Small Dents and Dings
For minor imperfections, a putty knife is often all you need to remove loose debris. Apply a thin layer of lightweight spackle to cover the hole and allow it to dry completely. If the hole still shows after the first application, repeat the process, building up the area in small increments until it’s flush with the surrounding surface. Once the spackle has dried, use your drywall knife to smooth out any excess material, then give the area a light sanding to achieve a seamless finish.
Step 2: Repair Popped Nail Heads
To address a raised nail, first locate a drywall screw that can provide temporary support for the surrounding material. Ideally, this should be placed about 1-1/2 inches above or below the popped nail to ensure stability. Next, reposition the original nail and secure it in place. Once the area is stable, apply spackling compound to cover any remaining imperfections, allowing it to dry completely before sanding the surface to a smooth finish.
Step 3: Patch Holes from Doorknobs
When faced with damage caused by a doorknob, a small patch kit is often all you need to get the job done. Begin by applying the patch over the hole and then use a drywall knife to smooth out lightweight joint compound in a crisscross pattern on top of the patch. Be sure to feather the edges so that they blend seamlessly with the surrounding wall. Allow the compound to fully dry before considering additional coats, should the first layer not provide adequate coverage.
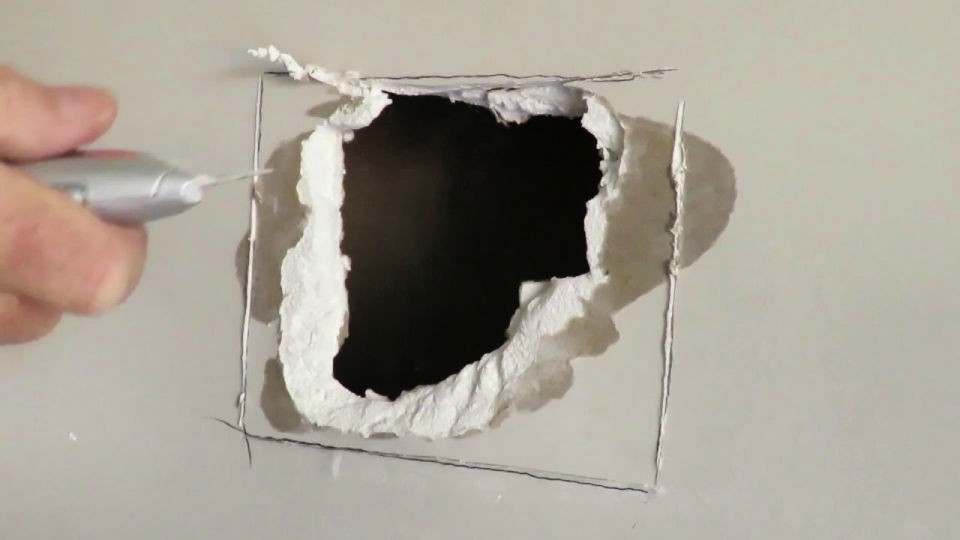
Step 4: The California Patch Method
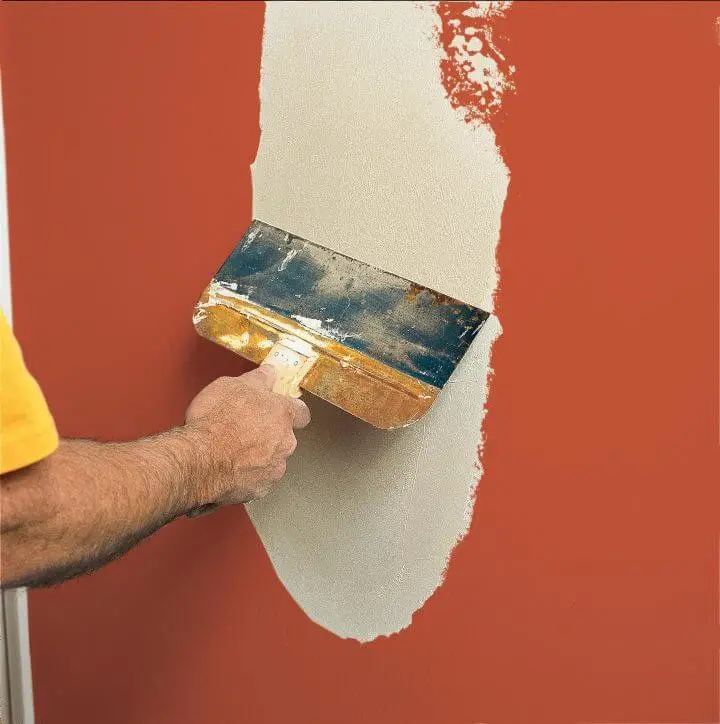
For holes six inches or smaller, a straightforward approach is effective. Begin by cutting a piece of drywall that’s approximately two inches larger than the hole on all sides. Next, use a utility knife to score along the edges of the loose gypsum, taking care not to damage the paper backing. Gently snap off the loose material, and place the resulting patch over the hole, tracing its outline with your finger or a pencil. Cut the wall to fit the patch, leaving a small margin around its edges. Once the patch is in position, apply a thin layer of joint compound to the back of the paper backing, pressing it firmly into place. Finally, cover the entire area with an additional layer of compound, allowing it to dry completely before sanding and painting as usual.
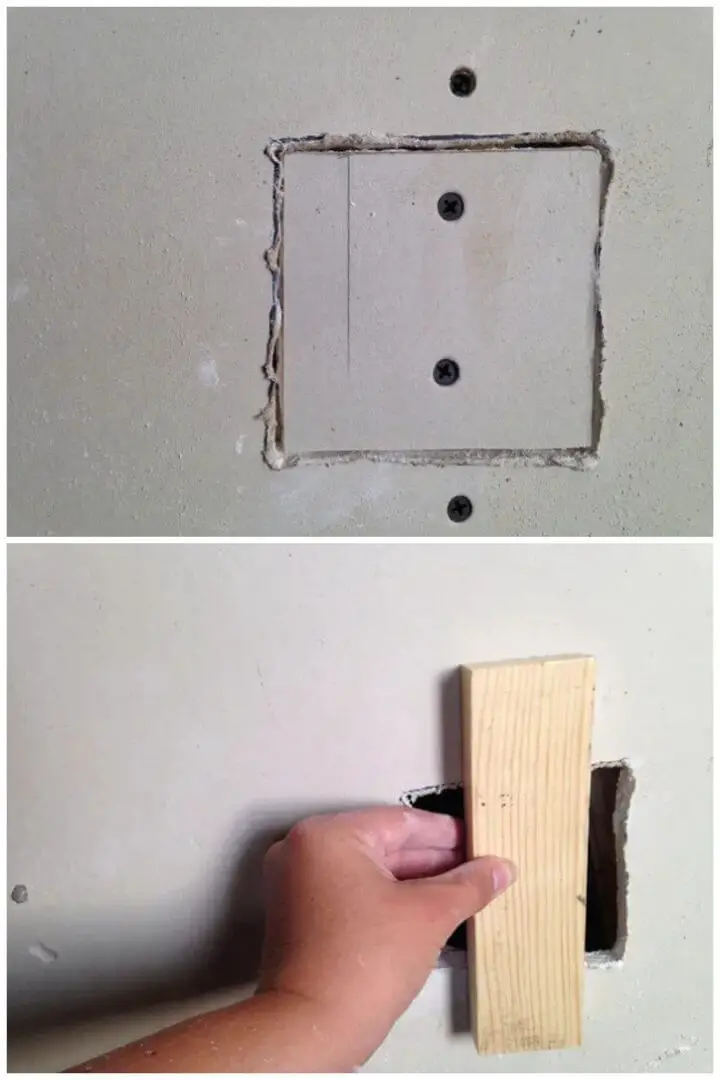
Step 5: Fix Larger Holes
When dealing with holes larger than six inches, start by cutting a piece of drywall that’s just slightly bigger than the opening itself. Begin by tracing the shape of the patch over the hole on the surrounding wall, then carefully cut along the lines to create a precise fit. Next, place two furring strips inside the hole, one on each side, and secure them in place using screws. With your strips in position, take the patch and attach it to the furring strips, ensuring a solid bond. Finally, apply joint tape and compound to seal any gaps and create a seamless finish.
Step 6: Repair Dinged Corners
When addressing damaged wall corners, start by carefully cutting away the exposed corner bead using a hacksaw. Simultaneously, use a utility knife to trim the drywall as needed. Next, remove the damaged section and replace it with fresh corner bead, securing it firmly in place. To complete the repair, apply joint compound along the corner, taking care to achieve a smooth finish.
Step 7: Finishing Touches
After all repairs have fully dried, employ a gentle touch by lightly sanding the affected areas to achieve a smooth finish. Next, apply primer followed by a coat of paint that harmoniously matches your existing wall treatment. If you’re dealing with a textured wall repair, take the time to blend the repaired area by sanding it lightly. To introduce added texture, mix joint compound with water and use a stiff brush to flick the mixture onto the wall, carefully replicating the surrounding texture. Alternatively, consider using a texture spray can for a quicker and more efficient solution.
Sanding and Painting
Once the joint compound has reached its final stage of drying, it’s essential to gently sand the repaired areas to achieve a seamless finish. This step is crucial in preparing the surface for subsequent applications. Next, prime the repairs to create a barrier that seals the compound and provides an ideal base for painting. Finally, apply a coat of paint that closely matches your wall’s color, effectively concealing any evidence of the repair.
Video Tutorial
By combining the instructions from this written guide with a step-by-step video tutorial on repairing drywall, you’ll gain a deeper understanding of the techniques involved and be able to visualize the process more effectively. This powerful combination will enable you to tackle even the most damaged walls with confidence. While it’s true that patience is essential for achieving a flawless finish, following these steps will help you get there in no time.
Frequently Asked Questions About Drywall Repair
For those seeking a comprehensive understanding of drywall repair methods, costs, and do-it-yourself guidance, this section is designed to provide insightful answers to frequently asked questions. With practical advice on fixing cracks, holes, and damage, readers will be equipped with the necessary knowledge to tackle even the most daunting drywall issues efficiently.
What materials do I need for basic drywall repair?
To tackle everyday fix-ups, you’ll require the following essentials: A dependable joint compound or lightweight spackle that can be easily molded to fit the area in need of repair. In addition to this adhesive-like material, a drywall knife or putty knife will come in handy for spreading and smoothing out the compound. Once the area is primed and ready for finishing touches, sandpaper or a sanding block will help you achieve a smooth, even surface. Finally, don’t forget to have some primer and paint on hand that matches your wall’s original hue, so you can easily blend the newly repaired area with the surrounding surfaces.
How do I fix a small hole in the drywall?
To ensure a seamless repair, begin by removing any loose debris from the affected area. Next, fill the hole with a spackle using a putty knife, taking care to spread it evenly and avoid creating air pockets. Allow the first coat to dry completely before reapplying if necessary. Once the surface is smooth, move on to sanding the area to achieve a flawless finish. Finally, prime and paint the repaired section to perfectly match the surrounding wall, effectively eliminating any visual imperfections.
Can I fix a large hole in the drywall myself?
To effectively repair a large hole in drywall, start by cutting a replacement piece that is slightly larger than the opening itself. Next, use this new piece to trace out the surrounding area, allowing you to accurately cut the wall to match its dimensions. The installation process involves placing furring strips within the hole and securing the patch with screws or nails. Once in place, apply joint tape around the edges of the repair to create a strong bond between the old and new drywall. Finally, complete the job by coating the area with joint compound, sanding it down to a smooth finish, and then painting over the entire surface to blend seamlessly with the surrounding area.
How do I repair a dent or ding in drywall?
To tackle minor dents, start by applying a thin layer of lightweight spackling compound using a putty knife. Spread it evenly across the affected area, taking care not to fill it too much, as this can lead to unevenness. Allow the mixture to fully dry before moving on to the next step. Once dry, use a sanding block or fine-grit sandpaper to gently smooth out the surface, feathering the edges so that the repaired area blends seamlessly with the surrounding material. After sanding, apply a primer and then your chosen paint color to complete the process.
What is the best way to match the paint after repairing drywall?
When tackling a paint job, it’s essential to start by ensuring you’re working with the correct shade. One way to achieve this is to utilize any leftover paint you may have on hand. If that’s not an option, grab a small sample of the original painted wall and bring it to your local paint store for their expert color-matching services. To guarantee a seamless finish, be sure to prime the repaired area thoroughly before applying additional coats.
How can I avoid visible seams after drywall repair?
For a seamless finish, employ the following strategies when dealing with cracks or joints in your walls: start by applying joint tape to cover any visible imperfections, then build up thin layers of joint compound, allowing each layer to dry completely before moving on to the next. Once you’ve achieved a smooth surface, use sandpaper to fine-tune the area, and only then proceed with priming and painting to ensure a professional-looking finish.
What should I do if the drywall repair texture doesn’t match?
When it comes to matching the textured finish on walls after a repair, there are a few techniques you can use. One approach is to dilute joint compound with water and apply it using a brush or sponge. This method allows you to achieve a similar texture to the surrounding area. For an even more uniform application, consider using a texture spray can. Before attempting any of these methods on your repaired wall, practice your technique on a scrap piece of drywall first to ensure you’re getting the desired result.
How long does it take for the joint compound to dry?
When it comes to drying times for compounds, several factors come into play. The level of humidity, temperature, and the thickness of the application all impact how long it takes for the material to dry completely. Here’s a general breakdown: lightweight compounds tend to take around 24 hours to fully dry, while regular compounds can take up to two days (48 hours) to reach their maximum drying potential. If you’re looking to make quick work of a repair, consider using a quick-setting compound – it’ll save you time and get the job done faster.
Can I repair water-damaged drywall?
To effectively tackle drywall repair, it’s crucial to identify the source of moisture causing the damage. Once that’s addressed, you can focus on removing the damaged section and replacing it with new drywall, following a tried-and-true approach for tackling larger holes. While repairing drywall may initially seem daunting, possessing the right tools and techniques can empower you to tackle even the most common issues with ease. Whether dealing with a small imperfection or a sizeable gap, these fundamental FAQs provide the foundation for embarking on your DIY adventure.
How To Repair Drywall (12 Ways to Patch a Hole in Drywall)
Discover a comprehensive guide to repairing drywall by mastering 12 expert techniques for seamlessly patching even the most significant holes. Whether you’re dealing with minor imperfections or extensive damage, our practical advice will ensure your wall looks like new again.
How to Repair Drywall – Step by Step
Want to give your walls a fresh new look? Fixing small imperfections in drywall can be a relatively straightforward process. Whether you’re dealing with minor holes, dents, or larger gaps, there are techniques to suit every need. For instance, spackle is ideal for smaller repairs, while the California patch method is better suited for more extensive damage. And don’t forget about the finishing touches – textured walls require a bit of extra attention to ensure a seamless repair. If you’re looking for more detailed guidance, a helpful video can provide all the information you need to get started and restore your walls to their former glory.
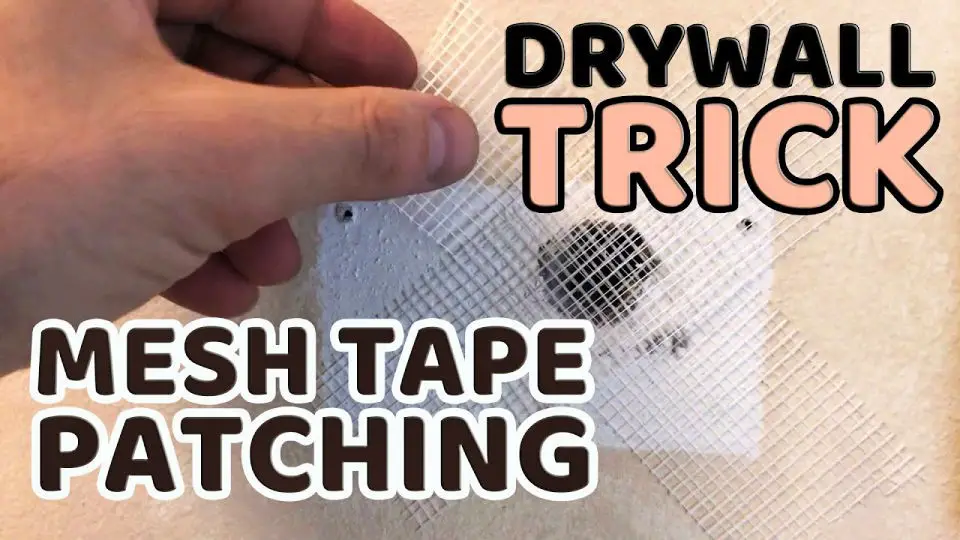
Secret For Quick Drywall Repair
Mastering the art of quick drywall repairs is a valuable skill for any DIY enthusiast, particularly when working on fast-paced projects that require a speedy turnaround. This tutorial provides step-by-step guidance on how to achieve a professional-looking finish in no time. One crucial aspect is cutting the hole to match your drywall piece perfectly, ensuring a seamless joint when reassembling. Additionally, using mesh tape with quick-set mud allows for faster drying and streamlines the process. Furthermore, this technique also ensures a smooth surface ready for tiling or further finishing. With these expert tips, you’ll be able to tackle small holes as well as larger projects, such as prepping for a backsplash, with confidence. Whether you’re a seasoned DIYer or just starting out, these simple yet effective techniques will help you streamline your drywall repairs and achieve a stunning finish.
How to Repair Drywall and Fix a Large Hole in the Plaster Wall
To transform large holes in drywall and plaster walls from eyesores to pristine surfaces, follow Garry Purcell’s straightforward steps. His easy-to-understand tutorial equips you with the necessary tools and techniques to achieve professional-looking results without encountering unnecessary complexities. Whether you’re a homeowner looking to restore your own property or a landlord seeking to improve a rental unit, Garry’s guidance simplifies what might initially seem like a daunting task. For a comprehensive walkthrough of his method, check out his tutorial on YouTube: [link]. This efficient and reliable approach is perfect for DIY enthusiasts seeking to tackle wall repair projects with confidence.
How to Quickly Patch a Hole in Drywall
Transform the process of patching holes in drywall with a clever approach that yields durable and unnoticeable repairs. This step-by-step guide, brought to life through video, distills the methodology into manageable steps, making it perfect for tackling everything from minor cracks to one-inch gaps. The core emphasis lies in minimizing disruption and achieving seamless integration with existing wall textures. Furthermore, learn how to strategically apply mesh tape internally for added strength, ideal for areas requiring extra support or anchor reinforcement. As you follow along, discover practical and easy-to-implement tips that will help you achieve professional-appealing results with ease.
How to Fix Small Holes in Drywall
To revitalize your drywall surfaces, The Home Depot Canada presents a straightforward technique for addressing small holes. By following a logical sequence of steps, you can restore your walls to their original condition. This approach is particularly useful when dealing with the imperfections caused by nails and screws, allowing you to achieve a seamless finish without necessitating a full-scale repainting. As a convenient solution for homeowners seeking a speedy fix, this method efficiently addresses small holes in drywall.
How to Patch and Repair Drywall
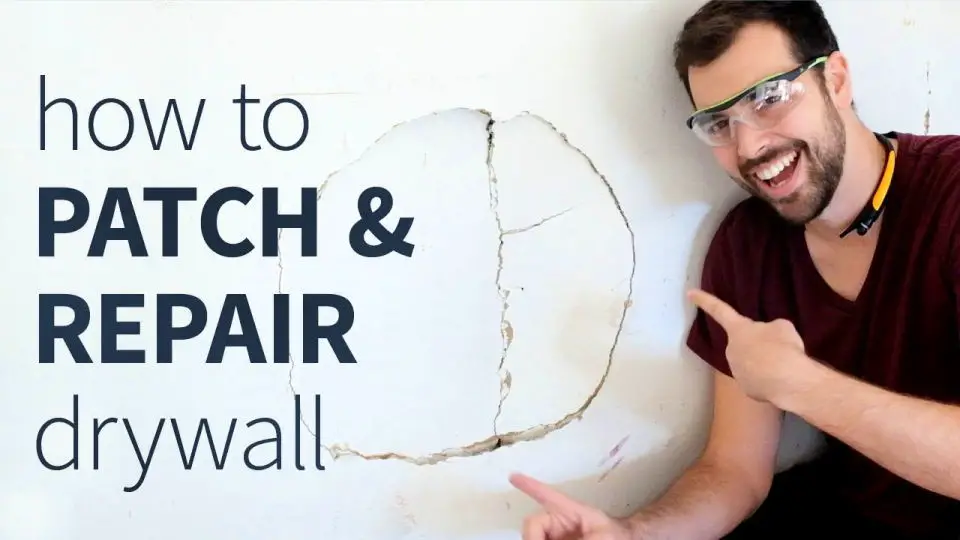
Embarking on a DIY drywall repair adventure can be intimidating, but with the right guidance, you’ll be amazed at how seamless the process is. Evan and Katelyn’s comprehensive tutorial takes you by the hand, walking you through each step to achieve a flawless finish. From expertly filling small nail holes with spackle to tackling larger damaged areas with drywall patches and joint compound, this guide demystifies the repair process. Not only does it cover patching techniques, but also provides valuable insights on sanding and painting for that showroom-quality look. If you’re ready to revitalize your space and give your walls a fresh new face, then let’s dive in and make those imperfections a thing of the past!
Easy to Repair Drywall
Patching drywall holes requires a bit of finesse, but with Tom Silva’s straightforward guide from This Old House, you’ll be able to achieve a seamless fix on your walls, regardless of the hole size. The best part? You won’t need any special tools – just some scraps of drywall, joint compound, and a little patience will do. To ensure a perfect match, carefully cut your patch to fit the hole before applying it. Then, apply thin layers of joint compound for an artful finish that blends seamlessly with your wall’s surface. Whether you’re dealing with small or large openings, these tips will help you achieve a polished look that’s as good as new.
How to Repair Drywall
To mend drywall holes with accuracy, start by smoothing out the surrounding area with sandpaper, ensuring a clean canvas. Next, apply a Homax Wall Patch to cover the hole, providing a stable foundation for your repair. Allow spackle to set before feathering it out towards the edges, allowing it to fully dry. If necessary, use Homax solutions to match the wall’s texture and complete the restoration with a coat of paint, resulting in an undetectable fix.
How to Patch a Hole in Drywall
While patching a hole in drywall may appear intimidating at first, it’s actually a manageable task when approached correctly. To achieve professional-looking results, one must select the optimal tools – such as drywall knives and screws – and master the techniques for securing wallboard, applying joint compound, and completing a seamless finish. For a detailed guide on repairing drywall holes up to 6-7 inches in diameter, including the intricacies of cutting, fastening, taping, and finishing, consult this informative tutorial on Lifehacker. This guide not only breaks down each step into manageable components but also emphasizes the value of patience and precision, ensuring that your wall is restored to its original condition.
DIY Fix a Hole in Drywall

To address a common household predicament – a hole in drywall – we’ve developed a step-by-step guide to ensure a successful repair. This approach begins by assembling the necessary tools and materials, before moving on to execute the fix with precision. Perfect for those new to DIY projects, this tutorial will walk you through each stage of the process, guaranteeing a flawless patch job that leaves your walls looking smooth and unblemished.
How to Repair Large Sections Of Drywall
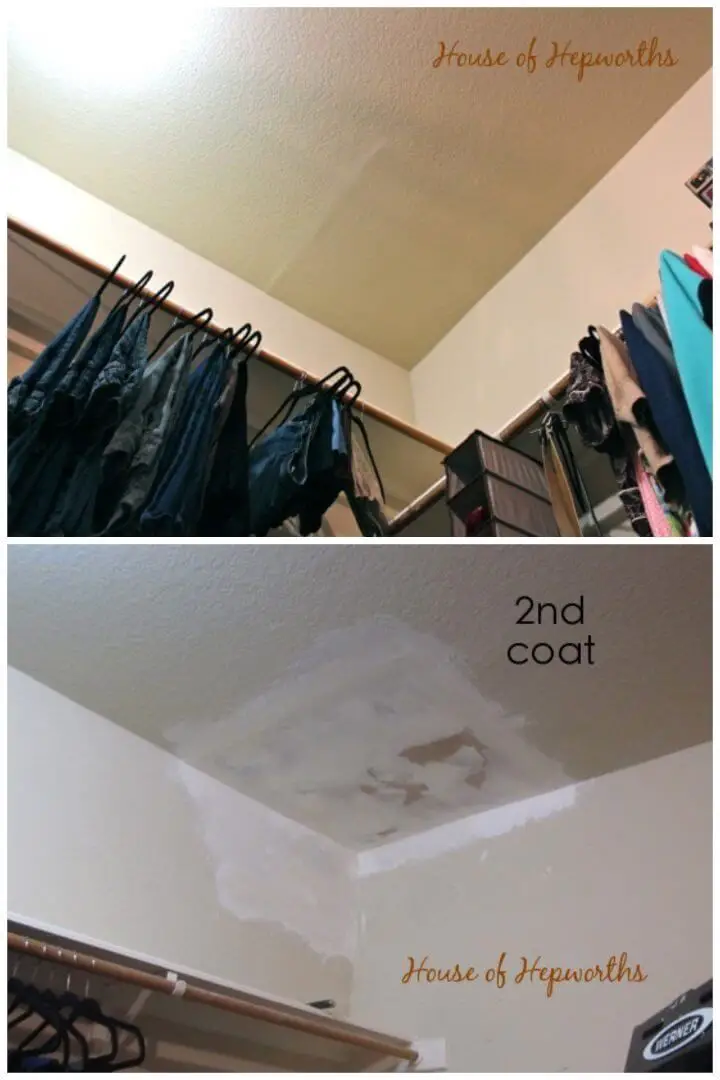
Transforming your home maintenance skills requires more than just a few DIY tricks. At House of Hepworths, we’re committed to helping you master the art of drywall repair. Our comprehensive guide takes you through every step of fixing large sections seamlessly, from selecting the right tools to achieving a professional-looking finish. By following our easy-to-follow instructions and hands-on approach, you’ll not only gain valuable knowledge but also develop the confidence to tackle even the most common home repairs. For those who prefer a do-it-yourself solution, this guide is the perfect starting point for a successful DIY experience.
Repair Torn Drywall Paper
Torn drywall paper can be a real challenge after removing wallpaper or tile. But fear not! Zinsser Gardz sealer is here to help you repair those unsightly tears with ease. By following this step-by-step guide, you’ll be able to restore your drywall surface to its original smoothness, ready for painting and priming. Whether you’re a DIY enthusiast or a homeowner looking to refresh a room, this comprehensive guide provides all the necessary tips and materials to get the job done. With Zinsser Gardz sealer and some simple techniques, you’ll be saying goodbye to fuzzy, damaged drywall surfaces and hello to a seamless finish that’s ready for painting.
Conclusion:
Mastering the art of repairing drywall is a valuable skill that not only saves you time and money but also preserves your home’s aesthetic appeal. With 12 methods to fix various types of damage, from minor dents to extensive holes, this guide empowers you to tackle even the most daunting projects. By following our step-by-step instructions and utilizing the right tools and materials, you can achieve results that rival those of a professional. Don’t neglect the finishing touches – meticulous sanding and painting are crucial to create a seamless transition with the surrounding area. As you become proficient in drywall repairs, this DIY endeavor will transform into a fulfilling and stress-free experience.
