Why Vacuum Seal Mason Jars?
When it comes to preserving the quality and longevity of your foods, vacuum sealing Mason jars is an effective method that offers numerous benefits. Not only does it extend the shelf life of dry goods like nuts, seeds, and spices by reducing oxidation and moisture, but it also protects against pests like weevils and moths, ensuring a safe and uncontaminated food supply. Additionally, vacuum sealing helps prevent food waste by allowing you to buy in bulk and store for extended periods, ultimately saving you money on grocery trips. The preservation of flavor, aroma, and nutrients is another significant advantage, as reducing exposure to air maintains the original quality of your food. Furthermore, sealed jars are easy to label, stack, and store, making pantry organization a straightforward process, while also providing ready-to-use foods that save you preparation time in the kitchen. On top of these benefits, using reusable Mason jars promotes an eco-friendly lifestyle by reducing reliance on single-use plastics. By incorporating vacuum-sealed Mason jars into your food preservation routine, you’ll be making the most of your food purchases, minimizing waste, and keeping your pantry organized and meals tasting great.
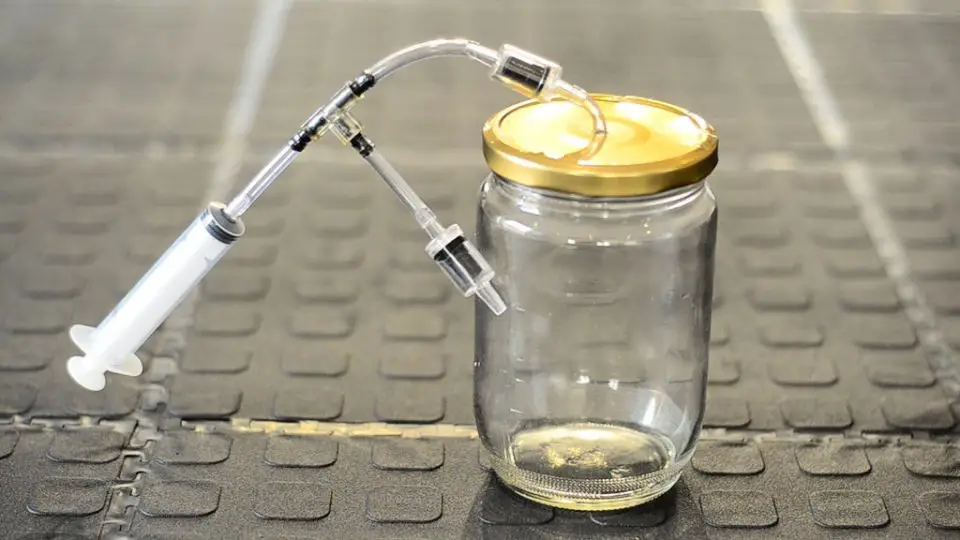
How to Vacuum Seal Mason Jars
Extending the shelf life of your food and maximizing the use of glass jars is a great way to make a positive impact on the environment. Glass jars are ideal for preserving food due to their eco-friendly nature, ability to withstand extreme temperatures, and non-reactive properties. By vacuum sealing nearly any jar using a vacuum canister, you can significantly reduce waste and save money by reusing jars from store-bought products. This simple process allows you to reuse jars multiple times, making it an effective way to minimize your environmental footprint while also saving you money.
Step 1: Gather Your Supplies
To successfully preserve your dry goods, you’ll require the following equipment and supplies:
Firstly, you’ll need a vacuum seal canister accompanied by a hose attachment to effectively remove air from the containers.
Next, acquire glass jars with lids that feature a rubber seal for optimal results. This will ensure that no moisture enters the jar, preventing spoilage. Lastly, gather your dry goods in preparation for storage.
Step 2: Prepare Your Jars
To prepare your jars and lids for reuse, it’s essential to give them a thorough cleaning. Remove any remaining food residue by washing them with soap and water. Once clean, ensure they are completely dry before employing them in the sterilization process. When selecting jars, opt for those without cracks or chips to guarantee optimal sealing performance.
Step 3: Fill Your Jars
When storing dry goods, begin by filling your jars to the desired level. To prevent air from entering and compromising the seal, be mindful of how full each jar is. Leave a small buffer zone – about 1-2 inches (2.5-5 cm) – at the top to guarantee a snug fit when you close the lid.
Step 4: Place the Lid on the Jar
To secure the contents of your jar, tightly screw on the lid, taking extra care if you’re using a one-piece lid from a store-bought product, such as a pasta sauce jar. Before doing so, verify that the rubber ring inside the lid is in good working condition. This rubber gasket plays a vital role in creating an airtight seal, ensuring your stored items remain fresh and free of contamination.
Step 5: Place the Jar in the Vacuum Canister
To create a secure vacuum seal, carefully place the jar within the canister, ensuring the latter’s height exceeds that of the former. This design ensures a proper fit and optimal sealing performance.
Step 6: Vacuum Seal the Jar
To initiate the vacuum sealing process, first connect the hose from your vacuum sealer to the nozzle on the canister. Next, power on your device and locate the sealing button. Pressing this button will activate the machine’s air-removal function. As the machine extracts the air from the canister, you’ll know it’s complete when it ceases operation. At this point, feel free to turn off the vacuum sealer, signifying a successful seal.
Step 7: Remove the Jar
As you lift the lid off the vacuum canister, retrieve your airtight jar from its container. The distinct ‘pop’ noise that greets your ears is a clear indication that the vacuum sealing process has been effective, successfully preserving the contents of your jar.
Repeat the Process
To secure multiple jars, follow a consistent process for each one. Be prepared to potentially run multiple vacuum cycles on certain jars to guarantee that all the air has been fully removed. This may be necessary if the jar contents are particularly dense or have a high volume of gases trapped inside.
Things to Remember
To effectively seal a jar, it’s crucial that your canister is significantly taller than the jar you’re attempting to seal. Some containers might necessitate repeating the vacuum process multiple times to fully eliminate any residual air. This added step ensures a proper seal and prevents potential spoilage or contamination.
Video Tutorial
Watch this step-by-step video tutorial on vacuum sealing almost any jar: Vacuum Seal Almost Any Jar – Recycle Glass Jars for Food Storage. This visual guide complements the written instructions provided here, breaking down the techniques into easy-to-follow steps. As you work through these simple yet effective methods, not only will you maximize your glass jars’ potential but also contribute to a more eco-friendly lifestyle by reducing waste. The result is a harmonious blend of practicality and sustainability.
FAQs on Vacuum Sealing Mason Jars
To ensure a seamless experience when vacuum-sealing Mason jars, we’ve aggregated a comprehensive list of frequently asked questions. This curated compilation serves as a valuable resource, providing straightforward and detailed responses to commonly posed inquiries. By addressing these queries head-on, you’ll be empowered to tackle the process with greater ease and confidence, ultimately streamlining your food preservation endeavors.
What is vacuum sealing?
The process of vacuum sealing, which involves removing air from the container prior to sealing, has been shown to have a profound impact on the longevity of packaged goods. By eliminating oxygen and inhibiting the proliferation of microorganisms such as bacteria and mold, vacuum sealing can extend the shelf life of food products by a significant margin.
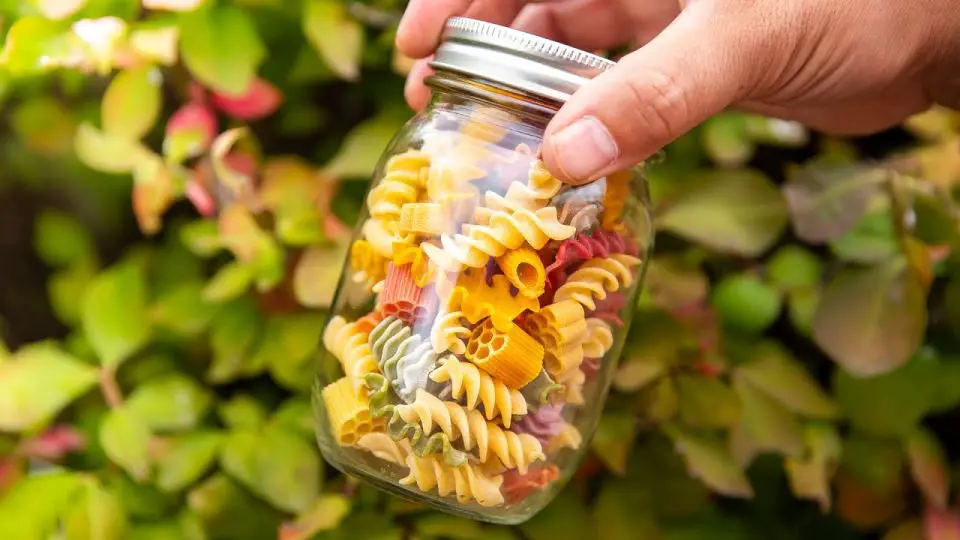
Can you vacuum seal any type of food in Mason jars?
When it comes to preserving food in Mason jars, the type of item being stored plays a significant role. Dry goods like nuts, seeds, dried fruits, flour, and spices can be successfully vacuum sealed, making them ideal for long-term storage. In contrast, moist foods with higher moisture content can still be preserved, but they often require refrigeration and have a shorter shelf life compared to dry goods. Liquids are the most challenging items to store in Mason jars, requiring special techniques and often necessitating freezing before sealing.
Do I need a special vacuum sealer to seal Mason jars?
While it’s true that some vacuum sealers come equipped with attachments tailored to Mason jars, there are alternative approaches and workarounds that don’t require specialized gear. In fact, manual techniques and hacks, like utilizing a brake bleeder, can be employed to achieve effective jar sealing without relying on dedicated equipment.
How long can vacuum-sealed foods last in Mason jars?
The shelf life of foods that have been vacuum-sealed can be quite variable, depending on factors such as their inherent characteristics, storage conditions, and the quality of the seal itself. For instance, dry goods tend to remain fresh for several years when stored in a cool, dark environment and maintained with proper vacuum sealing techniques.
Can vacuum sealing prevent food spoilage entirely?
While it’s impossible to completely halt food spoilage, vacuum sealing plays a significant role in slowing down the process by minimizing air exposure. For optimal results, it’s essential to begin with fresh, top-quality ingredients and adhere to proper storage conditions to extend shelf life as much as possible.
Is it necessary to sterilize Mason jars before vacuum sealing?
When storing dry goods long-term, it’s crucial to sterilize the containers to eliminate any potential bacterial or fungal contaminants. A simple yet effective approach involves washing the jars thoroughly with hot, soapy water and then drying them using a gentle heat source, such as an oven, for at least 10 minutes. Alternatively, boiling the jars in water for the same duration can also be an efficient method.
Can I reuse lids for vacuum sealing?
While reusing old lids may seem like a cost-effective solution, it’s crucial to exercise caution. If the lid is undamaged and its underlying sealant ring remains intact, it’s possible to reuse it for vacuum sealing purposes. Nevertheless, when canning food in a water bath or pressure canner, it’s essential to employ new lids each time to guarantee a reliable seal, thus ensuring food safety.
How do I know if my Mason jar is properly sealed?
When the vacuum sealing process is complete, the lid of the jar should exhibit minimal flexibility when pressed in the center, accompanied by a faint popping noise as the vacuum seal takes shape while the jar cools. Conversely, if the lid flexes significantly upwards and downwards, it’s likely that the seal has not formed properly.
What should I do if my vacuum-sealed jar loses its seal?
Before attempting to reseal the jar, conduct a thorough visual inspection of both the jar and lid for any signs of damage or wear. If the glassware appears undamaged, you may proceed with resealing the container. However, if the seal has broken due to prolonged storage, it’s crucial to inspect the contents for any potential spoilage before consumption is considered. In fact, vacuum sealing Mason jars offers a reliable means of preserving food, thereby extending its shelf life. By mastering the process and adhering to established best practices, you can confidently ensure your stored food remains fresh and palatable for as long as possible.
How to Vacuum Seal Mason Jars (8 Ways Step By Step)
To extend the shelf life and preserve the quality of your stored food, mastering the art of vacuum sealing Mason jars is a crucial skill. By following these 8 straightforward steps, you’ll be able to effectively remove air from the jar, preventing contamination and spoilage. This comprehensive guide will walk you through the process, ensuring that your perishable items remain fresh for an extended period.
How to Vacuum Seal a Mason Jar – Step by Step
Unlock the secrets of preserving with a modern spin! With a simple yet effective method, you can vacuum seal mason jars to keep your food fresh for longer. In just a few easy steps, this comprehensive guide will show you how to achieve remarkable results, perfect for pantry organization, meal prep, or extending the shelf life of your favorite foods. By following this step-by-step process, you’ll be able to make the most out of every jar and enjoy the benefits of preserved goods with confidence.
How to Vacuum Seal Mason Jars in Seconds
Sealing mason jars with Avid Armor’s USB 32 chamber sealer is a quick and efficient way to preserve dry goods. The process begins by lightly tightening the lid on each jar to just above fingertip tightness. Next, place the jar in the chamber and initiate the vacuum and seal cycle. Once complete, simply tighten the lid fully for a secure seal. For those without a chamber sealer or who need to store liquids, alternative methods can be used for quart-sized jars. A step-by-step guide on how to achieve this is available by clicking here.
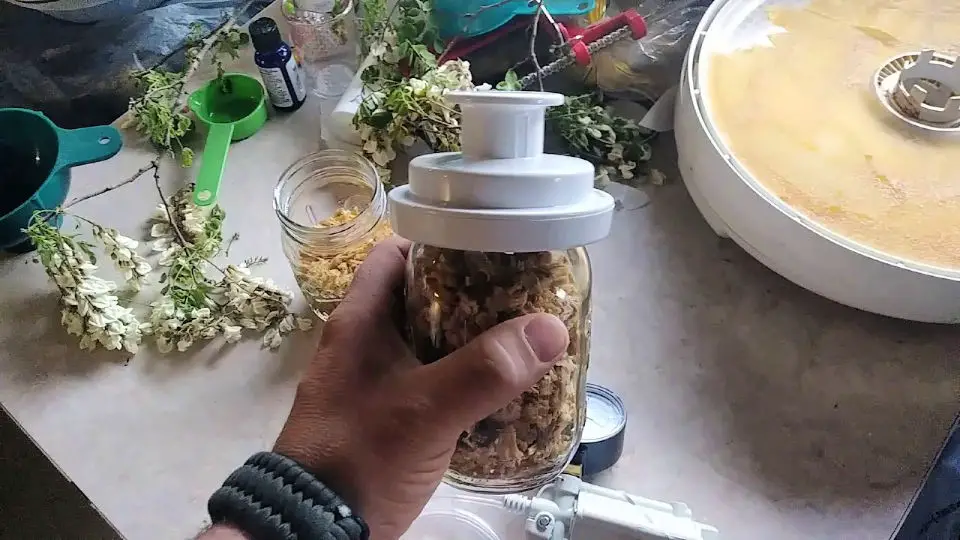
DIY Vacuum Seal Dry Goods in Mason Jars for Storage
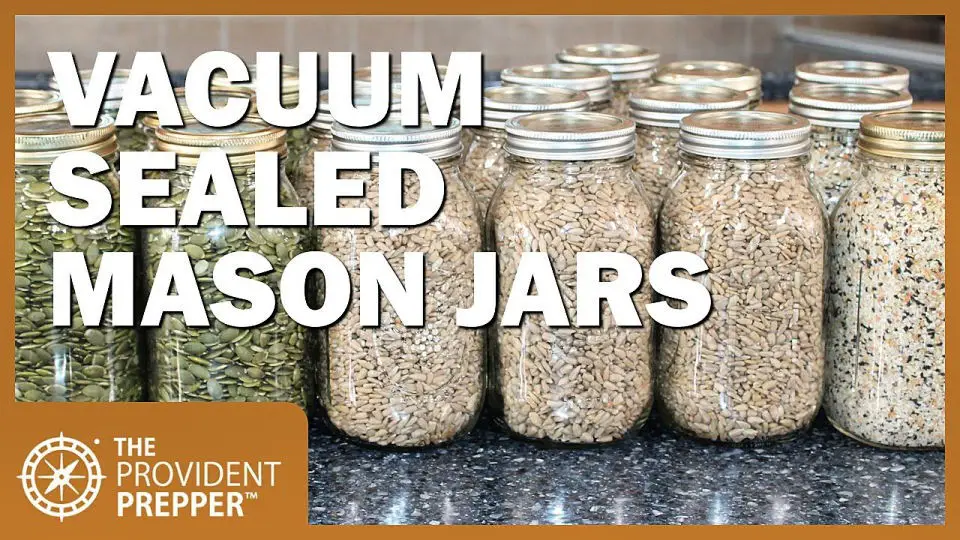
Prolong the shelf life of dry goods by embracing the power of vacuum sealing! With minimal effort, you can preserve nuts, seeds, and other perishable items using Mason jars, maintaining their freshness while saving money in the long run. By avoiding rancidity and optimizing storage, you’ll be able to store your pantry efficiently, ensuring a steady supply for future meals. For further guidance on the process, refer to The Provident Prepper’s comprehensive guide.
How to Vacuum Seal Dry Food in Mason Jars
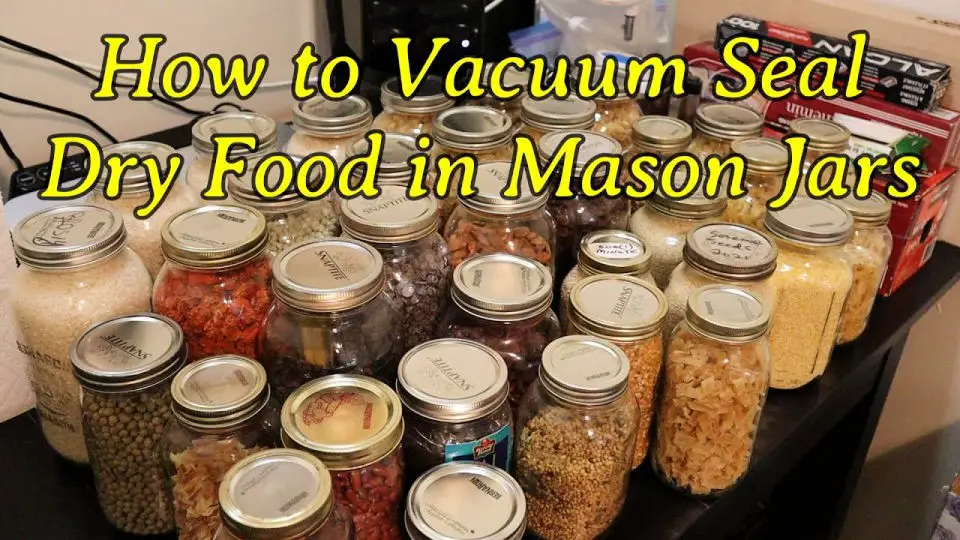
To effectively preserve dry foods in Mason jars, follow this step-by-step guide on vacuum sealing. This process is perfect for storing dehydrated potatoes, rice, tea, nuts, or other pantry staples. By mastering the art of vacuum sealing, you’ll be able to maximize the shelf life of your stored goods, keeping them fresh and organized for future use. The tutorial begins with selecting the ideal jars and culminates in using a FoodSaver jar sealer. Whether you’re looking to tidy up your pantry or ensure your dried foods remain well-preserved, this streamlined approach will help you achieve your goal.
Homemade Mason Jar Vacuum Sealer
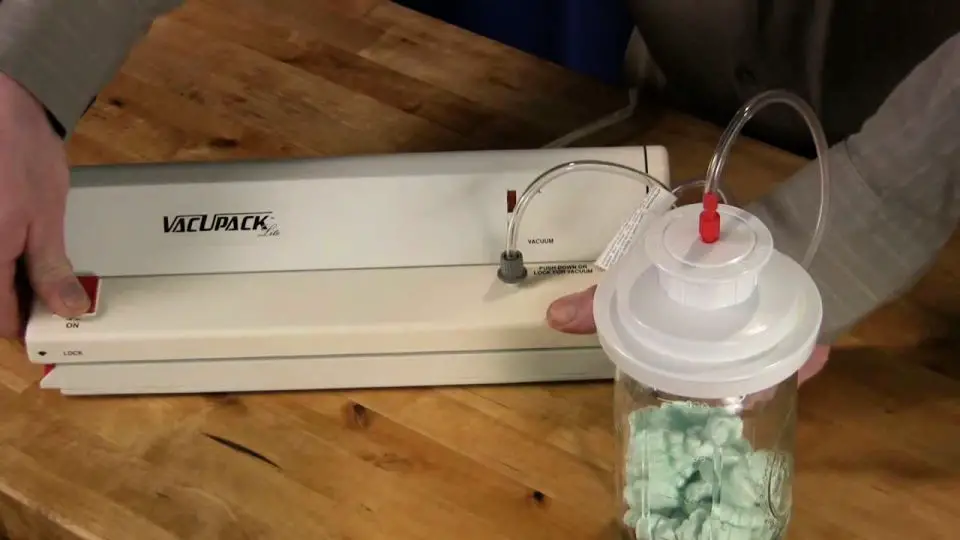
Discover how to effortlessly preserve your food with the VacUpack Lite Vacuum Packer. Mastering vacuum sealing techniques for jars is key to extending the shelf life of your goods. One effective method involves using wide-mouth mason jars, which can be simplified and accelerated by attaching the hose to the jar sealer port, employing flat lids readily available at most retail stores or through our website, and simply turning on the machine. A reassuring green gauge indicates a secure seal has been achieved, making this process an ideal choice for those seeking a reliable food storage solution.
Vacuum Seal Mason Jars for Under $30
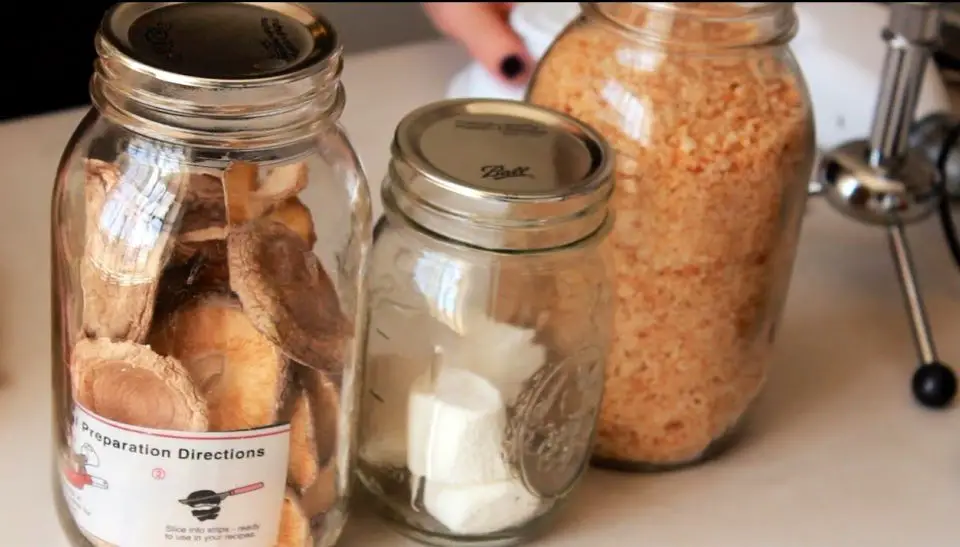
Transforming the shelf life of your edibles without breaking the bank is now possible with a clever vacuum-sealing hack. By combining a $10 Food-Saver jar sealer and a $20 vacuum sealer, you can effortlessly preserve both dehydrated and dried foods within your mason jars. This budget-friendly method makes it ideal for storing homemade creations like breadcrumbs or dried mushrooms. To illustrate the effectiveness of this technique, imagine witnessing a marshmallow’s remarkable transformation before your very eyes. For a comprehensive guide on how to achieve this feat without spending a fortune, click here. By adopting this efficient approach, you’ll be able to keep your pantry organized and enjoy a longer shelf life for your food.
How to Vacuum Seal Mason Jars
Mastering the art of vacuum sealing mason jars is an essential skill for preserving the freshness and longevity of bulk purchases like almonds. By following these straightforward steps, you’ll be able to extend the shelf life of your favorite foods by years. The key lies in filling the jars to the optimal level and utilizing the right tools. This technique is not only a boon for home preservation enthusiasts but also offers a wealth of benefits for maintaining good health through smart storage. To gain further insight into this topic, visit JourneyGoodHealth.
Non-Electric Vacuum Sealing Mason Jars
Learn how to effortlessly seal mason jars without relying on electricity, perfect for preserving your dehydrated foods. This innovative approach utilizes a non-electric vacuum gun to achieve a tight seal, ideal for items like dehydrated chicken or tuna. By following the step-by-step tutorial available at Buckeye Bushcraft, you can quickly and effectively preserve your food while minimizing environmental impact. The simplicity of this method makes it an attractive option for those looking to adopt sustainable home preservation practices.
How to Store Oatmeal in Mason Jars with Vacuum Sealer
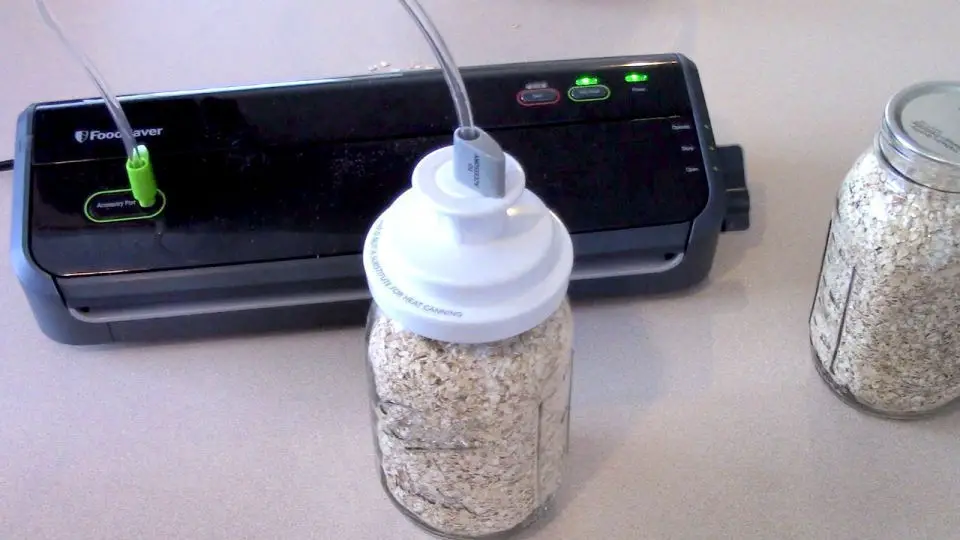
To prolong the shelf life of your oatmeal, consider storing it in Mason jars with a vacuum sealer. Begin by freezing your oats for three days to eliminate any potential weevil eggs, ensuring your oatmeal remains pest-free throughout its storage. Once frozen, fill Mason jars with the oats and utilize a vacuum sealer equipped with a jar attachment to remove air from the container. This efficient method will effectively secure your food’s longevity, allowing you to enjoy fresh oatmeal for your next breakfast. For a comprehensive guide on this process, refer to the informative tutorial provided by Great Lakes Prepping, which offers a simple and foolproof approach to maintaining the freshness of your oatmeal.
Conclusion:
Mastering the art of vacuum sealing mason jars requires a combination of the right techniques and essential supplies for a successful outcome. This comprehensive guide has presented eight step-by-step methods to efficiently preserve foods, extending their shelf life remarkably. From utilizing a vacuum sealer with a jar attachment to exploring the capabilities of a freeze dryer, these diverse approaches cater to various needs and preferences. It’s crucial to remember that effective vacuum sealing hinges not only on the chosen method but also on adhering to best practices such as sterilizing jars and ensuring lids are in good condition. By adopting these techniques, you’ll be well-equipped to maximize the freshness and longevity of your stored goods, significantly contributing to your food preservation endeavors.
