Why Build DIY Shelves?
Crafting DIY shelves offers a multitude of advantages that not only elevate your living space but also bring a sense of accomplishment and personal growth. Here are some compelling reasons to consider embarking on a DIY shelving project:
Cost Efficiency: By choosing materials that fit your budget, you can significantly reduce costs compared to purchasing pre-made shelves.
Customization: With DIY, you have complete control over the design, allowing you to tailor the shelves to perfectly fit your space and needs. Whether it’s an awkward corner or specific dimensions, DIY offers unparalleled customization options.
Aesthetic Harmony: By selecting a finish, color, and design that complements your home’s aesthetic, you can seamlessly integrate the shelving into your existing decor.
Skill Development: Engaging in DIY shelf projects is an excellent opportunity to develop your carpentry and problem-solving skills. With each project, your confidence and expertise will grow.
Sense of Achievement: Completing a project from start to finish provides an immense sense of pride and accomplishment. There’s no feeling quite like admiring the fruits of your labor – handcrafted shelves that reflect your unique style.
Practical Functionality: Beyond aesthetics, DIY shelves serve as functional storage solutions for cluttered spaces. They can be designed to hold books, display collectibles, or organize kitchen essentials, providing a practical and organized approach to everyday life.
Eco-Friendly Option: By choosing sustainable materials or repurposing wood, your DIY project can contribute to environmental conservation. It’s a step towards adopting a more eco-conscious lifestyle and reducing waste.
In conclusion, building your own shelves is a rewarding endeavor that enhances your home, personal skills, and sense of accomplishment. It’s a practical, customizable, and enjoyable project with long-lasting benefits.
How to Get Started with DIY Shelves
While embarking on a DIY shelving project may seem like a straightforward task, it’s actually an opportunity to infuse your living spaces with character, flair, and practicality. Whether you’re a seasoned pro or just starting out, the process of crafting your own shelves can be incredibly fulfilling. By breaking down the process into manageable steps, you’ll be well on your way to creating a unique and functional shelving system that reflects your personal style.
Understand Your Needs and Space
Before embarking on your shelving project, pause to reflect on its intended purpose. Will it be used to showcase decorative items, keep books organized, or optimize storage space in a pantry? Clarifying this fundamental aspect will streamline the entire process from inception. Once you’ve defined the goal, turn your attention to the installation site. Accurately measure the area to determine the ideal shelf size that will harmonize with its surroundings. Factor in the existing décor’s style and how your new shelves can blend seamlessly into it.
Choose Your Materials
When it comes to shelving, the choice of material can greatly impact the overall look and feel. A wide range of options are available, each with its own unique characteristics. Wood, for instance, is a timeless classic that can be finished in countless ways, making it a versatile choice. Metal pipes, on the other hand, offer an industrial-chic aesthetic that’s perfect for those who want to add a touch of edginess to their space. MDF or plywood, meanwhile, provide a cost-effective solution that can be painted to match any décor. Ultimately, selecting the right material depends on your personal style, the functionality you need from the shelf, and your budget constraints.
Gather Your Tools
To embark on a DIY project, having the right tools is crucial. The specific tools you’ll need will depend on the complexity of your project and the materials you’ve chosen to work with. At the very least, you may need a saw (such as a hand saw, circular saw, or miter saw) to make precise cuts. In addition to a saw, you should also have a drill and an assortment of drill bits at your disposal, allowing you to create holes for screws or other fasteners. A screwdriver is another essential tool, as it will come in handy when driving screws or other types of fasteners into place. As you work on your project, you may need to measure and mark various pieces to ensure they’re properly aligned. For this task, a tape measure is an invaluable asset. Furthermore, a level will help you guarantee that surfaces are perfectly horizontal or vertical, as needed. Finally, if you plan to sand any of the materials you’re working with, having some sandpaper on hand can be a big help in smoothing out rough edges and achieving a professional finish.
Plan Your Design
To get started on designing your bookshelves, take a moment to envision the overall layout. While it’s not necessary to create a detailed blueprint, having a general idea of what you’re aiming for will help guide your decisions. As you sketch out your design, think about the number of shelves you want, how much space you’ll leave between them, and any decorative elements that will add visual interest.
Construction and Installation
Before starting the construction process, ensure that all materials are cut to precise measurements. For those who lack confidence in their cutting skills, many hardware stores offer cutting services as a convenient solution. Once materials are prepared, focus on assembling the shelves by attaching brackets, building frames, or creating boxes for box shelves. As you work, double-check that every component is square and level to guarantee a sturdy foundation. Next, enhance the aesthetic appeal and provide protection with paint, stain, or varnish. Finally, install your finished shelves in their desired location. If mounting them to a wall, it’s essential to secure them to studs or utilize appropriate anchors suited for your specific wall type.
Final Touches
As you step back to survey your newly installed shelves, take a moment to appreciate the fruits of your labor. The process may not be perfect, but that’s all part of the charm – the ability to make adjustments and refinements as needed is one of the most rewarding aspects of DIY. Take this opportunity to fine-tune the display, moving items around until you’re pleased with the final result.
Safety First
When embarking on a DIY shelving project, safety should be your paramount concern. Ensure you’re properly protected by wearing essential gear, working in a well-ventilated space when utilizing paints or stains, and meticulously following manufacturer guidelines for tools and materials. By doing so, you’ll be able to focus on the creative aspects of your project without worrying about potential hazards. Breaking down the task into manageable steps can also help alleviate any initial intimidation, allowing you to approach the project with a sense of excitement and accomplishment. Whether you’re aiming for floating kitchen shelves, rustic crate designs, or sleek modern creations, planning thoroughly, taking your time, and embracing the creative process will ultimately result in a rewarding and enjoyable DIY experience that enhances your home.
How to DIY a Floating Shelf: Three Different Ways
Enhancing the visual appeal of a space with a well-crafted floating shelf is a design approach that seamlessly combines form and function. By offering practical storage solutions while maintaining a minimalist aesthetic, these DIY creations can elevate any room’s ambiance. This comprehensive guide will walk you through three unique methods for creating a floating shelf, each tailored to suit different skill levels and tool availability. From novice to expert, we’ll cover the essential steps required for each approach, empowering you to find the perfect fit for your project needs.
Method 1: Using Metal Brackets
To create DIY shelves using metal brackets, follow Method 1. Begin by preparing the necessary materials, opting for construction lumber due to its affordability and wide availability. Have it cut to your desired shelf length at the store to streamline the process. Next, mark the wall where you intend to install the shelves, aiming to place them into wooden studs behind the drywall for maximum strength. Hold the shelf against the wall to mark the stud locations on the back, ensuring accurate placement.To secure the brackets, use a 13/32″ drill bit to create holes in the lumber that align with the studs on the wall. This step is crucial for stability and support. If desired, take it a step further by chiseling out a mortise on the back of the shelf to allow the bracket plate to sit flush with the wall, eliminating any gaps.Once the brackets are secured, sand your shelf smooth and apply a finish of your choice, whether that’s stain or paint. Finally, install the shelves onto the brackets by attaching them to the studs. If studs aren’t available, use drywall anchors to ensure a secure hold.
Method 2: Making a Wooden Bracket with Dowels
To construct a robust wooden bracket utilizing dowels for your DIY shelving project, follow this method. Begin by marking where the dowels will be positioned on the wood, taking care to avoid direct stud locations, which is crucial for installation purposes. Cut the dowels to approximately five inches in length.Next, drill holes that correspond to the size of your dowels, ensuring they are secure and even. Then, split the shelf by sawing off about an inch and a half from the back side where you’ve drilled the holes. This resulting piece will serve as the mounting bracket for your DIY shelves.To assemble the bracket and shelf, insert the dowels into the holes of both pieces, applying glue to secure them in place within the bracket portion. Once assembled, add set screws on the top side to keep the shelf stably secured to the dowels.Finally, mount the bracket piece to a wall stud, ensuring it’s level and securely fastened. Then, slide the shelf onto the dowels and tighten the set screw for a sturdy and stable shelving system.
Method 3: Pocket Hole Method
To create sturdy and stylish DIY shelves, utilize the Pocket Hole Method – an approach that requires a solid wooden wall or stud placement for secure attachment. Begin by preparing the area, ensuring it’s suitable for this method.
Next, adjust your pocket hole jig to accommodate 1-inch material, despite the wood being thicker (in this case, 1.5 inches). Drill pocket holes along the shelf, aligning them with the stud locations. This will provide a strong foundation for your shelves.
Once the drilling is complete, move on to the finishing touches. Sand and stain or paint your shelf as desired, giving it the look you want.
Finally, install your shelf by screwing it directly into the studs using the pocket holes. If you prefer a cleaner appearance, use plugs or dowels to cover the holes, providing a polished finish.
Video Tutorial
The video tutorial on this method is available on YouTube, offering a comprehensive visual guide that complements this written explanation. The accompanying demonstration brings each technique to life, making it easier to grasp the nuances of each approach. As you weigh the pros and cons of each method – considering factors such as time required, tools needed, and desired outcome – choose the one that best aligns with your resources and design goals. Furthermore, floating shelves not only provide practical storage solutions but also serve as stylish decorative elements that can add personality to your living space.
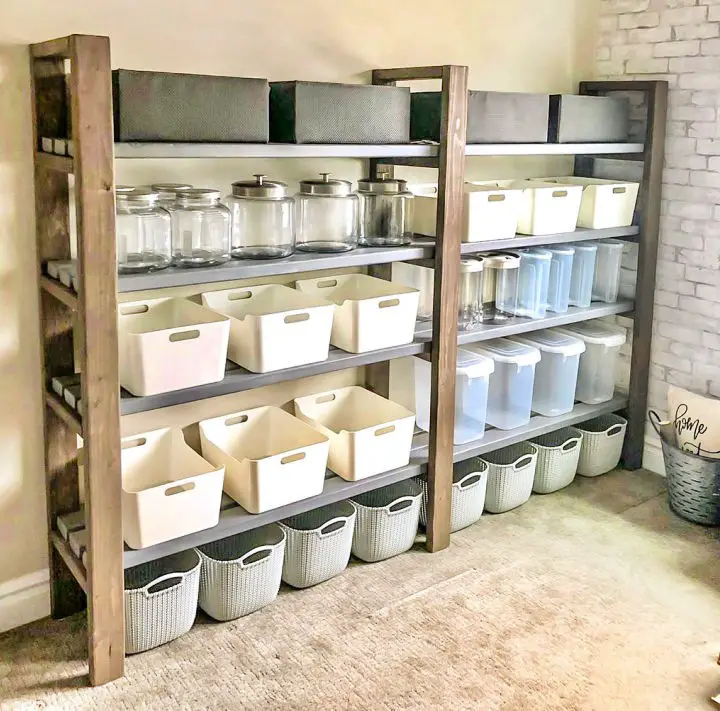
How to Build Cheap and Easy DIY Storage Shelves
Building storage shelves in your basement or other areas of your home can be an affordable and achievable DIY project that doesn’t demand extensive woodworking expertise. By following these straightforward, sequential steps, you can create practical and visually appealing storage solutions within your budget constraints.
Materials and Tools Needed
To begin your DIY shelving project, you’ll need to gather the necessary materials. A good starting point is the frame, which requires 2 pieces of 3-inch lumber. For the shelves themselves, you’ll need 3/4 inch plywood. To assemble everything, you’ll also need construction screws or nails. In addition to these physical components, having a few essential tools at your disposal will make the job much easier. A miter saw is crucial for precise cuts and angles, while a drill or nail gun will speed up the process of driving screws or nails into place. A speed square will help you ensure accurate measurements and cuts, and a measuring tape will be used to take those measurements in the first place. Finally, having a circular saw or similar cutting tool on hand is vital for making larger cuts. To keep yourself safe throughout the project, don’t forget to wear safety glasses and gloves.
Step-by-Step Guide
To begin building your shelves, start by planning their dimensions based on available space and storage needs. A good starting point is to aim for shelves that are 24 inches deep, with the height and width varying depending on the space. Once you have a plan in place, move on to cutting the materials needed for the project. Use a miter saw to cut 2x3s into vertical posts and crossmembers, taking care to account for the width of the vertical posts when cutting the crossmembers at 21 inches. Cut your plywood to size for the shelves, using 4×8 sheets split in half to create 2-foot by 8-foot pieces ideal for the shelving surface. With your materials prepared, it’s time to build the frame. Start by laying down two 8-foot long 2x3s parallel to each other and mark every 2 feet where the crossmembers will go. Transfer these marks across both boards using a speed square to ensure alignment, then center and attach the crossmembers to the marked areas using screws or nails. Use a stop block for consistently cut pieces to ensure symmetry and stability. Next, it’s time to attach the frame to the wall. For concrete walls, consider using a ramset or concrete screws for secure attachment. If you prefer freestanding shelves or can’t attach them to your walls, add vertical supports to the back of the frame for stability. Once the frame is attached, add the shelving surface by placing your plywood on top and securing it with your chosen fasteners. Use 1/2-inch plywood for durability and ease of sliding boxes. Add vertical supports at the front of the shelves, and if making freestanding shelves, add supports to the back as well. Finally, make any necessary adjustments to ensure all shelves are level and securely attached. If desired, cut the top of the vertical posts for a flush finish or leave them for additional storage options like hanging items.
Maintenance and Care
Periodically inspecting your shelving units is crucial for maintaining their durability. Take a proactive approach by regularly checking and securing any loose fasteners, such as screws or nails, that could potentially compromise the structure’s integrity. Additionally, ensure the shelves are kept clean and free from excessive weight to prevent sagging or damage.
Video Tutorial
To supplement the written guide, I recommend watching a helpful YouTube video on DIY storage shelf construction. This visual tutorial provides an alternative perspective that can further enhance comprehension and execution of the techniques presented. By following these straightforward steps, you can create useful and well-made storage shelves without breaking the bank. Whether you’re looking to store seasonal decorations, tools, or simply declutter your space, this project offers a practical and functional way to organize any home.
DIY Shelving FAQs
Enhancing one’s living space through DIY projects can be incredibly fulfilling, and building custom shelves is an excellent place to start. To ensure a seamless experience, let’s address some of the most frequently asked questions in this domain, providing the knowledge and guidance needed to tackle such a project with confidence.
What materials do I need for DIY shelving?
To embark on your shelf-building journey, you’ll need to gather the right materials. The type of shelves you’re planning will dictate what you require. For instance, if you’re aiming for a traditional wooden look, you’ll likely need wood in various forms – think hardwood, plywood, or MDF. If an industrial vibe is more your style, metal pipes could be the way to go. To hold everything together, you’ll need screws and brackets galore. Before you start building, take some time to smooth out any rough edges with sandpaper. And don’t forget to add a touch of personality with paint or varnish. Finally, make sure you have all the necessary tools within arm’s reach – think saw, drill, screwdriver, tape measure, and level.
How do I choose the right type of wood for my shelves?
When selecting a type of wood for your shelves, consider both the intended use and your personal aesthetic preferences. For high-capacity, heavy-duty shelves that require robust support, hardwoods such as oak or maple are excellent choices. Conversely, if you’re planning to paint or use the shelves for lighter applications, engineered woods like plywood or medium-density fiberboard (MDF) might be a more practical option.
Can I make shelves without power tools?
While it’s certainly feasible to build straightforward shelving units sans power tools, using pre-cut wood can indeed simplify the process. Nevertheless, possessing even a basic drill can greatly facilitate the assembly procedure, making it more efficient and stress-free.
How do I ensure my shelves are level when installing?
When it comes to ensuring proper alignment for your drilling operations, a level is an essential tool to have in your arsenal. Not only does it help you achieve perfect horizontal alignment, but also provides accuracy when checking vertical levels. To get the most out of your leveling process, take the time to mark your drilling points carefully and double-check with the level before finalizing your work. This attention to detail will pay dividends in terms of increased precision and reduced errors.
What’s the best way to finish my DIY shelves?
When it comes to finishing wood shelves, the outcome largely hinges on your desired aesthetic and the type of material being used. For wooden shelving units, you have the option to stain or paint them. Prior to applying a finish, ensure that the surface is sanded down smoothly to guarantee optimal results.
How can I make my DIY shelves more durable?
To enhance shelf longevity, consider the following strategies:
Select premium materials that can withstand regular use.
Optimize bracket placement and utilize support systems to distribute weight evenly.
For added stability, secure shelves firmly to walls by targeting studs whenever possible.
Finally, apply a protective coating such as polyurethane to wooden shelves to shield them from scratches and spills.
Can DIY shelves be as strong as store-bought ones?
When executed correctly, DIY shelves can rival the strength of their professionally manufactured counterparts. The key to achieving this lies in the quality of materials, thoughtful design, and precise installation.
How do I choose the right location for my shelves?
When designing your shelving system, it’s essential to consider the purpose behind the shelves as well as the available space. Before making any decisions, take a moment to envision how the shelves will be used and whether there are any potential obstructions that could hinder their functionality. Additionally, think about the practicality of the location – is it easily accessible for the items you plan to store or display? By taking these factors into account, you’ll be able to create a shelving system that effectively meets your needs and enhances the overall aesthetic of the space.
Is it cheaper to build or buy shelves?
When it comes to building shelves, cost-effectiveness is often a consideration, particularly when you already have some necessary materials or opt for budget-friendly choices. While prices can fluctuate significantly depending on the intricacy of the design and the materials chosen, having a few affordable options at your disposal can make all the difference.
Can I repurpose materials for DIY shelving?
When it comes to creating unique and functional shelving solutions for your home, repurposing old materials like wood, crates, or metal pipes is an innovative way to add character while promoting eco-friendliness. This approach not only reduces waste but also allows you to infuse your space with a personal touch. By combining the right tools, preparation, and creative flair, you can craft shelves that are both visually appealing and meet your practical needs.
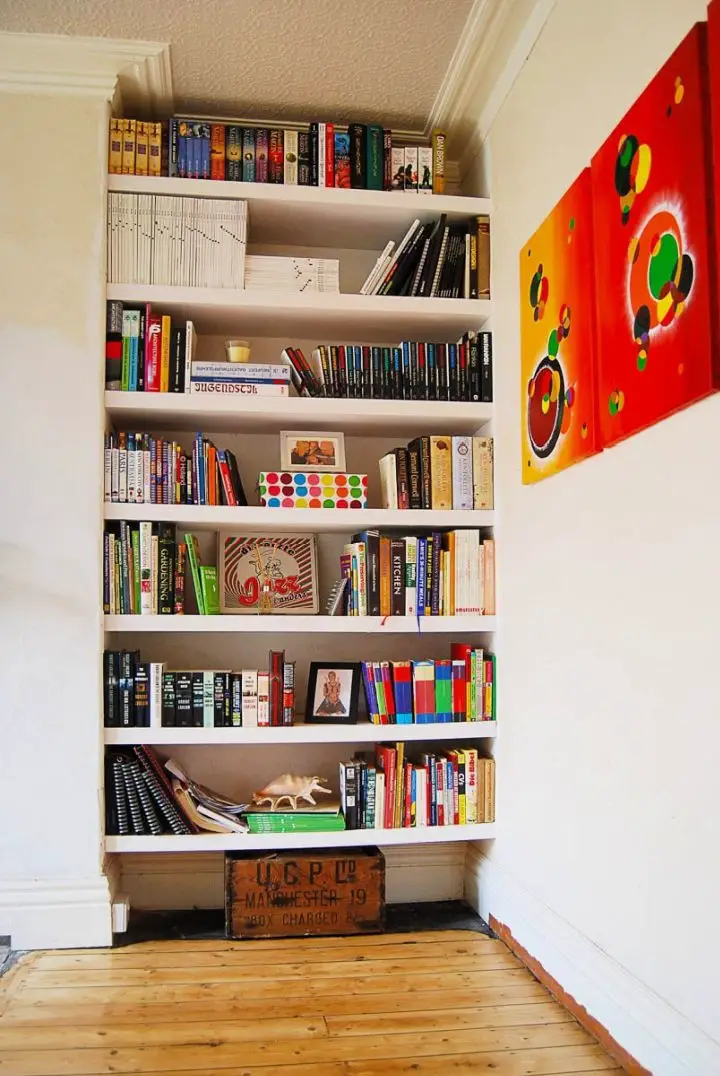
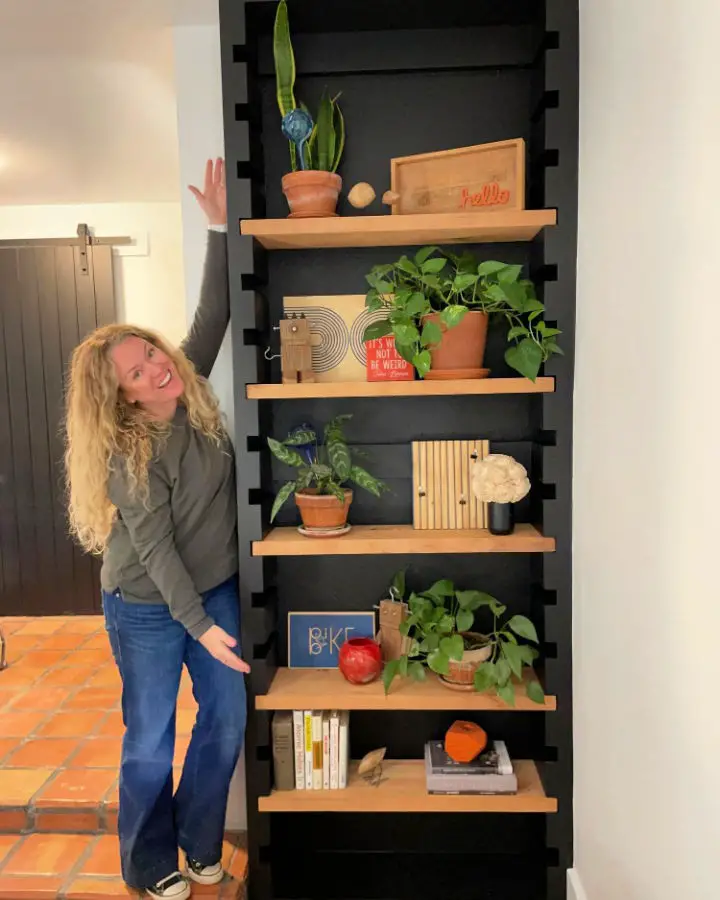
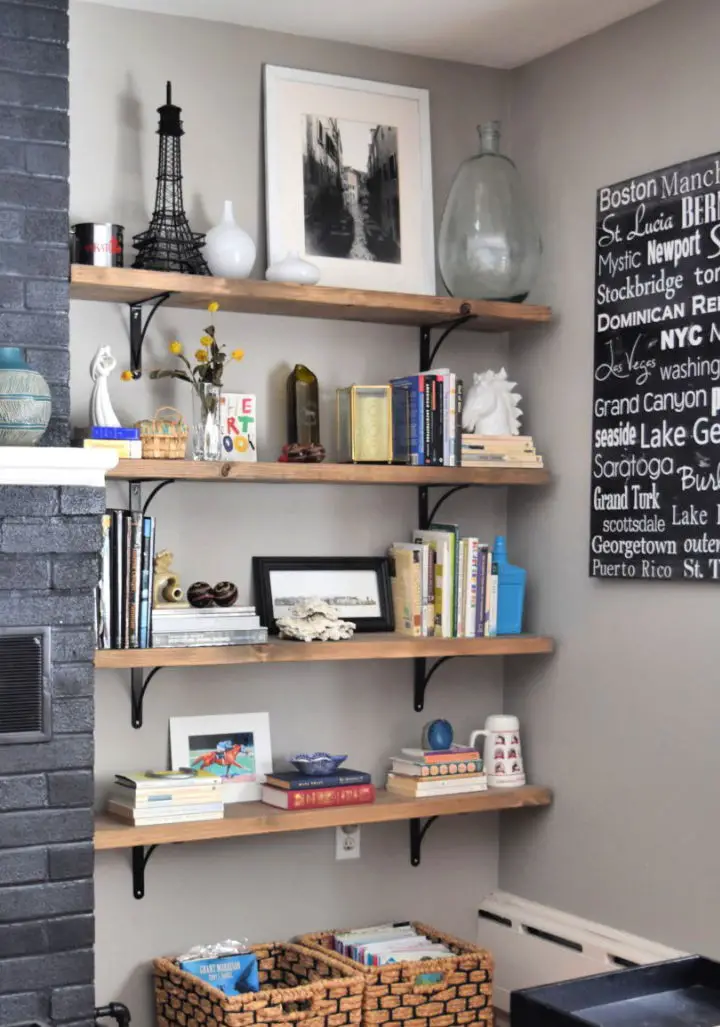
DIY Shelves (30 Easy DIY Shelving Ideas to Make a Shelf)
Transform your living space with 30 simple yet creative DIY shelving projects that blend style and functionality. Whether you’re a seasoned handyman or a newcomer to the world of DIY, these ideas will inspire you to create unique and functional shelves that reflect your personal taste.
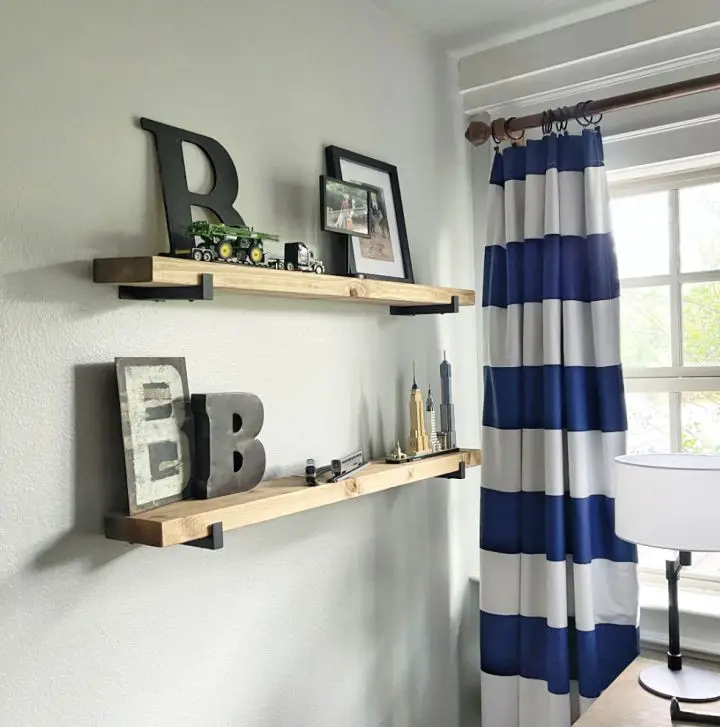
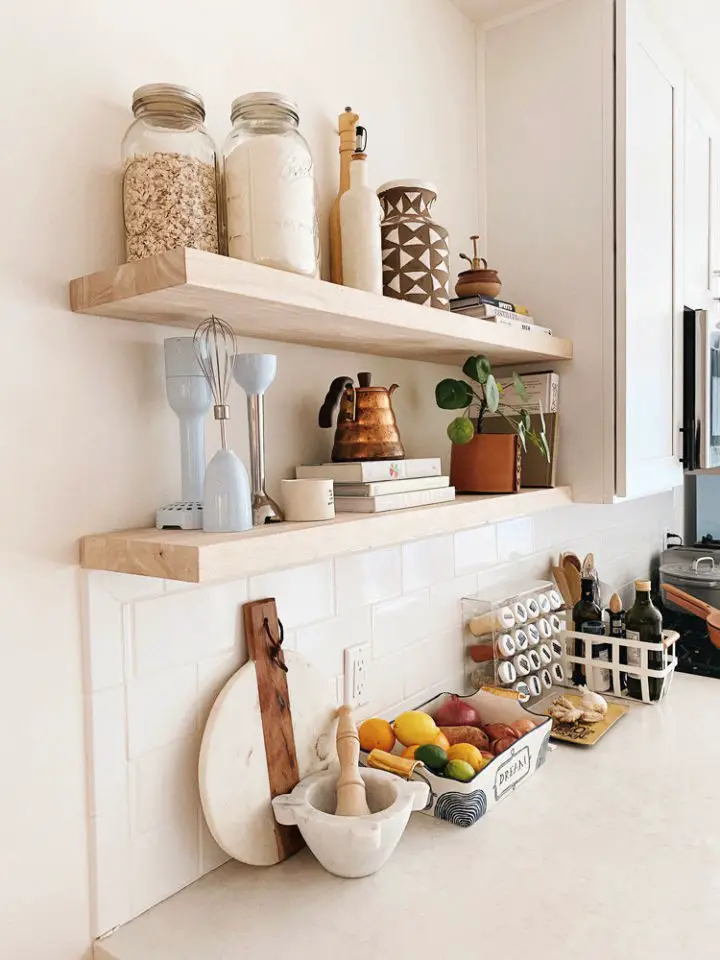
How to Make and Install Floating Kitchen Shelves
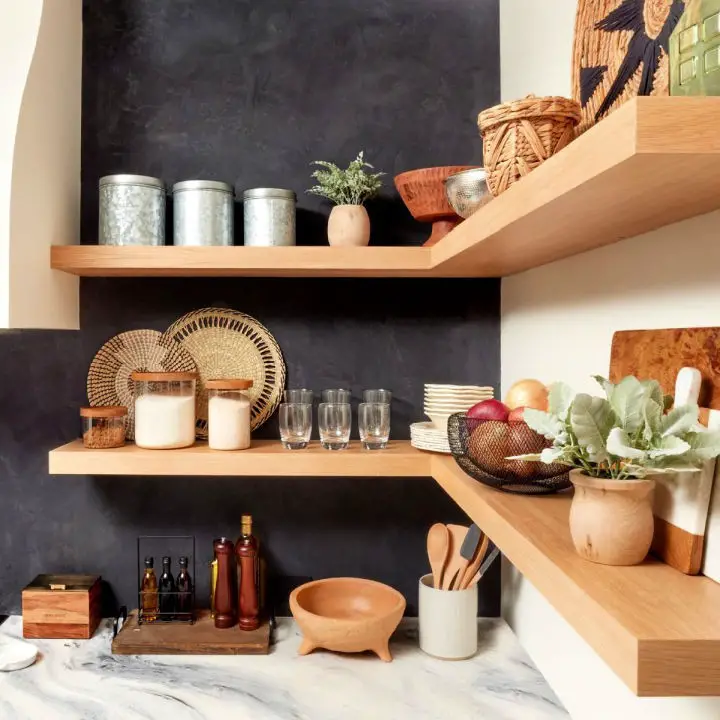
Elevate the look of your kitchen with a modern twist by creating custom floating shelves, inspired by Family Handyman’s comprehensive guide. This DIY endeavor is ideal for those seeking to revamp their space with a sleek, airy ambiance. The tutorial provides a detailed step-by-step process, empowering you to construct sturdy, hidden hardware shelves that seamlessly blend functionality and style. With crystal-clear instructions, informative images, and expert advice, you’ll be equipped to install these stylish additions, transforming your kitchen into a clutter-free sanctuary that harmoniously balances beauty and practicality.
Building a Wood Closet Shelves
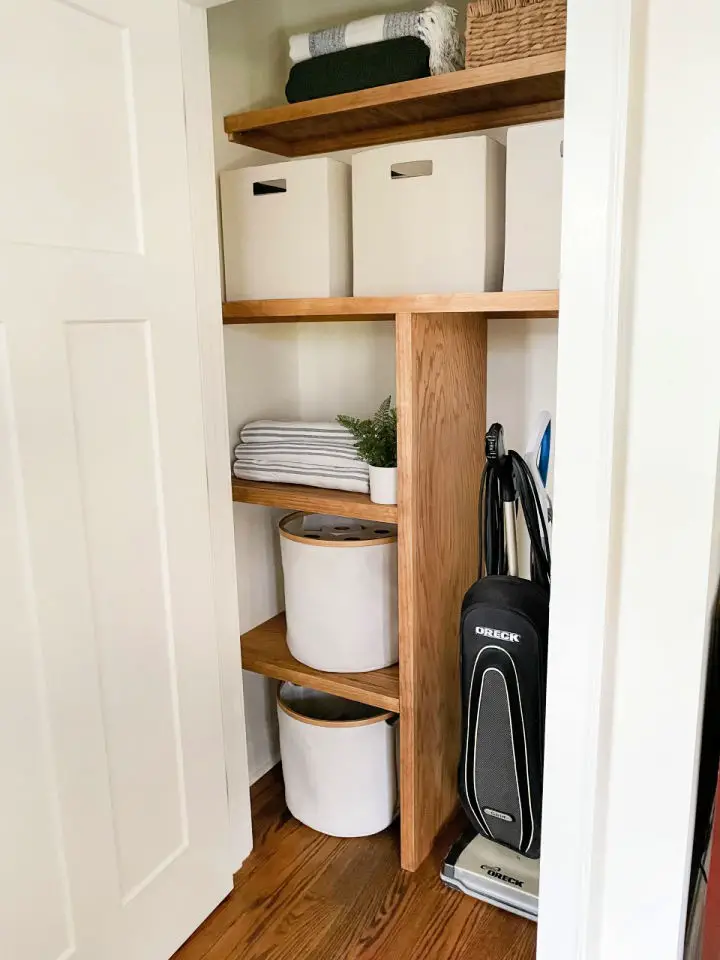
Transform your cluttered closet into a harmonious sanctuary with Amelia Lawrence Style’s comprehensive DIY guide to custom wood closet shelves. This step-by-step instructional guide equips you with the skills to design and construct bespoke wooden shelves that cater to your unique storage requirements. Say goodbye to items slipping through wire racks, as solid wood offers a sturdy and aesthetically pleasing solution. The guide delves into essential techniques such as precise measurement, expertly cutting and installing support boards, and selecting the right materials for a professional finish. Whether you’re looking to add a single shelf or overhaul your entire closet, this valuable resource enables you to build a functional and visually appealing storage space in the comfort of your own home.
Modern DIY Wall Shelf Design
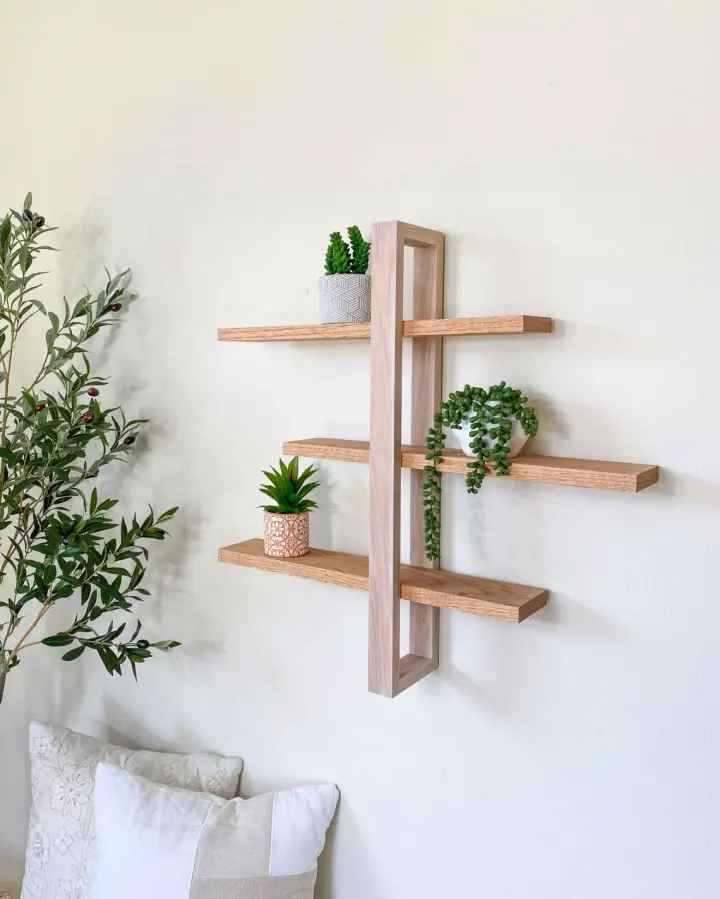
Ready to infuse your home decor with a unique touch? Our step-by-step guide takes you on a journey to create a modern DIY wall shelf that effortlessly enhances any room. Within just two days, including drying time for coats, you’ll transform a blank wall into a stunning focal point.
To achieve this impressive piece of craftsmanship, you’ll need a miter saw, sandpaper, and a few other essential tools and materials. As you navigate the process, you’ll learn expert tips on using Minwax products to achieve a professional finish – ensuring your shelf not only looks fantastic but also withstands the test of time.
Join us in this DIY adventure and unlock the power to elevate your living space with a customized shelving masterpiece.
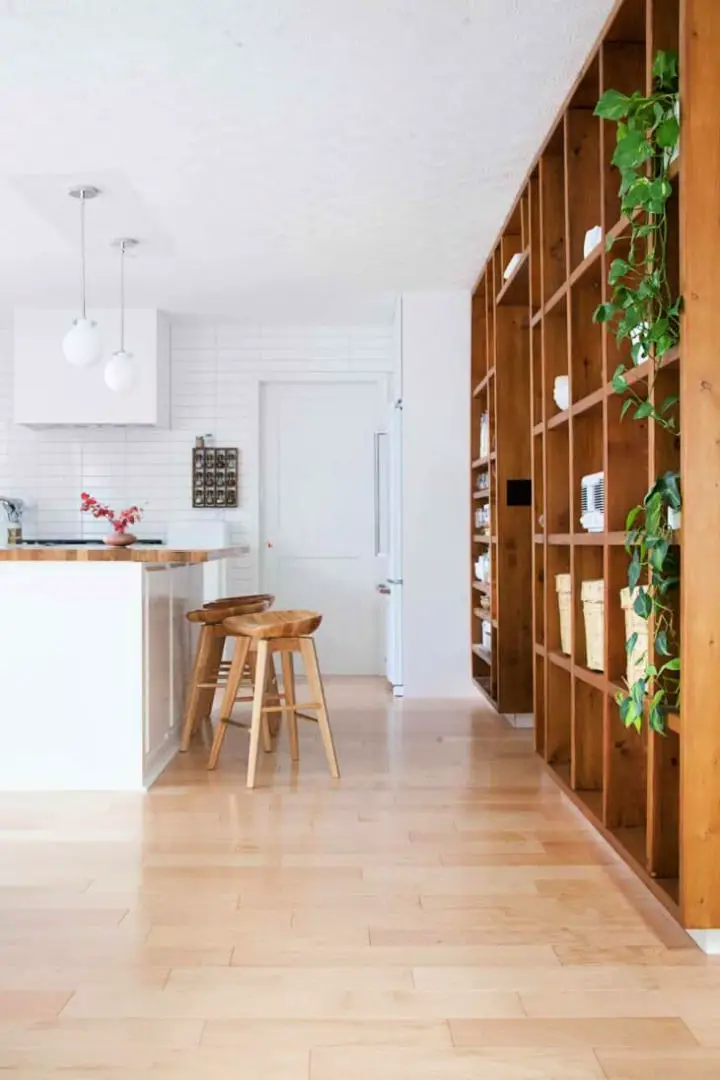
How to Build Wall to Wall Shelving
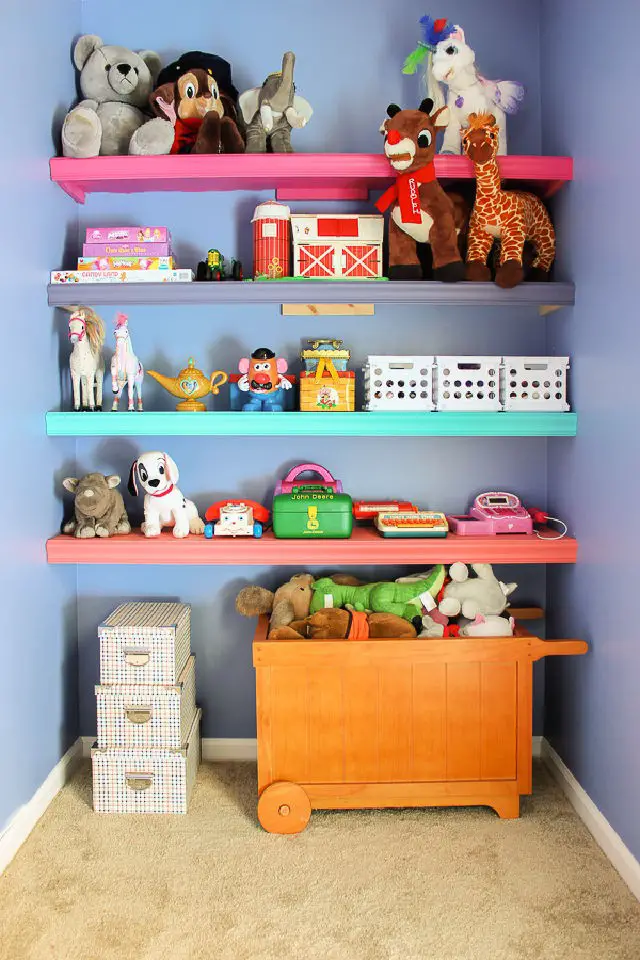
When it comes to adding functional style to your space without breaking the bank, DIY wall shelves are an excellent project to embark on. With Jenna’s guidance from Rain on a Tin Roof, you can turn cluttered areas into organized havens in just about an hour for under $50. This affordable and easy-to-follow tutorial includes a comprehensive tools and supplies list, as well as step-by-step instructions that cover everything from ensuring sturdy support to adding decorative flair with molding. Not only do these shelves provide much-needed storage solutions, but with a splash of paint, they can also add a pop of color to any room. Perfect for playrooms or any area of your home that needs an organizational boost, Jenna’s wall shelf building guide is a resourceful way to create a more tidy and inviting space.
Making a Floating Shelves in Linen Closet

Transform a cluttered linen closet into a modern oasis with ease by harnessing the power of DIY floating shelves. By following Casa Watkins Living’s comprehensive guide, you’ll be able to construct sturdy floating shelves using 2x3s and plyboard, ensuring a seamless installation that exudes sleek sophistication. With Stephanie’s expert guidance, you’ll discover practical storage solutions like Turkish towel sets and woven baskets to maximize your hallway closet’s potential. Simply gather the necessary tools and materials from The Home Depot, and get ready to elevate your home’s storage and style with custom shelves tailored to your unique space and design preferences.
Easy DIY Wood Wall Shelves $15
Get the lowdown on building charming DIY wall shelves that won’t break the bank! With Shanty 2 Chic’s easy-to-follow guide, you can create these budget-friendly wonders using minimal materials and scrap wood, all for under $15 per shelf. The tutorial takes you by the hand through every step, from pinpointing wall studs to securing sturdy anchors for a seamless drywall installation. Once assembled and finished with a warm Golden Oak stain, these shelves are not only functional but also add a personal touch to any room, making them perfect for anyone looking to enhance their space with a quick and satisfying DIY project.
Homemade Pantry Shelf for $50
Transforming your pantry from chaotic to calm is a breeze with Kelly Ballard’s DIY Pantry Shelf tutorial on City Girl Meets Farm Boy. This budget-friendly project, featured on Handmade Haven, empowers you to create custom shelves using 2×4 wood, perfect for storing kitchen essentials in style. With a simple materials list and easy-to-follow instructions, even those new to carpentry can successfully measure, cut, and assemble sturdy shelves tailored to their specific needs. This step-by-step guide makes the process enjoyable and accessible, allowing you to organize your kitchen with confidence and add a personal touch to your home.
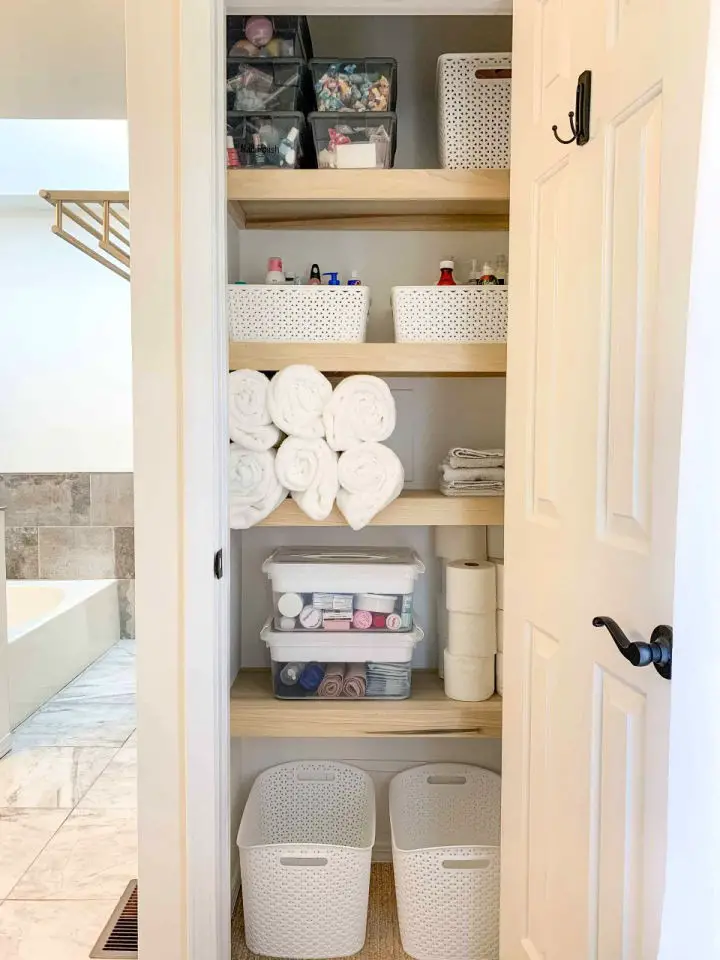
DIY Built in Bathroom Shelves and Cabinet
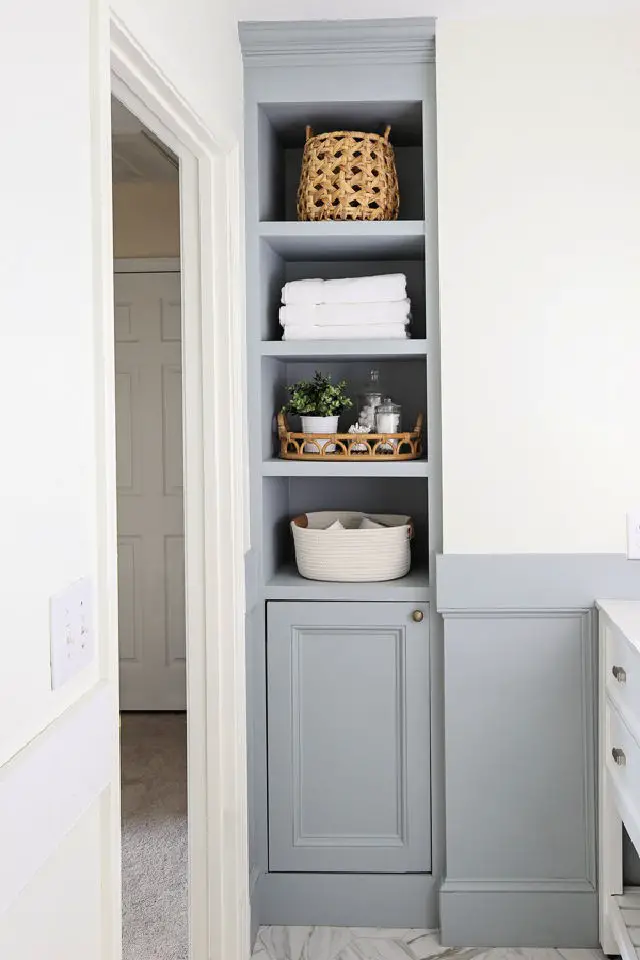
With its comprehensive guide, Angela Marie Made empowers DIY enthusiasts to create a bespoke built-in bathroom shelving system and cabinet that seamlessly integrates into their personal space. By omitting specific measurements, the tutorial allows for customization, making it accessible to individuals with varying room layouts. The author provides an exhaustive list of materials and tools required, accompanied by step-by-step instructions designed to be easy to follow, even for those new to DIY projects. From constructing the frame to attaching shelves and applying a professional finish, the guide walks readers through each stage, culminating in a functional and visually appealing storage solution. Additionally, the optional section on crafting a cabinet door offers valuable insights for achieving a polished finish, further solidifying this project’s potential to transform bathrooms with practicality and style.
Rustic DIY Wooden Crate Shelf
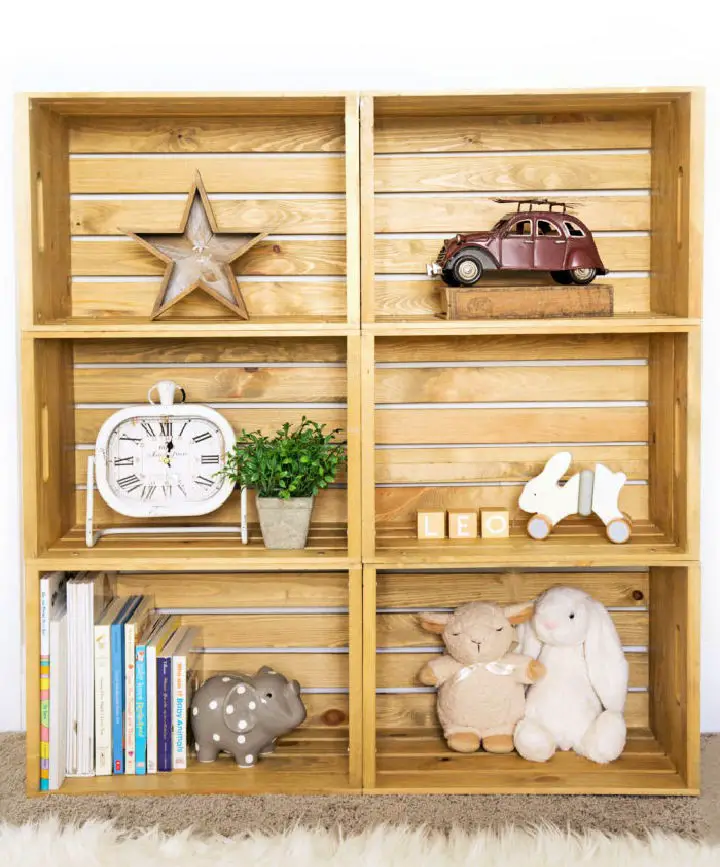
Transform your living space with a unique touch by creating a DIY Wooden Crate Shelf! This budget-friendly project from Haute & Healthy Living shows you how to build a charming, rustic shelf that adds character to any room. Whether it’s a nursery, bedroom, or home office, this versatile storage solution is perfect for showcasing cherished items. The beauty of this project lies in its customizability – simply choose your favorite stain and select the number of crates needed to fit your space. With clear instructions and a list of essential materials, you’ll be well on your way to creating a one-of-a-kind shelf that reflects your personal style. Not only is it an affordable option, but building your own shelf adds a layer of sentimental value to your décor.
How to Build a Rustic Wood Shelves
In the world of home decor, adding a personal touch can make all the difference. At Home With The Barkers takes it one step further by providing a comprehensive guide on creating rustic wood shelves that exude warmth and character. This DIY project is designed to be accessible to anyone, regardless of their level of expertise, by breaking down the process into manageable steps. From selecting the perfect wood to achieving a flawless wax finish, every detail is covered. Whether you’re looking to enhance your living space or create a unique feature for your home, this tutorial provides the inspiration and guidance you need to bring your vision to life.
Modern Plywood Shelf Ideas
When planning to craft a modern plywood desk, The Merrythought’s DIY guide provides a clear and straightforward path to building a stylish and functional piece of furniture. This comprehensive tutorial empowers you to create a storage-rich and display-friendly desk using simple materials like plywood, a circular saw, and a jigsaw. By following the step-by-step directions, which include precise measurements and cutting techniques, you’ll gain the skills to construct a sturdy desk that effortlessly complements any room’s decor. To ensure a professional finish, the guide also offers valuable sanding tips and finishing recommendations. Don’t forget to secure your new desk to the wall for added safety and stability, allowing you to elevate your workspace with a touch of handmade charm.
Inexpensive DIY Closet Shelves
Revitalize your closet sanctuary by embracing the simplicity of DIY wood closet shelves, courtesy of Arin Solange at Home. This no-frills guide offers a budget-friendly approach to crafting elegant and functional storage solutions that effortlessly organize and declutter your space. With Arin’s step-by-step instructions, you’ll learn how to select the ideal lumber, cut it with precision, and assemble your shelves with ease. Additionally, discover expert tips on finishing touches to achieve a polished appearance and innovative strategies for arranging your belongings effectively. Are you ready to breathe new life into your closet? Dive into Arin’s engaging tutorial and transform your space today.
Budget Friendly DIY Floating Shelf
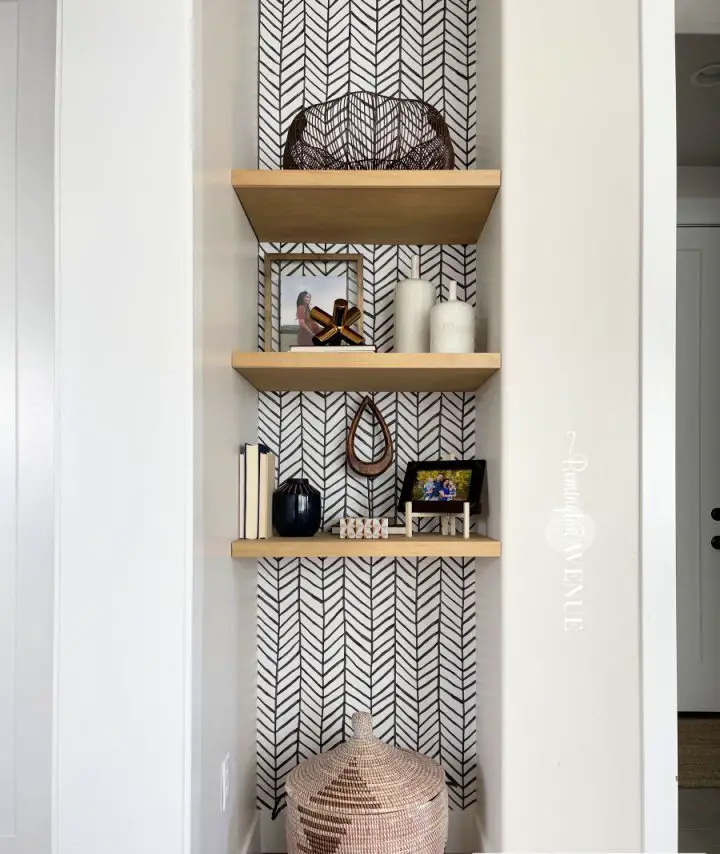
Discover how to turn a neglected nook into a beautiful and functional space without sacrificing style or budget. With the Budget-Friendly Floating Shelf DIY Tutorial from Remington Avenue, you’ll learn how to build sturdy and attractive shelves that add custom storage and encourage personalization through decoration. The tutorial also provides valuable tips on preparing your walls for installation using peel- and-stick wallpaper. By following this step-by-step guide, you’ll be able to revitalize any corner of your home with practical beauty.
Make Your Own Floating Shelves
Elevate your home’s ambiance by installing sleek DIY floating shelves, inspired by Little House On The Corner’s comprehensive guide. With step-by-step instructions and a detailed materials list, including timber, MDF, and essential tools, this project simplifies the process of creating functional storage solutions that seamlessly blend with your interior design. From preparing support timbers to attaching shelf cladding, every stage is meticulously outlined for a stress-free DIY experience. To complete the look, you’ll also learn how to fill holes and add a coat of paint, ensuring your shelves not only serve their purpose but also become a stunning focal point in your space. Perfect for organizing treasured possessions or displaying favorite books, these floating shelves are an ideal project for anyone looking to enhance their interior design while savoring the satisfaction of a job well done.
How To Install Floating Shelves
Elevate your kitchen’s style and functionality with DIY floating shelves! Building on the expertise of Kate Voegele from We The Dreamers, this step-by-step guide empowers even novice DIY enthusiasts to construct sturdy and visually appealing storage solutions. By emphasizing the importance of precise measuring and drilling, selecting the ideal materials and tools – such as a self-centering drill guide for perfect alignment – you’ll be well-equipped to tackle this project with confidence. With Kate’s own experiences serving as a testament to the value of patience and meticulous attention to detail, you’ll be able to transform your space into a haven of practical elegance through the creation of your very own floating shelves.
Handmade 1×6 Storage Shelves
Transform your home’s storage space into a charming sanctuary with Ana White’s Simple 1×6 Storage Shelves. Boasting a rustic charm, these robust shelves can be crafted in just an hour, sans the need for specialized tools or materials. Made from budget-friendly 1×6 boards and an optional metal rail, they strike a perfect balance between aesthetics and functionality.
Customize the size to fit your space and follow Ana White’s straightforward instructions for a seamless installation. Perfect for storing kitchen jars or decorative items, these shelves will add a touch of sophistication to your walls. Simply head to Ana White’s website and snag the free plans to give your storage solutions a personal touch.
How to Build Closet Shelves
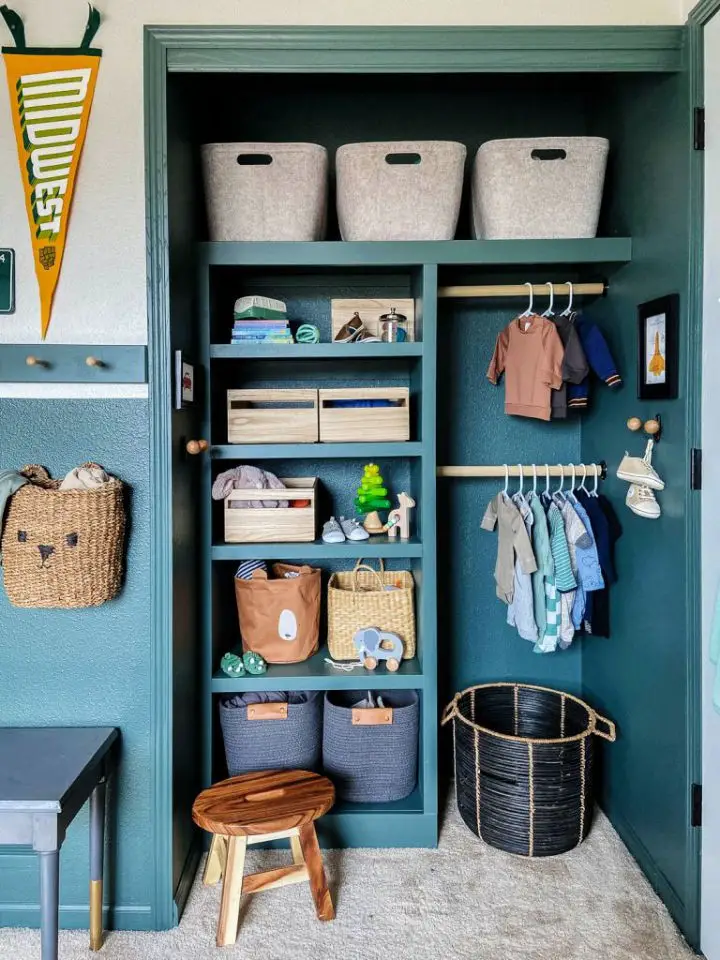
Elevate the functionality and visual appeal of your nursery’s closet by transforming generic wire shelves into custom-built storage solutions, thanks to Small Stuff Counts’ comprehensive guide! This DIY-friendly tutorial provides a clear materials list, precise dimensions, and step-by-step instructions to help you create space-maximizing shelving that not only streamlines your nursery but also adds an attractive touch. Whether you’re a seasoned DIY enthusiast or just looking for a cost-effective way to organize your home, this project is designed to inspire and empower you to build beautiful, functional closet shelving that reflects your personal style.
DIY Wooden Shelves
Transform your kitchen space into a haven of organization and style by embracing the world of DIY shelving. Mandi Johnson’s expert guide on A Beautiful Mess provides a comprehensive roadmap to replacing bulky cabinets with sleek, open shelving. By following her step-by-step instructions, you’ll learn how to select and prepare construction-grade lumber for a budget-friendly project that balances functionality with aesthetic appeal.
With Mandi’s insightful guidance, including techniques for sanding, finishing, and building, anyone can elevate their home’s charm and practicality. By creating custom-made shelves, you’ll infuse your kitchen with a personalized touch that perfectly harmonizes with your unique interior design style.
Modern DIY Pipe Shelves
Get inspired to build functional and stylish DIY pipe shelves with a comprehensive guide on Instructables. HomeMade Modern’s step-by-step tutorial provides a detailed roadmap for creating sturdy and customizable shelving systems using iron plumber’s pipe. Perfect for those seeking unique, industrial-chic decor that adds a personal touch to any room, these pipe shelves offer a harmonious blend of form and function. By following the guide’s clear instructions and helpful tips, you’ll be empowered to craft your own one-of-a-kind shelving system that seamlessly integrates with your home’s existing decor. Experience the satisfaction of creating practical and visually appealing shelves that elevate your space’s aesthetic.
Free Wood Shelves Building Plans
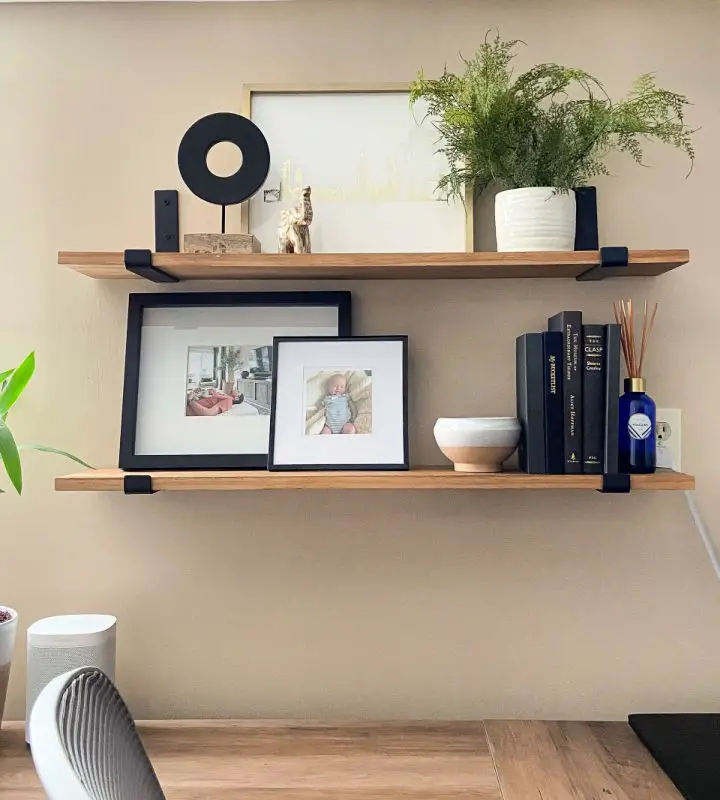
Simple wooden shelves are a versatile solution for enhancing your home’s storage capabilities while adding a touch of elegance. Building on DIY Playbook’s expertise, Casey Finn has crafted a comprehensive guide that breaks down the process into manageable steps. By utilizing pine wood for its exceptional staining properties, these shelves not only provide ample storage but also cleverly conceal unsightly outlets through strategic placement.With an emphasis on clarity and accessibility, Finn’s instructions cover crucial aspects such as cutting, sanding, staining, and bracket installation. The guide also offers insightful tips on selecting the perfect wood and brackets to ensure a sturdy and visually appealing outcome. As you work through the project, Casey’s engaging narrative injects personal touches, making the process relatable and attainable for anyone looking to breathe new life into their space.
Making a Box Shelves
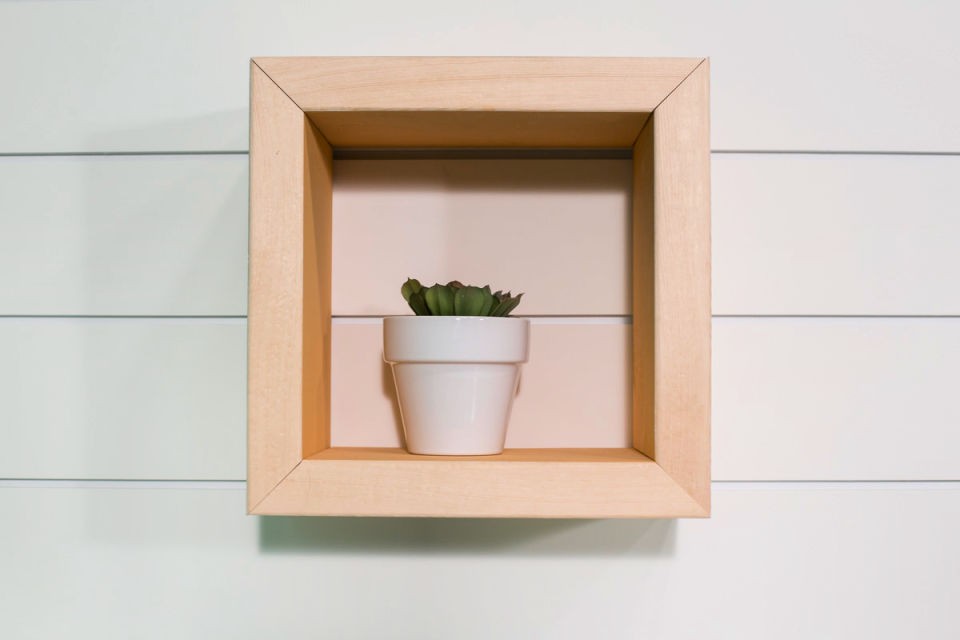
Transform your living space into a stylish haven by crafting DIY box shelves with Dunn DIY’s clear instructions. This innovative project turns simple wood into a functional piece of wall decor, showcasing your favorite items while adding a personal touch to your home. The process is straightforward: cut, sand, prime, and paint the wood before assembling it into a sturdy, eye-catching shelf. Perfect for crafting enthusiasts, this rewarding project allows you to display plants or keepsakes with a handmade flair. To achieve a polished finish, emphasize precision and patience – the end result will bring a sense of accomplishment and a unique feature to your interior design.
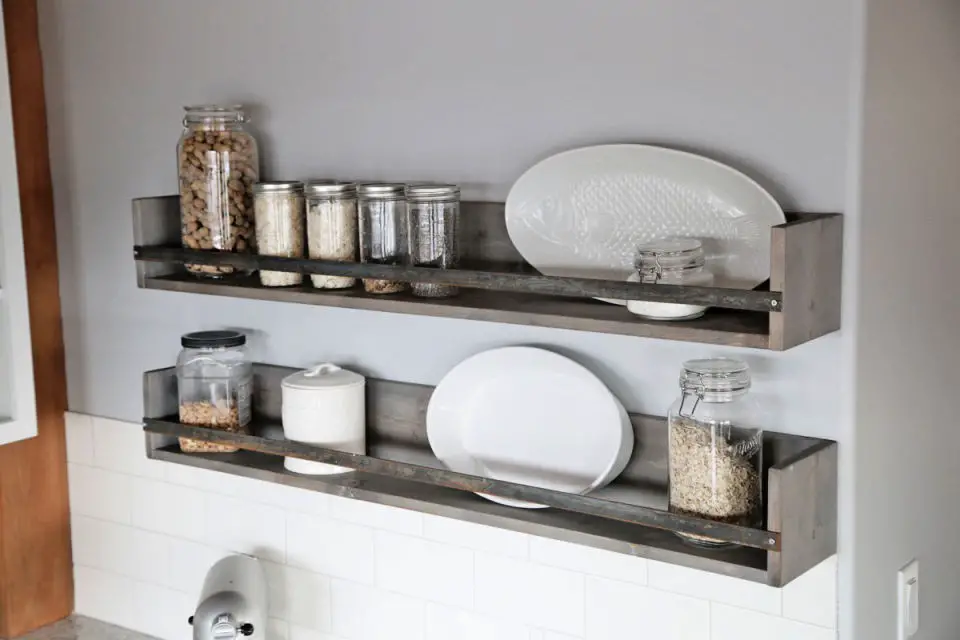
Simple DIY Floating Kitchen Shelves
Enhance the style of your kitchen by creating DIY floating shelves that exude a personal touch. With Jenna Sue Design’s comprehensive guide, you’ll be able to effortlessly produce seamless and sturdy shelves without requiring any specialized hardware. This tutorial is perfect for homeowners seeking to add a unique flair to their space, providing step-by-step instructions for measuring, cutting, and installing the shelves. Every detail is meticulously covered to ensure a polished outcome, whether you’re aiming to add storage or display space. The tips provided will help you achieve a professional look that combines charm and functionality in your kitchen. Additionally, the guide offers valuable insights into wood choices, finishes, and weight capacity to guarantee a successful project. Get ready to transform your kitchen with confidence and ease.
Adjustable Shelf Built in Bookcase
Experience the thrill of creating an adjustable shelf built-in bookcase with The Awesome Orange’s comprehensive guide, brought to life by Sadie Mae John. This step-by-step tutorial simplifies the process, making it accessible for DIY enthusiasts of all skill levels. From essential tools and materials, such as 2x10s and wood screws, to the actual construction, this adaptable project allows you to modify it according to your evolving décor needs or growing plant collection.
With clear explanations and an engaging tone, the tutorial guides you through measuring, cutting, and assembling your own bookcase. The result is a customized piece that’s both functional and visually appealing, perfect for any space.
Build Your Own Garage Shelves
Want to create a well-organized garage without sacrificing aesthetics? Look no further than Ana White’s DIY guide on crafting freestanding storage solutions with sturdy shelves. This comprehensive tutorial provides an easy-to-follow process for building custom shelving units that can accommodate various wall types, making it perfect for renters or homeowners who don’t want to drill into their walls. With the ability to adjust shelf placement, add a workbench, or build a media center, these solid wood shelves are highly versatile and can be tailored to fit your specific needs. Plus, with the option to paint or stain them to match your decor, you’ll have the freedom to create a cohesive look that complements your garage’s unique style. By following Ana White’s detailed instructions, you’ll be able to set up your shelves securely and efficiently, ensuring your garage remains tidy and your belongings remain easily accessible.
Building a Wood Shelves
Imbue your living space with rustic charm by following Jenna Burger Design LLC’s step-by-step guide on installing wood shelves with brackets. This practical approach to DIY shelving, first published on January 18, 2019, empowers homeowners to transform any nook or wall space into a stylish and functional focal point. The comprehensive guide stresses the importance of selecting sturdy brackets, ensuring proper wall anchoring, choosing the ideal wood, and applying a rich stain for a professional finish. Supported by before-and-after images, this walkthrough makes it easy for readers to follow along, even if they’re new to DIY home projects. With confidence, they can create a satisfying and aesthetically pleasing addition to their interior decor, resulting in a unique blend of form and function that enhances the overall ambiance of their living space.
Creative Hanging Shelves
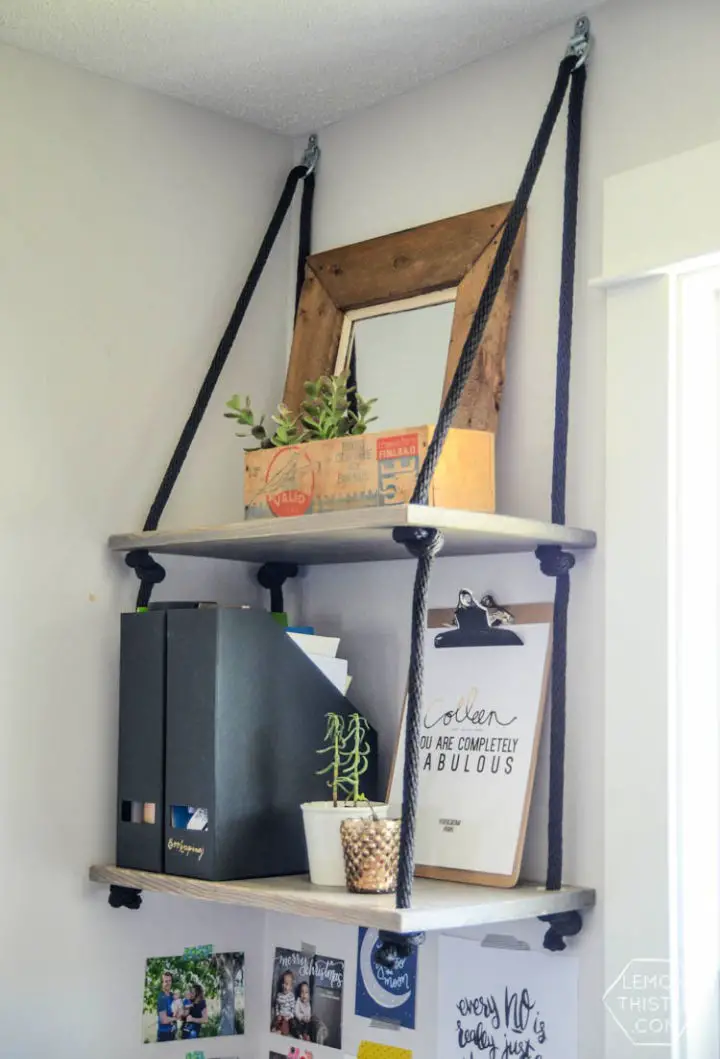
Transform your small space with innovative shelving solutions! By following Lemon Thistle’s DIY guide on creating hanging shelves, you can effortlessly elevate the functionality and aesthetic appeal of your room in a matter of hours. With minimal materials from your local hardware store, you’ll be able to construct sleek open shelves that not only save valuable floor space but also become a focal point for your decor. The beauty of these floating shelves lies in their clever design, which eliminates bulky brackets by utilizing sturdy nylon rope and metal anchors. By learning how to cut, stain, and install these durable shelves step-by-step, you’ll be able to personalize the look to suit any room’s unique character. Perfect for those who appreciate a harmonious blend of functionality and design, these hanging shelves are an accessible way to infuse your office or living space with personality.
Make a Toscana Bookshelf
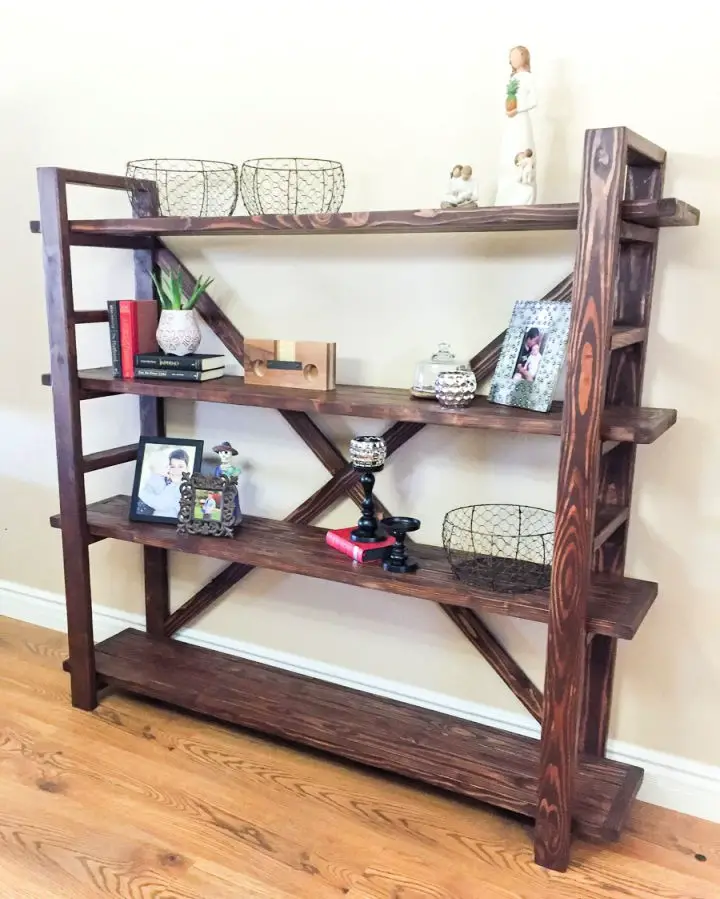
At Jen Wood House, we’re excited to share a DIY guide on how to build your own Toscana Bookshelf, inspired by the high-end designs found at Anthropologie. For a fraction of the cost, you can create a stunning bookshelf that not only adds functionality but also becomes a beautiful focal point in your home. This comprehensive tutorial provides clear instructions and valuable tips, such as securing shelves for added stability, to ensure a durable and stylish finish. With a materials cost of around $80, this project is perfect for DIY enthusiasts who want to create something truly special and impressive. Whether you’re looking to transform a room or showcase your handiwork, our Toscana Bookshelf tutorial has got you covered.
Free Dining Room Open Shelving Plans
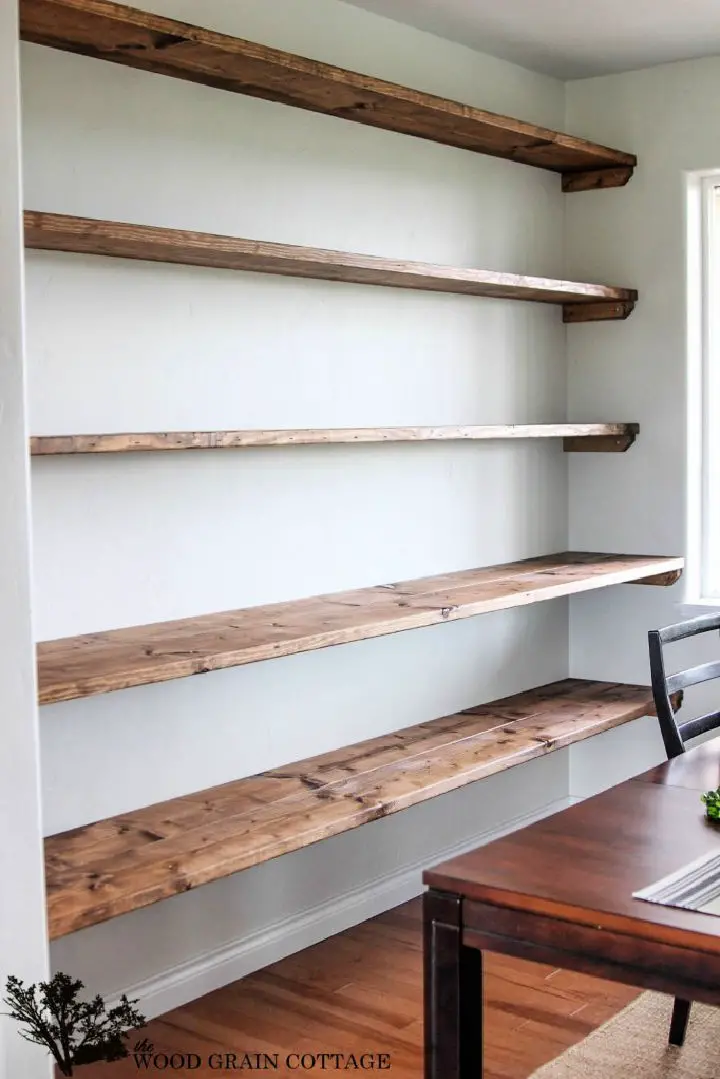
Transform your dining room into a stylish sanctuary by embarking on a DIY open shelving adventure with The Wood Grain Cottage’s expert guidance. This comprehensive guide simplifies the process, providing clear instructions and a list of essential supplies to ensure a successful project. With this tutorial, you’ll learn how to measure and cut shelving supports, stain and secure your boards, and ultimately achieve a functional and elegant storage solution that won’t break the bank. By following these easy-to-follow steps, you’ll not only create a beautiful addition to your dining area but also gain practical tips for avoiding common pitfalls like wood splintering, ensuring a frustration-free crafting experience.
Making a Sliding Shelves Tutorial
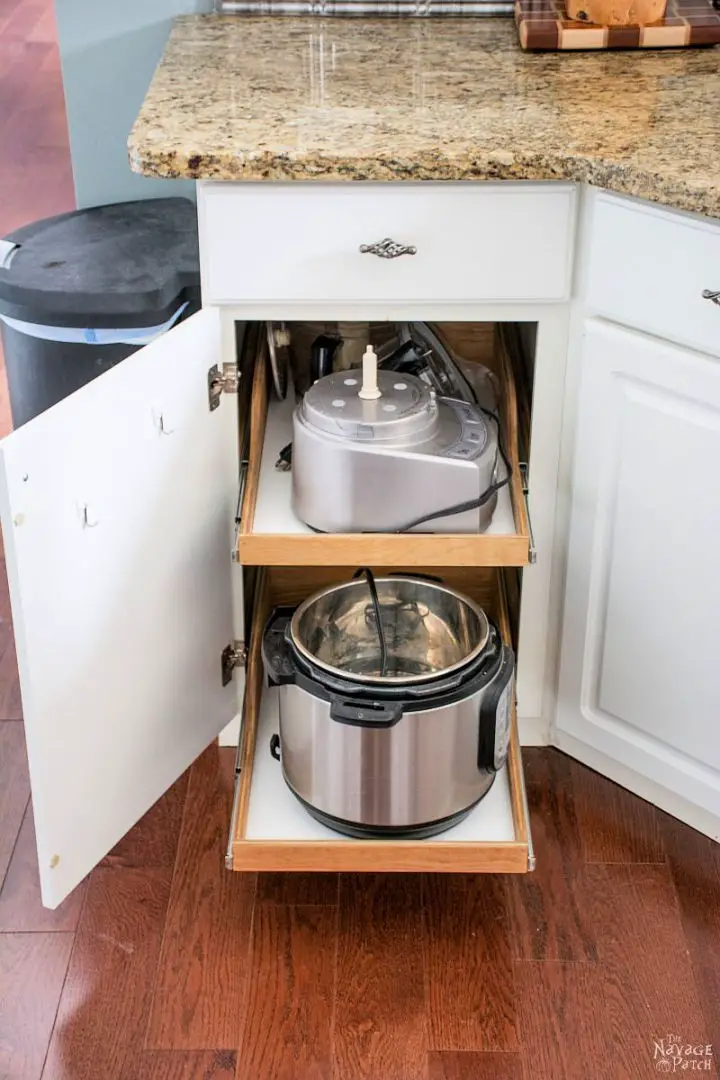
Transform lower cabinets by installing sliding shelves – a budget-friendly DIY solution for maximizing deep and hard-to-reach spaces. The Navage Patch has revamped its comprehensive guide, offering a streamlined approach to creating pull-out shelves that eliminates the frustration of misplaced items and wasted storage. This cost-effective method ensures you’ll enjoy attractive, sturdy, and fully functional sliding shelves without sacrificing your wallet. With a clear, step-by-step tutorial and valuable tips, you’ll be able to achieve a more organized and accessible kitchen. By diving into this practical and satisfying project, you’ll enhance your home with a game-changing upgrade.
How to Make a Pantry Shelves
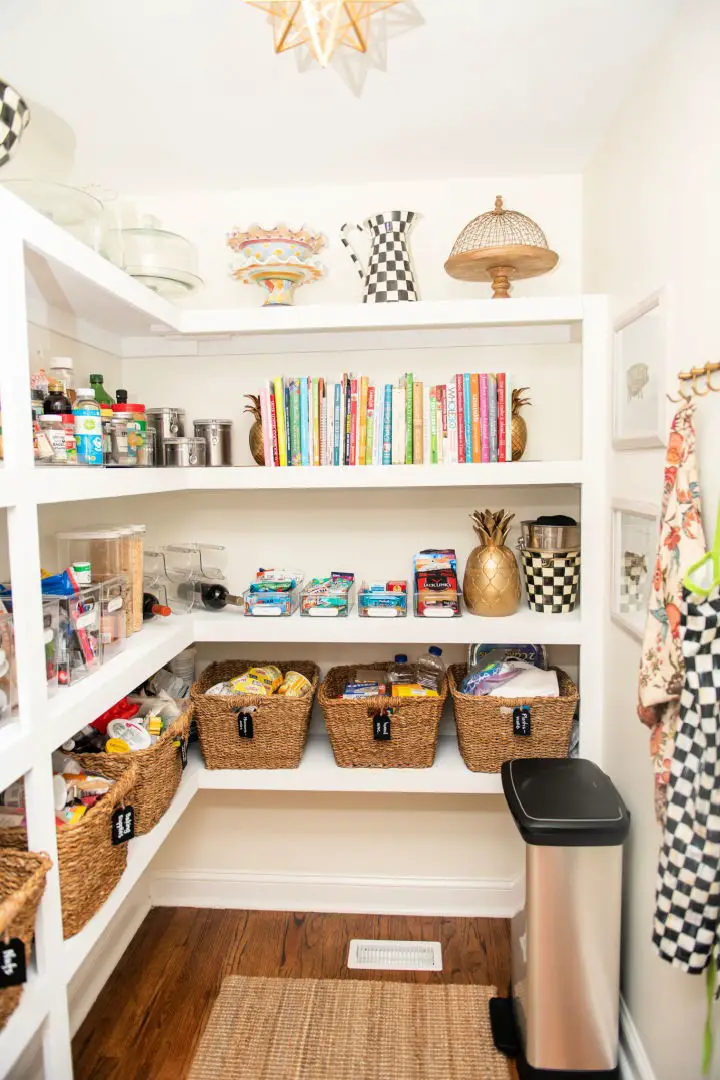
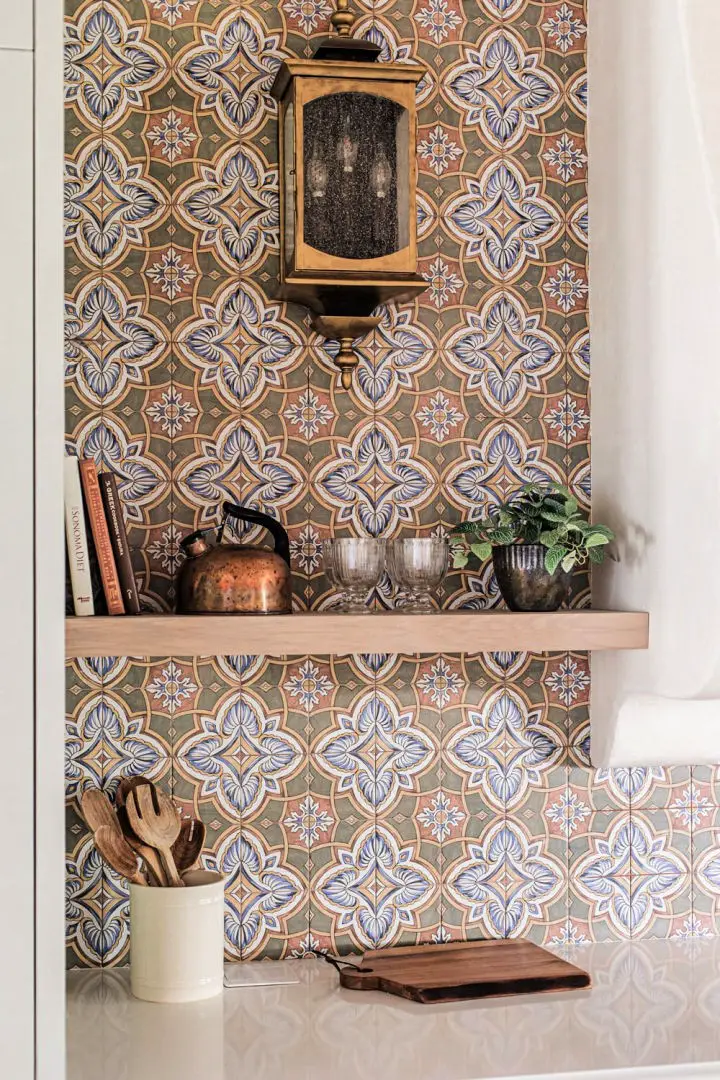
Transforming your pantry space just got a whole lot easier, thanks to the clever DIY solution from Coffee Beans and Bobby Pins. By following their easy-to-follow tutorial, you’ll be able to create sturdy, bespoke pantry shelves that not only boost your kitchen’s functionality but also add a touch of elegance. Ditch those flimsy wire shelves for good and welcome a custom-built storage system that will last. With step-by-step guidance on planning, marking studs, and adding finishing touches, this practical project is guaranteed to yield impressive results and a tidy space. Get ready to take your home to the next level with this comprehensive and engaging pantry upgrade guide.
Conclusion:
Our journey through the world of DIY shelves has culminated in a comprehensive collection of 30 straightforward shelving ideas, equipping you with the tools to personalize your space. We’ve taken you on a path from exploring the benefits of building your own shelves to understanding your needs, selecting the ideal materials, and executing your design with safety and efficiency in mind. This guide aims to empower you to tackle any shelving project with confidence, enabling you to transform your living space while infusing it with a sense of accomplishment and personal flair. Ultimately, creating DIY shelves is not just about adding storage or decluttering; it’s about crafting a unique reflection of your creativity and individuality. With this guide, you’re ready to start building and watch your space come alive.
