Why Make Your Own Candle Holders?
While creating your own candle holders may seem like a daunting task, it offers numerous benefits that extend beyond simply saving money. Here’s why you should consider embarking on this creative journey: First and foremost, personalization plays a significant role. By crafting your own candle holders, you can tailor the designs to your unique taste or match them with the decor of your home. This level of customization is not possible when purchasing pre-made holders. Furthermore, handmade candle holders make for thoughtful and one-of-a-kind gifts that showcase effort, care, and creativity. Moreover, using recycled materials or natural elements allows you to create eco-friendly candle holders that not only reduce waste but also add a touch of sustainability to your decor. The process of making candle holders can also be therapeutic, providing an opportunity to unwind, focus on a creative task, and feel the sense of accomplishment that comes with creating something beautiful with your own hands. Additionally, making candle holders at home is often more cost-effective than purchasing pre-made options. With a few simple supplies, you can create multiple holders for the price of one retail option. Finally, the DIY process itself can be an educational experience, allowing you to hone your crafting skills and gain a deeper understanding of different materials. Ultimately, making your own candle holders is a rewarding endeavor that combines creativity, sustainability, and personal expression, resulting in a sense of warmth and joy that’s sure to bring people together.
How to Make Candle Holders
Creating customized tea light candle holders through DIY can be an incredibly fulfilling experience. Not only do these unique pieces bring a personal touch to your home’s ambiance, but they also serve as thoughtful and meaningful gifts for any occasion. This comprehensive guide will take you by the hand and lead you through each step of the process, ensuring that your finished product turns out beautifully and uniquely yours.
Materials Needed:
To craft a plain round timber, you’ll need a selection of tools and materials. Begin by selecting a piece of lumber that is 69mm by 69mm in size, then cut it down to a length of 100mm. Next, you’ll require a drill press to shape the timber as desired. A 45mm Forstner bit will come in handy for creating precise holes, while a round edge router bit can be used to add a decorative border or edge to your design. Sandpaper will help to smooth out any rough edges or splinters, and a pencil is necessary for marking measurements and guidelines. If desired, you can also utilize a vice to provide additional stability during the cutting process.
Step 1: Marking Your Timber
To locate the exact center point on the top surface of your timber, start by measuring its dimensions and subtracting a slight margin (in this case, around 68mm). Next, use a combination square set to half the width of the timber to draw lines that will serve as guides for drilling side holes. It’s essential to repeat this process on all sides of the timber to ensure precise alignment and accurate placement of the side holes.
Step 2: Drilling the Top Hole
To create the recess for the tea light, start by securing your timber piece perpendicular to the drill press bit. Use a Forstner bit set to drill a hole approximately 72mm deep, centered on the timber. The depth of the hole should be slightly greater than the height of the tea light, allowing it to sit flush within the recess.
Step 3: Drilling Side Holes
To construct a sturdy and well-lit timber frame structure, start by drilling carefully planned holes on either side of each timber. Ensure these openings are spaced consistently throughout the length of the beam, with the top edge of each hole located just below the midpoint of the structure’s overall depth. This precise placement allows for optimal natural light penetration while maintaining the integrity and stability of the framework.
Step 4: Routing Edges
To complete the refinishing process, use a rounded edge bit on your router to carefully smooth out the edges of each hole. This will give your candle holder a refined appearance and eliminate any rough spots. As you work, be sure to secure your timber firmly in place with clamps to ensure stability and prevent any accidents.
Step 5: Sanding
To achieve a flawless finish on your candle holder, begin by thoroughly sanding every surface – including the edges of the holes and any flat areas. Start with a coarse grit and gradually work your way up to an extremely fine one, carefully ensuring that each subsequent grit refines the previous one for an incredibly smooth finish.
Step 6: Finishing Touches
Before moving on to the finishing touches, ensure all residual sawdust is removed and inspect the surface for any areas that may require additional sanding or smoothing to achieve a flawless finish. Once complete, you can proceed with applying your chosen finish, whether it’s beeswax, linseed oil, or opting for a natural look by leaving the wood as is.
Video Tutorial
Wanting to dive deeper into the world of DIY crafting? Start by creating your own unique tea light candle holder! For an immersive visual experience, check out our YouTube tutorial on making a tea light candle holder, where you can follow along with step-by-step instructions. This comprehensive guide offers a dual approach, combining written instructions here with the video tutorial to ensure clarity and enhance your overall crafting experience.Beyond just being a fun project, creating tea light candle holders is an excellent way to express your creativity and showcase your personal style. By utilizing the right tools and exercising a bit of patience, you can craft stunning, one-of-a-kind candle holders that radiate warmth and add ambiance to any space.
FAQs on DIY Candle Holder
Crafting personalized candle holders can be a fulfilling endeavor, and addressing common queries upfront can streamline the process. Whether you’re a novice or looking to hone your skills, the following FAQs will guide you in creating unique and functional pieces that add warmth and ambiance to any space.
What materials can I use to make candle holders?
When it comes to crafting unique candle holders, creativity knows no bounds. You can upcycle a wide range of materials to create one-of-a-kind pieces that reflect your personal style. Consider using natural elements like wood (timber or birch logs), clay (air-dry or oven-bake), metal (tin cans or copper pipes), glass (mason jars or old wine glasses), or even recycled materials (paper, fabric, or other eco-friendly options). If you’re looking to add a touch of the outdoors, natural elements like stones, shells, or sand can also be used. Ultimately, choose materials that align with your desired aesthetic and available tools.
How can I ensure my DIY candle holders are safe to use?
When it comes to ensuring safety while burning candles, there are several precautions you can take to minimize the risk of accidents. First and foremost, make sure that any materials nearby – such as curtains or decorations – are non-flammable or positioned at a safe distance from the flame. This will help prevent unwanted fires. Additionally, use a proper insert, like a smaller glass or metal container, to hold the candle itself. This can help contain any wax drips and prevent them from igniting. Another crucial step is never leaving lit candles unattended – this can be as simple as not walking away from a burning candle for an extended period of time. It’s also important to place candle holders on stable, heat-resistant surfaces, such as ceramic or stone, rather than fragile or combustible materials. Finally, consider opting for flameless options like LED tea lights, which provide a similar ambiance without the risk of fire.
Can I make candle holders without using power tools?
Hand-crafting candle holders doesn’t require the use of power tools, as there are several creative alternatives that can be employed. For instance, you can wrap twine or yarn around a glass jar using glue to create a rustic and charming holder. Another option is to shape air-dry clay into desired forms without relying on machinery. Additionally, tin cans can be transformed into lantern-like candle holders by punching holes with a hammer and nail. These methods are particularly suited for those who are new to crafting or lack access to power tools, offering a fun and accessible way to create unique decorative pieces.
How do I customize candle holders for different occasions?
Transforming your candle holders into unique pieces is as effortless as tweaking the decoration or material to match the occasion’s tone. To give it a festive flair, inject vibrant colors, ribbons, or seasonal ornaments. For a sophisticated ambiance, introduce metallic hues or cleverly combine marble and copper accents. If you’re aiming for a rustic or earthy vibe, opt for natural materials like wood or clay. And, to make gifts truly special, incorporate personalized touches such as initials, dates, or heartfelt messages.
What is the best way to clean DIY candle holders?
When it comes to cleaning your candle holder, the approach often depends on the material it’s made of. For instance, glass and metal surfaces can typically be cleaned with a mild soap solution or a specialized glass cleaner. Wooden holders require a slightly different treatment – simply wipe them down with a damp cloth and consider applying a wood polish from time to time. As for clay-based holders, a dry cloth is usually sufficient for dusting, but it’s essential to avoid using water unless the holder has been properly sealed, as unsealed air-dry clay can be prone to damage. Before embarking on any cleaning method, always test a small, inconspicuous area first to ensure you won’t inadvertently harm your candle holder.
Can DIY candle holders be a profitable craft to sell?
To turn handmade candle holders into a lucrative venture, consider incorporating unique features that set them apart from mass-produced products. This can be achieved by:
* Researching current trends to identify what styles are currently in demand.
* Developing a signature style or feature that becomes synonymous with your brand.
* Selling through various channels such as craft fairs, online marketplaces, and local boutiques.
* Pricing competitively, taking into account the cost of materials and your time.
It’s also essential to promote your products effectively by leveraging social media platforms or a personal website to reach potential customers. By doing so, you’ll be well-equipped to turn your DIY candle holder projects into successful endeavors.
25 Homemade DIY Candle Holders (Make a Candle Holder)
Unleash your creativity and transform your home with 25 innovative DIY candle holder projects that are easy on the wallet and big on style. Whether you’re looking to add a personal touch to your living space or seeking unique gifts for friends and family, get ready to spark some inspiration as you start crafting today!
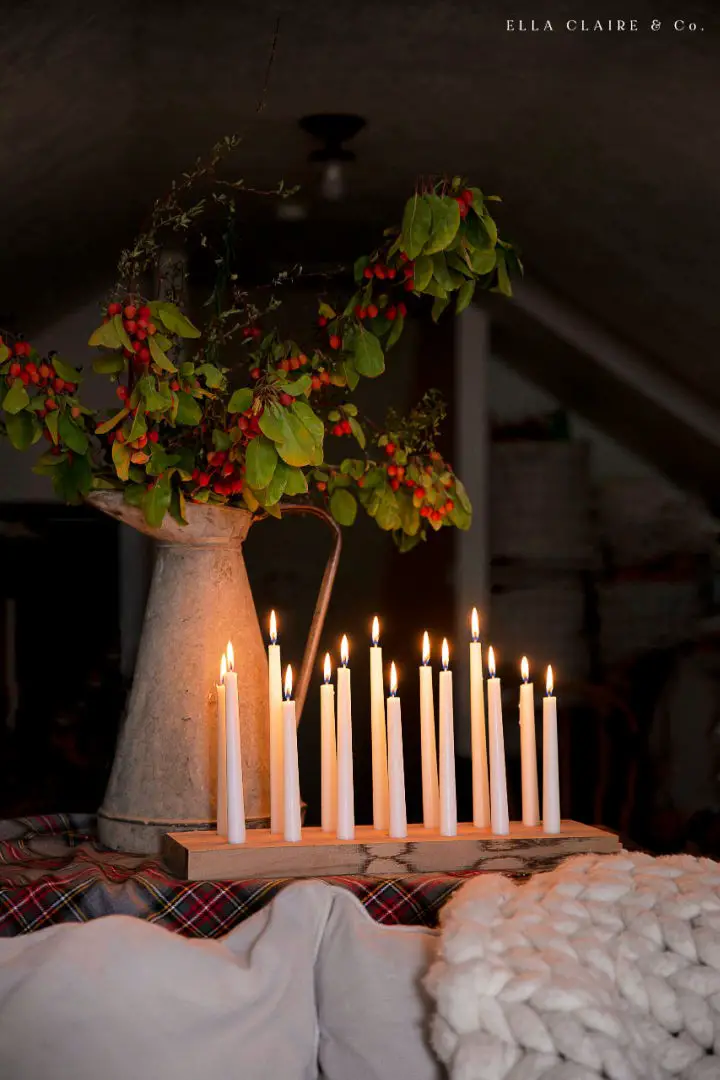
Making a Winter Log Candle Holder Centerpiece
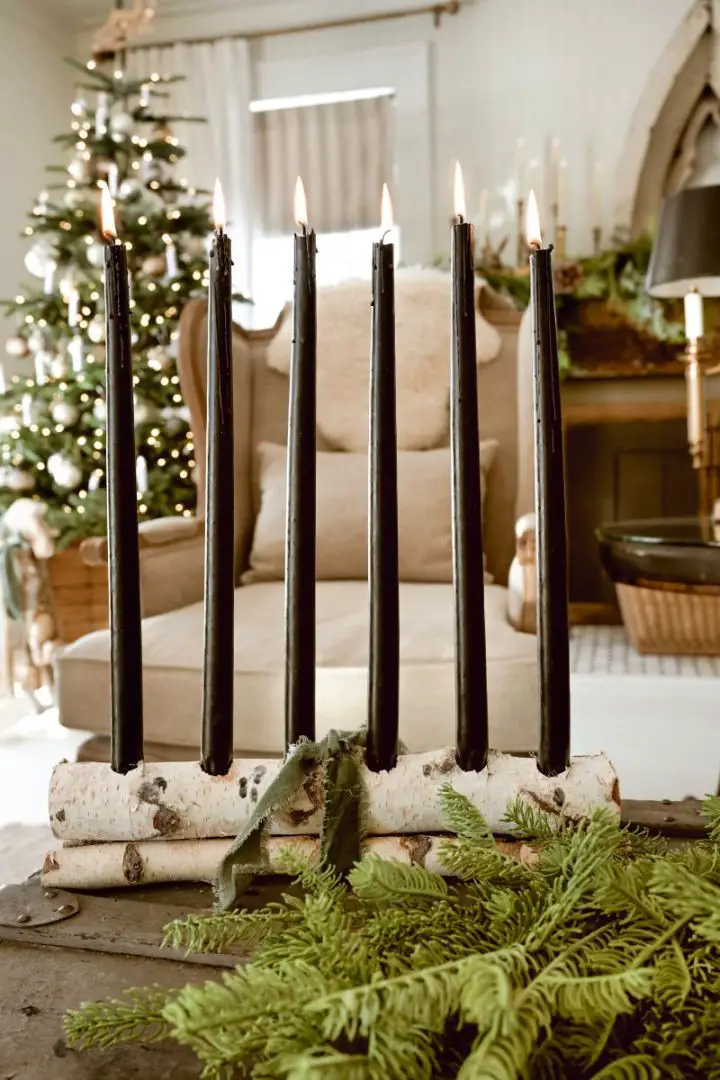
Transforming your home into a cozy oasis with the essence of nature is an achievable and enjoyable task. By crafting a DIY winter log candle holder centerpiece, you can infuse your space with warmth and character. Start by gathering a log, a 7/8-inch spade bit, and a powerful drill to create holes for your taper candles. To ensure a secure fit, soften the candle bottoms with a lighter before placing them in the log’s hollowed-out spaces. This project not only adds charm to your space but also leverages readily available natural materials. For an added touch of rustic sophistication, consider crafting a birch log ladder to harmonize with your new centerpiece and elevate its visual appeal.
Easy DIY Ceramic-look Candleholder
As the days grow shorter, there’s nothing quite like the soft glow of candles to create a cozy atmosphere in your home. To make this ambiance even more inviting, try creating your own unique candleholders using The Lovely Drawer’s DIY guide to crafting ceramic-look holders. This tutorial is perfect for crafty individuals who want to add a personal touch to their decor or handcraft special gifts for loved ones. By working with simple materials like white fimo clay and porcelain paint, you can create beautiful, handmade candleholders that evoke the elegance of ceramic pieces. The process is easy to follow and yields stunning results, even for those new to crafting with clay. As you light up your evenings with these charming creations, you’ll be embracing the warmth and coziness of the winter season.
DIY Quilted Mason Jar Candle Holder
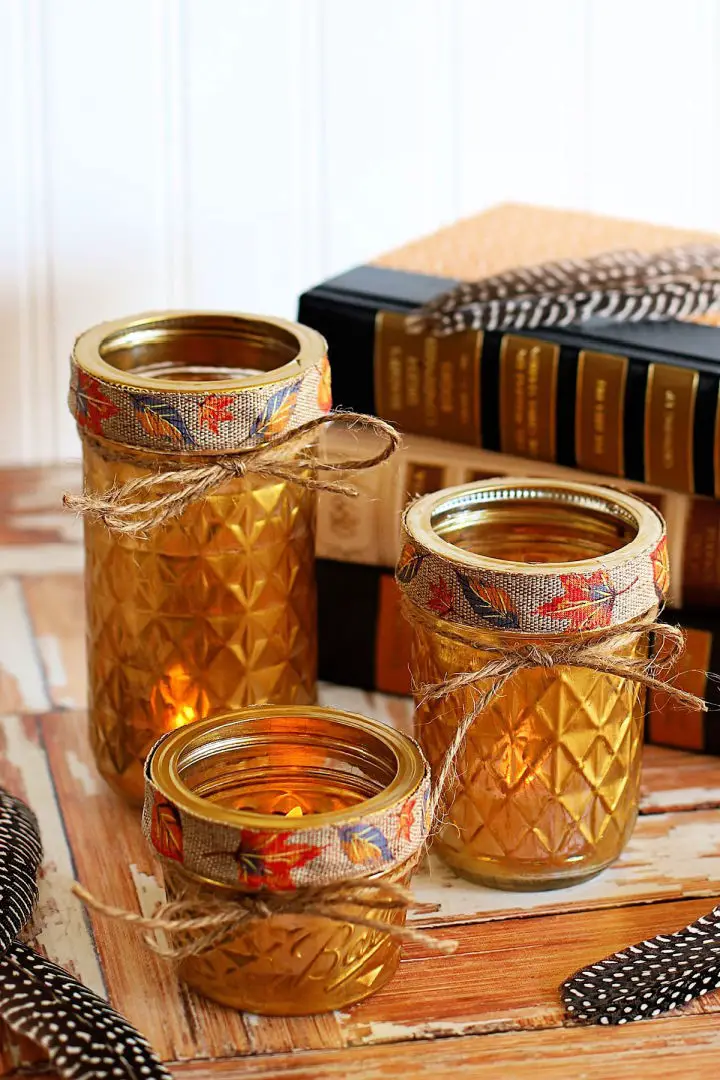
Elevate your holiday gatherings or wedding decor with a touch of whimsy by transforming ordinary Ball jelly jars into enchanting votive candle holders using this easy DIY project from House of Hawthornes. The unique quilted texture of these upcycled jars is given new life through a simple process that requires just a few supplies and some creative flair.
By following Pam Kessler’s step-by-step guide, you’ll learn how to give your votive holders a metallic sheen through painting, and then customize them with seasonal ribbons and battery-operated tea lights for a safe and mesmerizing glow. This budget-friendly project allows you to personalize the holders to suit any occasion, creating a one-of-a-kind piece that reflects your unique style.
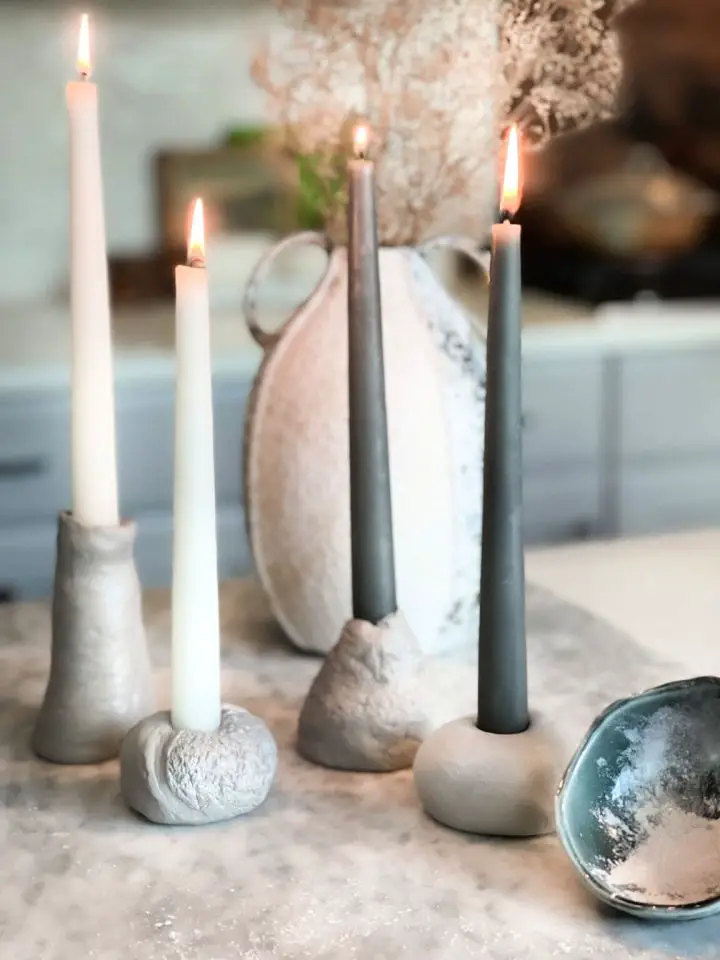
Make a Wabi Sabi Clay Candle Holder
Elevate your home decor with the serene beauty of wabi-sabi-inspired clay candle holders from Smor home. This tactile DIY project is perfect for those who find solace in the imperfect, as it celebrates the organic essence of this Japanese aesthetic. By combining oven-baked clay, basic tools, and your imagination, you’ll craft a unique vessel that adds warmth and character to any room. Follow our step-by-step guide to create an artisanal candle holder that embodies tranquility, simplicity, and a touch of handmade charm. Whether for personal use or as a thoughtful gift, this DIY endeavour promises a fulfilling experience and a truly lovely outcome.
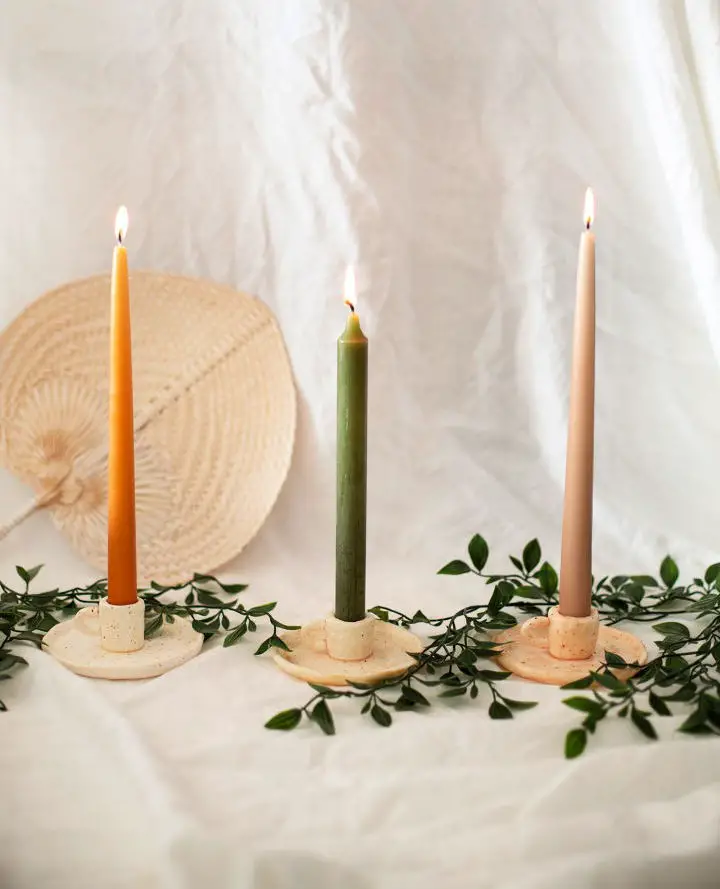
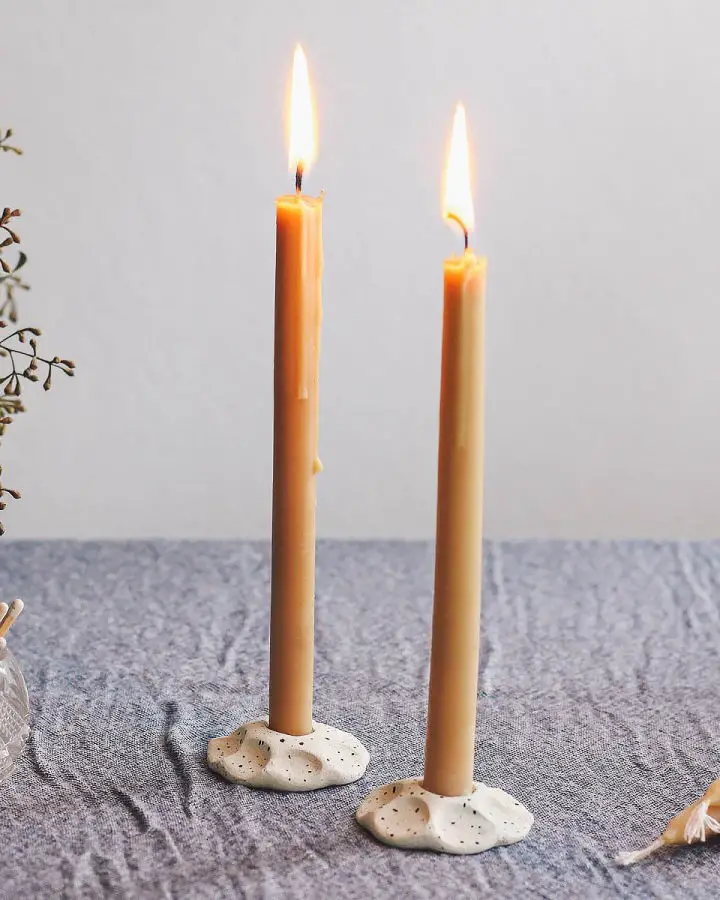
Make Your Own Air Dry Clay Candlestick Holders
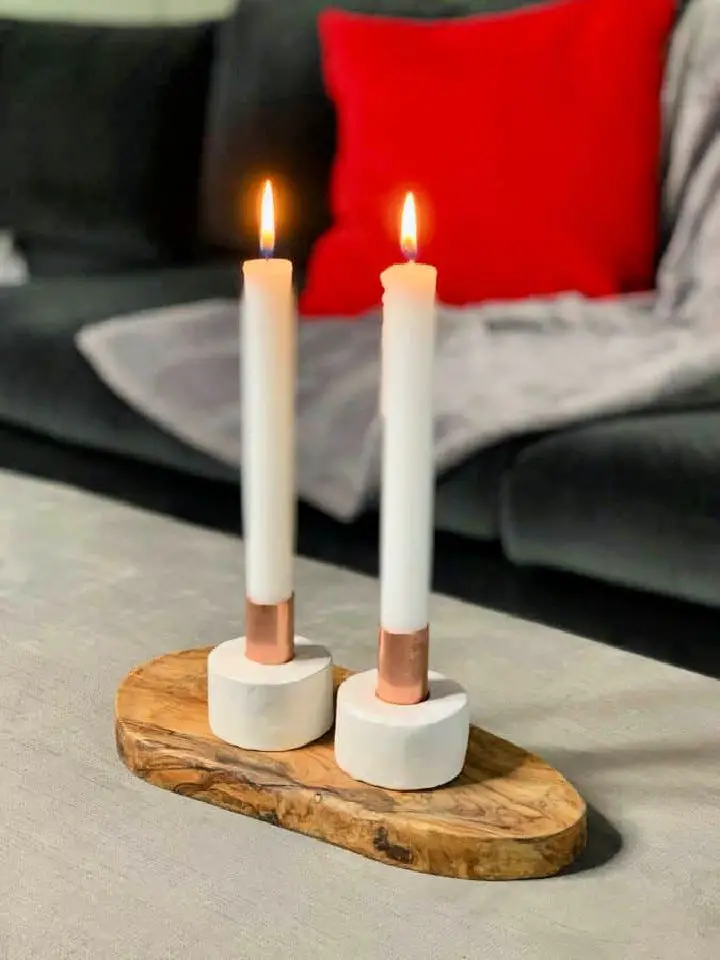
Ignite your creativity and bring a touch of handmade charm to your home decor by crafting stunning DIY clay candlestick holders. Inspired by Artsy Pretty Plants’ engaging tutorial, this guide will walk you through the process of transforming air-dry clay into elegant holders, complete with a copper accent for both practicality and style. Using artist sponges to smooth out imperfections, you’ll be able to create professional-looking pieces that are sure to impress. Whether you’re making these as gifts or as a personal crafting venture, this activity promises a satisfying result. With the right techniques and a little creativity, you can craft your own bespoke candlestick holders that will illuminate any room with a warm, personalized glow.
How to Make a Candlestick Holder
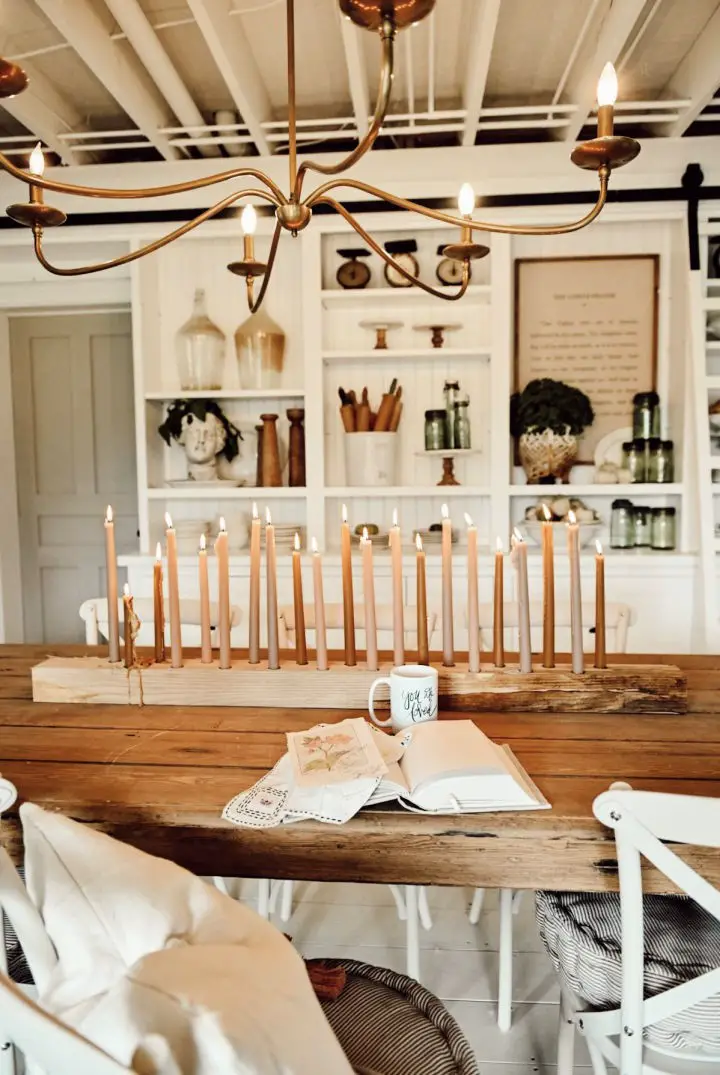
Transform your living space into a warm and inviting sanctuary by crafting a unique candlestick holder, as beautifully demonstrated by Liz Marie on her blog. This DIY endeavor is an effortless yet sophisticated way to inject warmth and sparkle into any room you desire, whether it’s your dining area or a cozy corner. With straightforward instructions from Liz Marie, you’ll be able to create a customizable centerpiece that’s perfect for snuggling up on chilly fall nights or celebrating the festive spirit of the holidays. The best part? You won’t need any advanced tools or materials – just a simple 4×4 piece of wood, a drill, and your preferred tapered candles. Embark on this engaging DIY journey and bring a personalized touch to your surroundings. Visit Liz Marie Blog to get started on this captivating project that promises to elevate your home’s decor.
DIY Clay Candlestick Holder
Transform your home decor with the warmth and personality of handmade clay candlestick holders. By following Lia Griffith’s comprehensive tutorial, you’ll be able to create charming pieces that perfectly complement tall taper candles on your fireplace mantel or dining table. The best part? This DIY project is both easy and rewarding, allowing you to express your unique style through the choice of clay color or acrylic painting. To ensure durability, simply seal your finished holders with Mod Podge or Krylon Clear Spray. With Lia Griffith’s clear guidance and detailed instructions on tools and materials, you’ll be able to enjoy a stress-free crafting experience that yields beautiful results.
DIY Air Dry Clay Candle Holder
Transform your space into a warm and inviting haven by crafting homemade candle holders using DIY clay. This simple yet elegant endeavor allows you to infuse your surroundings with the charm of handmade craftsmanship. By following CocoonRaw’s comprehensive guide, you’ll learn the ins and outs of shaping, texturing, and sealing your unique piece, from selecting the ideal air-dry clay to addressing any cracks that may arise during the drying process. To add an extra layer of visual interest, consider incorporating spices into the wet clay for a one-of-a-kind aesthetic. Once sealed, your finished candle holder will not only add a touch of uniqueness but also ensure its longevity. Whether you’re looking to elevate your home decor or create thoughtful gifts, these clay creations are sure to impress.
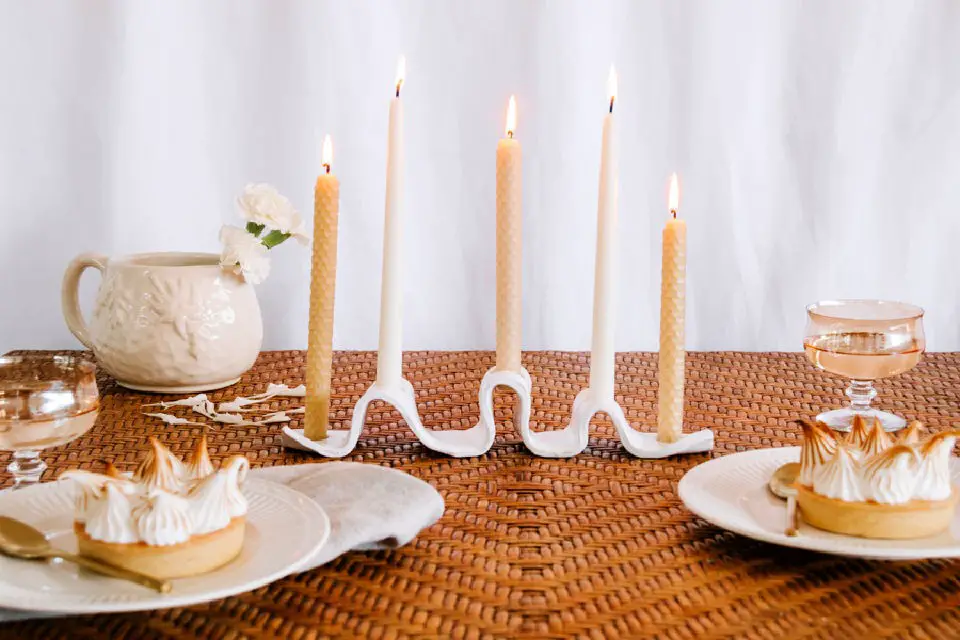
Mid-Century Candlestick Holder Ideas
Transform any festive table into a stunning centerpiece by crafting your own mid-century candlestick holders, inspired by Mandi Johnson’s DIY guide on A Beautiful Mess. This creative project utilizes plaster as its primary material, cleverly molding it within plastic shot glasses and PVC pipe caps to achieve the desired shape. To ensure success, precise measurements are crucial, accompanied by a dash of patience during the drying process. Once assembled, seal your custom creations with polyurethane to protect them from moisture and enhance their durability. Not only will this DIY endeavor save you money, but it also grants you the freedom to personalize the finish, effortlessly harmonizing with your home’s decor.
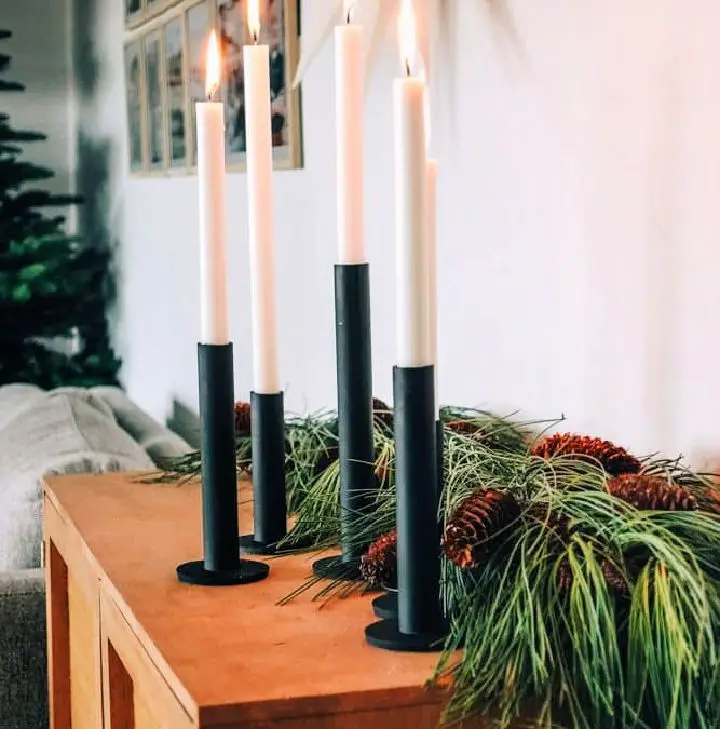
Multiple Taper Candleholder
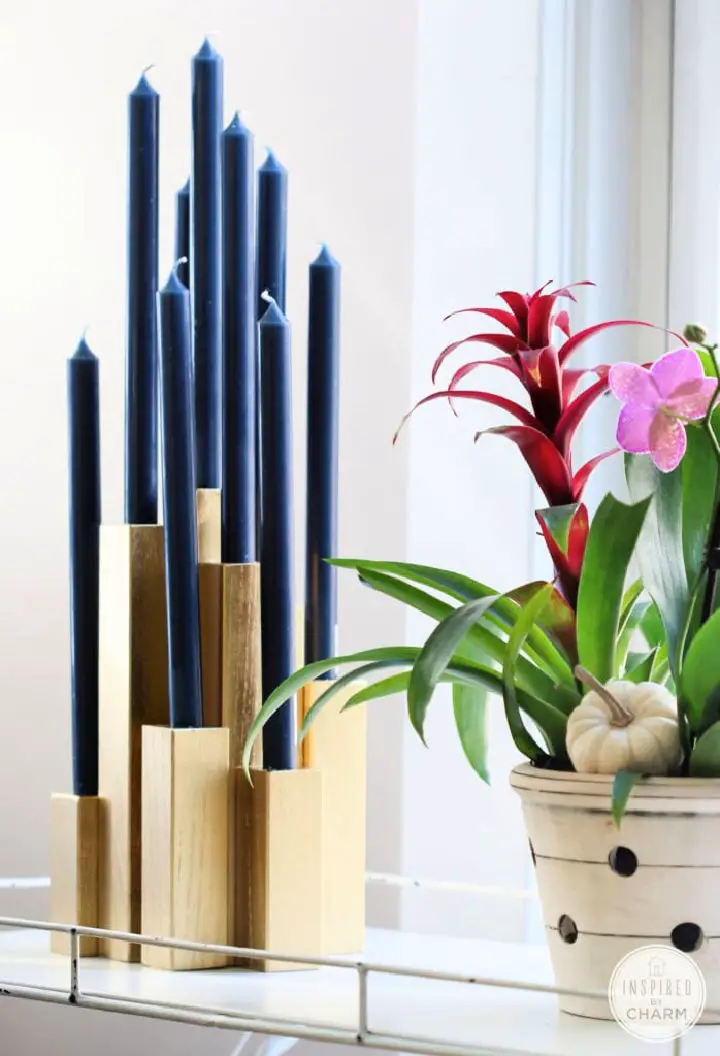
For those seeking to infuse their home decor with a touch of sophistication and personal flair, DIY enthusiasts will find inspiration in Inspired By Charm’s straightforward guide to creating a Multiple Taper Candleholder. This project is ideal for crafty individuals who crave customization options and are eager to put their creative stamp on their living space. The tutorial walks you through the process of crafting this stunning candleholder using wood parson legs, spray paint, and basic woodworking tools like sandpaper, saws, and drills. With the flexibility to choose from a wide range of colors – from luxurious gold tones to deep blues – your unique piece will not only illuminate your room but also serve as a testament to your crafting prowess.
Make a Caned Candle Holder
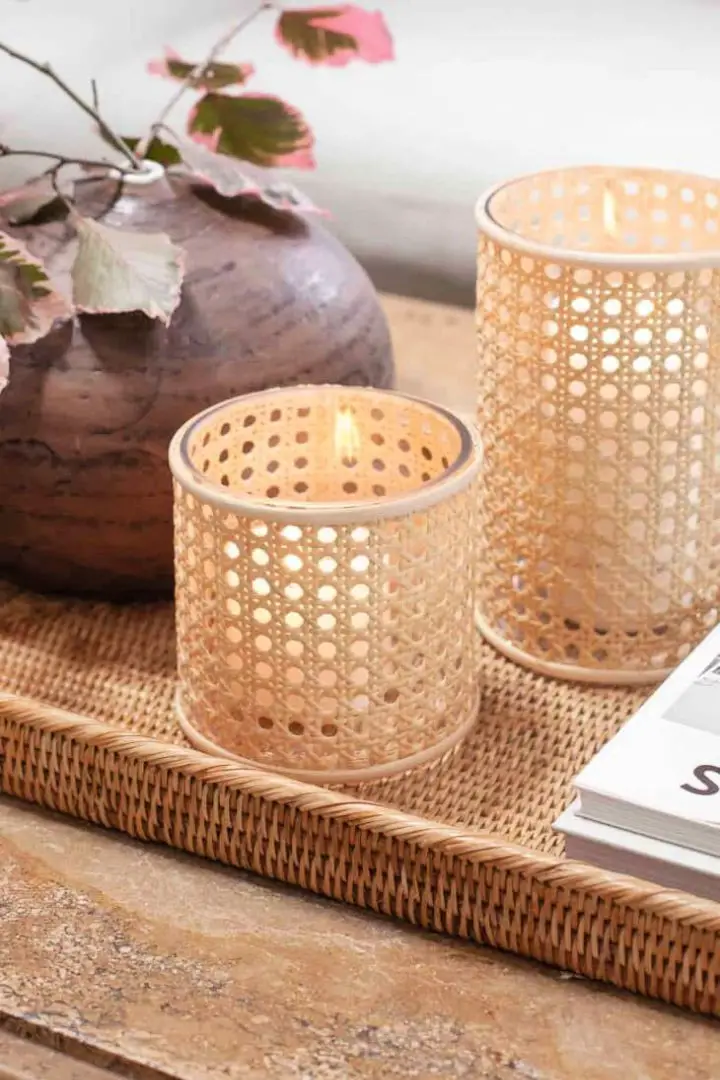
Add a touch of nostalgia to your home’s ambiance by creating a unique caned candle holder. This retro-inspired piece is surprisingly easy to make with just a few simple materials, including glass hurricane holders, caning, and a hot glue gun. By following the straightforward steps outlined in A Beautiful Mess’ tutorial, you’ll be able to transform an ordinary space into one that exudes character and warmth. Whether used as a centerpiece for cozy nights or as a statement piece on your coffee table or dining room, these handmade candle holders will add a personal touch to any room.
DIY Wooden Tealight Holder
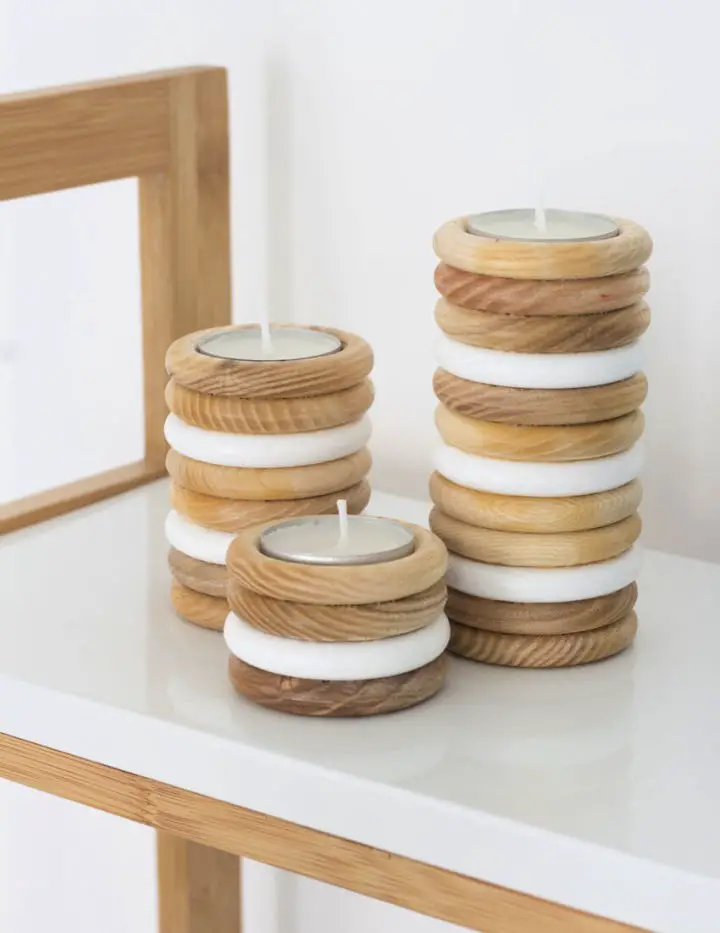
As the sun sets and evening descends, crafting DIY wooden tealight holders can transport you to a cozy realm without denting your wallet. By following Mike from The Crafty Gentleman’s straightforward guidance, you can effortlessly transform wooden curtain rings and Gorilla Wood Glue into stylish candle holders that radiate warmth and ambiance. This ingenious project requires minimal materials yet yields a profound impact on the aesthetic of your space. Whether used as a table centerpiece or decorative accent, these handcrafted holders inject a personalized touch to your decor, inviting a sense of tranquility and relaxation within. As always, safety remains paramount—never leave lit candles unattended. With this simple yet elegant DIY craft, you can imbue your home with an air of uniqueness and sophistication.
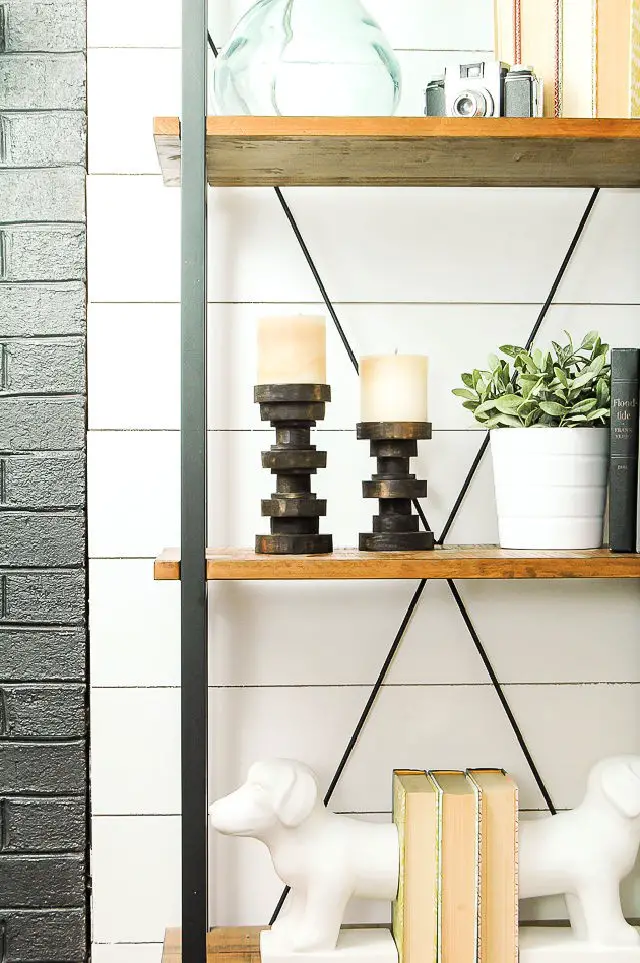
Beautiful Industrial Candle Holder
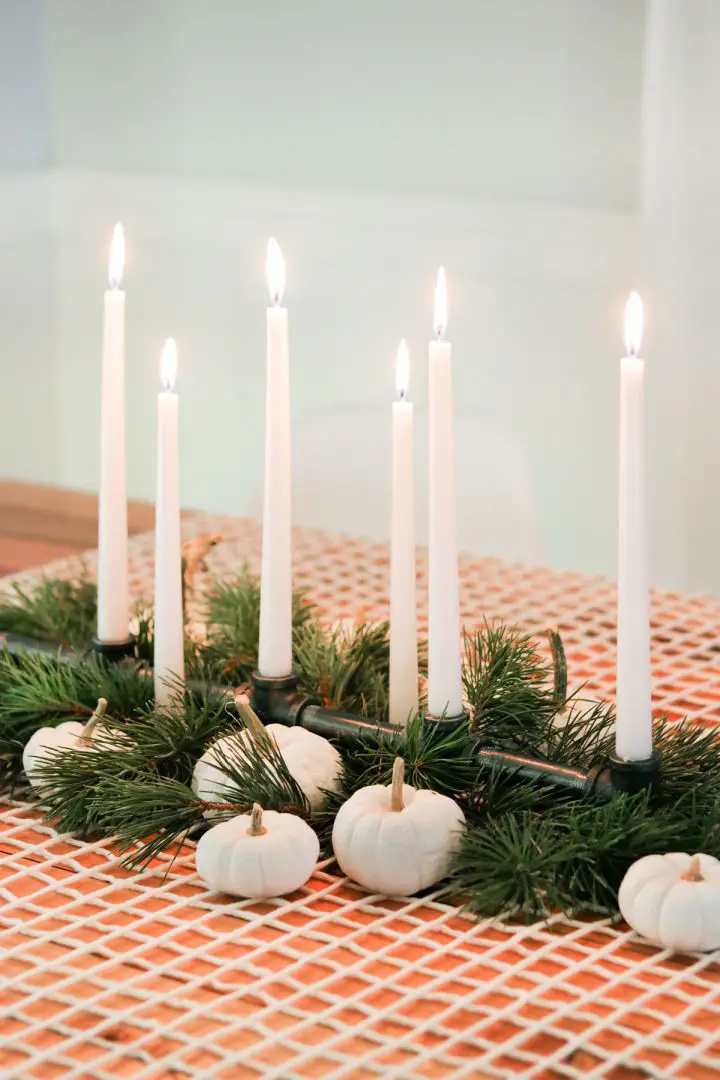
Transform your ambiance into a personalized haven with creative DIY candlestick holder projects, an effortless craft experience. In just 10 minutes, you can create a stylish and industrial candelabra, adjustable in height, that exudes modern masculinity. Perfect for enhancing your home decor, this customizable masterpiece is a breeze to assemble. For a natural look, discover the simplicity of painting real pumpkins white using chalk paint, thanks to a clever baking soda trick. This project not only illuminates your dining room but also serves as a unique centerpiece for any festive gathering. Find inspiration in our collection of extraordinary DIY candle holder ideas that can revolutionize your space.
Build a Wooden Candle Holder
Transforming your home with a personal touch is as easy as crafting DIY wooden candle holders. This rewarding project requires minimal tools and materials, yet yields unique pieces that elevate any room’s ambiance. With Ella Claire & Co.’s comprehensive guide, you’ll master the simple steps of measuring, drilling, sanding, and finishing the wood to create a set of charming candle holders. Perfect for decorating your tablescape or gifting to loved ones, these handmade creations will become cherished keepsakes. As always, prioritize safety by closely monitoring lit candles. Indulge in this craft and bask in the joy of creating something both beautiful and functional for your home.
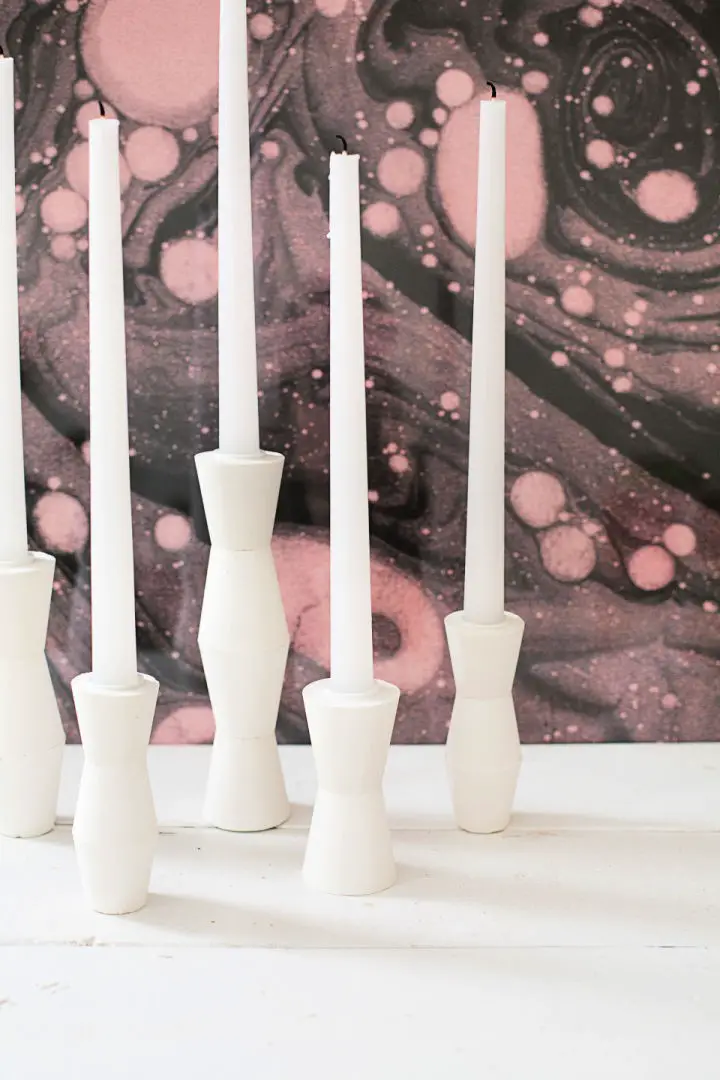
Make Your Own Ombre Taper Candle Holder

Transform your home’s ambiance with a dash of elegance and sophistication by crafting your own DIY ombre taper candle holders. By combining the versatility of polymer clay with the natural beauty of marble tile, you can create a one-of-a-kind piece that reflects your personal style. The process begins with rolling the clay into balls and supporting them on a stick as they bake to perfection. Next, add a touch of luxury by attaching gold spray-painted copper pipe ends and a sturdy marble base. This handmade accent is sure to elevate your table setting and make any season feel special.
Homemade Speckled Candle Holder
Transform any room’s ambiance with unique candle holder creations. Without prior crafting experience or breaking the bank, you can craft your own artisanal-inspired candle holders in under an hour. This DIY project is a perfect blend of functionality and style, making it an ideal holiday gift idea or home decor addition. By following six easy steps using readily available materials, you’ll be surprised at how quickly you can create one-of-a-kind pieces that exude a personal touch. The process is so accessible that even kids can join in on the fun. Simply shape baked clay into holders, add a dash of color with paint, and finish with a speckled pattern for an effortlessly chic look. Get ready to impress friends and family with your handmade creations.
DIY Candle Holder Set Made With Pvc Pipes
Transform your home decor in just 20 minutes with a simple DIY candle holder set using lily ardor’s straightforward guide. By combining pvc pipes, concrete, and spray paint, you can create a stunning piece that adds a touch of elegance to any room. Begin by preparing a level surface and mixing a small batch of concrete. Pour the mixture into molds and insert the pvc pipes, letting them set overnight. Once dry, gently sand the surfaces for a smooth finish and give them a stylish makeover with spray paint, achieving a stone-like appearance. Arrange these handmade candle holders in varying heights to add depth and sophistication to your space. With this easy and creative project, you can infuse your living area with personal flair and elevate its overall ambiance.
Scrap Plywood Candle Holder
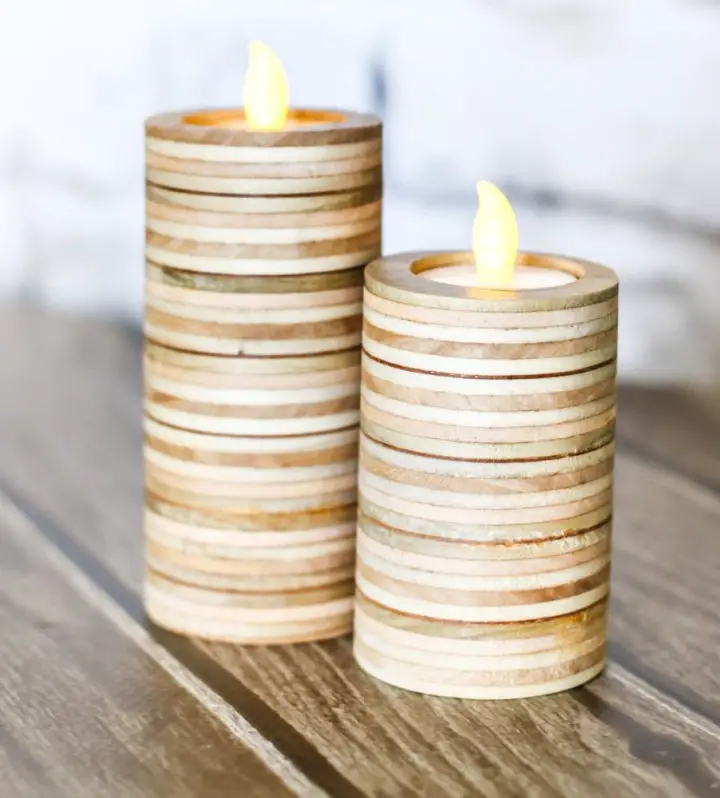
Transform scrap plywood into enchanting tea light candle holders with The House of Wood’s comprehensive DIY guide. This step-by-step tutorial demystifies the process by guiding you through selecting the right tools – including a hole saw and forstner bit – to the final touches of sanding and applying a clear polyurethane coat, ensuring a flawless finish. Perfect for adding warmth and character to your home or crafting unique gifts, these candle holders offer an ingenious way to breathe new life into discarded materials. With Jen’s expert guidance, you’ll enjoy a seamless crafting experience while producing stunning, functional pieces that exude a personal touch.
Dollar Tree Candleholder Design
Transforming everyday objects into elegant farmhouse-style decor pieces doesn’t have to be expensive. With just a few simple supplies, you can turn plain Dollar Tree finds into chic candleholders that add a touch of sophistication to any room. A quick and easy DIY guide from The Latina Next Door shows how to take stemless Harvest candleholders, tea light holders, and basic materials like spray paint and wooden beads and turn them into one-of-a-kind decor pieces. By using E6000 glue for a sturdy finish and adding customizable wooden beads, you can create unique centerpieces or accents that perfectly capture your personal style. With this budget-friendly project, you can elevate the ambiance of any space without breaking the bank.
DIY Concrete Candle Holder Using Plastic Bottles
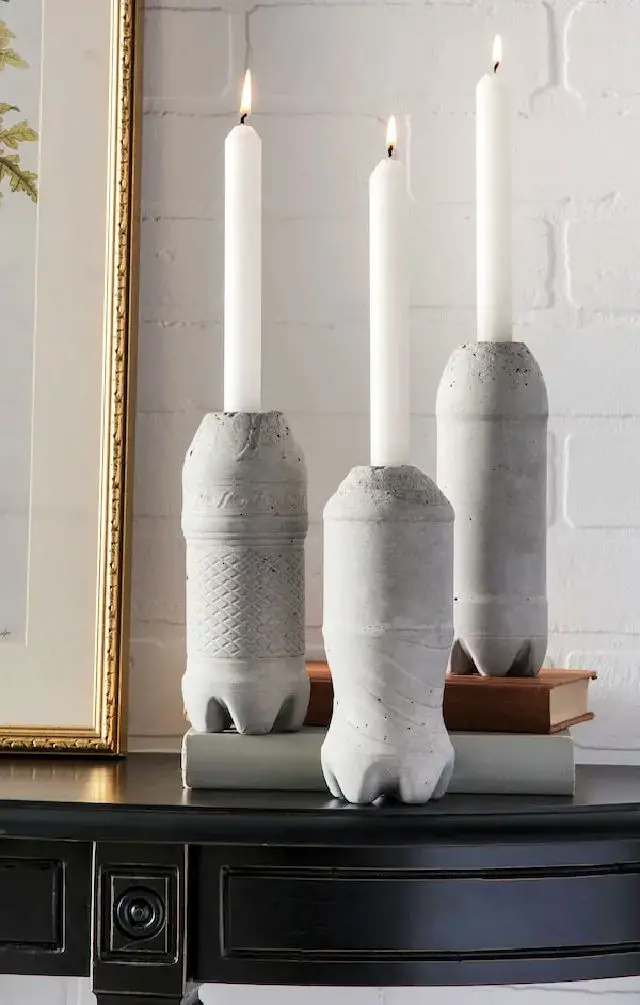
Looking to infuse your space with a personalized touch? Why not give DIY concrete candle holders a try? With this easy-to-follow guide, you can upcycle plastic bottles into unique and eye-catching candle holders using just a few simple materials. By combining Quikrete, recycled bottles, and everyday tools, you’ll be able to create functional and stylish pieces that are uniquely yours. Simply screen out any large rocks from the mix, add some cooking spray for ease of use, and finish with paint for an extra decorative pop. With this step-by-step process, you can craft a seamless experience and enjoy the satisfaction of creating something truly special.
Floral Candle Holders Using Vintage Handkerchiefs
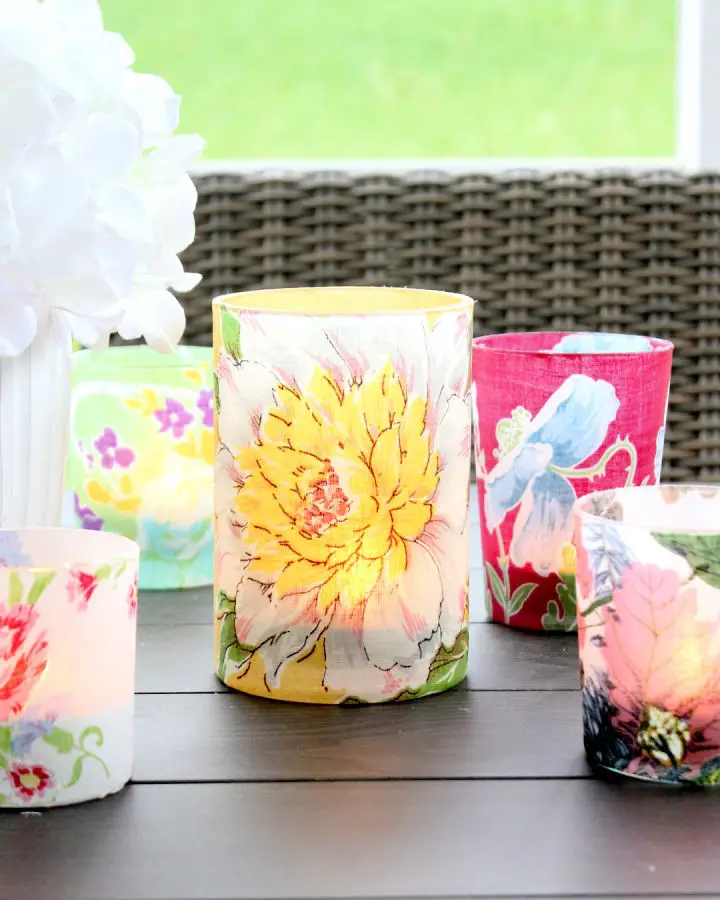
Transforming ordinary glassware into charming floral candle holders is a delightful DIY endeavor that requires minimal effort but yields maximum aesthetic appeal. By repurposing vintage handkerchiefs and combining them with clear glasses, Mod Podge, and a dash of creativity, you can create one-of-a-kind decorations that radiate warmth and elegance. These handmade votives are perfect for enlivening a dinner table or brightening a cozy corner, all while evoking the sophisticated charm of Anthropologie without breaking the bank.
With straightforward instructions and insightful tips at your disposal, this project is an ideal opportunity to infuse your home decor with a personal and stylish touch. By embracing your creativity and following a few simple steps, you can transform everyday materials into extraordinary pieces that are sure to impress.
Easiest DIY Farmhouse Candlesticks
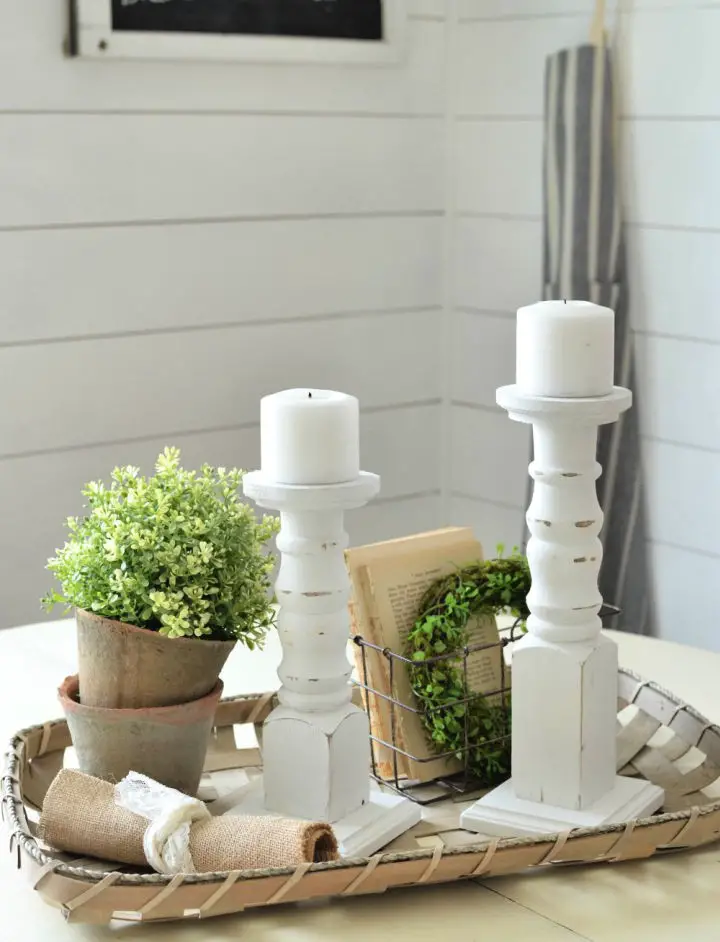
Transform ordinary spaces into extraordinary ones by creating stylish DIY pillar candle holders that exude sophistication. With Sarah Joy’s comprehensive guide, you’ll uncover the secrets to crafting charming farmhouse candlesticks using basic tools, a splash of paint, and a dash of creativity. Whether you’re a seasoned crafter or just starting out, this project promises to bring warmth and ambiance to your home – or make it a thoughtful gift for loved ones. Sarah’s expert tips will walk you through selecting the perfect spindle height, achieving a distressed farmhouse look, and more, ensuring a seamless crafting experience.
DIY Epoxy Resin Candle Holder
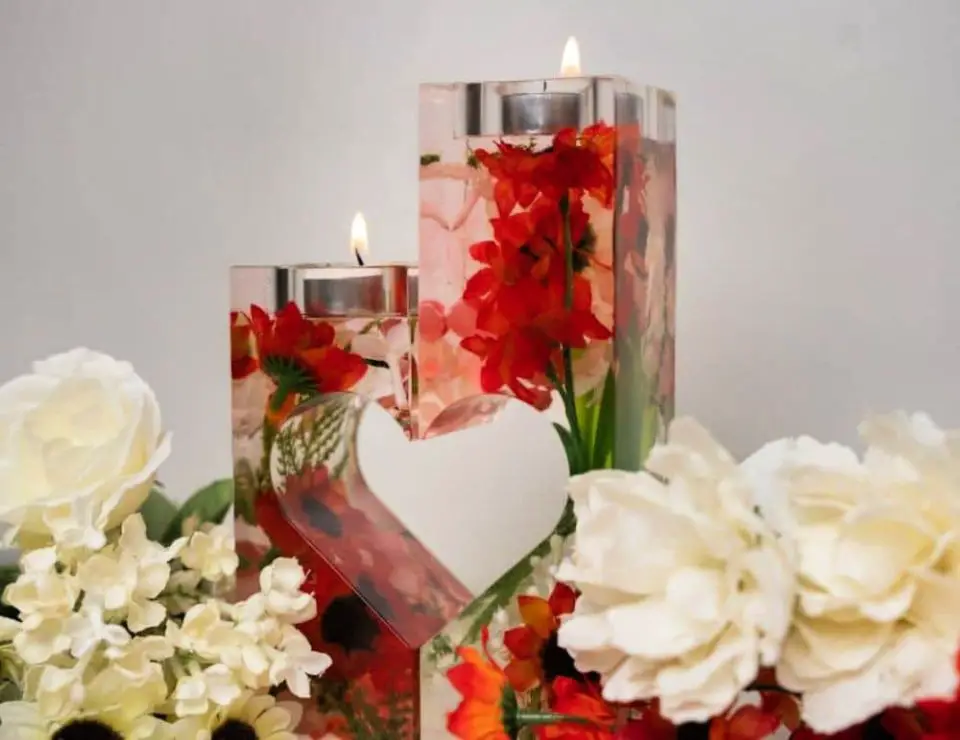
Crafting DIY epoxy resin candle holders allows individuals to infuse their personal style into home decor. Ashley Randolph’s comprehensive guide on the Resin Crafts Blog provides a step-by-step approach to creating these unique pieces while prioritizing safety and creativity. The tutorial emphasizes the importance of handling resin with care, given its sensitivity to high temperatures. By employing specific molds and materials, readers can learn how to encapsulate dried or faux flowers within resin. This involves initially applying a Table Top epoxy to secure the flowers, followed by a Deep Pour epoxy to fill the mold. The finished product is not only functional but also serves as an eye-catching accent for any room. To ensure a safe and enjoyable crafting experience, it’s essential to don safety gear like gloves and glasses. As individuals design their own resin candle holders, they can let their creativity shine through.
Handmade Fall Leaf Candle Holder
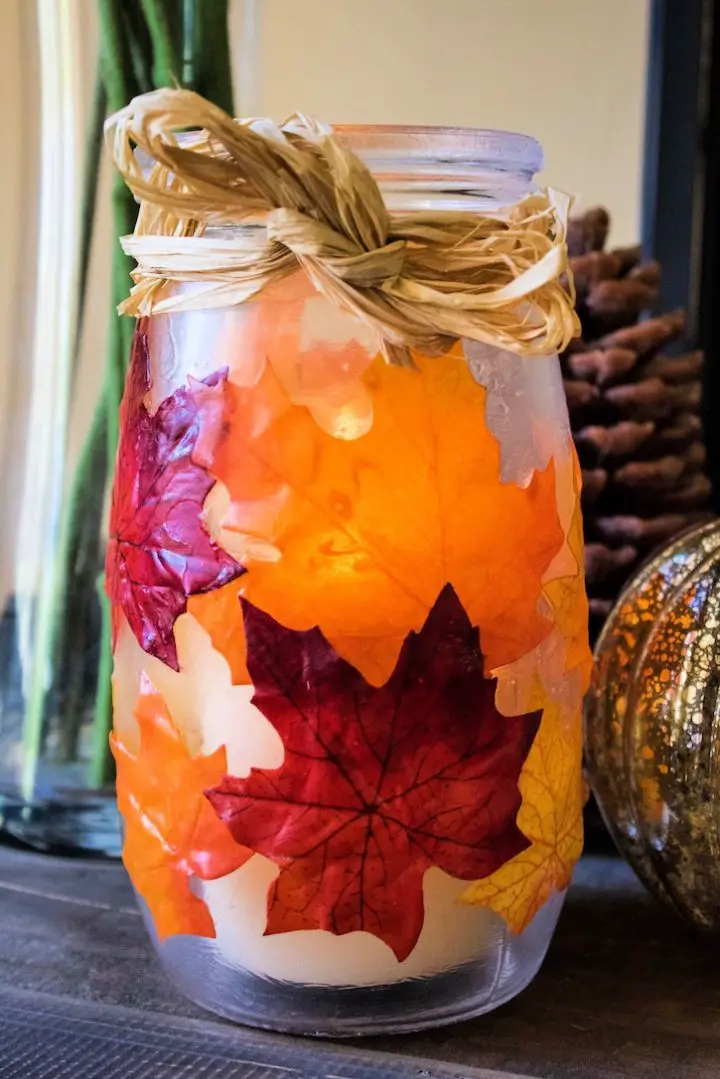
As the autumn season approaches, infuse your space with a warm and inviting ambiance by crafting a handmade glass jar candle holder. This charming project is suitable for crafters of all ages, from teens to adults and seniors. Not only does it serve as a beautiful addition to your fall décor, but it also makes a thoughtful gift for the holidays. With just a few simple supplies like a glass jar, Mod Podge, leaves, and optional twine, you can create a cozy glow that will illuminate your home. Use real or faux leaves to add texture and depth, and a sponge brush to layer them effortlessly. Allow your creativity to shine by overlapping the leaves in various directions, waiting for the Mod Podge to set, and then illuminating your jar with a candle or fairy lights. For an added touch of elegance, embellish your jar with a raffia, twine, or ribbon tie. This versatile piece can serve as both a vase and utensil holder, making it both functional and stylish. By crafting this easy and elegant fall candle holder, you’ll be able to light up your home with the warmth and coziness of the season.
Inexpensive DIY Pillar Candle Holder
Elevate your dining experience by creating custom DIY candlestick holders that reflect your personal style. While store-bought options may be tempting, making your own pillar candle holders can be a fun and rewarding DIY project that won’t break the bank. By repurposing scrap wood and utilizing basic tools, you can craft unique pieces that add a touch of elegance to any room. Start by marking your wood with a jumbo circle template, then cut and sand the shapes to achieve a smooth finish. For smaller circles, consider using a drill press and hole saw bit for precise results. Once sanded, stack and secure the pieces together using wood glue, finishing them off with a rich Espresso stain or paint that matches your decor. This DIY endeavor not only adds a personal touch but also injects charm and ambiance into any space, making it perfect for those who value handcrafted beauty. With minimal investment, you can create beautiful candle holders that complement any room, giving your home a unique and inviting atmosphere.
Conclusion:
In conclusion, creating homemade DIY candle holders offers a unique opportunity for self-expression and creativity. By following the steps outlined in this process, you’ll have the freedom to customize your design and make it truly one-of-a-kind. Whether you’re looking to add a personal touch to your decor or create a set of unique pieces to sell, the possibilities are endless. It’s essential to prioritize safety and use proper materials when crafting your candle holders, ensuring not only their aesthetic appeal but also their safe use. With these guidelines in hand, gather your supplies and let your creativity shine as you bring light to your space with your handmade creations.
