Personalizing one’s living space through DIY projects is a fulfilling experience, as it allows individuals to infuse their surroundings with unique touches that reflect their personality. The process of creating a handmade rug can be especially rewarding, offering a sense of accomplishment and pride in one’s ability to craft something from scratch. Whether you’re new to crafting or an experienced enthusiast, our collection of 25 DIY rug ideas provides the inspiration and guidance needed to produce stunning results. By exploring the fundamentals of rug-making, including customization options, advanced techniques, and troubleshooting common challenges, individuals can create a comprehensive guide that empowers them to tackle their own projects with confidence. A crucial aspect of this process is understanding the importance of selecting suitable materials, designing the rug’s aesthetic, and maintaining its condition over time. With this knowledge, anyone can transform their living space into a cozy haven that reflects their personal style.
Quick DIY Rug Making Tutorial
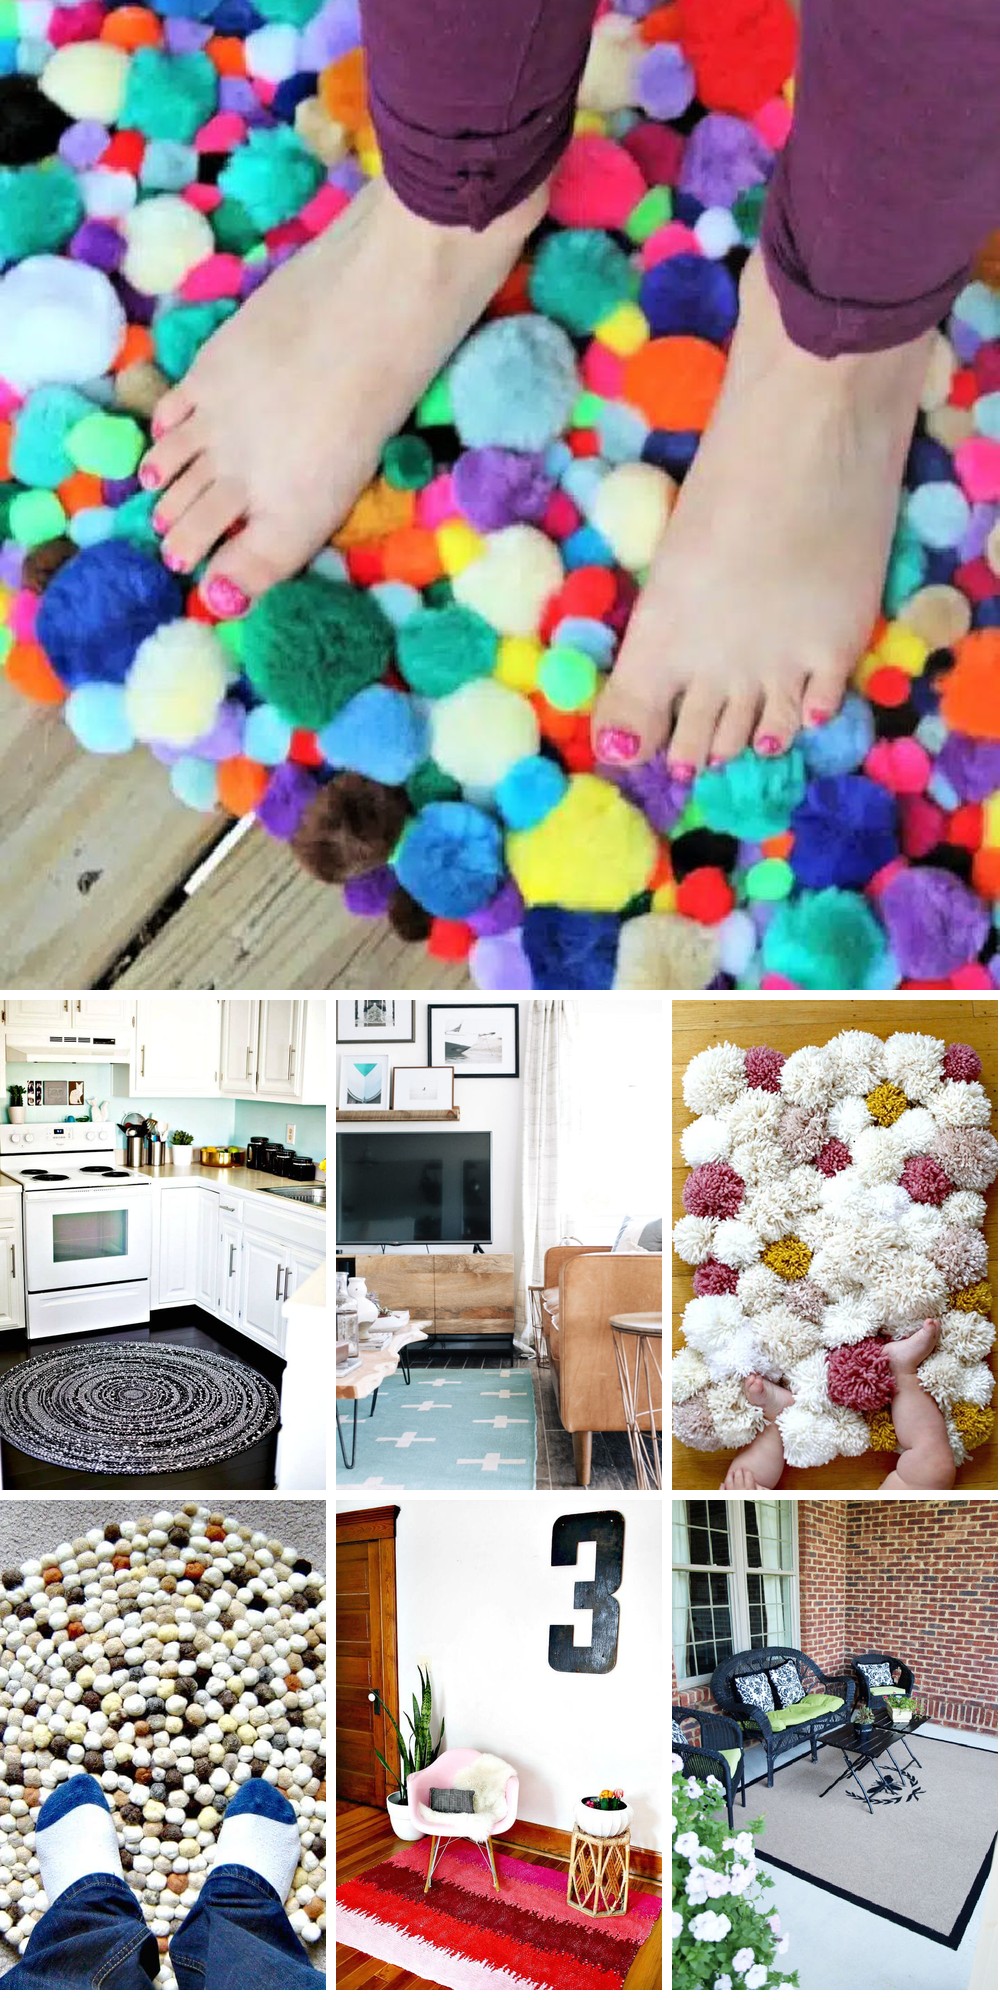
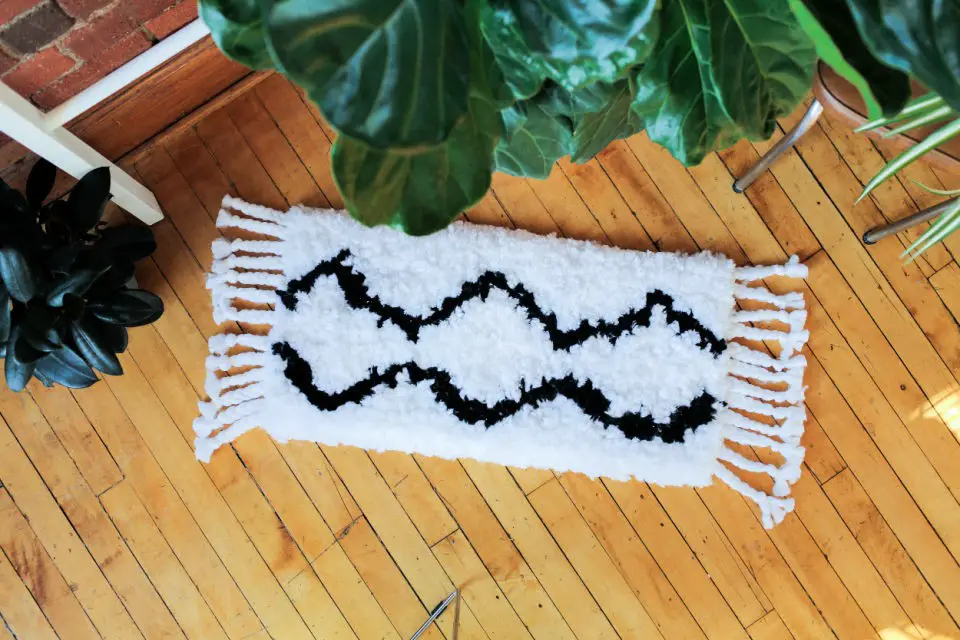
Crafting a shaggy rug at home can be an incredibly rewarding DIY endeavor. This comprehensive guide will walk you through the essential steps, tools, and materials required to create your own plush, vibrant shaggy rug. Whether you’re an experienced crafter or just starting out, this tutorial has been designed to ensure that everyone can follow along and produce a stunning piece for their home.
What You’ll Need
To begin, you’ll need a few essential supplies. Start by gathering a non-slip tapestry or canvas of your preferred size – the example uses a 21-inch by 15-inch canvas, but feel free to adjust based on your creative vision. You’ll also require a pair of scissors, as well as a darning needle (although not strictly necessary, it can be a useful addition). For hooking and yarn manipulation, have a 3mm-sized crochet hook at the ready – any size between 2mm and 3.25mm will suffice. Finally, prepare your worsted weight or chunky yarn in either one or multiple colors, depending on the complexity and aesthetic of your design.
Step-by-Step Guide
Transform Your Space with 25 Unique Homemade DIY Rug IdeasUnleash Your CreativityTo start creating your own rug, begin by crafting the border of your canvas. Identify the second row and column to ensure a seamless edge.Crocheting the BorderMake a simple knot by pulling your yarn through the canvas, then proceed with single crochet stitches, looping through the canvas holes until you reach the end of a row. When approaching a corner, make three crochet stitches in the same space to turn it smoothly, before continuing along the new edge. Repeat this process on all sides of the canvas, and when complete, weave in any loose ends.Filling in the RugTo start filling your mat, choose the shorter side of the canvas as your starting point. Insert your hook into the first hole and create loops around 1.25 to 1.5 inches long, moving consecutively through the holes.Color ChangingIf you’re using multiple colors, simply tie a new yarn color at the end of each row, allowing the colors to blend seamlessly. When reaching the desired length for a section, secure the yarn ends to prevent unraveling.Finishing TouchesOnce your rug is filled, trim any loops that exceed the others in length to achieve a uniform appearance. This crucial step ensures a polished finish.
Video Tutorial
To complement our comprehensive written guide, we’ve also created a helpful step-by-step video tutorial, aptly titled ‘DIY Shaggy Rug Tutorial’. This visual companion piece serves as an excellent accompaniment to our written instructions, allowing you to better grasp each technique and ultimately achieve the best results in your DIY shaggy rug-making endeavors.
Customization Tips for Your DIY Rug
When crafting a DIY rug, you’re not limited by commercial designs or color palettes. Instead, you can infuse your rug with personal touches that reflect your personality and style. To achieve this, consider the following key factors.Firstly, think about the colors that will best complement the room where your rug will reside. A bold pop of color can add vibrancy to a neutral space, while harmonious hues can create a sense of cohesion with existing decor. You may also choose to draw inspiration from the room’s color scheme and incorporate matching shades into your design.Next, explore the world of patterns and textures to add depth and visual interest to your rug. Stripes, geometric shapes, or abstract designs can all contribute to a unique and captivating look. Moreover, combining different materials – such as yarns and fabric strips – can introduce tactile elements that invite exploration and interaction.Of course, no DIY rug would be complete without some personal flair. Consider adding monograms, favorite quotes, or shapes that hold special meaning to make your rug truly one-of-a-kind. These details serve as a reflection of your personality and add an extra layer of storytelling to the piece.In addition to aesthetic considerations, think about the practicalities of your rug’s design. Measure your space carefully to determine the ideal size for your rug, taking into account factors like foot traffic and intended use. This will help you create a functional piece that also contributes to the overall ambiance of the room.Finally, don’t be afraid to experiment with dyes if you’re struggling to find the perfect hue. Natural dyes can provide a range of beautiful colors while also being an eco-friendly option.By incorporating these expert tips into your DIY rug-making process, you’ll create a stunning piece that not only reflects your personal style but also adds warmth and character to your home.
Advanced Techniques for DIY Rug Making
If you’ve already mastered the fundamentals of rug making and are looking for ways to push your creative boundaries, there are several advanced techniques worth exploring. One area to focus on is complex weaving patterns, such as herringbone, twill, or chevron designs. These intricate patterns require careful planning and execution, but they can add a level of sophistication and visual interest to your rug. Another approach is to experiment with different dyeing methods, including shibori, tie-dye, and batik. These techniques allow you to create custom colors and patterns that can really make your rug stand out. Additionally, incorporating texture through the use of materials like wool, cotton, silk, or recycled fabrics can add a new dimension to your rug. You can also experiment with different hooking and braiding techniques to create interesting tactile experiences. Finally, consider trying 3D effects like tufting or shagging to give your rug some extra depth and visual interest. By mastering these advanced techniques, you’ll be able to take your DIY rug-making skills to the next level and create truly unique pieces for your home.
Troubleshooting Common Issues in DIY Rug Making
Crafting a DIY rug can be a rewarding experience, but it’s not uncommon to encounter issues along the way. Fortunately, anticipating and addressing common problems can make all the difference in achieving a stunning final result. One of the most frustrating issues is uneven edges, which can be attributed to inconsistent tension during the weaving process. To overcome this, it’s essential to maintain consistent tension throughout. Another challenge that arises is color bleeding, where dyes may run or spread unexpectedly. To prevent this, it’s crucial to pre-wash materials and test dye stability before starting a project. Material fraying is another issue that can occur, causing loose ends or an unappealing finish. To combat this, using fray check solutions or hemming edges can help maintain a clean and tidy appearance. Finally, loose weaves can compromise the overall integrity of the rug, making it prone to damage or wear. To address this, tightening the weave by adjusting tension or using a smaller gauge material can be effective. By being mindful of these potential issues and taking proactive steps to overcome them, you’ll be well on your way to creating a beautiful and functional DIY rug.
Maintenance and Care for Your DIY Rug
To keep your DIY rug looking its best, it’s essential to adopt a regular maintenance routine and take steps to prevent damage. Here are some key tips to ensure your rug remains in excellent condition:Start by regularly vacuuming your rug to remove dirt and dust that can accumulate on the surface. For more thorough cleaning, use a mild detergent and water, but be sure to avoid soaking the rug as this can cause damage.When spills or stains occur, it’s crucial to address them promptly. Use a clean cloth to blot the area and apply a gentle cleaning solution if necessary. Always test any cleaning solution on a small, inconspicuous area first to ensure it won’t cause further damage.In addition to regular cleaning, it’s also important to take steps to prevent sun damage, which can cause colors to fade over time. Consider rotating your rug or using window treatments to minimize exposure to direct sunlight.When storing your rug, roll it rather than folding to prevent creases from forming. Store the rug in a cool, dry place, away from pests and other potential hazards.
Embracing Sustainability in Rug Making
Incorporating eco-friendly principles into your DIY rug-making process doesn’t just benefit the environment – it also adds a personal touch and storytelling element to your craft. To create a sustainable rug, consider the following strategies:
Repurpose with Purpose: Turn old clothing or recycled fabrics into your rug material, reducing waste and giving new life to previously discarded items.
Nature’s Palette: Opt for natural dyes derived from plants instead of synthetic alternatives, which can harm the environment. This not only benefits the planet but also yields unique, earthy tones in your finished rug.
Biodegradable Base: Choose materials that are biodegradable, such as wool or cotton, to ensure your rug will eventually decompose without harming the environment.
Local Love: Support local suppliers when purchasing materials for your rug, reducing your carbon footprint and contributing to the community’s economic growth. By adopting these sustainable practices, you’ll create a rug that not only reflects your personal style but also promotes environmental stewardship.
FAQs About DIY Rug Making
Embark on a journey of creative discovery as you delve into the world of DIY rug making with this exhaustive FAQ guide. Within its pages, uncover expert advice and insightful tips to help you craft stunning rugs in the comfort of your own home.
What materials do I need to start making a DIY rug?
To embark on a DIY rug-making project, start by selecting a foundation material such as burlap, canvas, or a non-slip underlay. In addition to this base, you’ll require fabric or yarn in your preferred hues, along with essential tools like scissors and a rug-creation device like a crochet hook or latch hook, depending on the technique you wish to employ.
How can I choose the right colors for my rug?
When selecting a rug, consider the room’s ambiance by taking cues from the existing colors in your decor. Think about how you can harmonize with complementary shades or create visual interest with contrasting hues. If you’re indecisive, opt for neutral tones like beige, gray, or navy, which tend to blend seamlessly into most spaces and provide a versatile backdrop for your design.
Can I make a rug if I’ve never done any crafting before?
Rug making is an art that offers endless possibilities for creative expression. Whether you’re just starting out or looking to refine your skills, the beauty of rug making lies in its adaptability. Begin with fundamental techniques like braiding or basic latch hooking, and as your confidence grows, you can experiment with more intricate methods.
How do I keep my rug from slipping on the floor?
When creating a DIY rug, it’s crucial to ensure that it remains stable and doesn’t shift around the room. To achieve this, consider using a non-slip rug pad beneath your handiwork. These pads come in a range of sizes, allowing you to choose one that perfectly complements your rug’s dimensions. Moreover, their versatility lies in being easily cut to size, guaranteeing a seamless fit between the two.
What’s the best way to clean my DIY rug?
When it comes to maintaining your DIY rug, regular vacuuming is key to removing dust and debris. For more stubborn stains or spills, opt for gentle spot cleaning using a mild detergent and water. However, be cautious not to overdo it – soaking the rug can cause damage. To avoid any mishaps, always test your chosen method on an inconspicuous area first. By keeping these simple guidelines in mind, you’ll be well-equipped to keep your handcrafted rug looking its best and adding warmth and personality to your home.
25 Homemade DIY Rug Ideas to Make
Transform your living space with innovative and eclectic rug creations that are both functional and visually stunning. Explore a diverse array of 25 unique DIY rug ideas, ranging from intricately braided to meticulously woven masterpieces, each one offering a distinct opportunity to express your personal style.
Making a Punch Needle Leopard Heart Rug
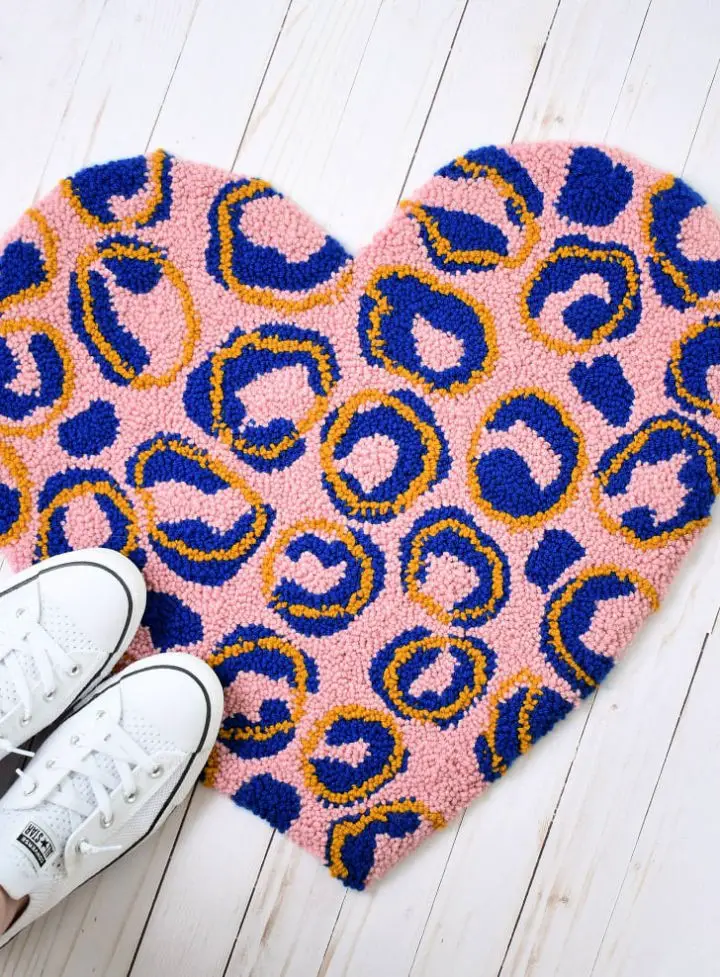
Unlock the creative potential of your home by crafting a one-of-a-kind leopard heart rug using a DIY punch needle technique. This innovative method, perfect for individuals with arthritic hands, allows you to bring your unique design style and color palette to life. The process is surprisingly straightforward, requiring just a few basic materials: a punch needle tool, artist canvas stretcher bars, a staple gun, Monk’s cloth, yarn, sharp scissors, and beige embroidery floss. Begin by constructing a frame to support your rug, then transfer your chosen pattern onto the Monk’s cloth. Finally, use the punch needle tool to bring your design to life, punctuating it with yarn in a material of your choice – cotton, wool, or acrylic. With this tutorial, you’ll not only gain the skills to create your own stunning rug but also have access to a library of free printable punch needle patterns, empowering you to transform your living space into a true reflection of your personality.
Cool DIY POM POM Fluffy Rug
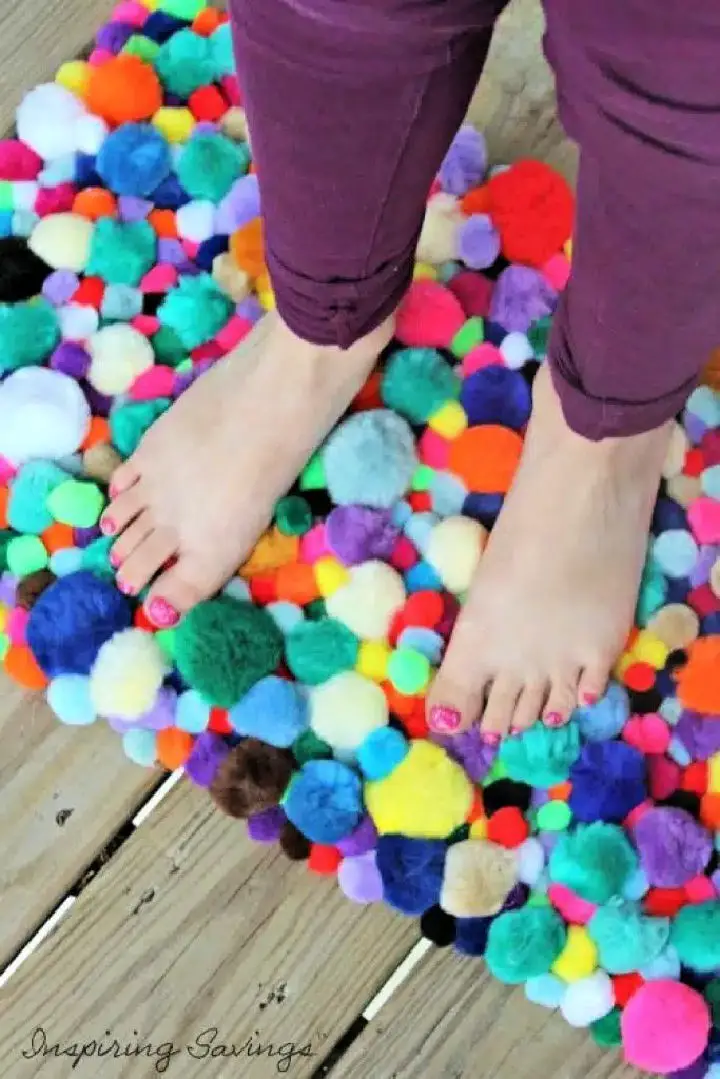
Transform your home decor with a vibrant DIY pom pom rug that’s as cozy as it is eye-catching. To create this lively space, you’ll need a few simple materials: a collection of brightly colored yarns, a pom pom maker, and some sharp scissors. The key to bringing the design to life lies in its flower pattern, which requires using different colors for borders and contrasts to make the design truly pop.
This project is about more than just aesthetics – it’s also a practical way to add warmth and comfort to your room on chilly days. To ensure the process runs smoothly, be sure to keep your scissors sharp and use the pom pom maker to speed things along. Additionally, using a honeycomb-style rug backing will give you non-slip functionality that keeps everything in place.
In the end, this DIY project is as much about creativity and design as it is about labor – the result is a truly unique piece of home decor that’s both functional and beautiful.
How to Make a Rag Rug Using Fabric Strips
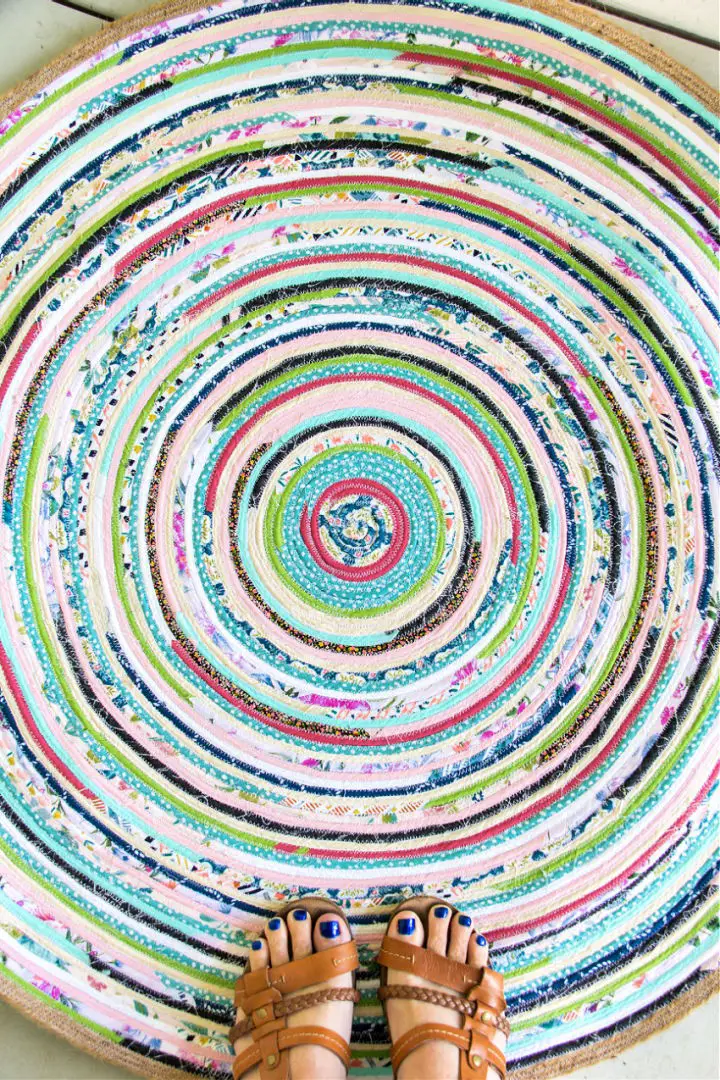
Transform bland spaces into cozy havens with a DIY rug that’s as easy as it is affordable. Repurpose fabric scraps from previous projects, like our DIY letter pillow or zipper phone purse, to create a one-of-a-kind, homey rug that demands no special skills or attention to detail. All you need are fabric strips, a craft cord, jute cord, sewing machine, white cotton reels, and scissors.
The process is straightforward: cut fabric into strips, wrap them around the cord, and sew them together in a snail-shell pattern. To maintain uniformity, keep the rug flat as it grows larger. Finally, use a jute cord to add a clean finish. This fun project is sure to spark your creativity and become a brilliant addition to your decor.
Make Your Own Donuts Rug
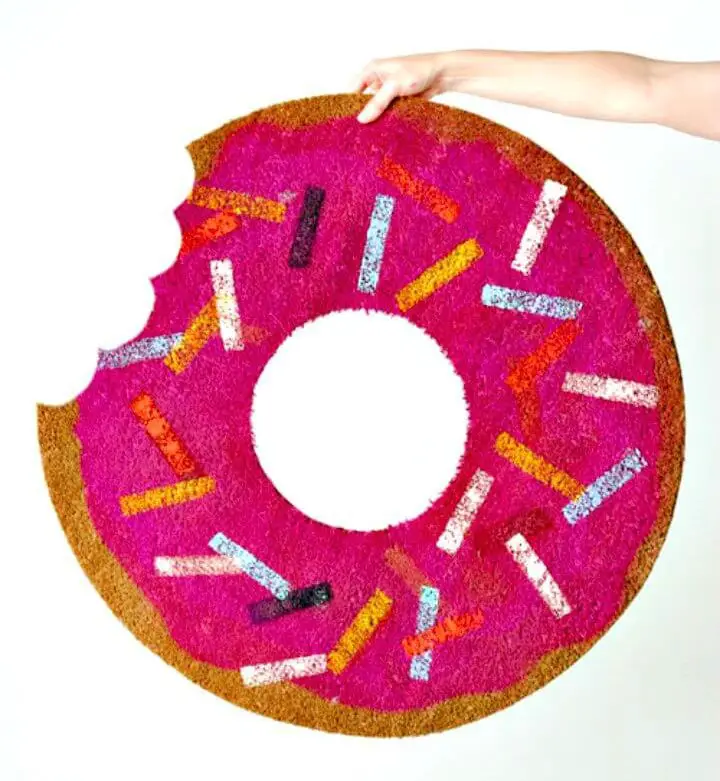
As we celebrate National Donut Day, why not give your home a sweet treat of its own? Transform an ordinary Ikea welcome mat into a scrumptious donut-themed rug that’s sure to brighten up any room. The project requires minimal materials – just the welcome mat and some colorful paint and brushes. But what makes this DIY endeavor truly special is that it’s not only a creative outlet, but also a way to bring joy and vibrancy to your living space. It’s more than just a rug – it’s a statement piece that showcases your love for fun, creativity, and donuts! With this simple yet effective project, you can add a personal touch of whimsy to your home decor and make every day feel like National Donut Day.
Adorable DIY Felt Ball Rug
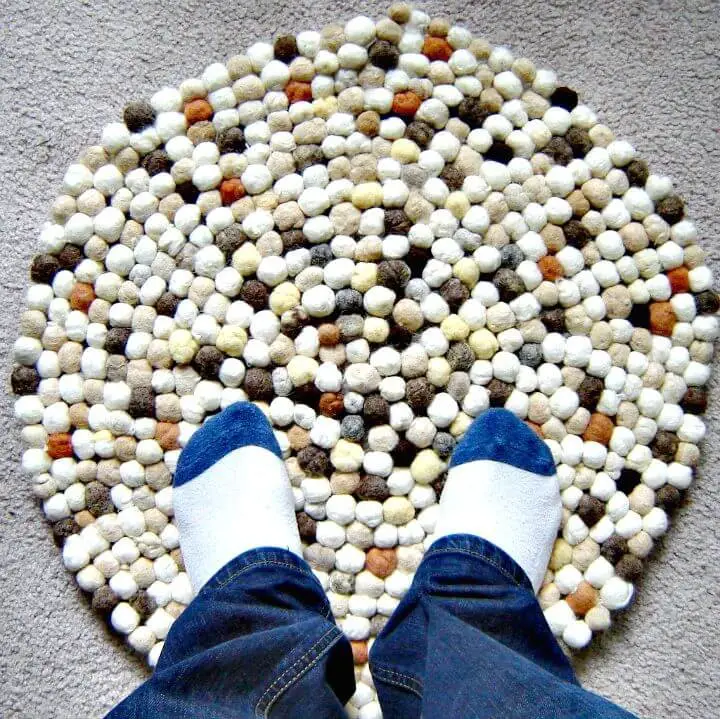
Transform your home’s interior with a one-of-a-kind DIY felt ball rug that defies conventional wisdom about design and materials. This innovative project proves that even the humblest of components, such as wool, dish soap, water, plastic containers, nylon thread, and needle, can be combined to create something truly remarkable when paired with patience and creativity.
Begin by taking various types of wool or pet fur and turning them into beautiful felt balls through a process that combines hand felting and rinsing. Once you have a collection of these 2cm-diameter orbs, carefully sew them together to form an impressive rug that’s not only unique but also surprisingly affordable.
Join this creative journey and discover how a fraction of the original $1000 market price tag can be achieved through hands-on crafting, making it a truly accessible and fulfilling DIY experience.
Turn Sweaters Into a Felt Rug

Transform your home into a haven of eco-friendly style by turning upcycled materials into stunning DIY rugs. This unique craft not only adds a personalized touch but also reduces waste, making it a therapeutic process that’s both calming and fulfilling. The vibrant, geode-inspired spiral design created from colorful wool sweaters is a true masterpiece, blending hues of pink, red, and purple to create a one-of-a-kind piece of home decor. By repurposing old clothes into a felt rug, you’re not only reducing waste but also embracing sustainability and creativity. To get started, gather just a few simple materials – old wool sweaters, a rotary cutter, cutting mat, metal ruler, fabric glue, and a hot glue gun – and let the leisurely process unfold, perfect for pairing with your favorite TV shows. As you craft this unique piece of home decor, you’ll be amazed at how effortlessly you can turn discarded items into a work of art that reflects your personal style.
How to Make a Woven Circle Mat
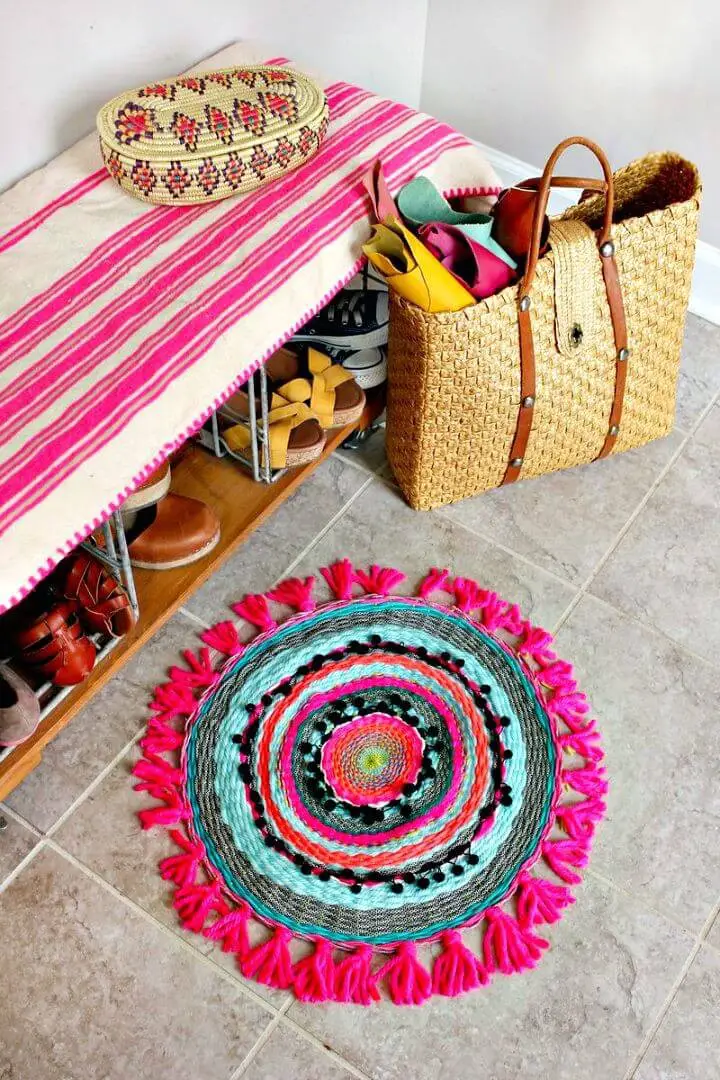
Transform the ambiance of your living space by mastering the timeless art of weaving, a skill that transcends cultural boundaries and eras. This DIY project combines traditional techniques with modern flair, utilizing an eclectic mix of materials such as yarn, paracord, twine, rope, fabric strips, pom pom trim, and even cardboard or foam board to create a one-of-a-kind, textured rug.
This comprehensive guide allows for endless customization options, enabling you to tailor the rug’s thickness and color palette to your unique style. Whether placed in high-traffic areas or low-key zones, this woven masterpiece will add a pop of personality and creativity to any room.
Perfect for those who relish hands-on crafting experiences, this ancient art form offers a chance to infuse your home with a piece of global heritage that’s distinctly yours. By embracing the intricacies of weaving, you’ll unlock a world of possibilities and create a truly special addition to your decor.
DIY Matisse-Inspired Cut-Out Rug
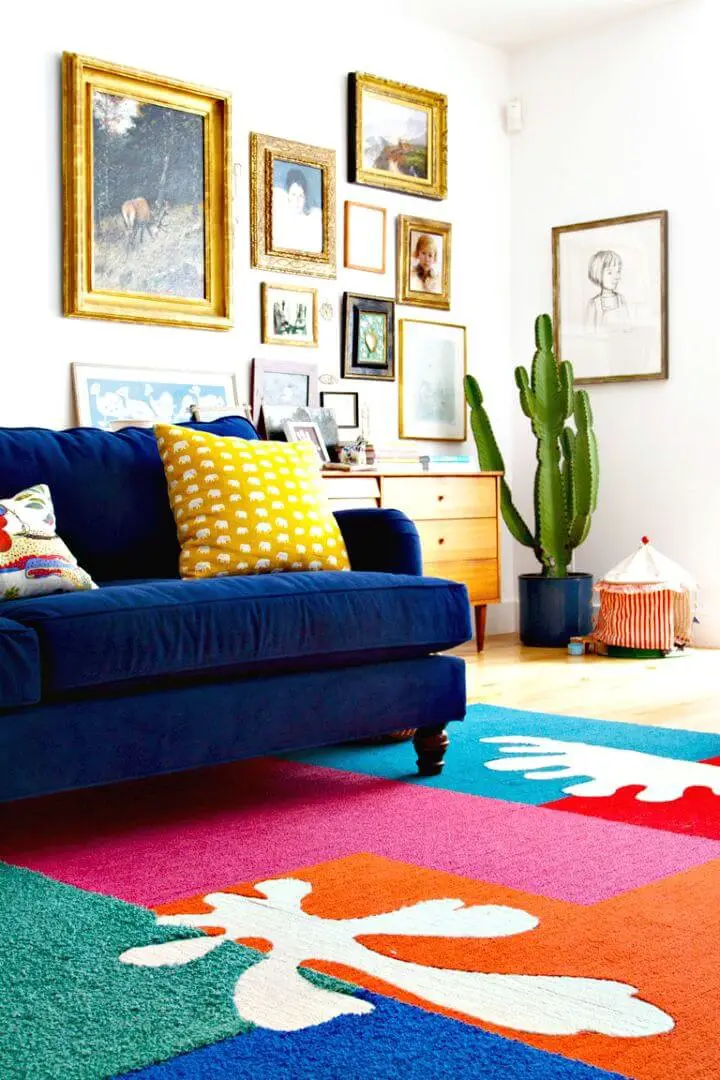
Transform your living space with a vibrant and artistic DIY Matisse-inspired cut-out rug, offering a unique blend of cost-effectiveness and personalized flair. This innovative project allows you to bring Henri Matisse’s bold shapes and colors into your home using FLOR tiles. By combining user-friendly materials with a touch of creativity, you’ll infuse your space with a bold shot of color and a distinctly personal touch. To complete this aesthetic transformation, gather the following essentials: FLOR tiles, a Stanley carpet knife, Goldblatt utility cutting shears, and additional FLOR dots.
No-Sew Round Braided Rug Using T-Shirts
Transforming unwanted t-shirts into a stunning DIY rug is a creative way to breathe new life into old clothes. By upcycling them into a braided rag rug, you can declutter your space while creating a unique decor piece that reflects your personal style. This eco-friendly project requires no sewing and is an engaging activity perfect for anyone looking for a fun weekend crafting experience. You can use not only t-shirts but also jeans or blankets to create a vibrant and functional addition to any room. With the option to choose coordinating colors or go for a eclectic mix, this rug will be a true reflection of your creativity and sustainability. So why not grab those old clothes and start crafting your one-of-a-kind braided rug? It’s a great way to showcase your style and make a statement about living sustainably.
Handmade Static Lines Woven Rug
As the seasons change and the days grow shorter, there’s no better way to cozy up your home than with a handmade DIY rug. The satisfaction of creating something with your own hands is unparalleled, and this handwoven guide will walk you through every step of the process. With just two types of pine boards, wood screws, nails, a power drill, a hammer, cotton twine, jersey yarn, and a tapestry needle, you’ll be on your way to crafting a one-of-a-kind 4.5 by 6 inch rug that’s as unique as it is bold. As you weave together the threads of creativity and patience, you’ll not only be creating a stunning piece for your home, but also building a sense of pride and accomplishment. And let’s be real – there’s nothing quite like having a conversation starter that’s also a reflection of your own making. So why wait? Grab your materials and get weaving – the result will be well worth the effort.
How to Make a Woven Rag Rug
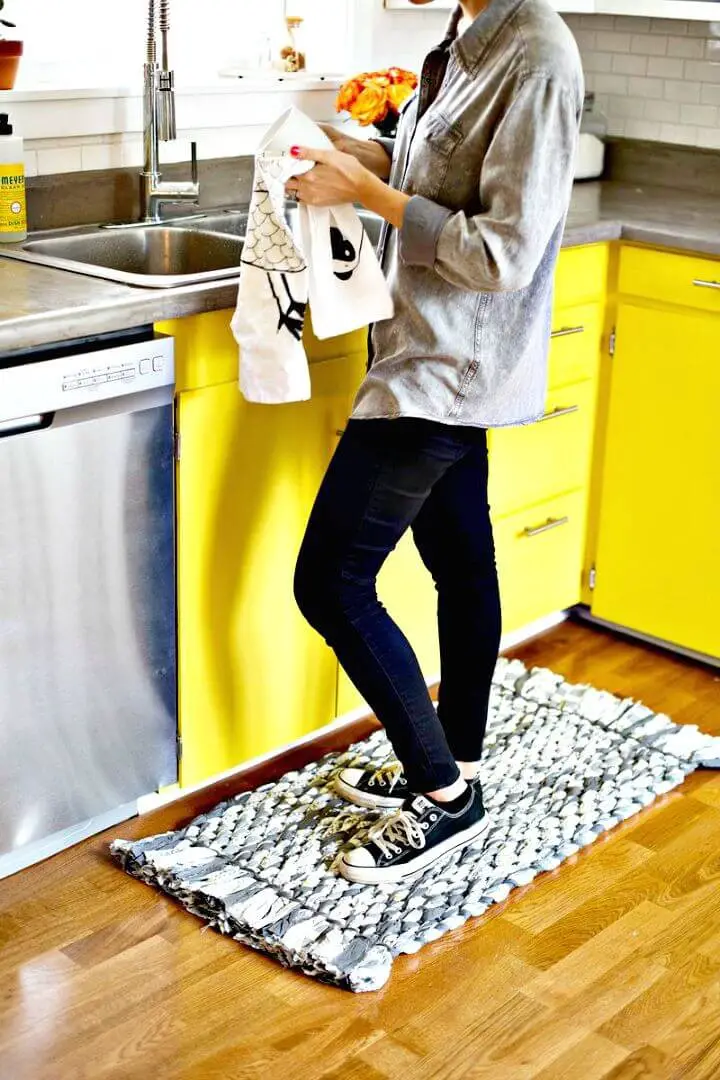
Transform old bedsheets into a cozy and personalized DIY woven rag rug without breaking the bank! This innovative project is perfect for those looking to upcycle and breathe new life into discarded materials. With just three king-size flat cotton bedsheets, some handy tools, and a little creativity, you can craft a charming addition to your living space that reflects your unique style. The process is surprisingly straightforward: simply mark and cut the bedsheets, weave the strips into a pattern on a piece of cardboard, and trim the ends to your desired size. The result is a beautiful rug that adds warmth and character to any room, serving as a testament to sustainable creativity and eco-friendly decor. So why settle for an ordinary store-bought rug when you can create something extraordinary with a little bit of imagination? Unleash your creativity and customize your rug to match your space and personal aesthetic.
Ikea Synthetic Material Rug Hack

Transform your living space into a one-of-a-kind sanctuary by injecting personal flair through a captivating DIY endeavor – dyeing a faux sheepskin rug from IKEA’s affordable $13 TEJN offering. This innovative project brings a pop of color to your interior decor using synthetic fabric dye and hot water, resulting in a vibrant and long-lasting hue on the rug.
Embracing this unconventional home improvement adventure allows you to channel your creativity into your space’s aesthetic while breathing new life into an ordinary household item. With the right materials and an open spirit, you can effortlessly turn your living space into a cozy haven. While running the dyed rug through the dryer may alter its texture, leaving it to air dry preserves its original softness. Dive headfirst into the world of DIY dyeing with this exciting project today!
Easy-To-Make Pom Pom Rug
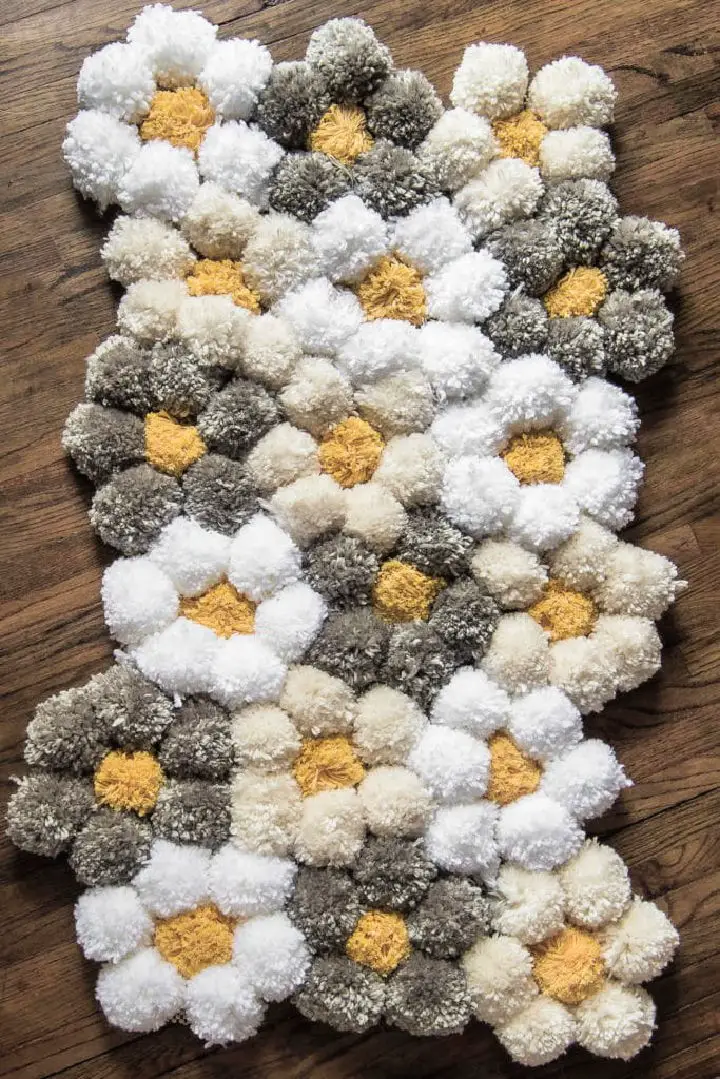
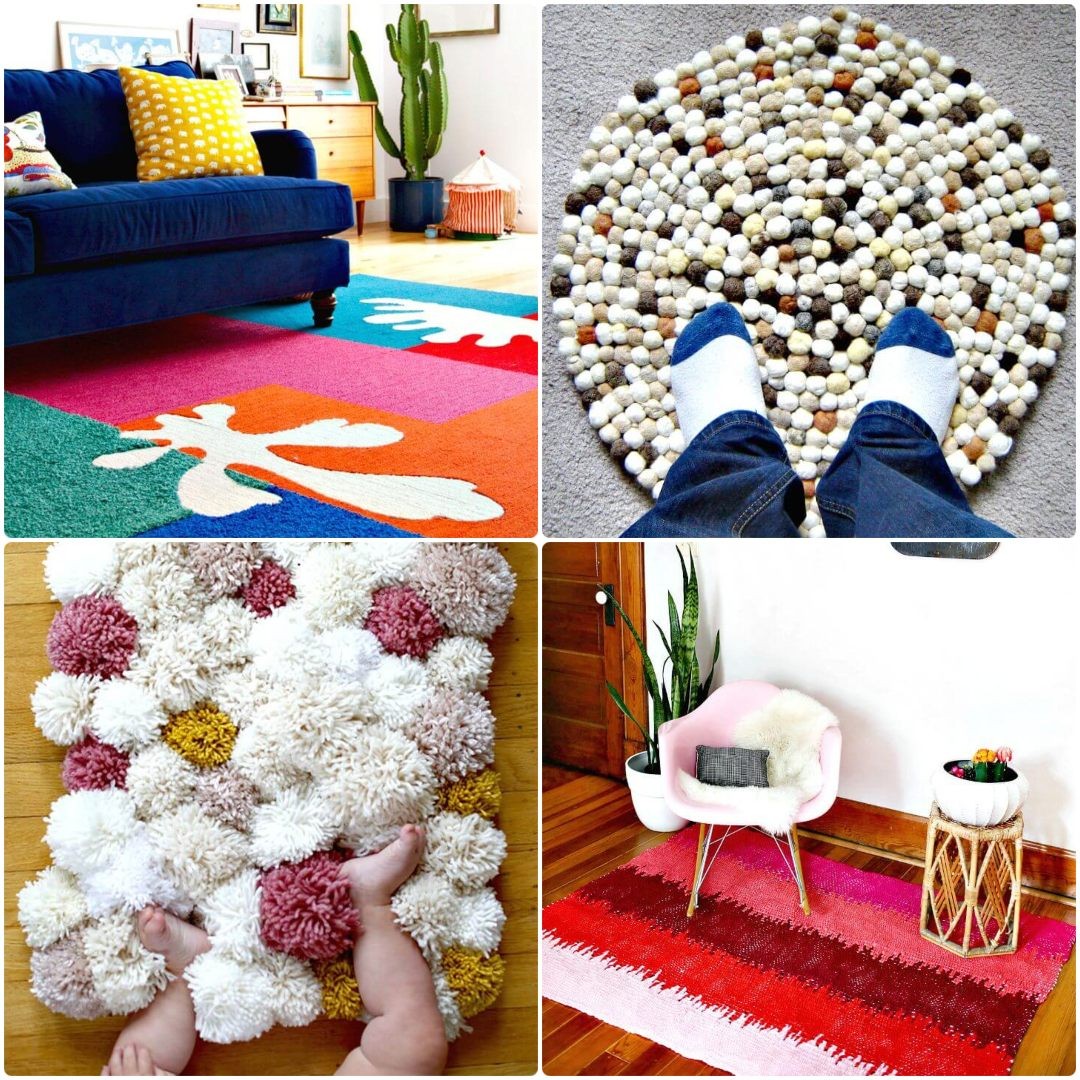
Step into a world of tactile delight with a DIY pom pom rug, an unconventional yet captivating addition to your home decor that will seamlessly blend texture and whimsy. This creative endeavor not only utilizes leftover yarn but also invites you to indulge in the luxurious sensation of softness. Crafted using a medley of white, cream, and oatmeal hues, this rug combines the comfort of plush fibers with the visual interest of varying textures. The project’s simplicity belies its impact, promising an experiential journey that will leave your feet craving more and your eyes delighting in the mesmerizing display. With a comprehensive guide to pom pom-making included, you’ll be well-equipped to create a rug that not only enhances your space but also becomes a testament to your creative prowess.
Gorgeous DIY Pom Pom Rug
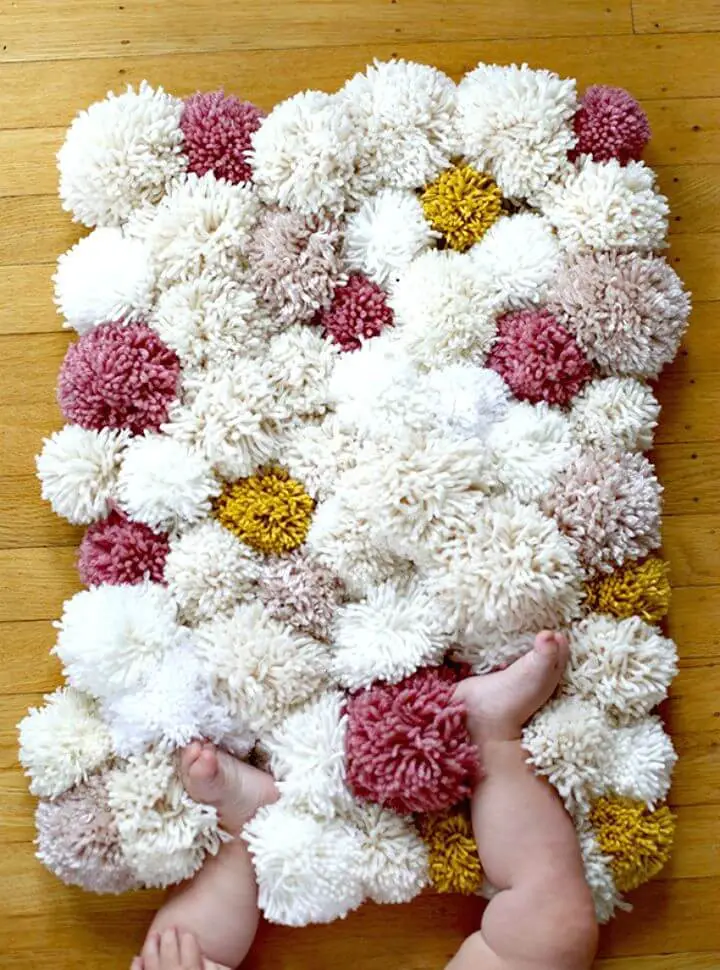
Transform your space with our vibrant collection of DIY rugs, starting with a playful yet practical touch for your children’s shared room. A DIY pom pom rug is the perfect addition to their sanctuary, combining comfort and style in a way that’s both customizable and unique. For example, this delightful project combines soft wool yarns with midnight soothing sessions, adding a dash of feminine flair to your 6-year-old-and-9-month-old girl’s shared space. The process involves making pom poms from readily available materials like wool yarn, toilet paper rolls, scissors, and a non-stick rug mat, allowing you to create a one-of-a-kind masterpiece that encourages playful wiggles of the toes all while cozied up. This pom pom rug is a delightful addition to your kids’ room and a fun, engaging DIY project that can be a fascinating pastime. Say yes to transforming your yarns into this cozy masterpiece today!
Making a Pom Pom Rug at Home
Transform your living space into a vibrant oasis by crafting an eye-catching DIY pom pom rug! This unique and easy-to-make home accessory is perfect for adding a pop of color and texture to any room. With just a few simple materials, including plastic canvas, colorful pom poms, hot glue, and an optional non-slip rug pad, you can create a one-of-a-kind statement piece that’s both playful and sophisticated. The finished product boasts a beautiful splash of color and a plush, comforting texture that will elevate your home decor in no time. Plus, the process is just as enjoyable as the result – you’ll have a blast collecting supplies and bringing this delightful rug to life. So why not get creative and make a charming pom pom rug today?
How To Stencil a Rug – Step by Step
Transform your living space with a touch of Moroccan flair by creating a DIY stenciled rug. This budget-friendly project combines creativity and thriftiness, making it an ideal option for those looking to revitalize their homes without breaking the bank. By combining a simple stencil – won, bought, or made at home – with a cost-effective indoor/outdoor rug, you can achieve a high-end design aesthetic at a fraction of the cost. With just a few basic crafting supplies like acrylic paint, fabric medium, and a paint roller or stencil brush, your ordinary rug can be transformed into a stunning decor piece. This project is not only about saving money – it’s also about the personal satisfaction that comes from creating something with your own hands. So, get creative, roll up your sleeves, and give that flat rug a breathtaking makeover today!
Beautiful Bee Wreath Rug
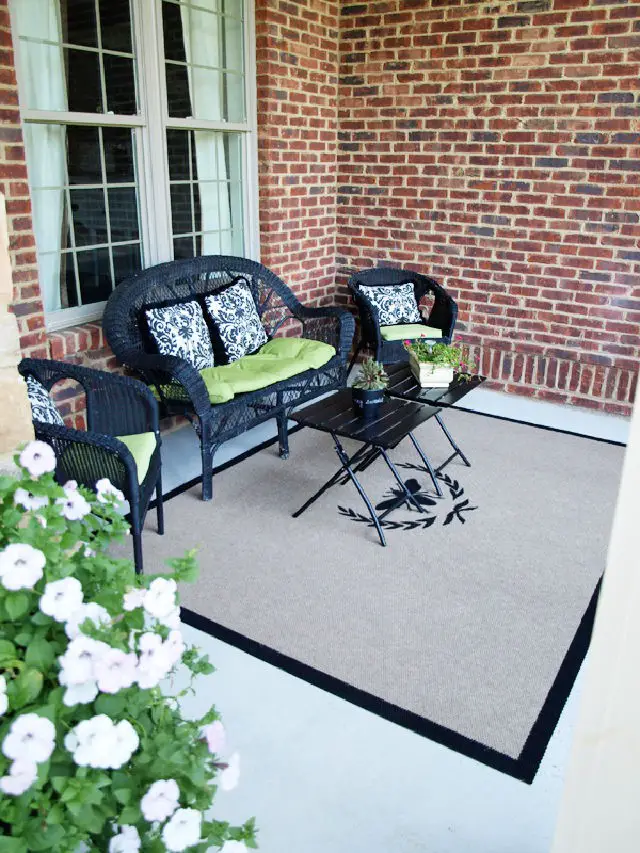
Transform your home’s exterior with a DIY porch rug that exudes personality and style. Start with an inexpensive rug from HomeDepot.com, and unleash your creativity to give it a unique makeover. The 6’x8′ rug provides the perfect canvas for self-expression, boasting a comfortable texture underfoot. With just a few simple tools – including a Sharpie, stencil, and flat black latex enamel paint from Lowes – you’ll be surprised at how easy it is to breathe new life into this humble rug. Whether you’re aiming to create an eye-catching statement piece or enhance the ambiance of your front porch, this fun project is sure to bring joy and satisfaction. And as you step onto your porch, you’ll appreciate the fruits of your labor every time.
Quick and Easy DIY Rug for Living Room
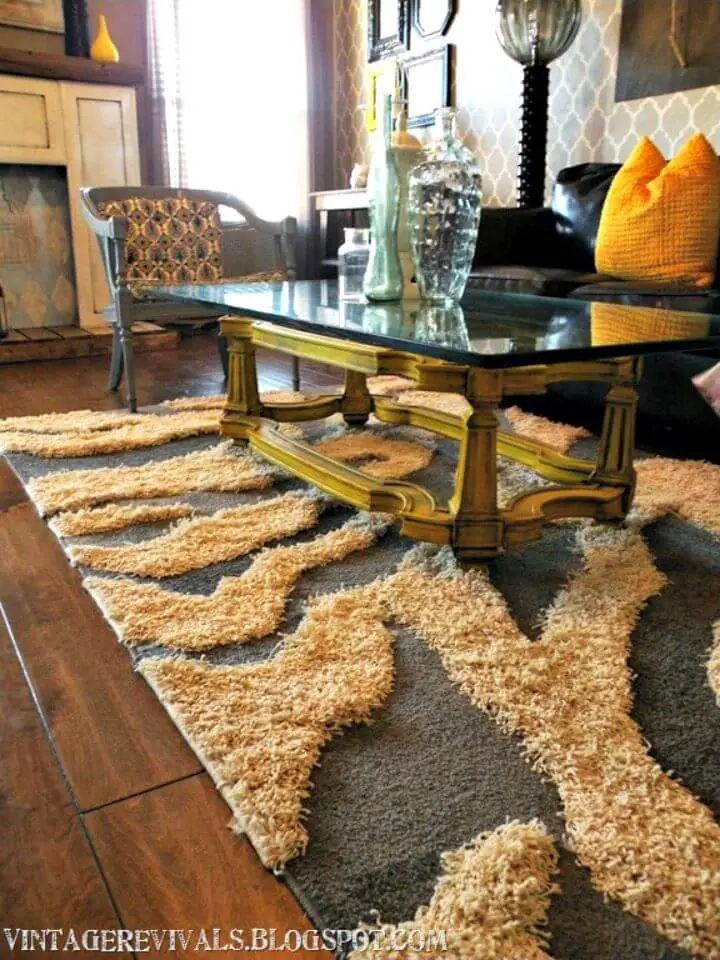
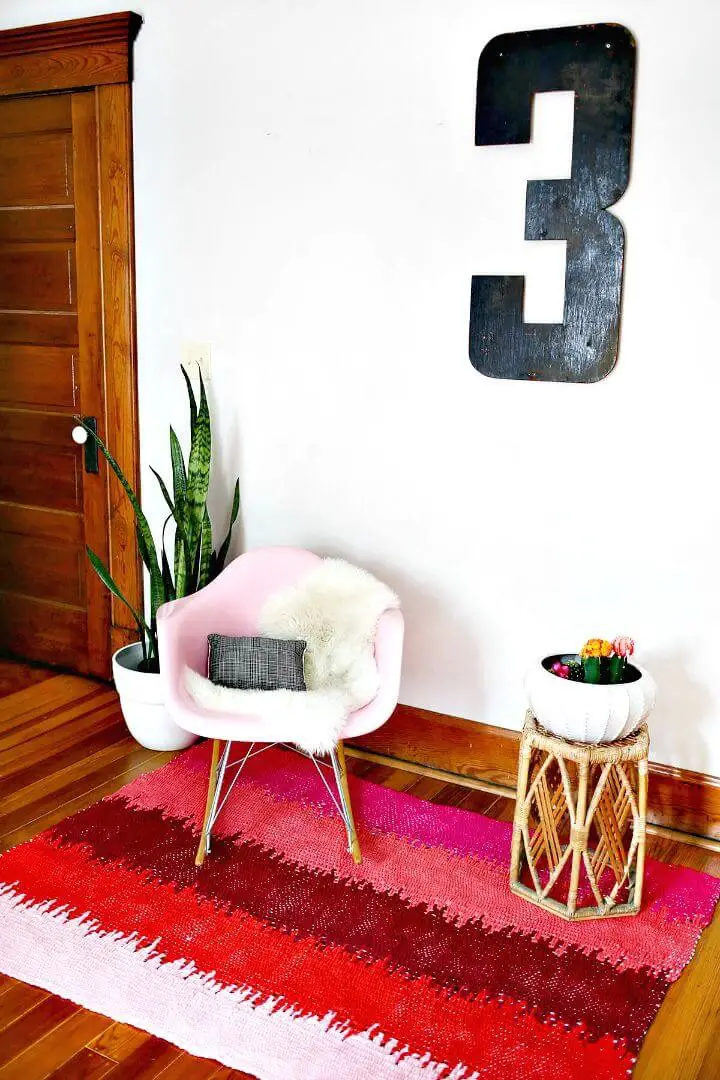
Transform your living space into a one-of-a-kind oasis by upcycling plain rugs into a stunning zebra print masterpiece. The key lies in combining creativity with simple materials like two rugs of different hues, a box cutter, and pressure-sensitive seaming tape.
To get started, sketch out your desired pattern on the back of the first rug and carefully cut out the pieces. Repeat this process with the second rug before piecing them together using the adhesive. This innovative DIY project allows you to bring your design vision to life while saving a significant amount compared to purchasing a high-end equivalent.
While it requires a bit of precision and patience, the end result is a breathtakingly unique rug that elevates your home decor and brings unparalleled satisfaction.
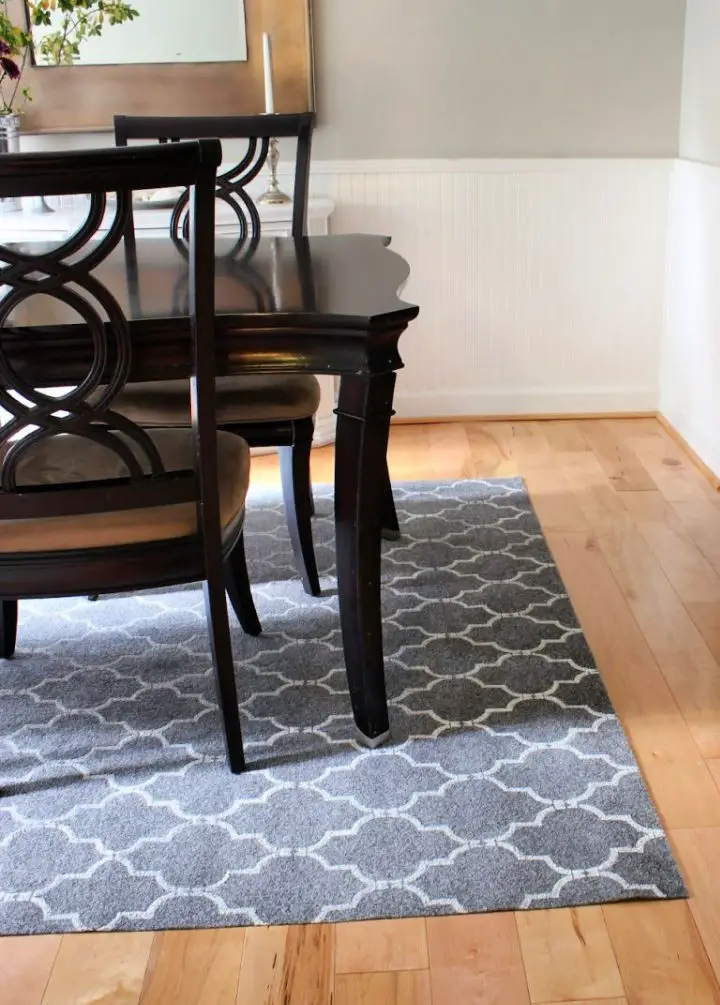
How to Paint Patterns On Rugs
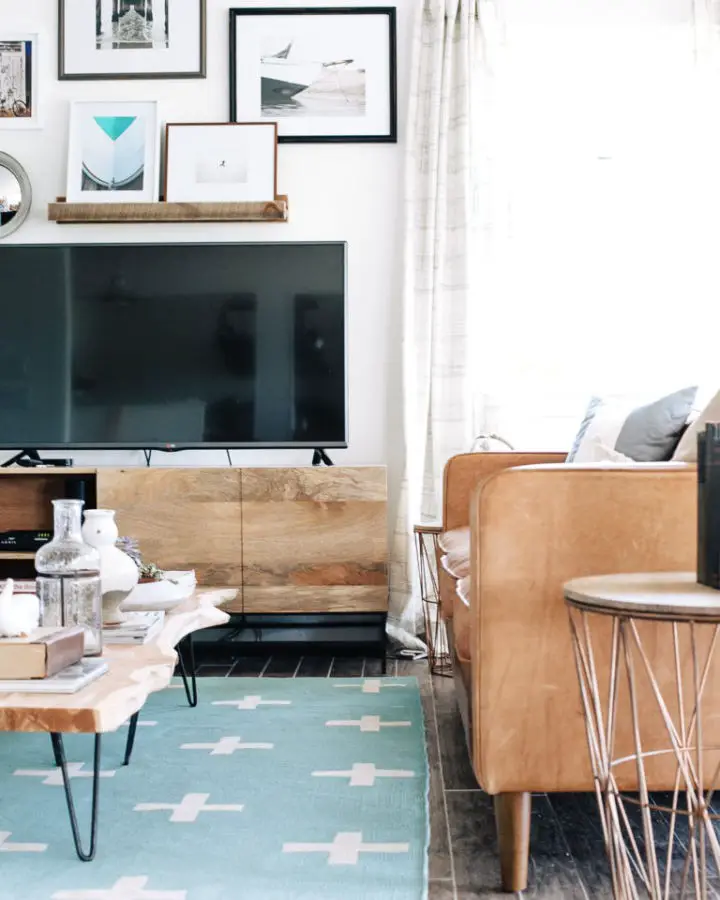
Transform the ambiance of your room with a creative DIY Painted Rug Project in collaboration with True Value. This innovative guide will empower you to turn an ordinary flatweave rug into a stunning focal point. The process is surprisingly straightforward, requiring just four easy steps: measuring, marking, painting, and peeling. What’s more exciting is the limitless design possibilities – choose from classic stripes to bold geometric patterns, all tailored to your room’s unique aesthetic. To get started, you’ll need Latex EasyCare paint, painter’s tape, a paint roller, paint tray, circular cookie cutter, tape measure, paintbrush, and of course, the rug itself. By putting your design vision into practice with this project, you’ll be sure to make a lasting impression in your next DIY adventure.
Hand-Painted Morrocan Rug
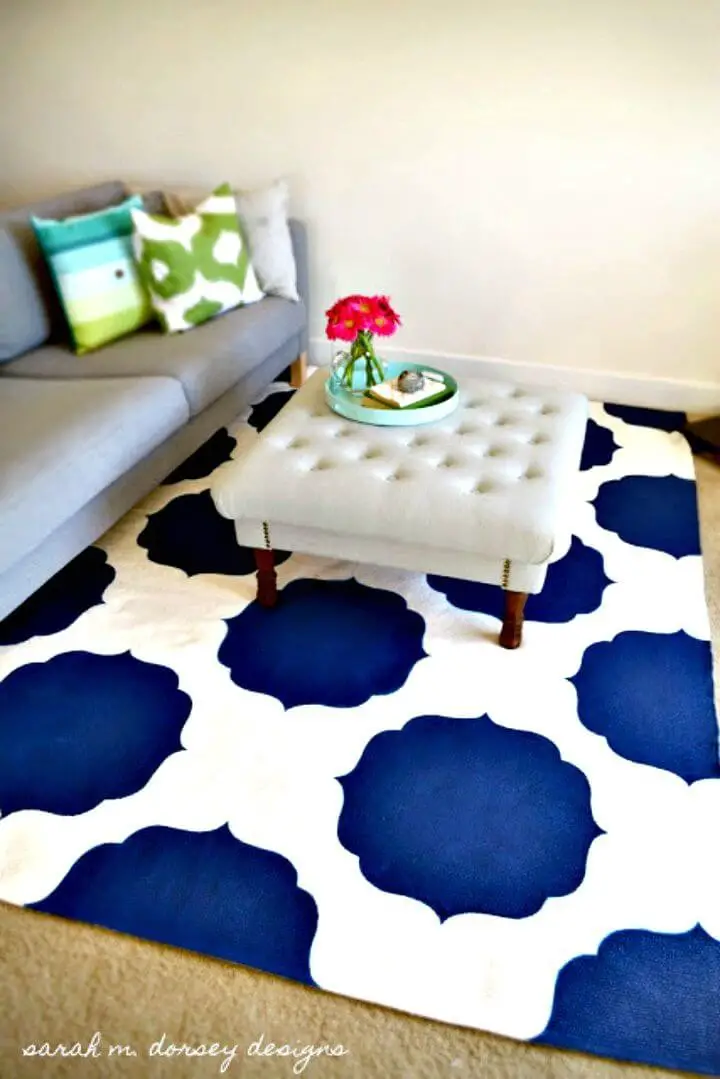
Embark on a creative adventure by crafting a one-of-a-kind DIY Moroccan rug for your home. This project begins with designing your ideal pattern, followed by gathering essential materials such as a base rug from Ikea, SW Loyal Blue paint, fabric medium, and plywood for the stencil. As you weave together these elements, remember that patience and attention to detail will ultimately yield the best results. Not only will this unique rug add character to your living room, but it will also serve as a stunning complement to your ottoman. Don’t be discouraged if the process takes longer than expected; the sense of accomplishment from the finished product is well worth the wait. To streamline the process, consider using flat paint or Simple Spray upholstery fabric paint, keeping in mind that lighter colors require fewer coats and ensure easier stencil alignment. With a little creativity and elbow grease, you can bring an exotic touch to your living space and create the perfect ambiance.
How to Make a Rope Rug
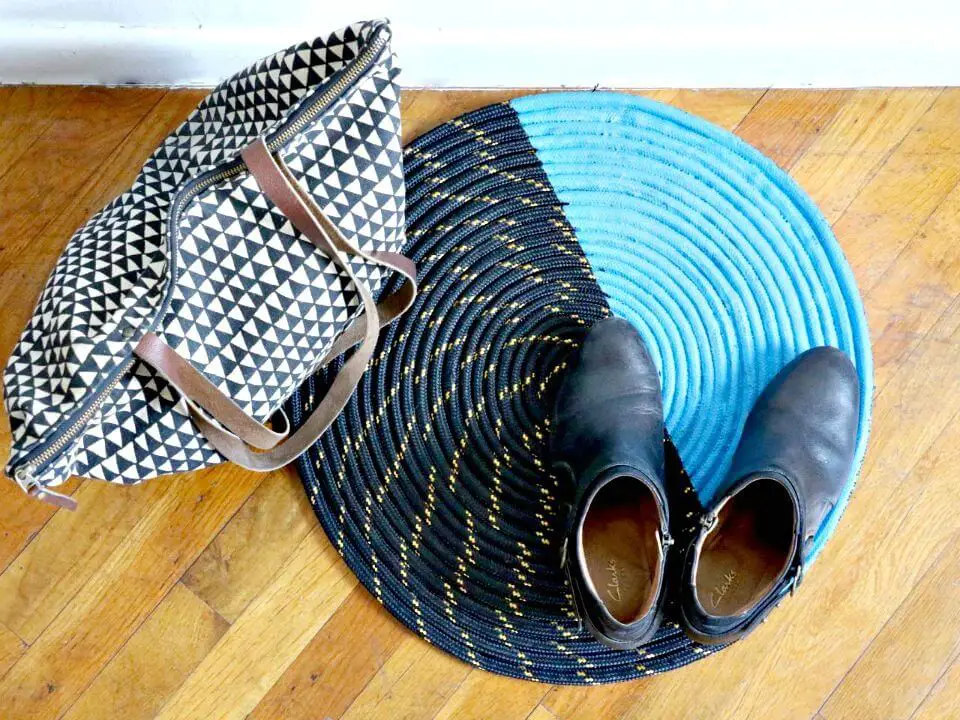
Transform the look and functionality of your entryway with a one-of-a-kind DIY rope doormat. This unique piece combines durability with visual appeal, making it perfect for all seasons. To create this stunning mat, you’ll need polyester rope, scissors, heavy-duty construction adhesive, a circle of felt, painter’s tape, a paintbrush, and silicone paint in your desired color. Begin by coiling the rope on a flat surface, securing it with adhesive, and covering it with felt. Once dry, apply painter’s tape to one side and coat with silicone paint. After the paint has dried, your handmade doormat is ready to be displayed. This DIY project adds a touch of charm to your home, making it both practical and visually appealing.
Homemade Rope Rug With Written Instructions

Transform your living space with a one-of-a-kind DIY rope rug, crafted from everyday supplies like 1/4-inch clothesline, fabric strips, and a standard sewing machine. This eco-friendly project not only reduces waste by repurposing fabric scraps but also yields a durable, handcrafted rug that adds texture and personality to any room. The versatility of this piece allows it to seamlessly blend into your living room or bedroom, while its unique aesthetic is sure to spark admiration and conversations. With clear guidance, you can unleash your creativity and infuse personal touches into your home, resulting in a stunning, treasured rug that will remain a beautiful mess for years to come.
POM POM Cloud Rug for Child’s Bedroom
Transform any space into a cozy haven with a unique DIY project that combines creativity and practicality. Say hello to the cloud rug, a whimsical masterpiece crafted from 116 handmade pom poms of varying sizes, suspended on a rug canvas. This tactile delight not only adds visual charm but also stimulates the senses. To bring this vision to life, you’ll need ten balls of chunky wool yarn, pom pom makers, and a rug canvas. The recommended use of chunky wool yarn offers both speed in pom pom creation and added safety with its fire-retardant qualities. The end result is a beautifully textured, fluffy rug that exudes warmth and personality. This project’s simplicity belies its rewards, as it can be tailored to your color palette and shape preferences. Plus, the practical benefit of being able to easily replace individual pom poms should one get stained makes this DIY endeavor truly stress-free. By adding a personal touch to your child’s room, you’ll create a space that is not only visually appealing but also meaningful and treasured.
Making a Chunky Yarn Rug From Scratch
Unleash your creativity and transform your space with a personalized DIY rug. By combining plastic chicken wire, chunky yarn, and scissors, you can craft a functional and attractive floor covering that reflects your unique design sense. The process begins by outlining your desired rug design onto the chicken wire, which serves as the foundation for your handcrafted creation.
Next, attach yarn in an interlacing pattern to create the main structure of your rug. This step requires patience and attention to detail, but the end result is well worth the effort.
To add a touch of elegance and whimsy, make braided tassels that can be attached to the edges of your rug. These charming embellishments will give your DIY project an extra layer of personality.
While this DIY endeavor may require a significant investment of time, the final result is sure to be a unique and functional piece that perfectly captures your personal style. With the ability to customize with any color or design, you can create a rug that complements your space exactly as you envision it.
Pretty DIY POM POM Rug Tutorial
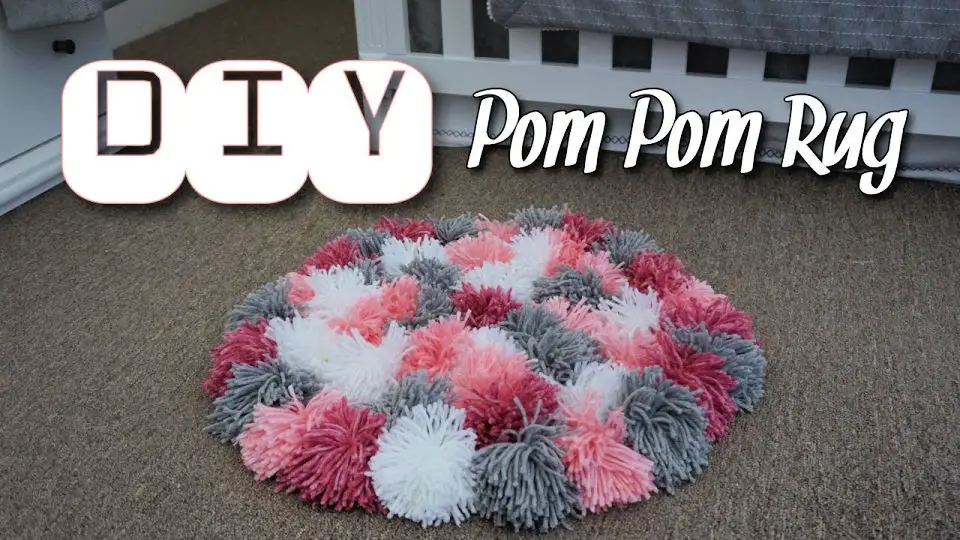
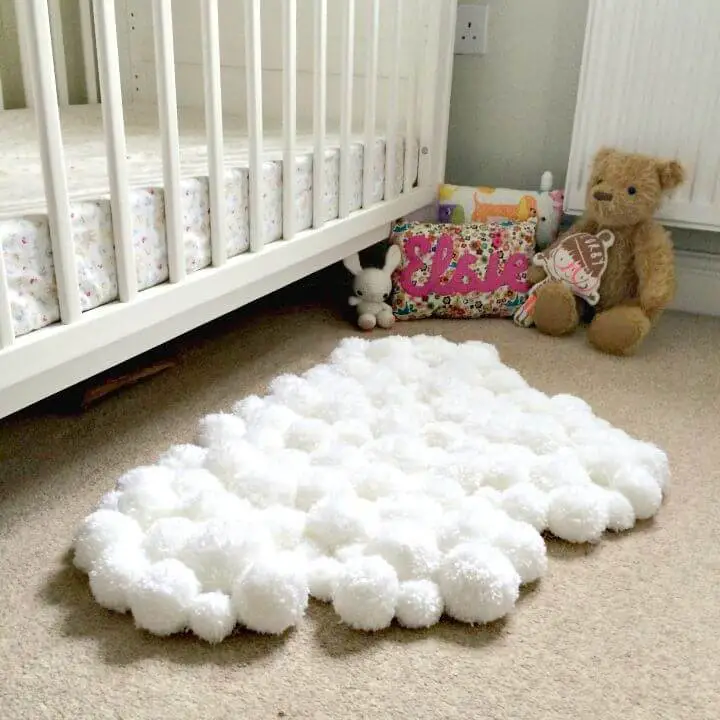
Get set to transform your little one’s nursery into a cozy haven with a vibrant DIY pom pom rug that’s as easy as it is adorable! This project is tailor-made for parents seeking to add a splash of color and softness underfoot. It pairs seamlessly with pink, white, and gray crib sets, making it an excellent addition to any nursery decor.
What’s more, this endeavour requires minimal materials – just yarn, scissors, a crochet latch hook, and a non-slip grip liner. The hands-on process of creating pom poms is not only quick and easy but also thoroughly enjoyable. As you bring your ingenuity to life, you’ll be creating a space that’s not just comfortable and stylish but uniquely yours as well.
The end result is a charming and cozy rug that will have you considering making another one for your own room! This project is all about crafting a haven that’s tailored to your little one’s needs, so grab your supplies and start creating today!
Conclusion:
Conclusion:
As we conclude our exploration of 25 homemade DIY rug ideas, it becomes clear that the real value lies not only in the unique opportunity to infuse personal style into your home but also in the foundation laid for crafting functional and decorative items that harmonize with your space. The comprehensive guidance provided covers a wide range, from straightforward methods like making shaggy rugs to advanced techniques and essential maintenance tips, ensuring you have all the necessary tools at your disposal. Furthermore, embracing sustainability in rug making elevates the craft, allowing you to create beautiful pieces while considering the environment’s well-being. Whether this is your first foray into DIY rug making or you’re seeking to refine your skills with new ideas and insights, this collection is designed to inspire and support your creative journey, guiding you every step of the way.