Want to transform your cluttered drawers into organized spaces without breaking the bank? Look no further than DIY drawer dividers, a budget-friendly solution that’s surprisingly easy to create. With just a few simple materials and a dash of creativity, you can turn your messy drawers into models of efficiency. This comprehensive guide takes you by the hand through every step of the process, from selecting the right supplies to measuring your space and installing your custom dividers. Plus, we’ll share some creative ideas for customization and safety tips to ensure your project is both successful and enjoyable. Whether you’re looking to streamline your kitchen utensils, organize office supplies, or tidy up cluttered vanity drawers, this guide has got you covered. Get ready to discover 25 unique DIY drawer divider ideas that reflect your personal style and meet your specific needs, and start enjoying the benefits of a more organized home today.
Why Make DIY Drawer Dividers?
When it comes to organizing your space efficiently and stylishly, making DIY drawer dividers can be a game-changer. Not only do they save you money by utilizing materials you already have at home, but they also allow for a custom fit that perfectly suits your drawer’s dimensions and storage needs, eliminating wasted space.One of the biggest benefits of DIY dividers is the improved organization they bring. With everything having its designated place, finding items becomes a breeze, and your drawers remain neat over time, eliminating the need to rummage through cluttered spaces.Beyond just functionality, making DIY drawer dividers can also increase your productivity. A well-organized space can reduce the time spent searching for items, which is especially crucial in areas like the office or kitchen where efficiency is key.Moreover, designing and making your own dividers taps into your creative side, allowing you to choose materials and designs that reflect your personal style and add a unique touch to your space. And by repurposing materials or using sustainable options, you’re contributing to a greener planet, taking small steps towards reducing waste and promoting sustainability.Perhaps most importantly, making DIY drawer dividers can bring a sense of satisfaction and accomplishment. Completing a project with your own hands can boost your mood and give you a sense of pride in your ability to create something useful.Ultimately, the goal is to make a system that works for you, and DIY drawer dividers are a simple, cost-effective way to enhance the functionality of your space, making everyday tasks just a little easier.
DIY Drawer Dividers: A Step-by-Step Guide
Transforming your storage space into an organized haven is just a few steps away. By embracing a DIY approach, you can effortlessly tailor dividers to perfectly fit your drawers, eliminating clutter and saving time. Building on the expertise of Ana White’s tutorial, this straightforward guide will walk you through a budget-friendly process to create custom drawer dividers that meet your unique needs.
Materials Needed
For your DIY project, you’ll need to gather the following essential tools and materials: C-channel made of aluminum, measuring half an inch in thickness. You’ll also require select pine boards, which should be around half an inch thick as well – plywood is a suitable alternative if you can’t find the former. To secure everything together, you’ll need half-inch long wood screws. A drill bit that’s slightly smaller than the screw head will ensure proper fitment. Additionally, have a Phillips bit on hand to drive those screws home. For more precise cuts, bring out your jigsaw and equip it with a metal cutting blade. As for clamping materials in place, make sure you’ve got some reliable devices at the ready. Don’t forget to prioritize safety by wearing eye and hearing protection while working.
Step 1: Planning and Measurement
Before embarking on your DIY project, take a moment to assess the internal dimensions of the drawer. This will help you determine the optimal amount of materials required to complete the task at hand. Consider the desired height and division layout for the finished product, as this information will be crucial in informing your purchasing decisions for C-channel and wood components.
Step 2: Preparing the C-Channel Brackets
To create the dividers for your shelving unit, start by cutting the C-channel into pieces that are approximately 2.5 inches in length. Each divider will require two brackets, which need to have screw holes drilled at one end. While a jigsaw with a metal cutting blade is an ideal tool for this task, as it effortlessly cuts through aluminum, ensure you’re equipped with the right equipment before beginning.
Step 3: Attaching the Brackets
To secure your dividers within the drawer, start by selecting the desired positions for them along its bottom edge. Then, attach the bracket brackets to this surface using wood screws, taking care to space them evenly apart. These carefully placed dividers will serve as a sturdy foundation for holding your contents in place.
Step 4: Cutting the Dividers
To achieve accurate measurements, carefully measure the distance between the two brackets, taking into account the screw heads. For this task, a miter saw is an excellent tool to utilize, although a jigsaw can also be employed as a suitable alternative. Once you have your measurement, cut the divider board – whether it’s select pine or plywood – to fit seamlessly between the brackets.
Step 5: Installing the Dividers
To create organized compartments within your custom-built drawers, slide the cut dividers into the pre-installed C-channel brackets. This process should result in neatly separated sections, allowing you to tailor your drawer’s layout to suit your specific storage and organization requirements. You can add multiple dividers as needed, positioning them either parallel or perpendicular to one another, depending on your unique organizational needs.
Customization and Further Ideas
With this adaptable DIY method, you’re not limited to just a single drawer. Feel free to scale it up to tackle larger organizational challenges like closets, or even apply it to smaller spaces like plate storage, Tupperware organization, or stationery management. The fundamental concept remains consistent and can be easily tailored to suit your unique needs and priorities.
Safety Tips
When utilizing power tools, it’s crucial to don the proper protective gear from the get-go. Ensure you’re shielding your eyes and ears with the necessary equipment. Additionally, take a proactive approach by securing materials in place using clamps to prevent any unwanted movement or slippage while cutting or drilling.
Video Tutorial
Building on the written guide, Ana White’s step-by-step video tutorial on making DIY drawer dividers offers a powerful combination of theory and practice. By watching the video, you’ll gain a deeper understanding of the techniques mentioned in this guide as they come to life through a practical demonstration. The synergy between the two provides a comprehensive overview for anyone looking to tackle this project. Whether you’re seeking to organize your kitchen, bathroom, or bedroom, this DIY endeavor offers an efficient and affordable solution.
FAQS About DIY Drawer Dividers
Discovering solutions to frequently asked inquiries about crafting and utilizing DIY drawer dividers can significantly enhance your organizational prowess, ultimately transforming your living or working space into a harmonious sanctuary.
What materials can I use to make DIY drawer dividers?
When crafting DIY drawer dividers, you have a range of materials at your disposal. Consider using cardboard from old boxes, scrap wood or plywood, foam board, acrylic sheets, or thick cardstock. The choice ultimately depends on the availability of these materials, the specific needs of your project, and your personal preference. It’s essential to select an option that suits your requirements and creative vision.
How do I measure and cut drawer dividers to fit my drawers?
Before embarking on the drawer organizer project, take precise measurements of its interior dimensions – width, depth, and height. This will enable you to plan the ideal layout and determine the number of dividers required. With these details in hand, cut your chosen material to size using a saw for wood or a craft knife for materials like cardboard or foam board. As a precautionary measure, double-check your measurements before cutting to guarantee a snug fit, ensuring the perfect arrangement within your drawer.
Can I make adjustable drawer dividers?
To accommodate evolving storage requirements, it’s possible to create adjustable drawer dividers that can be easily modified to suit changing needs. This can be achieved by incorporating materials that facilitate repositioning, such as pegboard and dowels. Alternatively, wooden dividers with slots for movable or removable panels can also provide the flexibility you need. Additionally, tension rods offer a tool-free option for creating adjustable compartments, allowing you to effortlessly adapt your storage setup to suit your changing needs.
How do I ensure the dividers stay in place?
To secure your dividers effectively, consider a combination of methods. For a temporary fix, use double-sided tape or adhesive strips. These provide a non-permanent hold, making them ideal for situations where you might want to remove or adjust the divider later. For more permanent solutions, screw or nail wooden dividers into place. This method is particularly suitable for wooden dividers that need to be anchored securely. Additionally, designing dividers that fit snugly between the drawer walls eliminates the need for adhesives altogether. By combining these approaches, you can create a secure and effective divider system.
Can I make drawer dividers for any type of drawer?
When it comes to crafting DIY drawer dividers, one of the greatest advantages is their customizability. You can create dividers tailored to any type of drawer – whether it’s a kitchen drawer, office organizer, bathroom cabinet, or even a workshop storage space. To ensure your creations remain effective and durable, however, it’s crucial to select materials that are suitable for the drawer’s specific contents. For instance, using moisture-resistant materials in bathrooms is essential to prevent damage from humidity.
What are some creative ideas for decorating DIY drawer dividers?
Transform plain dividers into stunning accents by incorporating creative twists. Consider painting or staining wooden dividers to seamlessly blend with your interior design aesthetic. Alternatively, give cardboard or foam board dividers a makeover by wrapping them in vibrant decorative paper or rich fabrics. For an added layer of whimsy, use washi tape or decals to add playful patterns and textures. This thoughtful customization can imbue your organization project with a unique sense of personality.
How can I make eco-friendly drawer dividers?
To minimize waste and reduce your ecological footprint when organizing your space, consider adopting environmentally friendly practices. This can be achieved by creatively repurposing materials you already have at home, such as cardboard boxes or scrap wood, to serve a new purpose. Alternatively, opt for sustainable materials like bamboo plywood, which boasts impressive eco-credentials. Moreover, make a conscious effort to avoid single-use plastics and non-recyclable materials that often end up in landfills and oceans. By doing so, you’ll not only efficiently organize your space but also contribute to a more sustainable future.
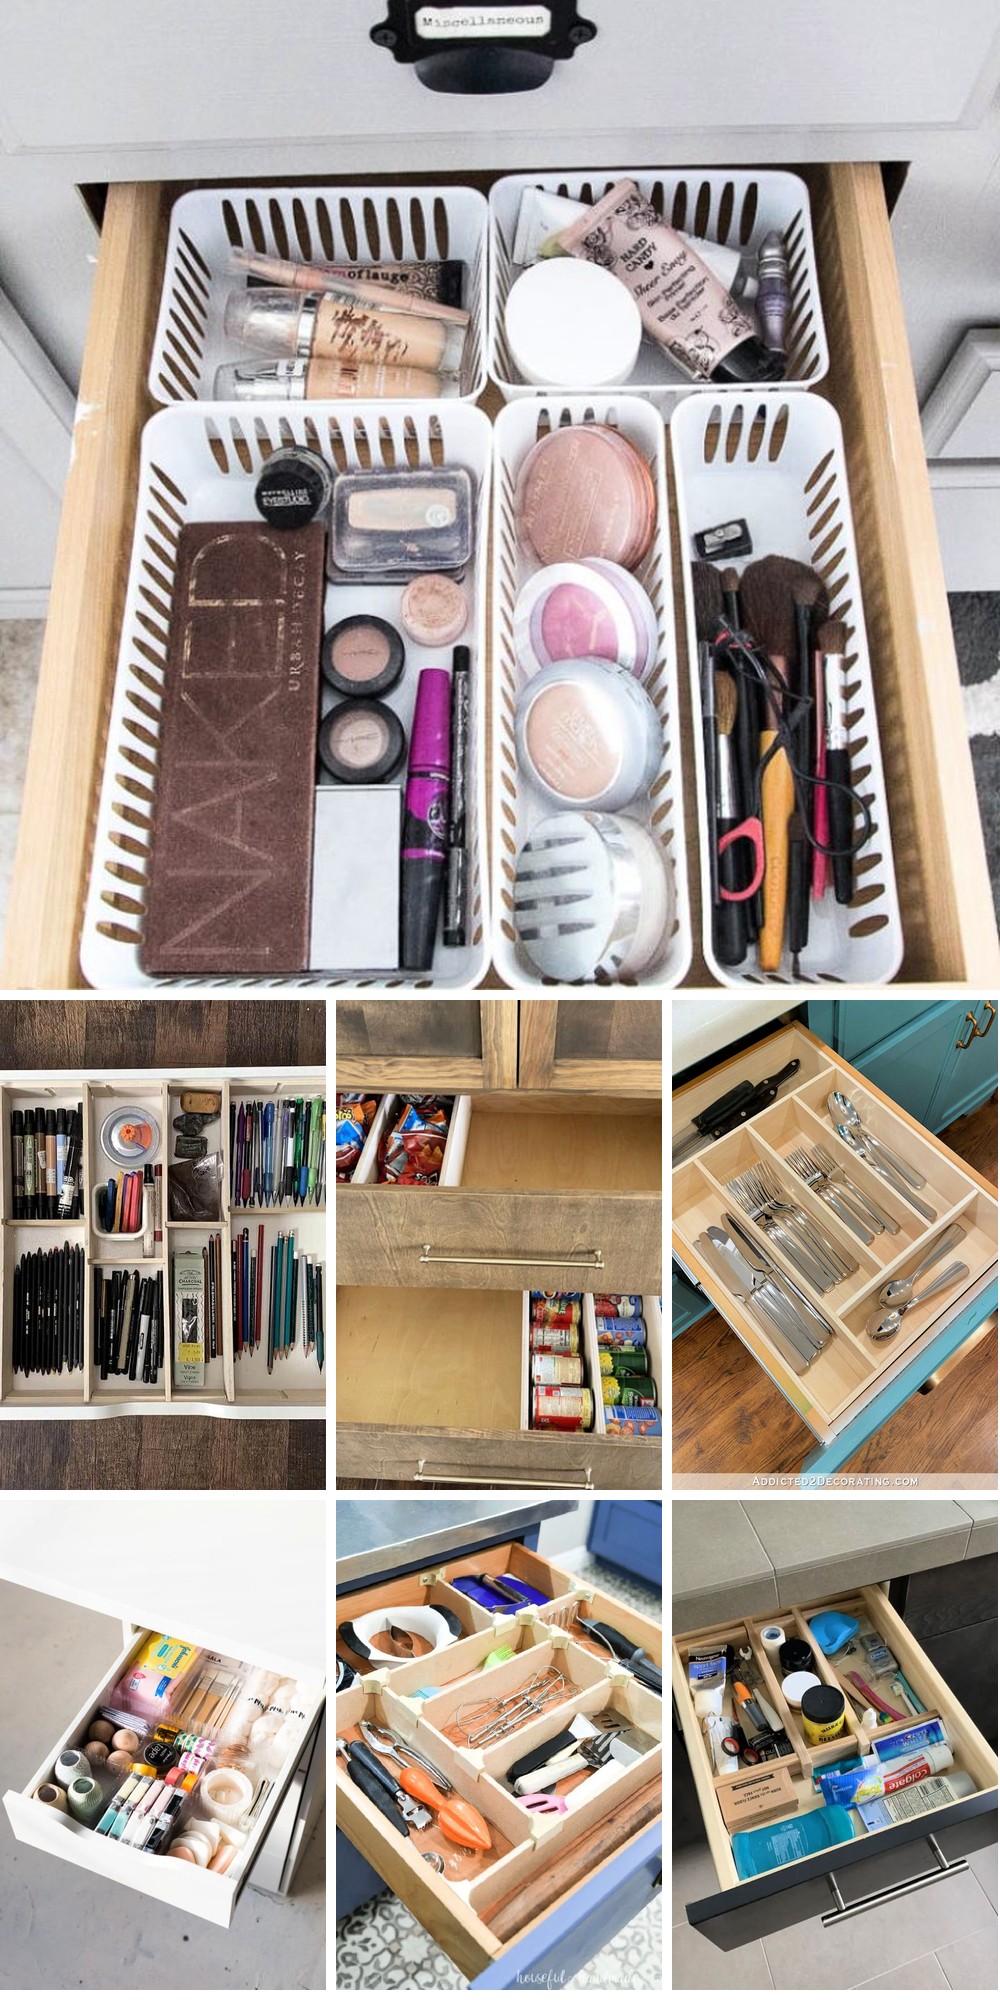
25 DIY Drawer Dividers (Learn How to Make Drawer Dividers)
Elevate your organizational skills and bid farewell to chaotic drawers by learning the art of crafting 25 unique DIY drawer dividers. Our comprehensive, easy-to-follow guide will walk you through every step, empowering you to tame the mess and revel in a sense of accomplishment as you say goodbye to cluttered storage spaces for good.
Drawer Organizer in 30 Minutes on a Budget
Revamp your cluttered drawer into an organized sanctuary by following this straightforward DIY Drawer Organizer tutorial. This project is a thrifty gem, requiring only 30 minutes of your time and scraps of wood, making it an excellent choice for those on a budget. With no nails or screws needed, this beginner-friendly project is perfect for those seeking a low-cost makeover. By following these simple steps, you’ll be able to customize your space and maintain order without breaking the bank. For a comprehensive guide and more inspiring DIY projects, visit DIYCandy.com. Start organizing with ease today!
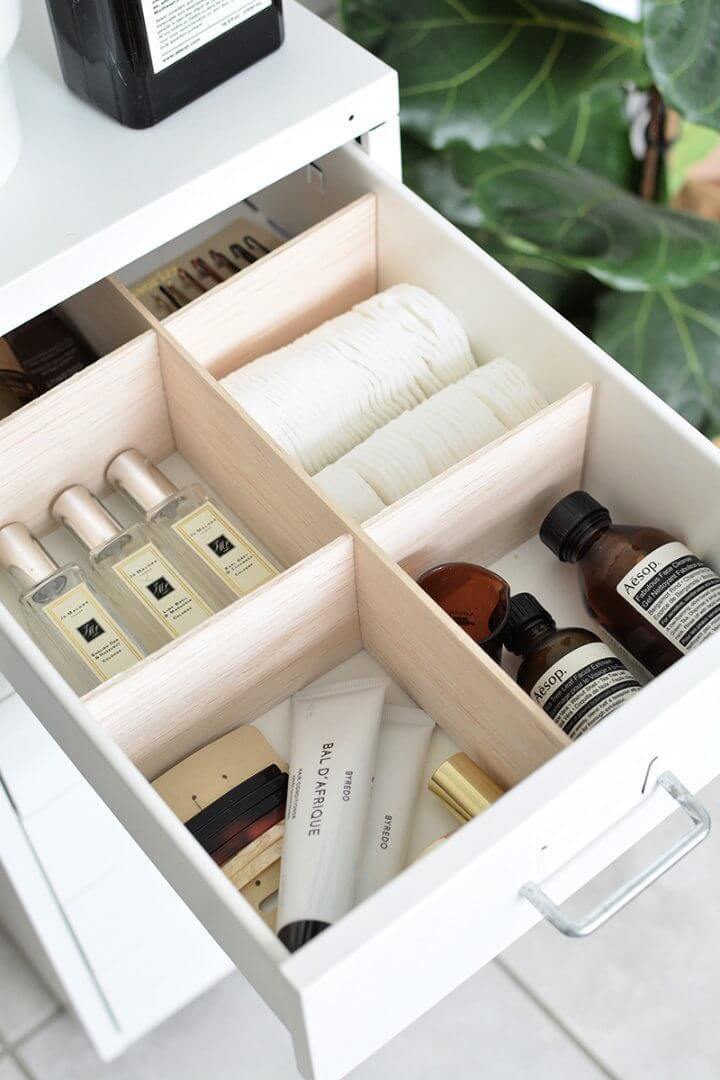
DIY Wooden Drawer Organizer
Transform your kitchen drawers from chaotic to calming with a DIY wooden drawer organizer that’s easy to create and requires minimal tools. By following the simple guide at Love & Renovations, you can craft a custom solution that boosts kitchen efficiency and brings joy to your daily routine. With Weldwood Instant Wood Adhesive handling the assembly process, this project is not only quick but also environmentally friendly, making it perfect for anyone looking to enhance their kitchen storage without breaking a sweat. Plus, it’s an excellent opportunity to repurpose scrap wood, reducing waste and adding a touch of sustainability to your DIY endeavors.
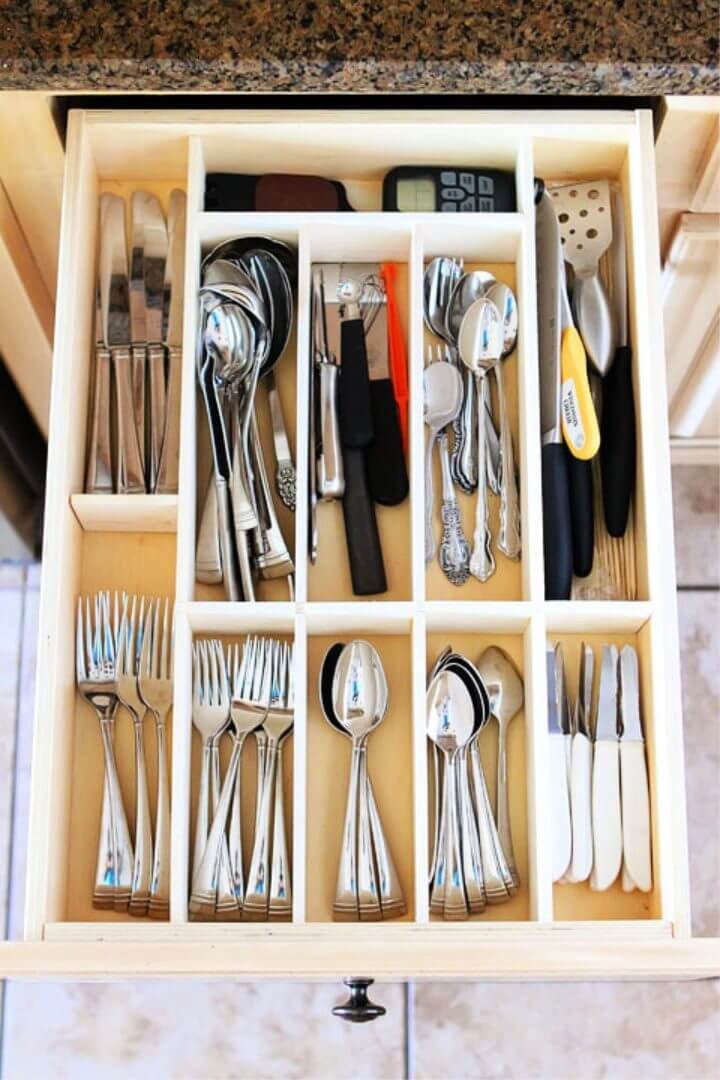
Kitchen Utensil Drawer Dividers
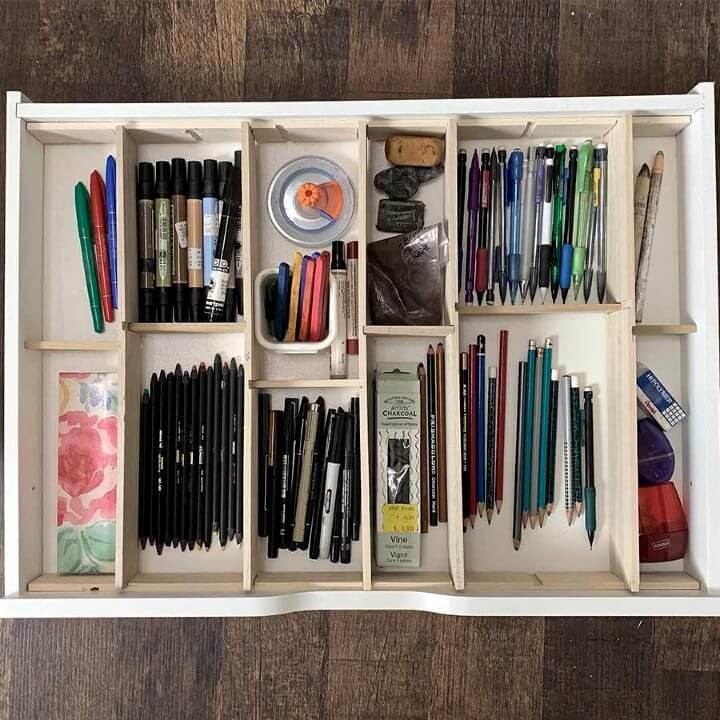
Unleash the potential of your kitchen drawers with this transformative DIY project! Say goodbye to cluttered chaos and hello to custom-organized spaces where every utensil has its perfect spot. The best part? It’s easier than you think. By following a simple, step-by-step guide, you can create kitchen utensil drawer dividers using basic materials like project boards and wood glue. This DIY approach allows you to tailor your space to fit your unique needs, eliminating unused gaps and making every utensil effortlessly accessible. Start building a neater, more functional kitchen today by visiting Addicted 2 Decorating for the full instructions.
How to Make a Drawer Dividers
Transforming chaotic drawers into organized spaces is now easier than ever with our step-by-step guide for building DIY drawer dividers. This customizable solution ensures that items are always in their proper place, eliminating the frustration of misplaced belongings. With a time commitment of just 2 to 5 hours and an estimated cost of $20-$80, you can enjoy a clutter-free environment without breaking the bank or requiring extensive DIY experience. By using minimal tools and plywood, this beginner-friendly project is perfect for those looking to maximize their storage space while minimizing waste. Follow our simple steps to achieve a tidy and organized haven that will make the most out of your available space.
Easy DIY Drawer Organizers
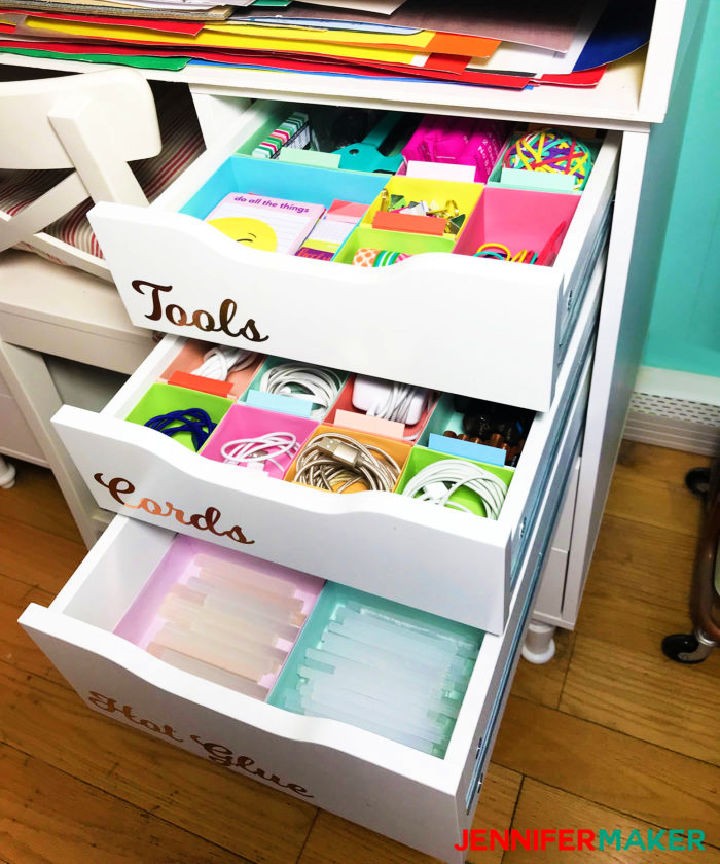
Say goodbye to cluttered drawers and hello to streamlined storage spaces by creating handmade DIY drawer dividers. These customizable organizers can fit almost any drawer size, including IKEA Alex drawers, using simple materials like cardstock and glue. The best part? They come with tabs for easy labeling, making it a cinch to keep items sorted and find what you need in an instant. With a step-by-step tutorial to guide you through the process, you’ll be able to transform your chaotic storage spaces into models of organization that bring joy and ease to your daily routine.
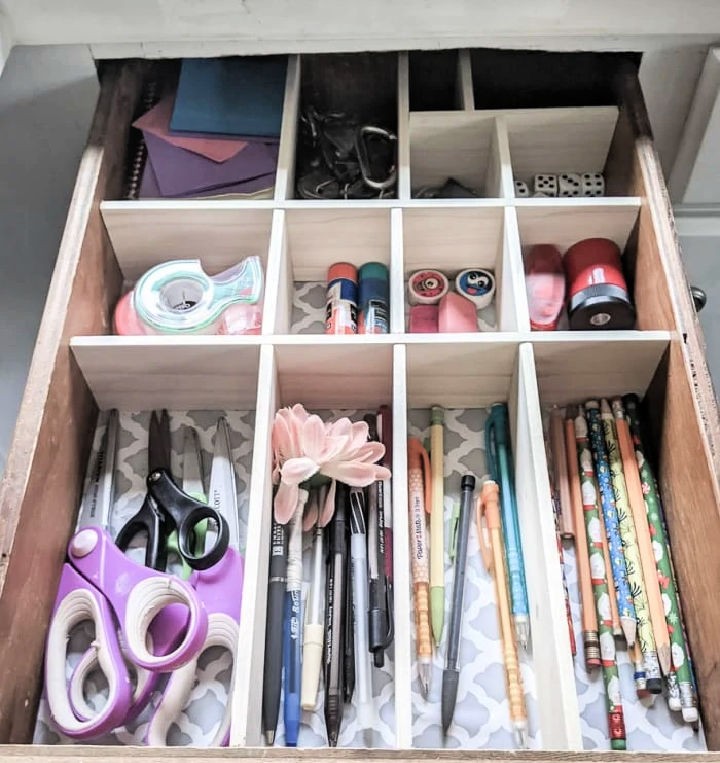
Making a Drawer Organizers
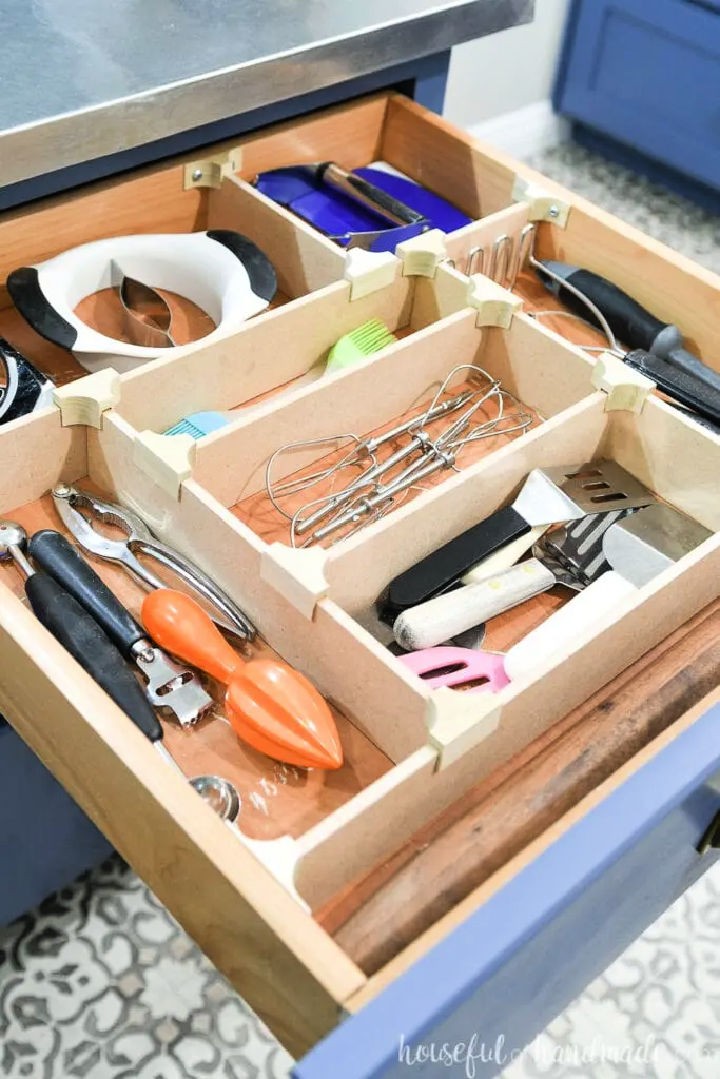
Reinvent your cluttered drawers into a sanctuary of tidiness with these straightforward DIY drawer dividers. By following the simple steps outlined at Houseful of Handmade, you’ll be able to craft custom dividers that remain steadfast, even when those drawers get opened with gusto. Additionally, learn how to create a practical knife holder that keeps blades safely tucked away. Perfect for any home seeking to infuse a touch of order and personal flair into their daily routine.
DIY Drawer Dividers With a Sliding Tray
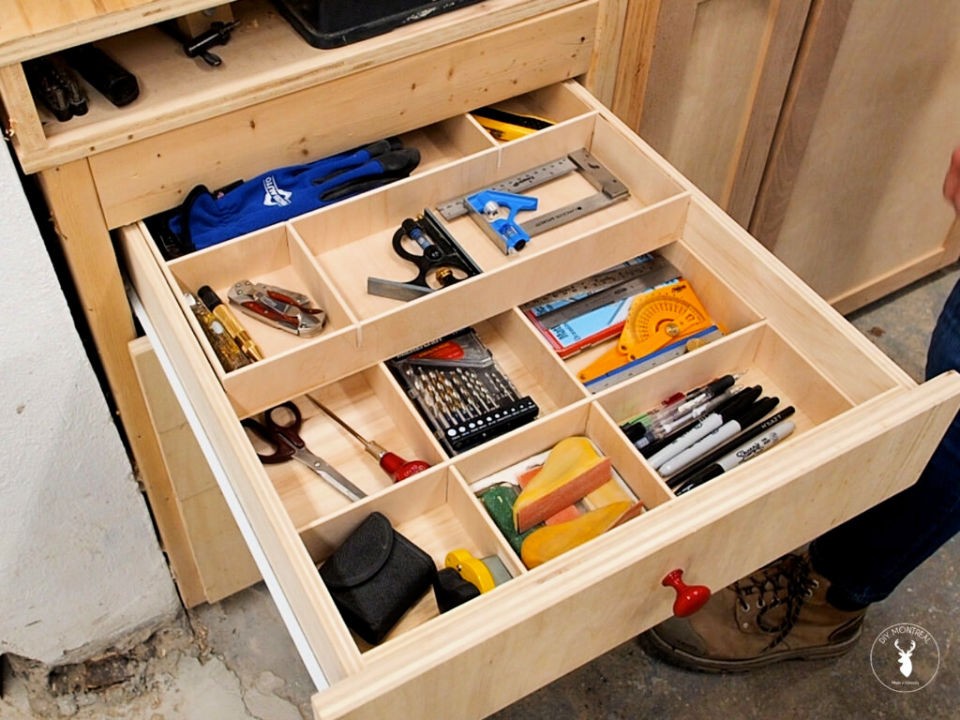
Transforming a chaotic workshop into an organized haven can be achieved through the creation of DIY drawer dividers and a sliding tray. This step-by-step guide provides a straightforward approach to maximizing every inch of space, keeping tools and accessories neatly arranged. By utilizing plywood or MDF, you’ll learn how to tweak your storage solutions, enhance accessibility, and reclaim lost vertical space. Say goodbye to clutter and hello to efficiency in your workshop with this easy-to-follow tutorial.
Super Easy Drawer Dividers
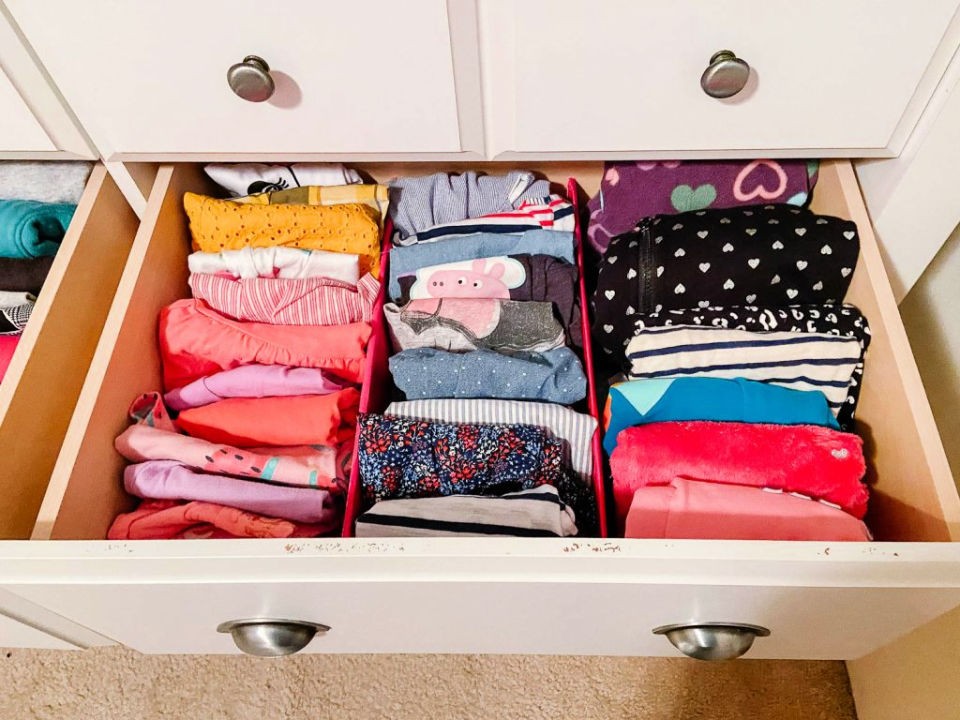
Elevate your storage game by transforming cluttered drawers into tidy havens using DIY drawer dividers from Small Stuff Counts. This eco-friendly and budget-friendly solution utilizes recycled materials like cardboard boxes, making it an environmentally conscious choice for organizing small items like baby clothes. The simplicity of this project belies its impact – once implemented, you’ll be astonished at how much more functional your space becomes. To get started, follow the easy-to-follow guide on decluttering, measuring, cutting, wrapping, and installing these dividers to bid farewell to messy drawers and hello to a sense of accomplishment.
Make Your Own Drawer Dividers
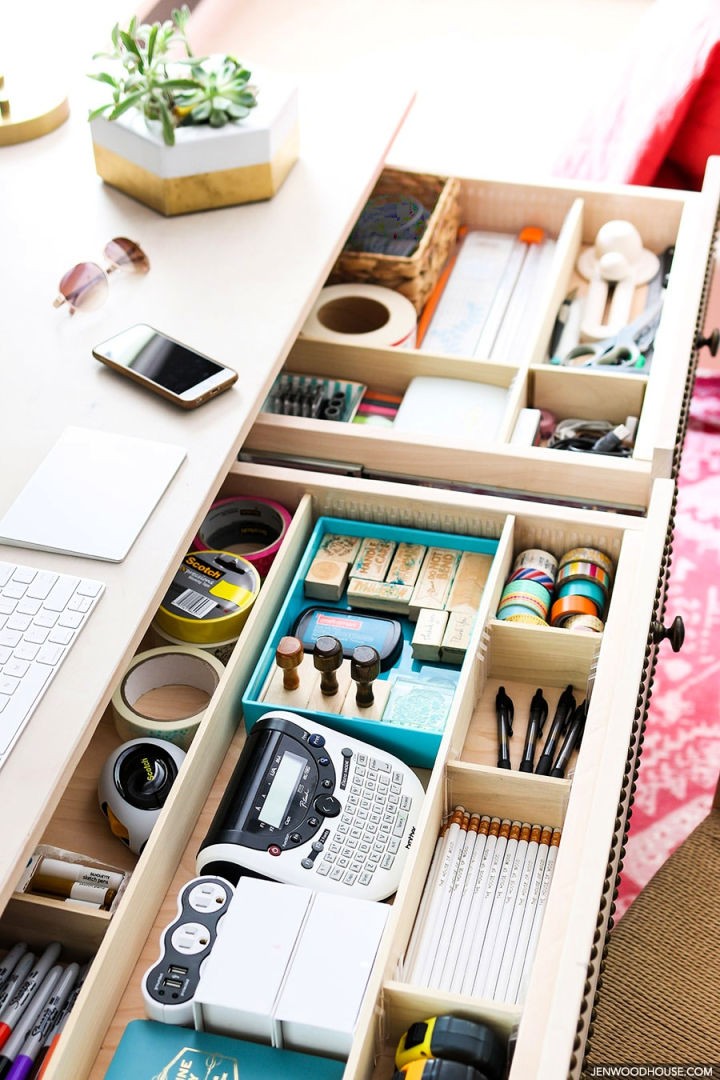
Discover the simplicity of transforming your workspace into a haven of organization with DIY drawer dividers. By following Jen Woodhouse’s straightforward guide on her blog, you can effortlessly create custom compartments to corral your desk drawers’ contents. This practical solution not only simplifies storage but also breathes new life into your daily workflow. With just a few easy steps, you’ll be able to reclaim control over your essentials and elevate the overall efficiency of your space.
How to Make a Drawer Dividers
Discover the joy of a clutter-free crafting experience with our DIY drawer divider tutorial! In just a few simple steps, you can transform messy drawers into a well-organized haven for your supplies. Our comprehensive guide on Instructables will walk you through creating customizable dividers that fit your unique needs and budget. Whether you’re a seasoned crafter or just starting out, this accessible project is the perfect solution to maximizing space and streamlining your craft stash in no time.
DIY Drawer Dividers Out of Cardboard
Transform your drawers from chaotic free-for-alls to organized sanctuaries with these easy DIY cardboard dividers. A cost-effective solution for maintaining a tidy office space, this project offers not only financial savings but also a sense of accomplishment that comes from decluttering. With just basic supplies like cardstock, glue, and a craft knife, you can follow our step-by-step guide to create your own custom dividers. Perfect for anyone who craves a neat workspace, this fun and rewarding activity promises a clutter-free drawer in as little as 2 hours. Start crafting today and discover the joys of an organized drawer!
How to Build a Drawer Divider
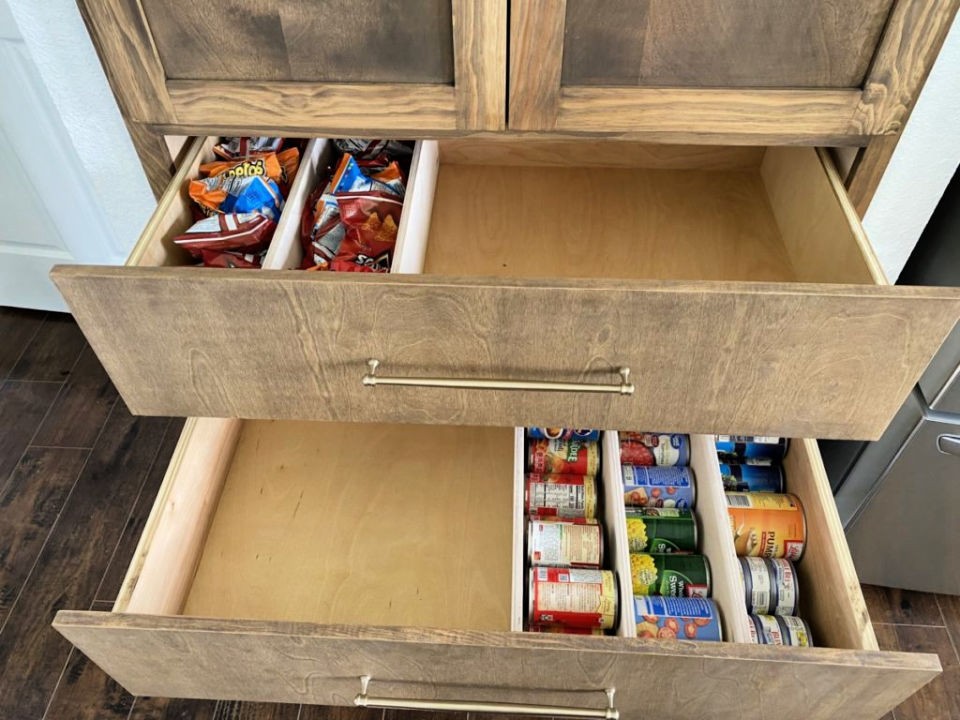
Get ready to tame the chaos and transform your drawers into tidy havens with DIY Drawer Dividers. This easy-to-execute project requires minimal time and effort, but yields maximum results. Simply empty out the cluttered compartment, take precise measurements, and craft your dividers from readily available materials like plywood. With a miter saw, drill, and Kreg Pocket Hole 720Pro at your disposal, you’ll be able to create sturdy, custom joints in no time. Whether you’re looking to streamline your kitchen or bring order to any drawer in disarray, this DIY solution is the perfect starting point. For a comprehensive guide on crafting cost-effective, bespoke drawer dividers, visit Sawdust2Stitches for expert tips and tricks.
Cheap DIY Drawer Dividers
Transform your disorganized drawers into tidy sanctuaries using this economical and accessible DIY project. By crafting customizable drawer dividers, you can effortlessly corral items of any size within the confines of your storage space. Bid adieu to the chaos that often besets kitchen utensil or office supply compartments, as this straightforward guide empowers you to create a practical, removable solution for maintaining a clutter-free environment. With minimal materials and a small investment of time, you can effortlessly optimize the organization of your drawers, freeing yourself from the stress of searching for misplaced items.
DIY Desk Organizing Drawer Dividers
Transforming cluttered spaces into tidy havens is just a DIY project away. Our simple guide to creating drawer dividers requires minimal supplies like cardstock, glue, and basic tools. What’s more, this highly customizable project lets you tailor your dividers to perfectly suit your needs, maximizing every inch of available space. The result is a game-changing solution for maintaining an orderly workspace and boosting productivity. For a step-by-step tutorial on crafting these functional and aesthetically pleasing dividers, head over to The Crafting Nook and bid farewell to messy drawers. In addition to tidying up your desk drawers, you can also give your baby’s closet a beautiful makeover with our easy-to-install, affordable baby closet dividers. These quick-to-assemble organizers will keep clothes off the floor and neatly organized, making it simple to find what you need when you need it.
Pull Out Drawer Dividers for Water Bottles
Say goodbye to the chaos of water bottles cluttering your kitchen countertops and hello to an organized haven with DIY pull-out drawer dividers! With simplicity and practicality in mind, these dividers transform a messy cabinet into an easily accessible space for all your favorite beverages. Whether you’re looking to tackle the January organizing frenzy or simply crave a decluttered sense of serenity, this game-changing solution is the perfect place to start. And with Jaime Costiglio’s helpful guide, you’ll be well on your way to streamlining your space in no time.
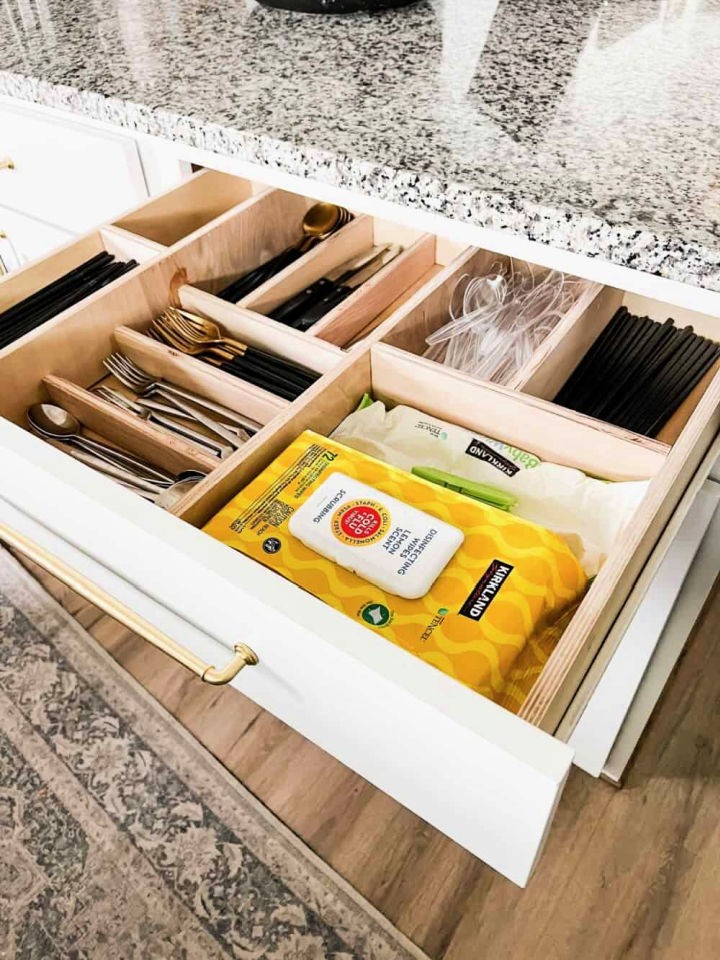
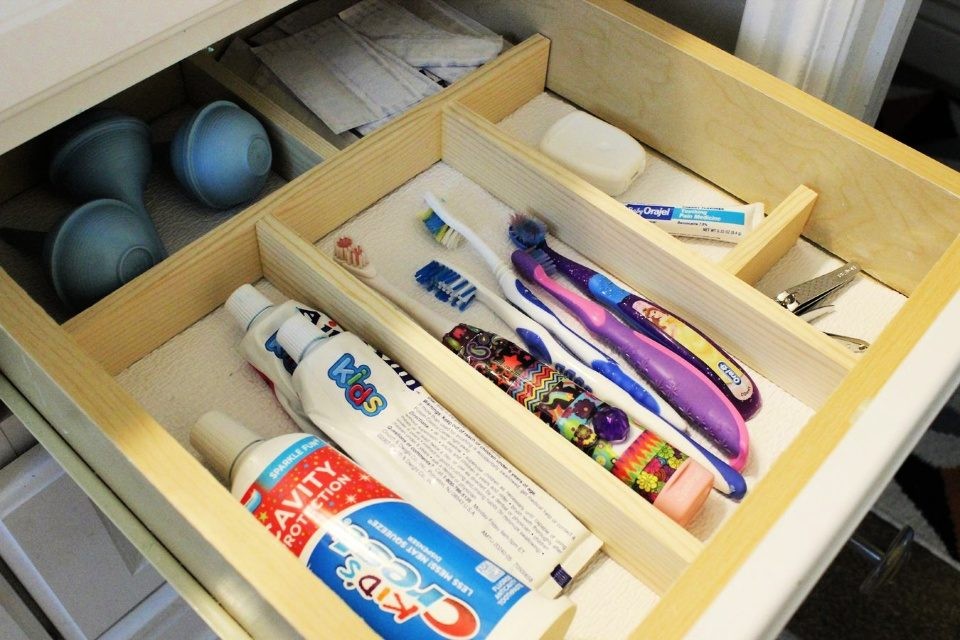
Wooden Kitchen Drawer Organizer
Transform your chaotic kitchen drawers into tidy and functional spaces without breaking the bank. This DIY guide reveals a simple and accessible solution for achieving a clutter-free kitchen without requiring extensive DIY expertise. By investing under $10, you can create custom, removable drawer dividers that cater to your specific storage needs. Say goodbye to digging through a jumbled mess of utensils and hello to a more organized and efficient kitchen experience. With this budget-friendly project, you’ll be able to bring order and harmony to your cooking space in no time.
Easy DIY Wood Drawer Dividers
Transform your kitchen drawers into an organized haven by creating your own DIY wood dividers. Ditch the flimsy plastic containers and opt for a more elegant, custom solution that adds a touch of sophistication to your kitchen space. With some basic plywood and a bit of crafting know-how, you can create functional and stylish dividers that keep everything in its place. Whether you’re dealing with limited storage or simply want to streamline your kitchen’s workflow, these dividers are the perfect answer. By following a simple measure-cut-assemble process, you’ll be able to enjoy perfectly organized drawers that make the most of your available space.
Free and Easy DIY Drawer Dividers
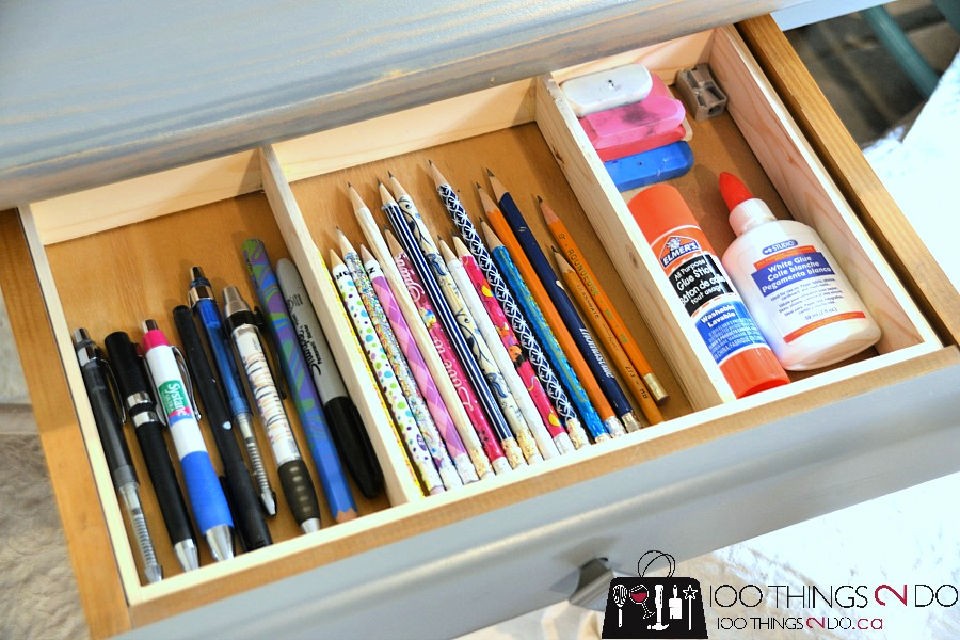
Imagine transforming your cluttered drawers into a meticulously organized space without breaking the bank. The solution is surprisingly simple: create custom drawer dividers using repurposed materials and a dash of creativity. This innovative DIY project can bring order to chaos in any room, from the kitchen to your workspace. Ready to get started? By following our easy-to-follow guide at 100Things2Do.ca, you’ll be able to tidy up quickly and efficiently without spending a dime. Say goodbye to drawer disarray and hello to a more organized you.
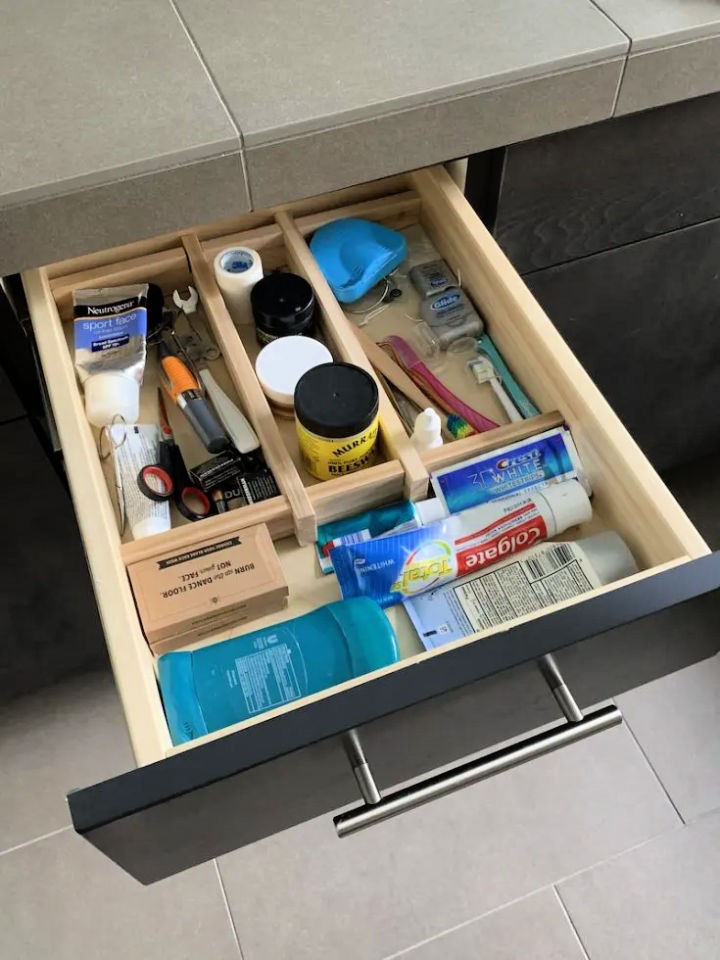
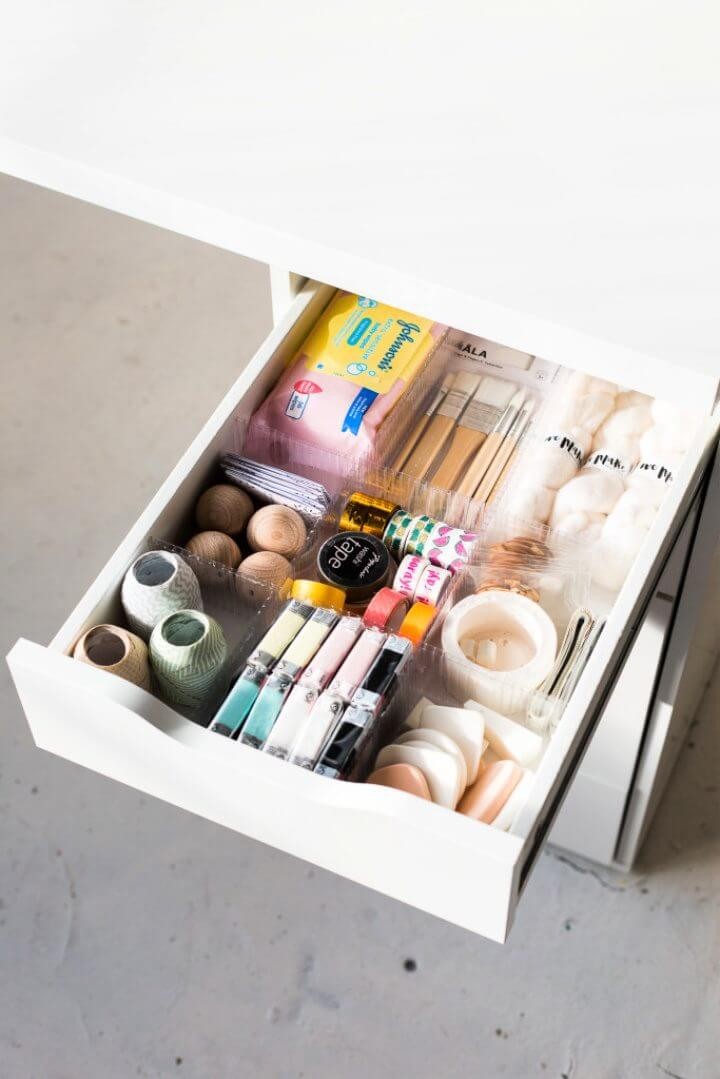
Dollar Store DIY Bathroom Drawer Organization
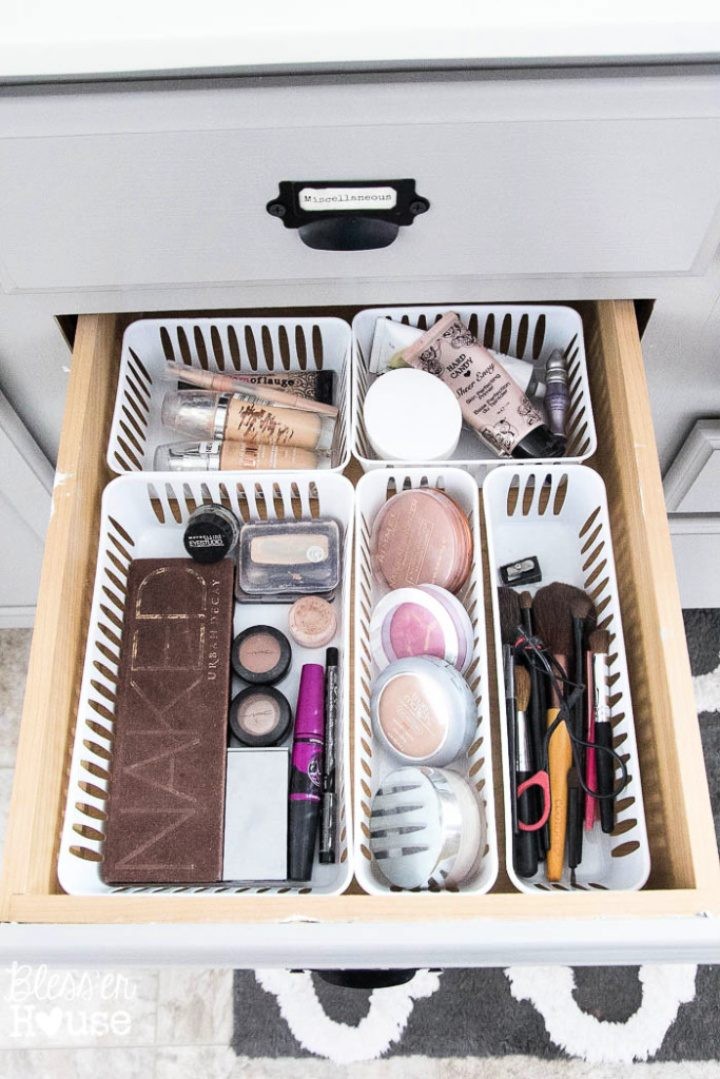
Discover how to transform your bathroom drawers from chaotic to captivating without sacrificing style or breaking the bank! By incorporating clever finds from your local dollar store, you can create a harmonious and organized space that exudes elegance without the hefty price tag. This practical guide provides a straightforward and inspiring solution for turning your bathroom into a tranquil oasis on a tight budget. For a step-by-step tutorial that brings balance to your home, visit The Summery Umbrella for expert advice.
DIY Makeup Drawer Dividers
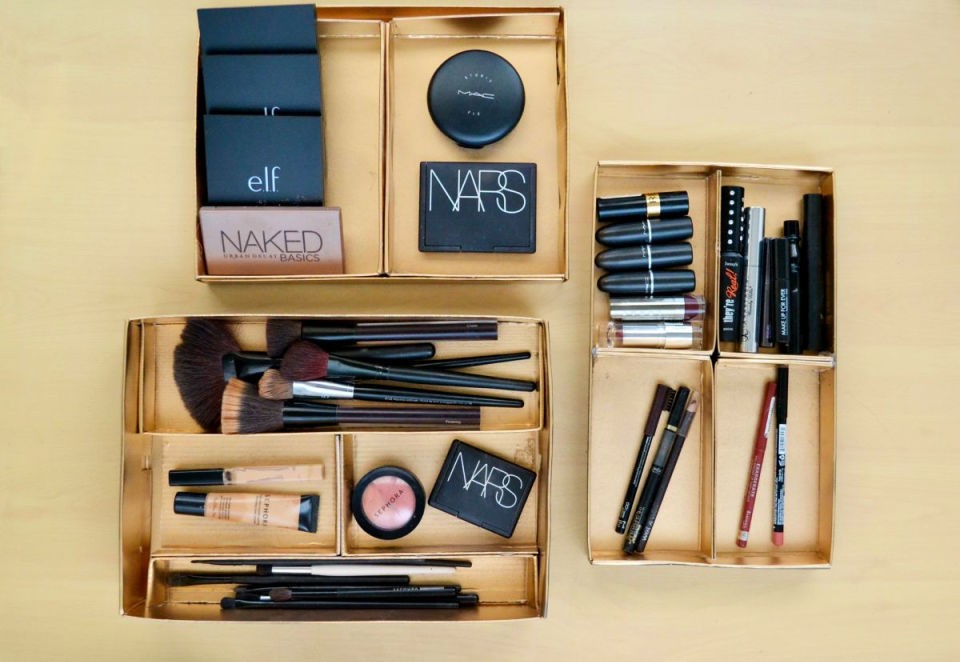
Transforming your chaotic makeup drawer into a serene sanctuary is now possible with this clever DIY Makeup Drawer Divider tutorial. By giving old shoebox tops a new lease on life, you can design custom dividers that not only streamline your space but also infuse it with personal style. This uncomplicated project demands only fundamental supplies like a hot glue gun, craft knife, scissors, and possibly a dash of metallic spray paint to imbue the finish with a touch of luxury. Perfect for organizing makeup, nail polish, or small items, these dividers guarantee to revolutionize your drawers in no time.
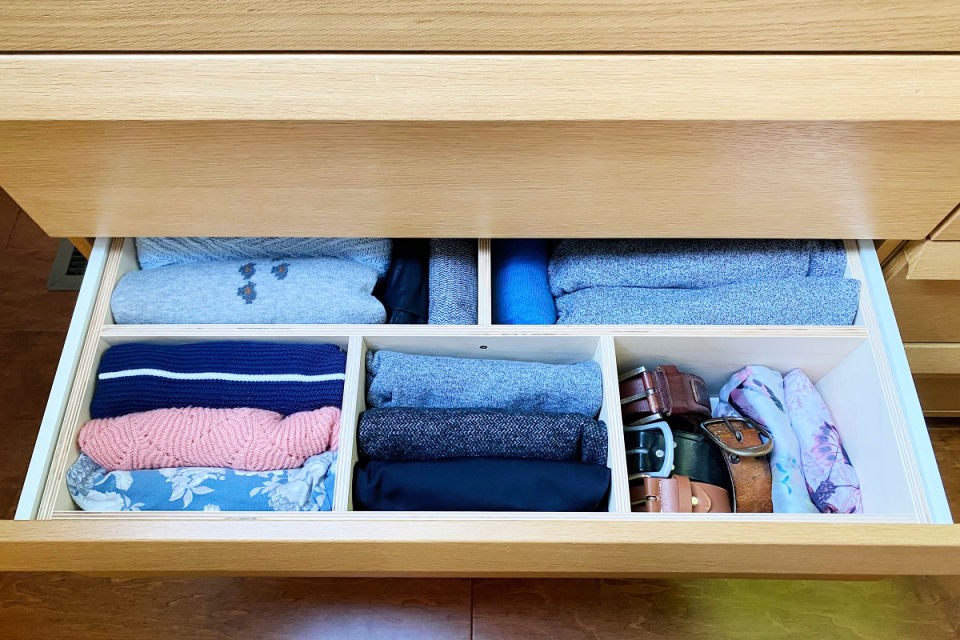
Build Wood Drawer Dividers
Transform your disorganized drawers into sleek, functional spaces with a simple DIY project using adjustable wood drawer dividers. This straightforward tutorial is perfect for anyone looking to boost their home’s organizational prowess. To get started, you’ll need basic tools like a Dremel and miter saw. With these handy tools, you can effortlessly revamp your Ikea Alex drawers and create customized storage solutions that cater to all your needs. By following this step-by-step guide, you’ll be able to compartmentalize your belongings with ease, streamlining your daily routine and freeing up valuable time for more enjoyable pursuits. Visit ArtsyPrettyPlants for the full tutorial, complete with detailed instructions, a comprehensive materials list, and actionable steps that will have you enjoying a clutter-free living space in no time.
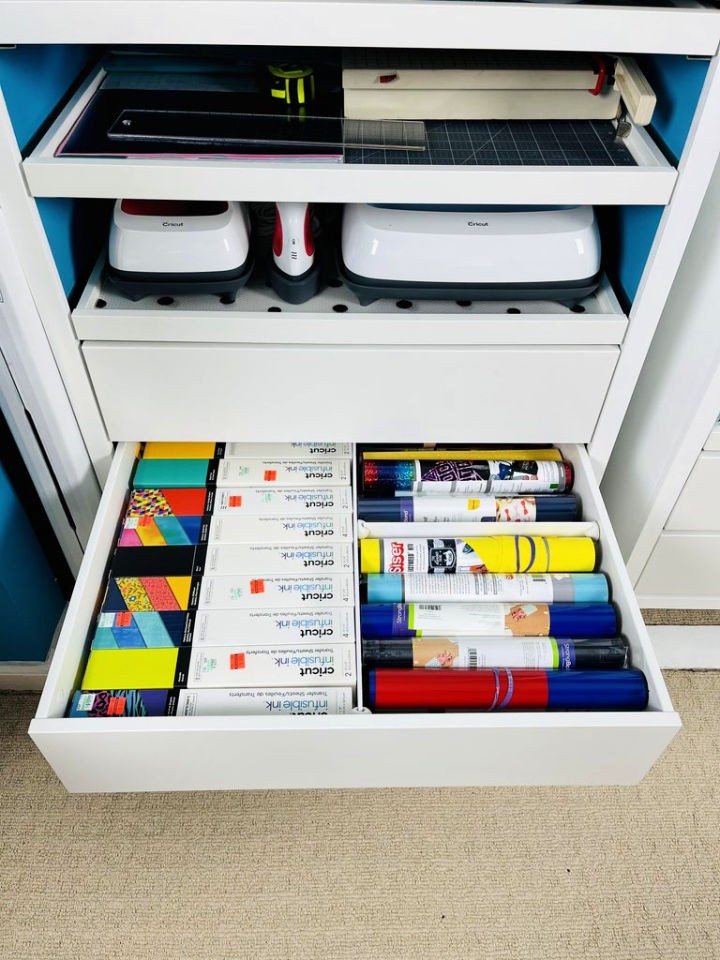
Drawer Dividers to Organize Your Craft Supplies
Turn cluttered drawers into organized havens with a creative DIY solution for managing craft supplies! This innovative approach from Fall for DIY provides an affordable and customizable way to keep your crafting materials tidy. By combining corrugated plastic sheets, a retractable knife, and a ruler, you can create adjustable dividers that fit any drawer size. Not only is this method budget-friendly, but it also ensures your supplies remain neatly categorized, making them easier to locate and utilize. This technique isn’t limited to craft supplies – it’s perfect for organizing stationery, kitchen tools, or even makeup essentials. Start your project today and transform every drawer in your home into a model of efficiency!
Make Your Own Drawer Dividers
Transform chaotic drawers into harmonious spaces with a touch of creativity! A DIY drawer divider project offers a tailored solution for non-standard organizers, effortlessly keeping your belongings organized while adding a charming twist to any room – be it kitchen or bedroom. With this easy and effective approach, you’ll bid farewell to cluttered chaos and welcome the joy of organization.
Wooden Drawer Organizing Dividers
Transform your cluttered drawers into tidy sanctuaries with a budget-friendly DIY project! At RestorationBeauty, discover how to create wooden drawer organizers for under $10, perfect for streamlining your kitchen or office space. This comprehensive guide walks you through a straightforward process of crafting custom dividers using basic tools and materials, ensuring maximum storage capacity and effortless accessibility. Ditch the disarray and welcome a sense of order with this cost-effective solution.
How to Make a Drawer Organizer
Discover the secret to a tidy abode without breaking the bank! By leveraging simple DIY skills and budget-friendly materials, you can transform your home’s organization from chaotic to cohesive. Our step-by-step guide will walk you through crafting a functional drawer organizer for under $10, helping you create a space where everything has its perfect place. Whether it’s a cluttered kitchen or a messy bedroom, this project is the perfect solution for anyone seeking a more streamlined living environment. And the best part? It’s an eco-friendly way to organize your belongings, ensuring your home not only looks great but also feels sustainable and peaceful.
Conclusion
As you wrap up this DIY journey, you’re left with a sense of accomplishment and the knowledge that your newly organized space is not only functional but also a reflection of your personal touch. The process of crafting DIY drawer dividers has allowed you to tap into your creativity and explore new possibilities. With the skills and insights gained from this guide, you now have the power to transform your drawers into bespoke havens that perfectly suit your needs and style. So, take pride in your handiwork and get ready to revel in the satisfaction of a clutter-free space, where every item has its designated place.