Crafting your own DIY bracelets is an excellent way to infuse your personal style and create unique jewelry pieces that can be worn on any occasion or given as thoughtful gifts. With a vast array of 60 easy and cute bracelet ideas at your fingertips, the possibilities are truly endless. This guide will walk you through efficient methods for making a simple yet stylish bracelet using just one string in under 5 minutes, along with other DIY jewelry tutorials that cater to all skill levels. Whether you’re looking to personalize your accessory collection or searching for innovative gift ideas, these tutorials will equip you with the skills and confidence to tackle any project. As we delve into the creative process, we’ll demystify the art of DIY bracelet making and empower you to unleash your inner crafter.
Why Make DIY Bracelets?
While crafting DIY bracelets may seem like a leisurely activity at first glance, it actually offers a wide range of benefits that can cater to diverse interests and needs. For instance, creating personalized gifts for friends and family demonstrates thoughtfulness and effort, making each piece truly unique. Furthermore, the ability to tailor accessories to one’s personal style and preferences means you can craft bracelets that perfectly complement your wardrobe. Additionally, making your own jewelry offers a cost-effective solution, allowing you to experiment with various styles without breaking the bank. Moreover, crafting can be a therapeutic activity, providing a relaxing escape from stress and promoting mindfulness through repetitive motions. As you develop new skills and techniques, such as knotting, weaving, and beading, you’ll gain confidence in your crafting abilities and be inspired to take on more complex projects. Finally, by choosing sustainable materials or repurposing items you already have, making your own bracelets can be an eco-friendly alternative to purchasing mass-produced jewelry.
How to Make a Bracelet with 1 String in 5 Minutes: DIY Jewelry Tutorials
Crafting a beautiful bracelet doesn’t have to be an overwhelming task. With minimal materials – a basic string and a bead of your preference – you can create a one-of-a-kind piece that effortlessly elevates any outfit. In just five minutes, follow this straightforward guide to learn how to craft a stunning one-string bracelet with ease.
What You’ll Need:
To create this unique piece, you’ll need a few specific materials. First, you’ll require approximately 1.2 millimeters of red braided cord, which should be around 25 inches in length. This will serve as the foundation for your design. Next, select an 18K real gold cat eye bead (or substitute it with any other bead that catches your eye). Finally, cut a straw to roughly 2 inches in length. These humble components will come together to form something truly special.
Step 1: Prep Your Materials
To begin crafting your unique jewelry piece, start by trimming a regular straw to an approximate length of 2 inches. This makeshift ruler will serve as a guiding point for shaping your bracelet. Next, inspect your selected string and bead combination. Ensure that the thread can effortlessly pass through the bead’s hole, allowing for smooth manipulation during the assembly process.
Step 2: Begin Wrapping the String
Begin by identifying the center point of your string and place your straw atop it. Next, start wrapping the string around the straw in a smooth, continuous motion from right to left. Continue this process for five or six repetitions, depending on your desired level of intricacy, to create a visually appealing bracelet design.
Step 3: Thread Through the Straw
As you complete the wrapping process, take the right end of the string and feed it through the straw. Once fully threaded, gently pull the string back out and then proceed to tighten both the left and right sides to ensure a secure hold on your finished product.
Step 4: Add the Bead
As you move forward with threading your selected bead onto the cord, ensure it’s securely in position before proceeding. Next, place the straw atop the cord, followed by wrapping it around from right to left for a total of five to six passes. Finally, pull everything through the straw once more and tighten the knot, securing the bead firmly in place.
Step 5: Make an Adjustable Closure
To achieve an adjustable bracelet, you’ll employ a variation of the method used in step four, substituting your fingers for the straw to create the knots. This technique should be comfortably familiar, requiring only a slight adjustment to execute with ease.
Step 6: Final Touches
To complete your bracelet, begin by trimming the excess cord, yet ensure you don’t cut too close to the knots. A crucial step in securing the ends and preventing fraying is to carefully apply heat to the cord’s edges, effectively sealing them.
Step 7: Enjoy Your New Bracelet
With the completion of this effortless project, you’re left with a stylish and personalized accessory that’s perfect for wearing proudly or bestowing upon a loved one as a heartfelt present.
Video Tutorial
Combining video and written guidance, we’ve crafted a comprehensive approach to making a stunning bracelet with just one string. For a step-by-step visual tutorial, check out Karen Hui’s insightful video guide: [link]. This harmonious pairing of visual and written explanations makes the process accessible for those who learn best through hands-on demonstration. By breaking it down into simple steps, anyone can create a sophisticated piece of jewelry without feeling overwhelmed. The key to success lies in embracing the creative process and having fun along the way.
FAQS on Making DIY Bracelets
Embarking on the journey of crafting your own bracelets can be an incredibly rewarding experience, allowing for a unique blend of creativity and self-expression. As you begin or continue to hone your skills, it’s natural to have questions – which is why we’ve curated a selection of frequently asked questions designed to guide and inspire you.
What materials do I need to start making DIY bracelets?
To create your own DIY bracelets, start by gathering a few essential materials. These include beads of various types, such as glass, wood, or metal, which will be the focal point of your design. You’ll also need elastic cord or string to provide flexibility and comfort for the wearer. Additionally, clasps and closures are crucial for securing the bracelet in place. A pair of jewelry pliers will come in handy for manipulating beads and other small components, while scissors can be used to trim excess material. Finally, super glue or jewelry glue is necessary for bonding certain elements together, such as attaching a clasp to the end of your design. As you become more comfortable with DIY bracelet-making, you may find yourself experimenting with additional materials like leather strips, embroidery thread, or specialized items like cabochons and settings.
How do I measure the bracelet to fit my wrist?
To determine your wrist size for the perfect bracelet fit, you’ll need a flexible tape measure or a piece of string. Wrap the measurement tool around the area where you’d like the jewelry to sit comfortably on your wrist. If using a string, mark the point where it overlaps and then measure this length against a ruler. To ensure a comfortable and secure fit, add half an inch to one inch (1.27 to 2.54 cm) to the measured length.
Can I make a bracelet without a clasp?
While traditional jewelry often relies on clasps to secure pieces in place, there are several ways to create slip-on stretch bracelets or adjustable knot bracelets that forego the need for a clasp altogether. To make stretch bracelets, you can utilize elastic cord, which naturally provides the necessary give and take to accommodate different wrist sizes. Alternatively, you can master various sliding knot techniques to craft adjustable knot bracelets, allowing wearers to easily adjust the fit as needed.
How do I secure the ends of a beaded bracelet?
To secure the ends of a beaded bracelet, there are a few different methods you can employ depending on the type of clasp and elastic used. If your bracelet features an elastic material, you can create a surgeon’s knot and reinforce it with a small amount of glue to prevent it from coming undone over time. For bracelets with traditional clasps, crimp beads or tubes can be used in conjunction with pliers to secure any wire or thread ends, before attaching the clasp itself using jump rings. This ensures that your bracelet remains securely fastened and won’t come loose under everyday wear.
What are some simple DIY bracelet designs for beginners?
Getting started with jewelry making is an exciting adventure! If you’re a beginner, don’t worry – there are plenty of easy designs to get you hooked. Here are some simple yet impressive projects to try: Start by creating stretch bead bracelets that can be dressed up or down, perfect for everyday wear. Next, move on to leather wrap bracelets that add a touch of sophistication to any outfit. If you’re looking for something more laid-back, simple string and bead bracelets are a great way to get creative with colors and textures. For a more personal touch, try braiding friendship bracelets that make thoughtful gifts or mementos. And don’t forget about the fun factor – popsicle stick bracelets are an awesome project for kids (or kids at heart!) that’s all about imagination and creativity.
How can I make my DIY bracelets look professional?
Achieving a polished appearance for your DIY bracelets requires attention to detail and quality execution. To elevate the look of your handmade accessories, focus on the following key elements:
Invest in high-quality materials that will give your creations a premium feel.
Make sure your cuts are precise and clean, ensuring a seamless finish.
Maintain symmetry and consistency throughout your design, whether it’s a pattern or texture.
Securely fasten ends and closures to prevent loose threads or dangling parts.
Above all, cultivate neatness in every aspect of your crafting process, from planning to execution.
Can DIY bracelet making be a good hobby for kids?
For many children, bracelet making can be an engaging and enriching hobby that fosters the development of essential skills such as patience, creativity, and fine motor control. A great place to begin is with straightforward projects that employ larger beads and flexible elastic cord, allowing young hands to navigate the process with greater ease.
How do I take care of my DIY bracelets?
To maintain the beauty of your DIY bracelets, it’s essential to establish good habits when it comes to their care. Firstly, avoid exposing them to water or humid environments, as this can cause damage or discoloration. Instead, store them in a cool, dry space where they won’t be subjected to harsh conditions. When cleaning is necessary, use a soft cloth and gentle motions to prevent scratching or damaging the materials. Additionally, refrain from placing your DIY bracelets near chemicals or other substances that could potentially harm them. By following these simple guidelines, you’ll be able to preserve the quality of your creations and enjoy wearing them for years to come. As you continue to craft new pieces, remember to also let your imagination run wild and create unique, personalized jewelry for yourself and those around you.
60 Easy DIY Bracelets: Cute Bracelet Ideas To Make
Transform your style with an array of simple yet stylish DIY bracelet creations, all of which can be effortlessly crafted in the comfort of your own home. This comprehensive guide is designed specifically for novices, providing a clear and concise roadmap to creating 60 unique and adorable bracelets.
How to Make Stretch Bracelets
Unlock the secret to crafting stunning, long-lasting beaded jewelry with confidence! By mastering the techniques shared by The Neon Tea Party, you’ll learn how to select the ideal Stretch Magic elastic string gauge, master the art of knotting, and secure your designs with G- Hypo Cement. With these expert tips at your disposal, you can create stretch bracelets that not only retain their original charm but also withstand the test of time. Whether you’re a seasoned DIY jewelry maker or just starting out, these practical insights will help you keep your creations intact and your style on point.
Easy DIY Name Bracelets
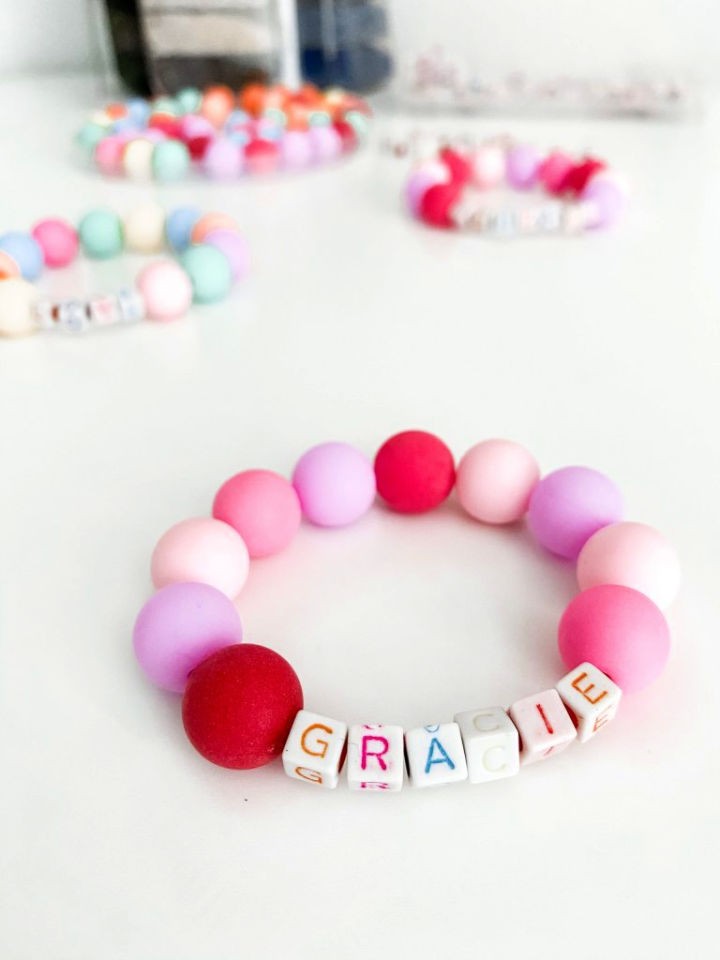
Crafting DIY name bracelets offers an immersive and personalized experience, allowing you to convey meaningful messages or showcase your unique style. By following our simple tutorial, you can learn to create these charming accessories using decorative and letter beads, elastic string, and crimp beads. Whether you’re looking for a thoughtful gift or a fun activity to share with kids, the process involves carefully selecting beads, securing them with crimp beads, and ensuring a comfortable fit. With helpful guidance, you’ll be able to master this craft and add a touch of individuality to your jewelry collection.
Beautiful DIY Glass Cabochon Bracelet
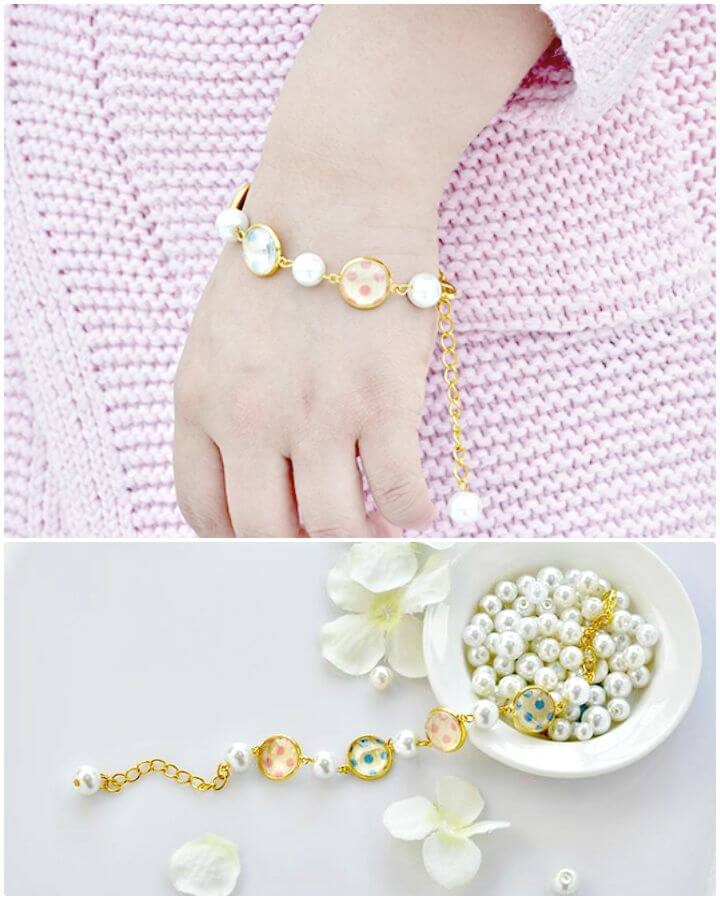
Crafting a glass cabochon bracelet adorned with pearl beads is an accessible DIY project that yields a stunning accessory perfect for any occasion. Pandahall’s tutorial simplifies the process into three manageable steps, guiding crafters through the creation of a stylish piece. Starting with a base crafted from scrapbook paper and topped with a glass cover, the design takes shape. Next, pearl beads are added to infuse elegance, followed by the attachment of chains and clasps that bring the entire piece together. This comprehensive guide offers practical instructions and a clear list of materials, making it easy for anyone to create their own unique cabochon bracelet. With its engaging approach and satisfying results, this project is ideal for those seeking a fun and rewarding jewelry-making experience.
How to Make Boho Leather Bracelets
Unleashing your creativity, one bohemian-inspired leather bracelet at a time. At Pop Shop America, we’re passionate about empowering people to craft their own unique accessories. With our easy-to-follow guide, you can create a stylish and carefree elegance piece using just a few simple supplies: antique corded leather, super soft suede cord, magnetic clasps, E6000 glue, and sharp scissors. The best part? No specialized tools or wire cutters required – the process is straightforward and fun!
Begin by measuring and cutting your leather cord to the desired length. Then, secure it to the magnetic findings with a small amount of glue. For those who prefer a more rustic look, mastering a simple leather slip knot can add an extra layer of uniqueness to your design. To simplify things further, you can even get all the essentials in one convenient DIY Leather Accessory Kit. So why not give it a try? With our guidance and your creativity, you’ll be rocking your new boho-inspired bracelet in no time!
Turquoise Rhinestone Wrapped Bracelet
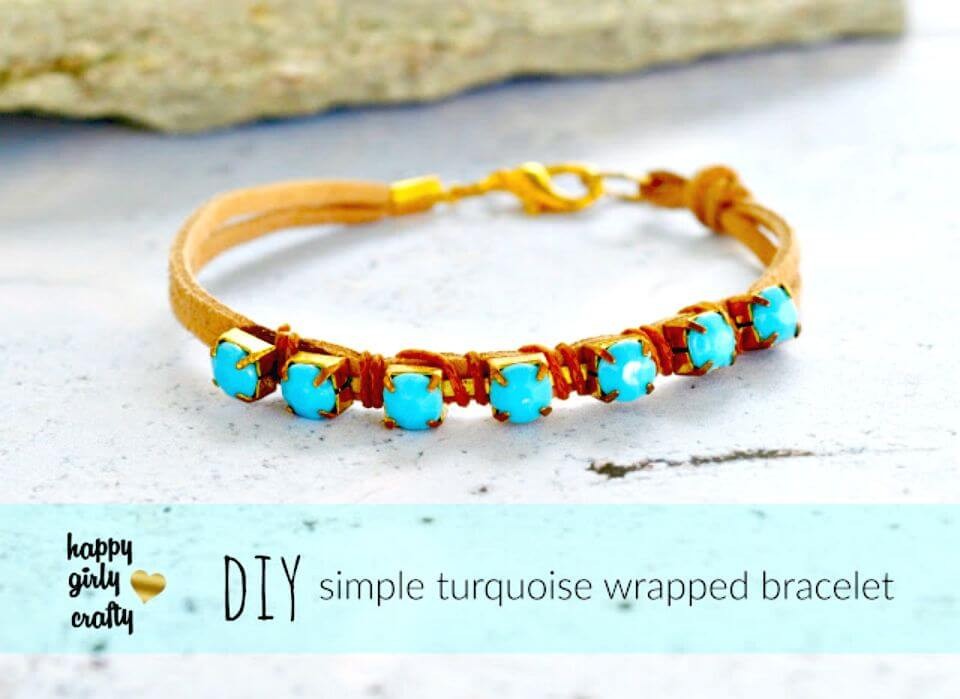
Craft a captivating turquoise rhinestone-wrapped bracelet with ease, thanks to Happy Girly Crafty’s step-by-step DIY guide. This vibrant accessory is perfect for adding a pop of color to your spring wardrobe, requiring only basic materials like suede cord, rhinestone cup chain, and a lobster clasp. The straightforward instructions make this project accessible to anyone who enjoys creating handmade jewelry, resulting in a charmingly unique piece that’s sure to garner compliments.
Make Your Own Zipper Bracelet
Transform a simple seven-inch zipper into a stunning piece of jewelry with this easy DIY guide. By combining the zipper with additional pulls, scissors, pliers, and a hot glue gun, you can create a one-of-a-kind accessory that adds a dash of personality to any outfit. To get started, simply cut and shape your zipper, then embellish it with decorative elements that reflect your personal style. Finally, secure the finished piece with a lobster claw clasp for a customized fit that’s all yours. This fun and accessible project is perfect for anyone looking to add a touch of handmade charm to their jewelry collection.
Beautiful DIY Studded Braid Bracelets
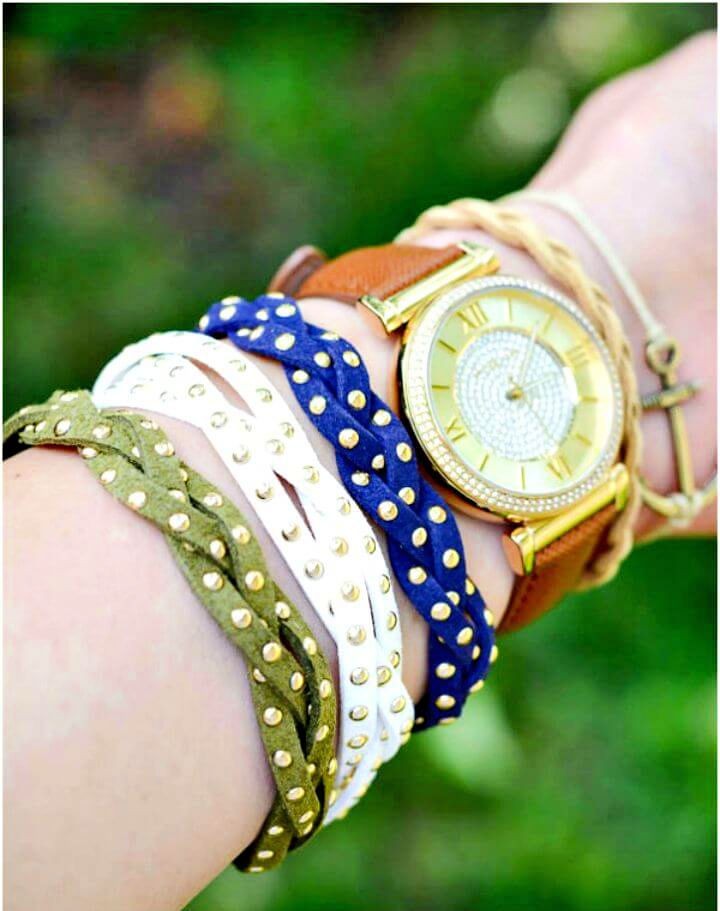
Unleash your inner fashionista by creating one-of-a-kind DIY studded braid bracelets that exude both edgy flair and timeless elegance. This comprehensive guide is designed for both seasoned crafters and newcomers alike, providing a straightforward pathway to crafting unique accessories that showcase your personal style. To get started, gather essential materials such as leather or faux leather strips, studs, a closure mechanism, and basic tools including scissors and glue. Once you’ve got the basics covered, it’s time to let your creativity shine by customizing your bracelets with an array of colors and stud patterns. Perfect for gifting or treating yourself, these statement pieces are not only a stylish addition to any outfit but also a testament to your burgeoning crafting skills. So why not dive in and create something truly special? With these simple steps, you’ll be on your way to crafting a bracelet that’s sure to turn heads.
Make a Suede Tassel Bracelet
Kim Purvis’ guide on Made in a Day reveals the secrets to creating a stunning suede tassel bracelet. The process is surprisingly straightforward, making it an ideal project for jewelry-making enthusiasts looking to expand their skills. With just a few basic materials, including medium brown leather suede string, jump rings, a lobster claw clasp, and embroidery string, along with some essential tools like pliers and a glue gun, you’ll be able to craft a beautiful bracelet that can even be paired with a matching necklace. Whether it’s a unique gift or a personal accessory, this handcrafted piece is sure to impress. The step-by-step tutorial is easy to follow and engaging, ensuring a fun and rewarding crafting experience that yields a chic and stylish suede tassel bracelet.
Extraordinary Leaf-shape Wire Bracelet
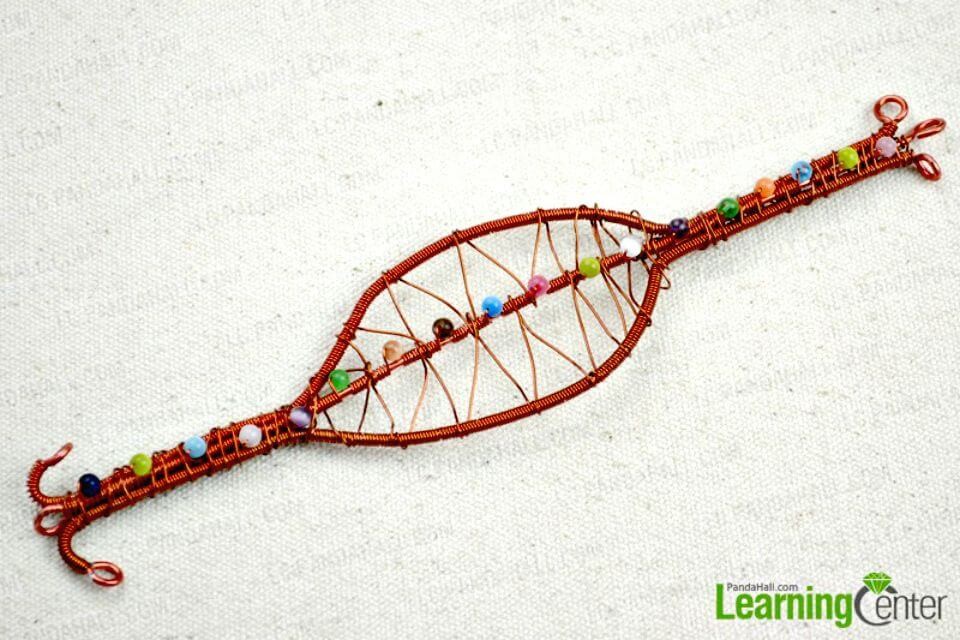
To create a breathtaking leaf-shaped wire bracelet, follow this comprehensive DIY guide. This tutorial is perfect for those seeking to infuse their jewelry collection with personal flair, as it simplifies the process while maintaining an accessible level of difficulty. To get started, gather your essential materials: aluminum wire, brass wire, and cat eye beads. Next, proceed through a series of step-by-step instructions to prepare the bracelet base, shape the coiled wires, and assemble the various components. Complete the piece by crafting a handmade S-hook clasp, resulting in a stunning accessory you’ll be proud to wear. As you practice your wire-wrapping skills, you’ll unlock the ability to create unique and intricate designs that showcase your artistic flair. So, grab your pliers and begin shaping wire into your next favorite accessory!
DIY Embellished Red Bead Weaving Bracelet
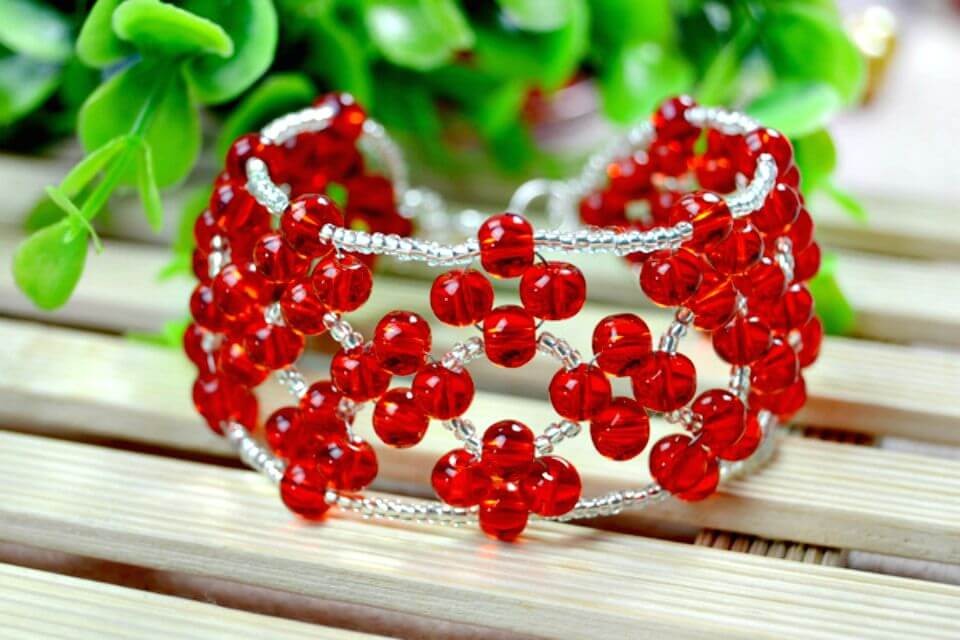
Discover the art of crafting an exquisite red right-angle weave bracelet through this concise tutorial. Geared towards jewelry enthusiasts of all skill levels, this straightforward guide utilizes simple beading techniques to create a delicate, yet festive accessory that adds a burst of color and charm to any outfit. By following the intuitive steps outlined below, you’ll effortlessly weave an embellished bracelet that will elevate your handmade jewelry collection with its polished finish, achieved through the connection of a jump ring and lobster clasp.
Making a Brass and Rope Bracelet
Transform ordinary materials into an extraordinary piece of jewelry with Eat+Sleep+Make’s DIY guide! With just a few simple supplies like brass tubing, colorful rope, and basic jewelry-making tools, you can create a stunning brass and rope bracelet that exudes modern style. The step-by-step tutorial is accompanied by helpful images, making it easy to follow along and produce a professional-looking finish. Take your creativity to the next level by adding a personal touch with gold wire and experimenting with different design elements. Whether you’re gifting or adorning yourself, this unique piece of jewelry is sure to turn heads.
Homemade Chain And Leather Wrap Bracelet
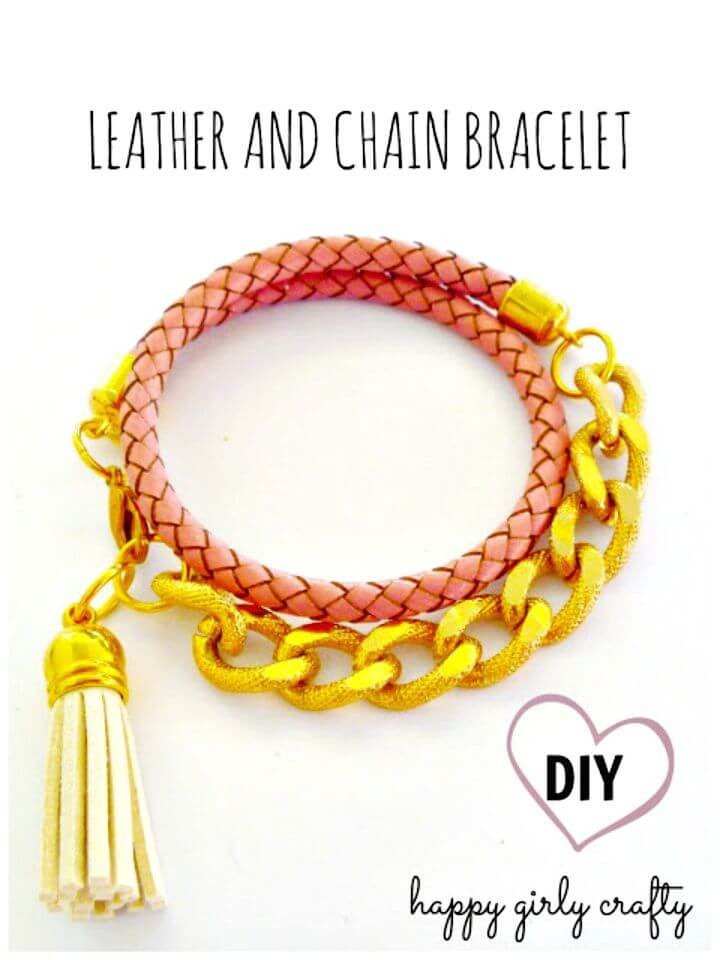
Transform your fashion sense with the art of crafting bespoke accessories. By following Happy Girly Crafty’s comprehensive guide on creating a sleek chain and leather wrap bracelet, you’ll master the combination of supple leather cord and eye-catching metallic elements, resulting in a unique and personalized accessory that’s perfect for gifting or adding a touch of elegance to your own wardrobe. With minimal tools required, including pliers, cutters, and basic jewelry findings, this easy-to-follow DIY project is accessible to crafters of all skill levels. Visit Happy Girly Crafty to discover the joy of creating your own accessories and elevate your style with a handmade flourish.
DIY Cascading Beaded Fringe Bracelet
Embark on a creative journey with this comprehensive guide from Craftaholique, where you’ll discover the art of crafting a captivating cascading beaded fringe bracelet. This step-by-step tutorial mirrors current fashion trends, guiding you through the process from securing the clasp with a crimp bead to adding the final beaded strands that create an exquisite cascading effect.
To bring this stunning piece to life, you’ll need a few essential materials: glass pearl beads, beading wire, and chain, as well as some handy tools like pliers and wire cutters. Not only will you learn to craft a breathtaking piece of jewelry that exudes handmade sophistication, but the process itself is also incredibly fulfilling.
As you work through this tutorial, you’ll gain confidence in your beading skills and develop a deeper appreciation for the art of creating something truly unique and beautiful.
Make Your Own Leather Cuff Bracelet
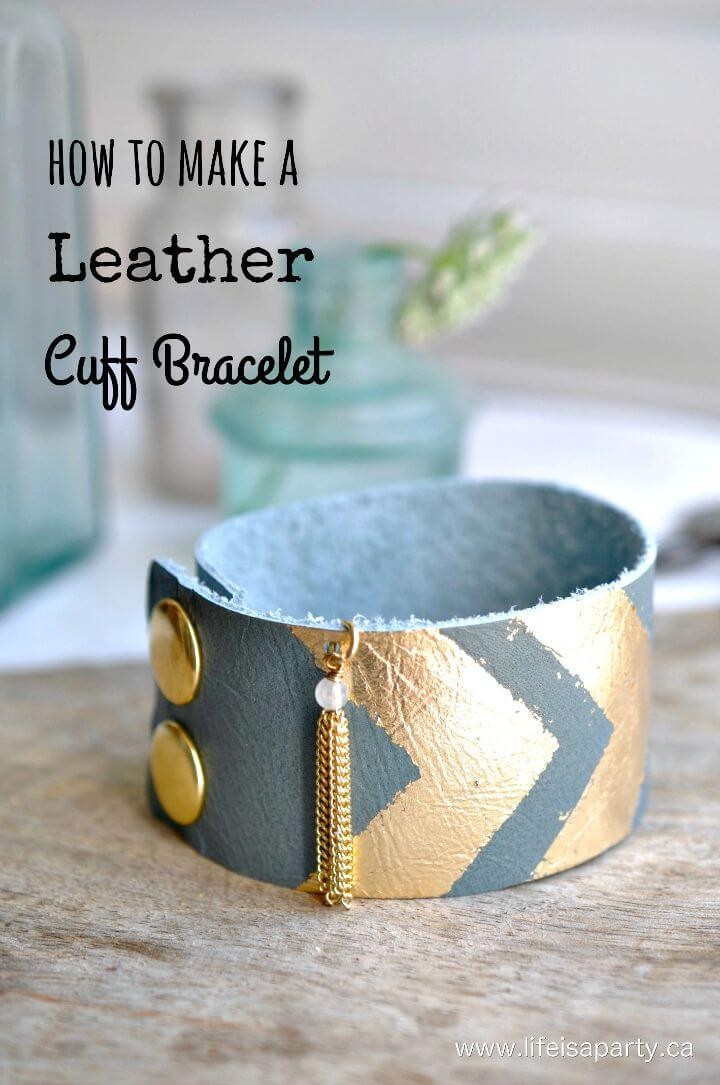
Are you ready to add a touch of uniqueness to your jewelry collection? Life is a Party’s comprehensive guide simplifies the process of creating a stylish leather cuff bracelet with minimal tools and materials. The tutorial covers essential skills, including cutting leather, attaching snaps, and embellishing with gold leaf and tassels. This DIY project is an ideal way to personalize your style for gifting or everyday wear. By following our clear, step-by-step instructions, you’ll create a comfortable yet eye-catching accessory that showcases your creativity. So, get crafting and elevate your jewelry game today!
Gorgeous DIY Popsicle Stick Bracelets
For a rainy day or chilly weather, there’s no better way to keep kids entertained indoors than with a fun and engaging craft activity that’s both simple and delightful. We’re excited to introduce you to one of our favorite activities: making popsicle stick bracelets! With just a few basic materials – jumbo popsicle sticks, boiling water, a glass to shape the sticks, and some decorative flair like paint or washi tape – kids can create their own unique accessories that they’ll love wearing. Simply boil the sticks, bend them into shape, and let them dry before unleashing their creativity with decorations. The result is a one-of-a-kind accessory that’s sure to bring a smile to their face.
How to Make Mars Bracelet
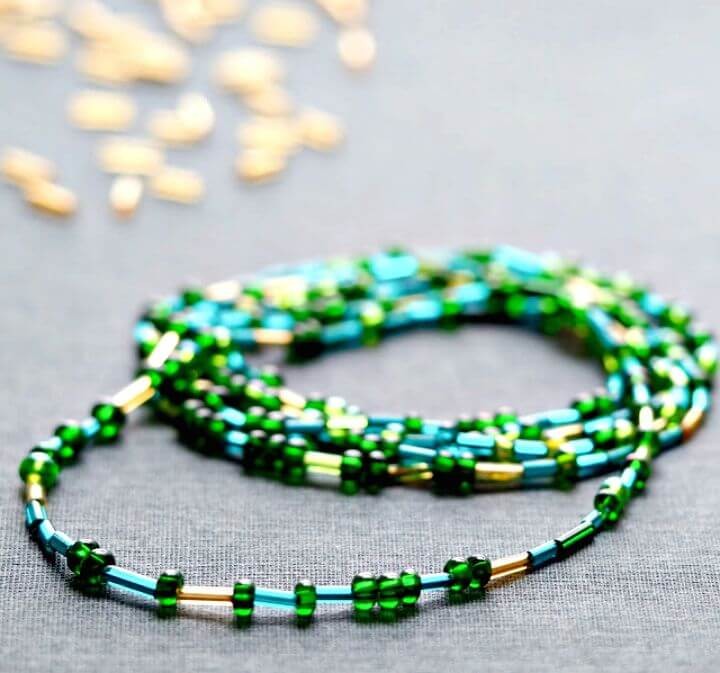
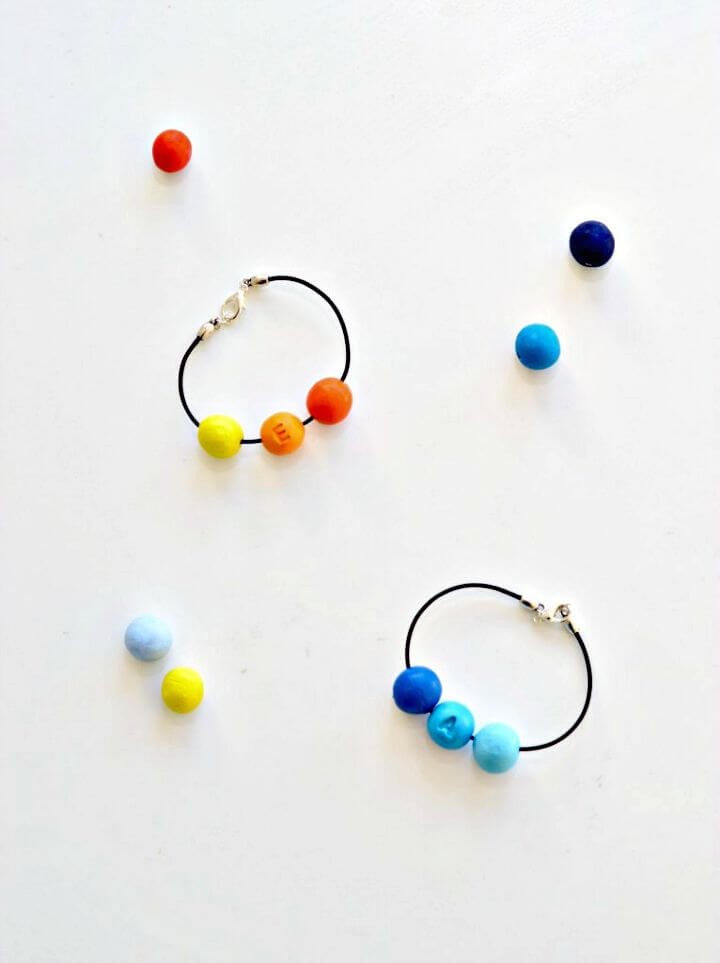
Embark on a creative journey by crafting a captivating ‘March’ bracelet using Journey into Creativity’s comprehensive guide. This DIY project challenges traditional norms by substituting conventional thread with an array of white beads, adding a distinctive flair. To get started, gather a vibrant red waxed cord, small white beads, and an eye-catching evil eye bead. Begin by creating a loop at the cord’s midpoint, threading a bead, and securing it with a knot. Repeat this process, carefully adjusting the bracelet length to ensure a comfortable fit on your wrist. Conclude the project by fastening a larger bead through the initial loop, symbolizing the beginning of March with a touch of creativity and tradition.
Handmade Firefly LED Bracelet
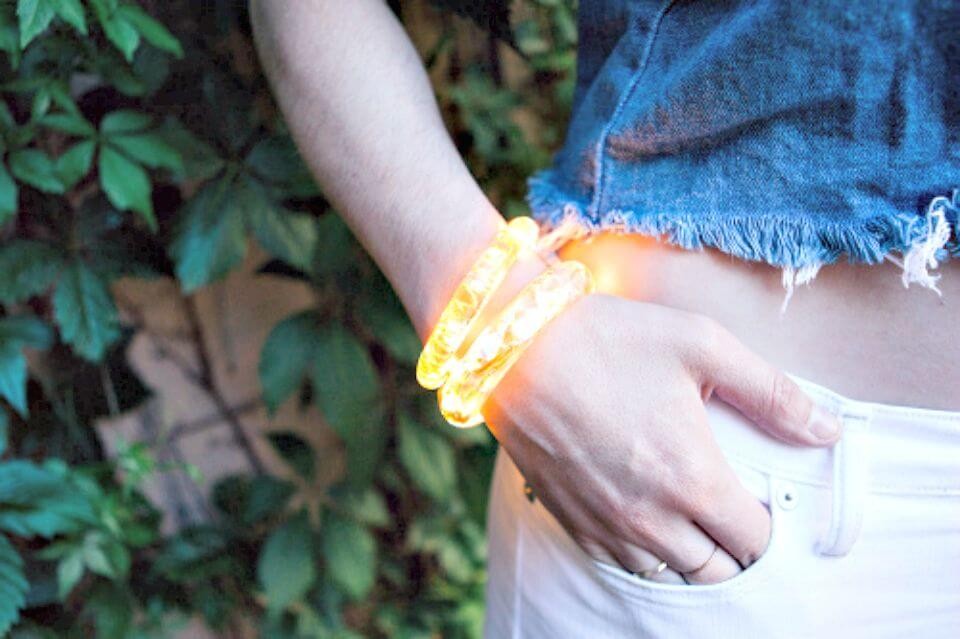
Transform your style with a DIY Firefly LED Bracelet, where fashion meets technology. This step-by-step guide will show you how to seamlessly integrate LEDs into a resin-cast bracelet, creating a rechargeable accessory that’s both captivating and eye-catching. Perfect for adding a touch of glamour to your outfit, this project is not only a creative outlet but also an introduction to wearable electronics. As you embark on this innovative journey, you’ll learn the importance of careful planning to ensure a functional, comfortable, and stylish final product. For those looking to merge their crafting skills with a hint of tech, this unique project is sure to turn heads at any gathering.
Candy Bead & Memory Wire Cuff Bracelet
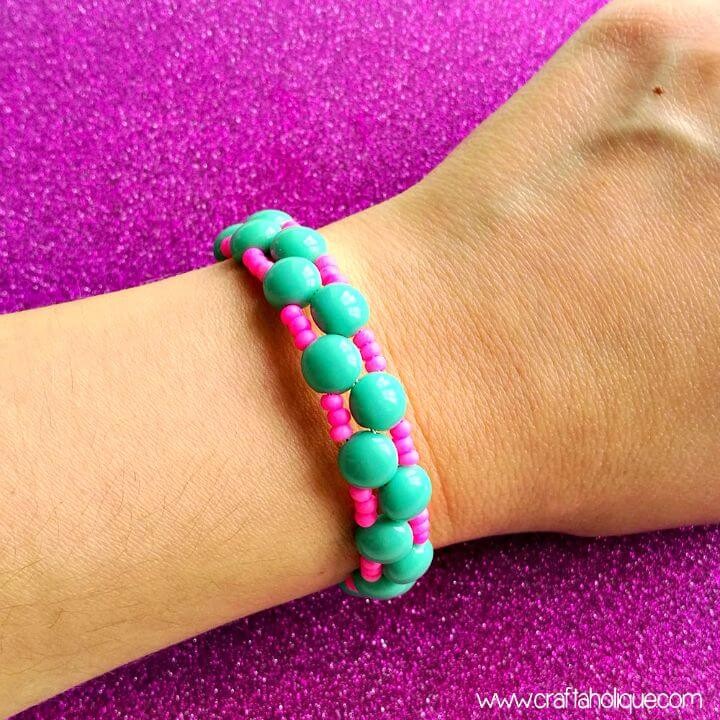
Immerse yourself in the world of beading by learning how to create a stunning cuff bracelet with this easy-to-follow tutorial from Craftaholique. Designed specifically for beginners, this step-by-step guide walks you through the process of crafting an accessory using candy beads and memory wire within 30 minutes. With minimal materials required and a straightforward technique, you’ll be well on your way to a fun and successful crafting experience. Cut memory wire with ease, arrange beads into a pattern that’s uniquely yours, and finish off your bracelet with a professional touch. The result? A beautiful and one-of-a-kind piece of jewelry that adds a pop of color and style to any outfit.
Quick DIY Essential Oil Diffuser Bracelet
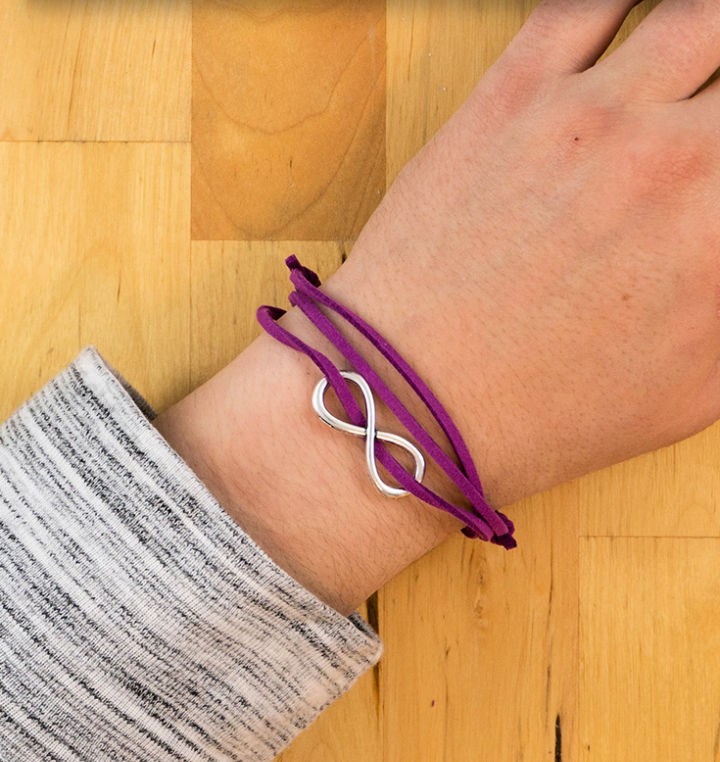
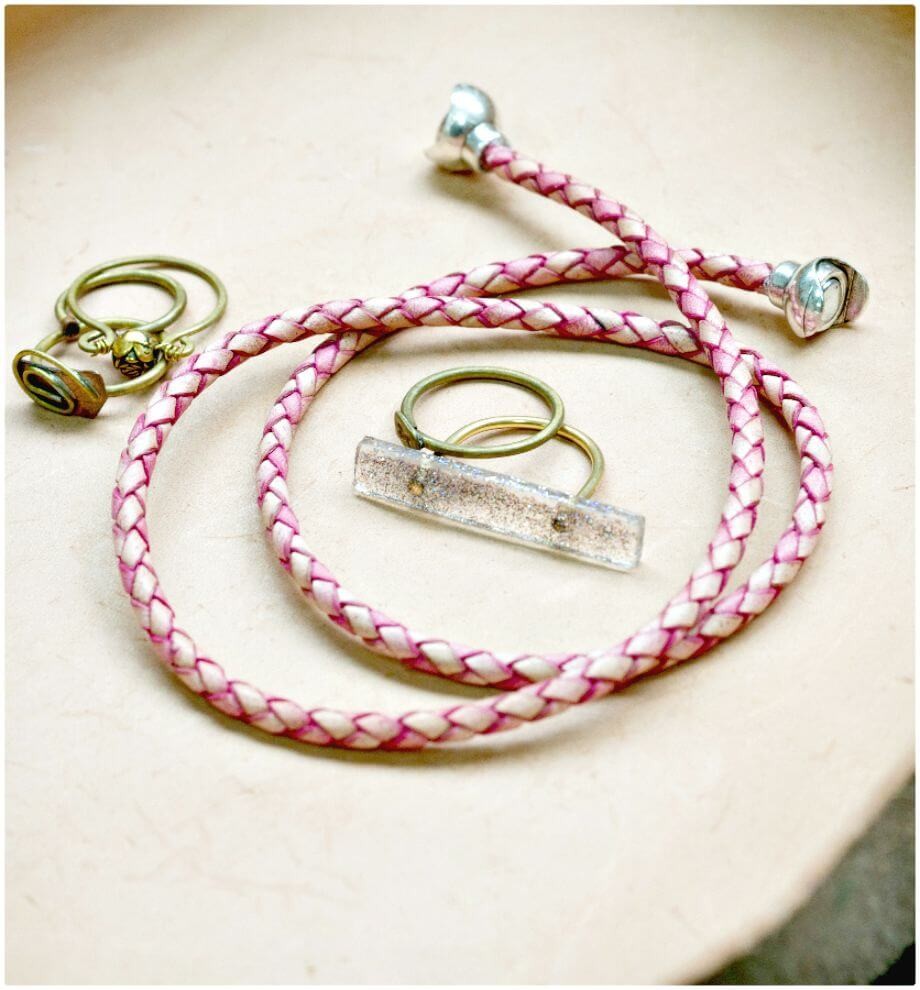
In just five minutes, you can create a unique and stylish essential oil diffuser bracelet using this simple DIY project from Practically Functional. Perfect for those who appreciate natural scents and enjoy crafting, this tutorial will walk you through the process of making a charming leather cord bracelet that doubles as a portable diffuser. Whether you’re looking to gift someone special or add a touch of aroma to your day, this easy-to-follow guide ensures a delightful crafting experience. You’ll learn how to incorporate a chic connector charm and secure the piece with adjustable sliding knots, allowing you to bring the benefits of essential oils wherever you go with this quick and fashionable accessory.
Morse Code Beaded Wrap Bracelet
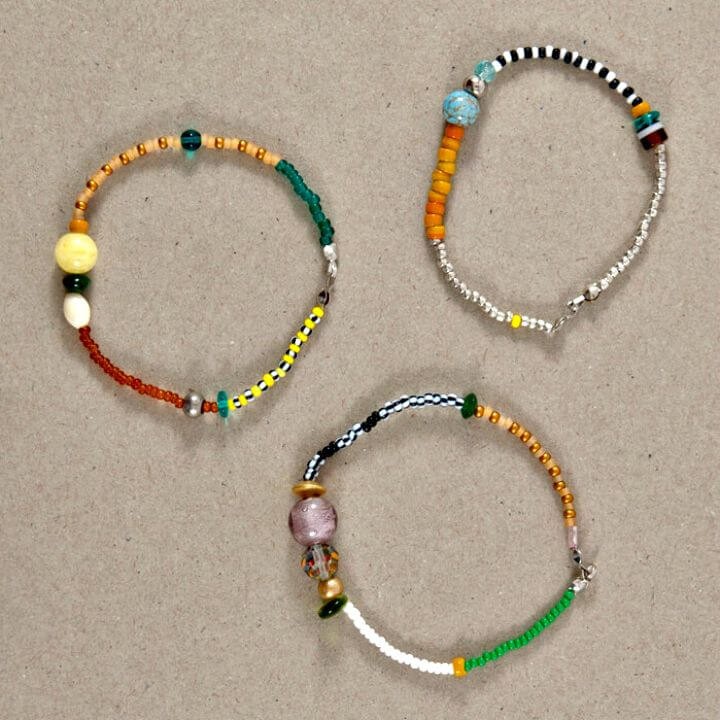
To create a one-of-a-kind Morse Code beaded wrap bracelet, start by collecting three types of beads that will represent dashes, dots, and spaces in your design. In addition to the beads, you’ll also need some thread and a reliable adhesive like glue or nail polish. This unique piece of jewelry is perfect for personalized gifts, as it allows you to convey meaningful messages such as ‘I love you’ or personal mottos. To get started, use an online Morse code translator to convert your desired text into a beaded design. Once you have the translated code, assemble your bracelet by following the sequence and securing it with a square knot and a small amount of glue. You can wear this stylish piece as either a necklace or wrap it around your wrist for a more subtle look. Crafting a Morse code jewelry piece is a thoughtful and engaging way to express your creativity while making a meaningful accessory that’s sure to be treasured.
Homemade Filigrane Armbänder Bracelets
Transform any dull day into a masterpiece with your very own handmade filigree bead bracelets! This DIY project, inspired by Johanna Rundel’s blog, is an effortless endeavor that requires only a few simple materials: nylon thread, clasp beads, rocailles beads, and a dash of imagination. As you work through the tutorial, you’ll discover how these vibrant accessories can instantly elevate your wardrobe. Whether you’re crafting a thoughtful gift or treating yourself to a creative indulgence, this project is sure to bring a burst of color into your life. With basic tools like scissors and flat-nose pliers at your disposal, you’ll be amazed at the unique piece of jewelry you can create. Experience the joy of crafting for yourself as you follow the step-by-step guide on DIY Blog.
How to Make Bracelets from Recycled T-Shirts
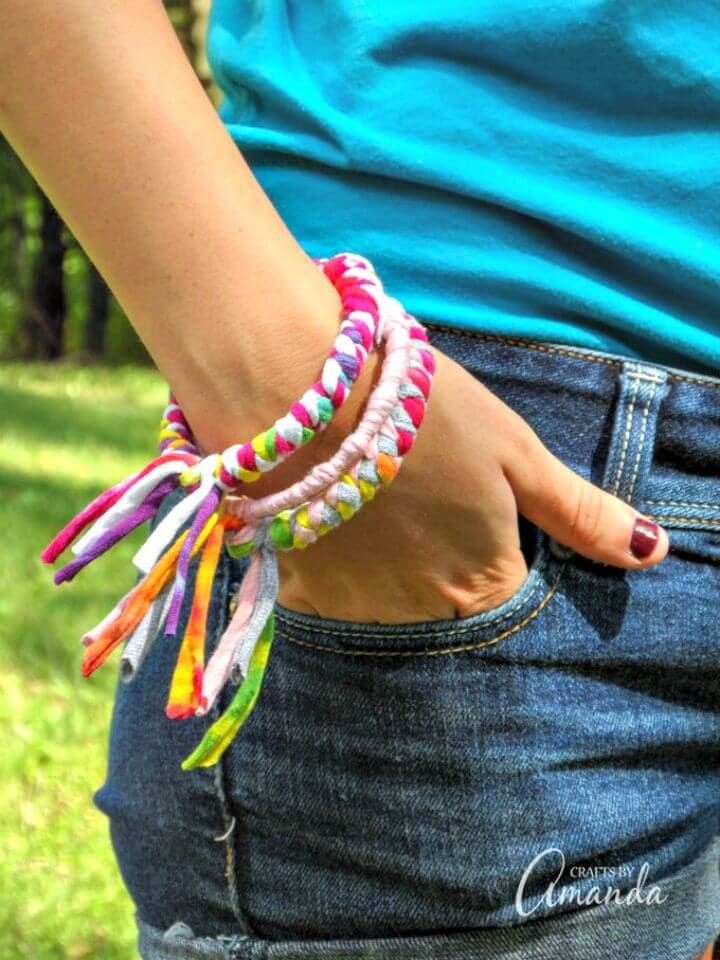
Transform your wardrobe into a treasure trove of creativity by breathing new life into old t-shirts. With Crafts by Amanda’s intuitive guide, you can turn discarded tops into vibrant, fashionable accessories that showcase your personal style. This eco-friendly craft is perfect for teenagers and preteens looking to express themselves while promoting sustainability. To get started, simply gather some bangle bracelets, scissors, and a hot glue gun. Next, cut strips from your t-shirts and use them to adorn the bangles through braiding or wrapping techniques, securing them with glue as you go. Not only will this project give old clothing a new lease on life, but it also makes for a thoughtful, handmade gift for friends and family. So why not get creative and create some one-of-a-kind t-shirt bracelets that reflect your unique personality?
Adorable DIY Spring Bracelets
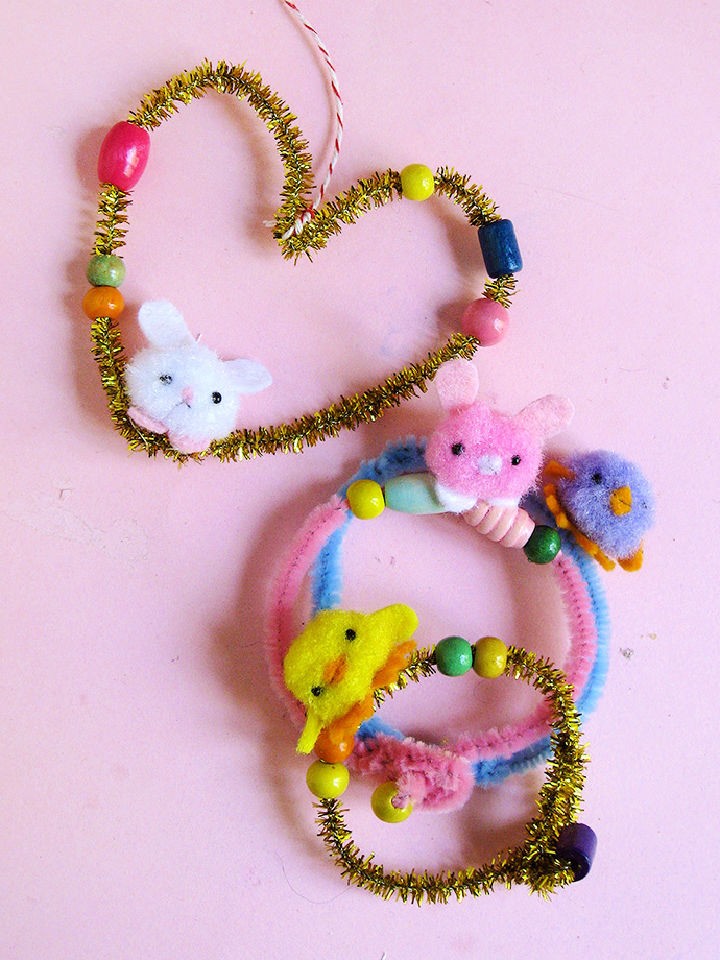
This spring, creativity bursts forth at Handmade Charlotte, where the joy of craft-making meets adorable pipe cleaner bracelets. Perfect for crafty kids who crave customization in their accessories, these sweet charms are surprisingly simple to create. With a minimal list of supplies including pipe cleaners, beads, felt, and pompoms, you can effortlessly bring delightful chicks and bunnies to life on your wrist. Every step is designed for easy following, guaranteeing a fun-filled crafting experience. Feel free to get creative with your favorite colors and make a one-of-a-kind fashion statement this season. As you craft away, remember to savor the joy of spring-inspired making!
Make an Embroidered Wrist Cuff
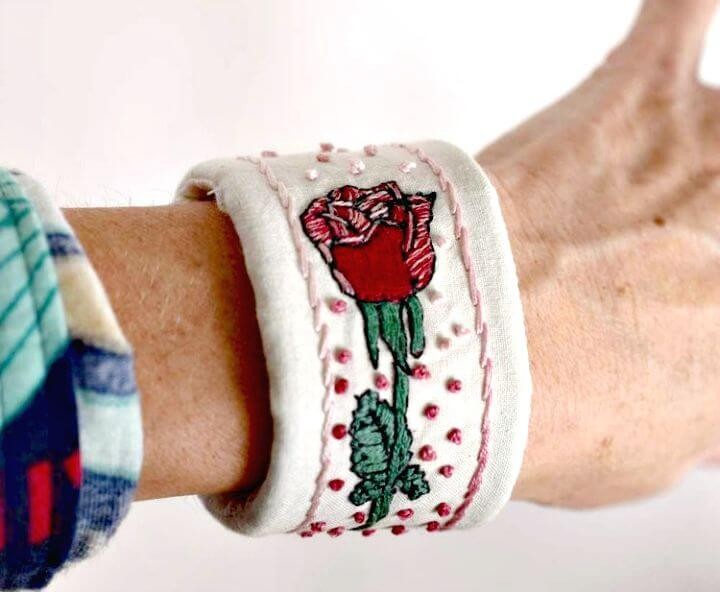
Get ready to infuse your accessory collection with a handmade touch! Pam Ash Designs presents a straightforward and captivating guide to crafting an embroidered wrist cuff, perfect for those who delight in embroidery and creating one-of-a-kind jewelry pieces. To bring this project to life, you’ll need a few essential materials: sew-on snaps for adjustability, muslin fabric for your embroidery, and felt for added texture. With crystal-clear instructions, you’ll be able to stitch together a piece that’s not only visually stunning but also a testament to your unique personal style. Embark on this creative journey and proudly wear the self-made embroidered wrist cuff that reflects your individuality!
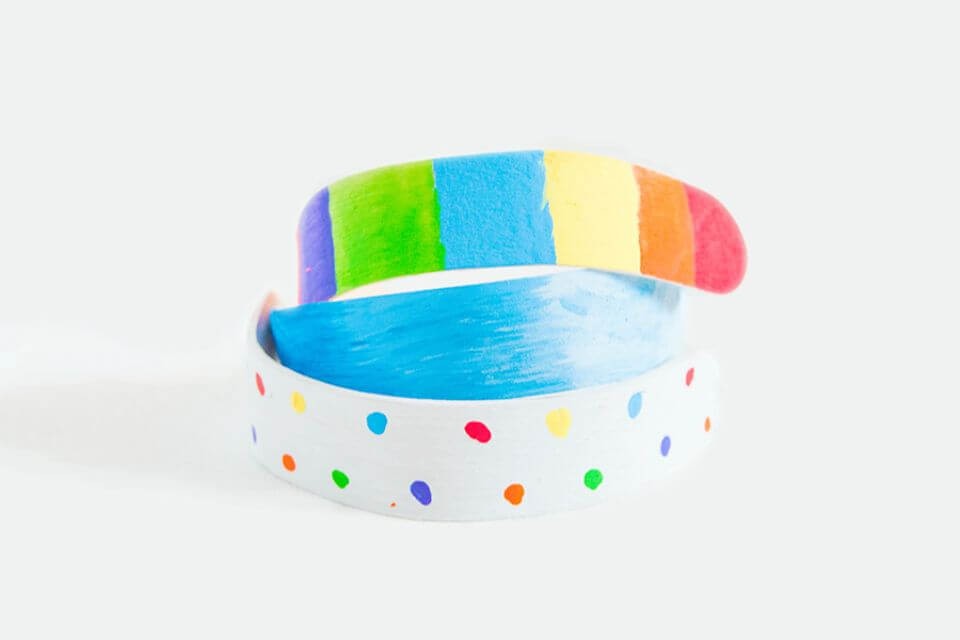
Abstract Painted Wood Bangle Bracelet
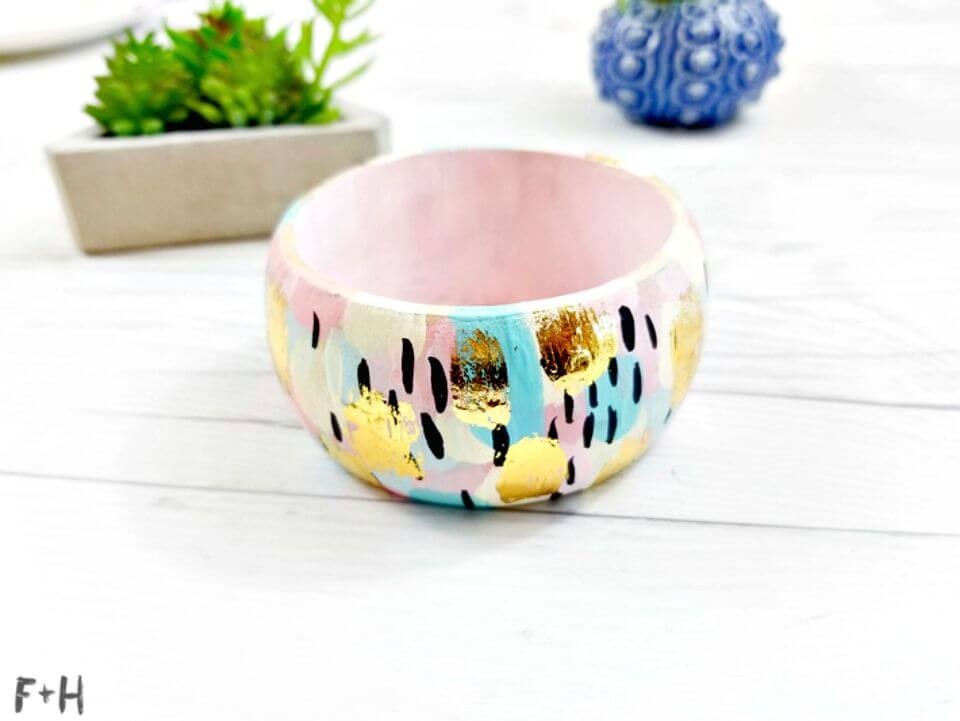
Transform a simple wooden bangle into a stunning accessory with this DIY tutorial from Fox + Hazel. With the help of pastel acrylic paints and shimmering gold DecoFoil, you’ll learn how to mix colors, apply foil, and seal your design for a personalized statement piece or thoughtful handmade gift. This straightforward project is perfect for spring, allowing you to create something unique and stylish that’s sure to turn heads. By following clear instructions, you’ll be able to craft a gorgeous bracelet that showcases your creativity and flair.
Easy DIY Bracelets and No Tools
Creating handmade jewelry is a delightful pursuit that brings satisfaction and uniqueness to one’s personal style. Without requiring specialized tools, the DIY bracelet guide on Instructables makes it easy to craft beautiful pieces from the comfort of your own home. The step-by-step instructions are crystal clear, ensuring a seamless experience for those eager to make their own accessories. With an array of designs to choose from, you can create one-of-a-kind pieces for every outfit or thoughtful gifts for loved ones. By embarking on this creative journey, you’ll infuse your jewelry collection with the warmth and character of handmade charm.
Make Your Own Paracord Bracelets

Crafting paracord bracelets is an accessible and budget-friendly DIY endeavor that appeals to crafters of all skill levels and ages. Our comprehensive guide at A Girl and a Glue Gun provides a detailed roadmap for mastering the art of creating these stylish accessories, with straightforward step-by-step instructions that empower you to produce high-quality bracelets at an affordable cost of less than a dollar each. This tutorial covers the entire process, from selecting vibrant paracord colors to adding secure buckles, guaranteeing a fulfilling crafting experience. Whether you’re making unique pieces for personal use, gifts, or as fundraising items, our guide equips you with the confidence and creativity needed to craft beautiful handmade paracord bracelets that reflect your personality.
Chic and Easy DIY Colorblock Bracelet
Give your outdated jewelry a chic makeover by transforming an old bracelet into a vibrant colorblock accessory with this easy DIY project. To start, roughen up the surface of the bracelet using sandpaper to ensure a smooth paint application. Next, use painter’s tape to create clean lines and block off sections that you want to remain unpainted. Then, apply your chosen colors in four different shades, allowing each layer to dry before adding additional coats. Once you’ve achieved the desired color effect, seal your masterpiece with a clear varnish for added durability. With these simple steps, you can turn an old bracelet into a modern, geometric statement piece that’s perfect for adding a pop of color to your fall wardrobe.
How to Make Confetti Bracelets
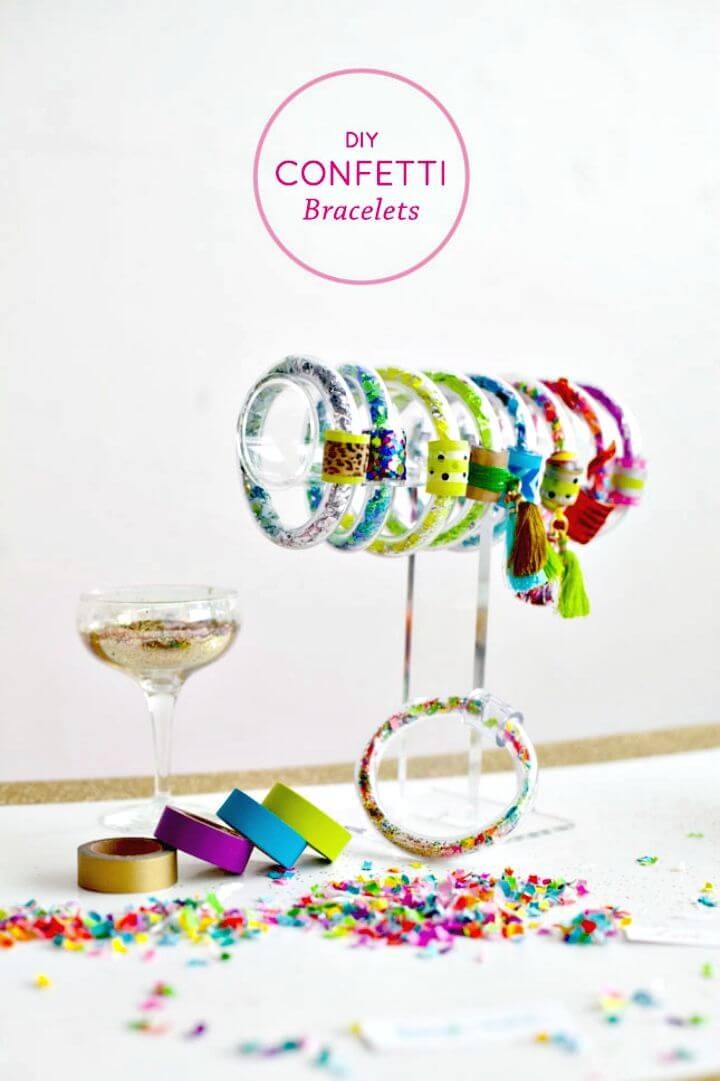
Transform your summer style into a masterpiece of creativity with Best Friends For Frosting’s bold DIY Confetti Bracelet project. This vibrant accessory is perfect for adding a pop of color and sparkle to any outfit. With just a few simple supplies, including clear vinyl tubing, confetti, and more, you can craft personalized bangles that not only reflect your personality but also serve as motivational reminders. Take it to the next level by incorporating secret messages or goals into your designs for an added layer of depth. Follow our easy-to-follow guide to create these one-of-a-kind pieces that are sure to spark conversations at any gathering, whether you’re gifting them to friends or wearing them yourself.
Beautiful DIY Friendship Bracelets
Mastering clasps is a game-changer for elevating friendship bracelets to new heights of sophistication. To achieve this, I highly recommend consulting Jessica Jones’ informative guide on her blog. With clear, step-by-step instructions and practical tips like using glue for thread cohesion, you’ll be able to create polished, long-lasting accessories that rival professionally made pieces. Whether you’re a DIY enthusiast or simply looking to upgrade your handcrafted game, this tutorial is perfect for anyone seeking to infuse their creations with a refined edge.
Make a Bracelet with Embellished Beads

Imagine crafting a charming autumn bracelet with your kids using a fun and engaging activity from Buggy and Buddy. With just a few simple materials like hemp cord, wooden beads, and metallic Sharpies, you can bring your imagination to life. Start by decorating the beads with vibrant patterns using the Sharpies, then thread them onto the cord to create a one-of-a-kind piece of jewelry. This thoughtful handmade gift is perfect for fall celebrations or as a special token of appreciation for friends and family. By following these easy steps, you’ll not only be creating something truly unique but also encouraging your kids’ creativity and imagination. So why not gather around and enjoy making these special bracelets together?
Make Your Own Tin Foil Bangles
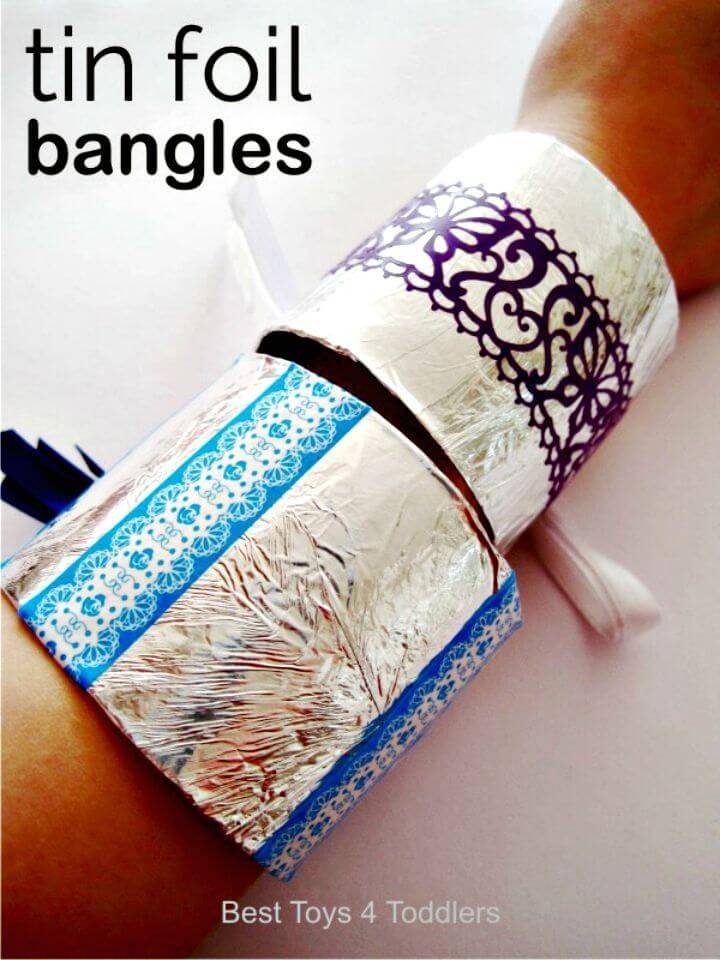
Immerse your kids in the world of creative recycling with Best Toys 4 Toddlers’ innovative project: transforming tin foil into dazzling bangles using everyday materials like toilet paper rolls. This interactive activity not only fosters imagination but also provides a fantastic way to breathe new life into discarded items, perfect for developing fine motor skills as children customize their handmade jewelry with ribbons and decorative tapes.
Simple DIY Folded Paper Bracelets
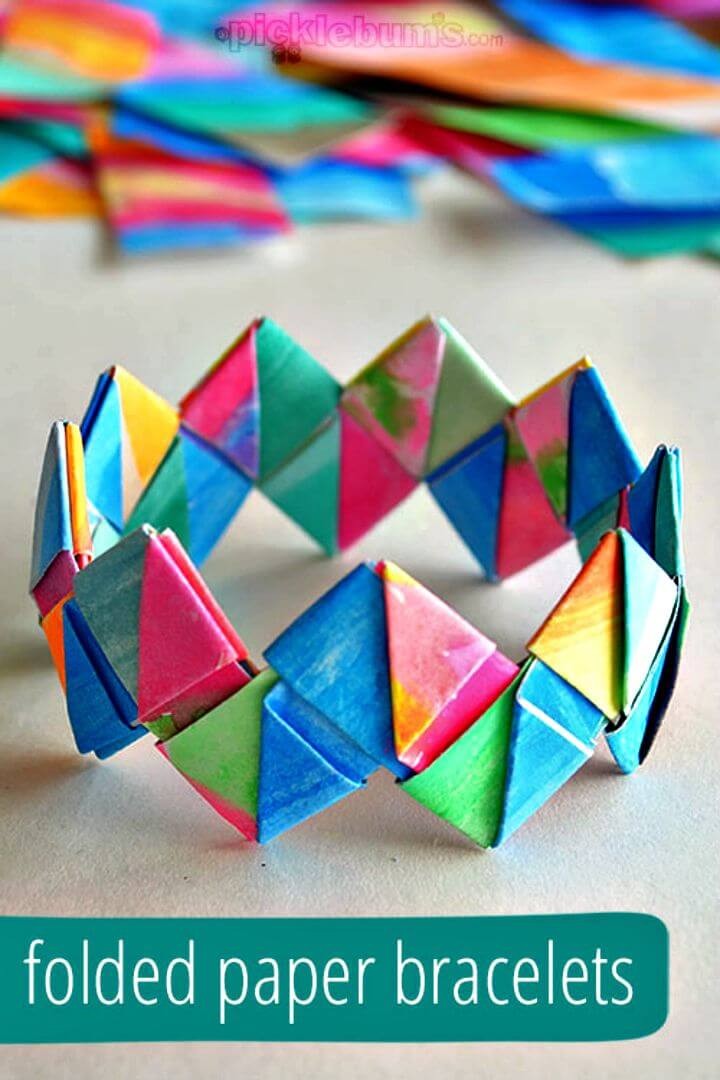
Transform your child’s watercolor masterpieces into one-of-a-kind paper bracelets with our simple guide at Picklebums. This creative endeavor not only breathes new life into their artwork but also presents a thoughtful gift idea for special occasions like Mother’s Day, allowing you to cherish the memories while giving back in a meaningful way.
By engaging your child in this hands-on crafting activity, you’re fostering a fun and interactive experience that develops their fine motor skills while providing a sense of accomplishment as they transform their artwork into stylish accessories. Our step-by-step instructions ensure that even novice crafters can successfully complete the project, making it an excellent opportunity for quality family time and preserving cherished memories.
Adorable DIY Charm Bracelet
Transform your style with a one-of-a-kind vintage-inspired pearl charm bracelet. This comprehensive guide from HonestlyWTF walks you through the fundamental technique of wire wrapping, allowing you to effortlessly attach elegant charms to a customizable bracelet that reflects your unique taste. To get started, assemble an arsenal of basic materials such as bead caps, pearls, headpins, spacer beads, and pliers. With these simple components at your disposal, you’re ready to begin crafting your masterpiece. Begin by threading a pearl onto a headpin, followed by a bead cap and spacer. Next, utilize round nose pliers to form a loop that securely attaches to the bracelet while tightly wrapping the wire. Trim any excess material and continue adding charms until your design is complete. In no time at all, you’ll have a handcrafted masterpiece ready to elevate your favorite outfits.
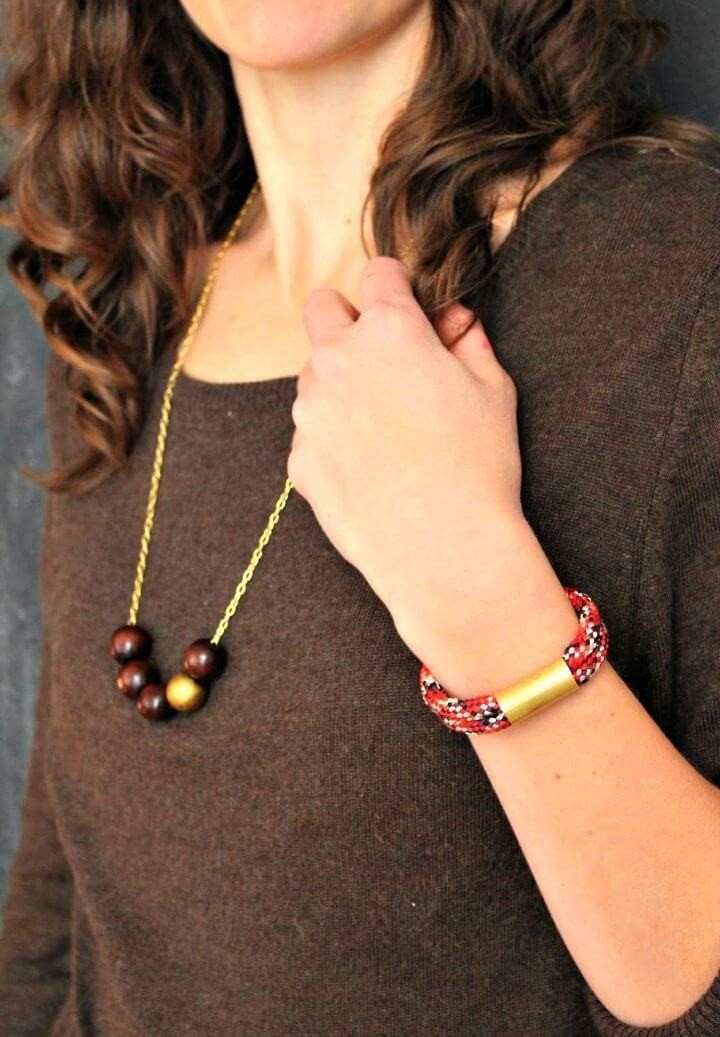
Gold Tube Bracelet Ideas
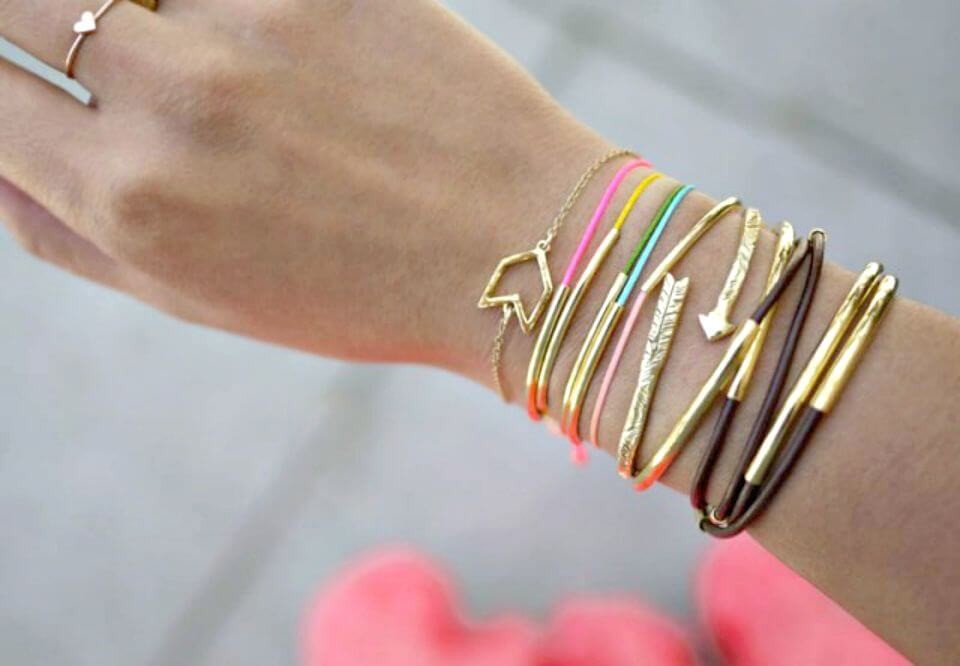
For jewelry enthusiasts seeking to turn their creativity into wearable art, Honestly WTF’s DIY Gold Tube Bracelets guide offers an excellent starting point. This comprehensive tutorial makes it easy to craft stylish bracelets using gold noodle tube beads and simple materials like Chinese knotting cord and leather. With an adjustable design that complements any outfit, this project is perfect for those looking to add a touch of elegance to their jewelry collection. By following the step-by-step guide, you’ll gain helpful tips and tricks to ensure a smooth crafting experience, making it easy to get started and create unique accessories that reflect your personal style.
Make Your Own Stamped Initial Bracelets
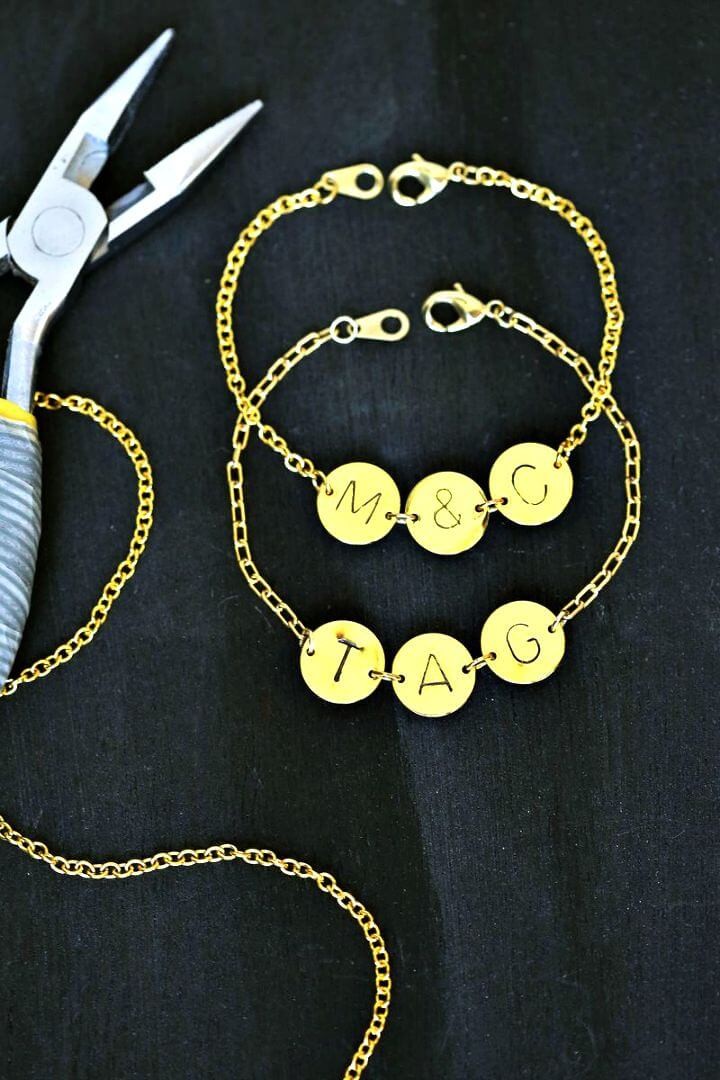
Transform your jewelry collection with a personalized touch by creating your own stamped initial bracelet using Laura Gummerman’s comprehensive DIY guide on A Beautiful Mess. This project is an exciting and rewarding experience that yields a professional-looking result. To get started, you’ll need a list of essential supplies provided by Laura, including gold coin discs, chain, jump rings, and a jeweler’s bench block. With her expert guidance on stamping technique and finishing touches, you’ll be able to craft a unique accessory or a heartfelt gift for someone special. As you engage in this charming crafting experience, you’ll enjoy the satisfaction of creating something truly yours.
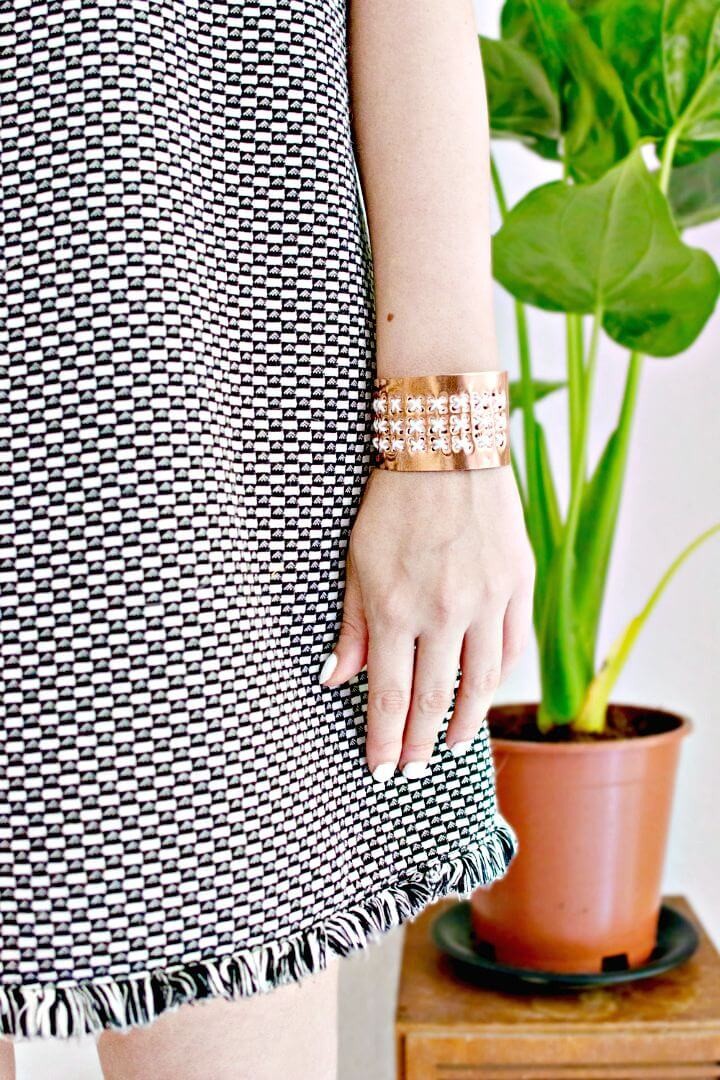
Quick DIY Etched Copper Cuff
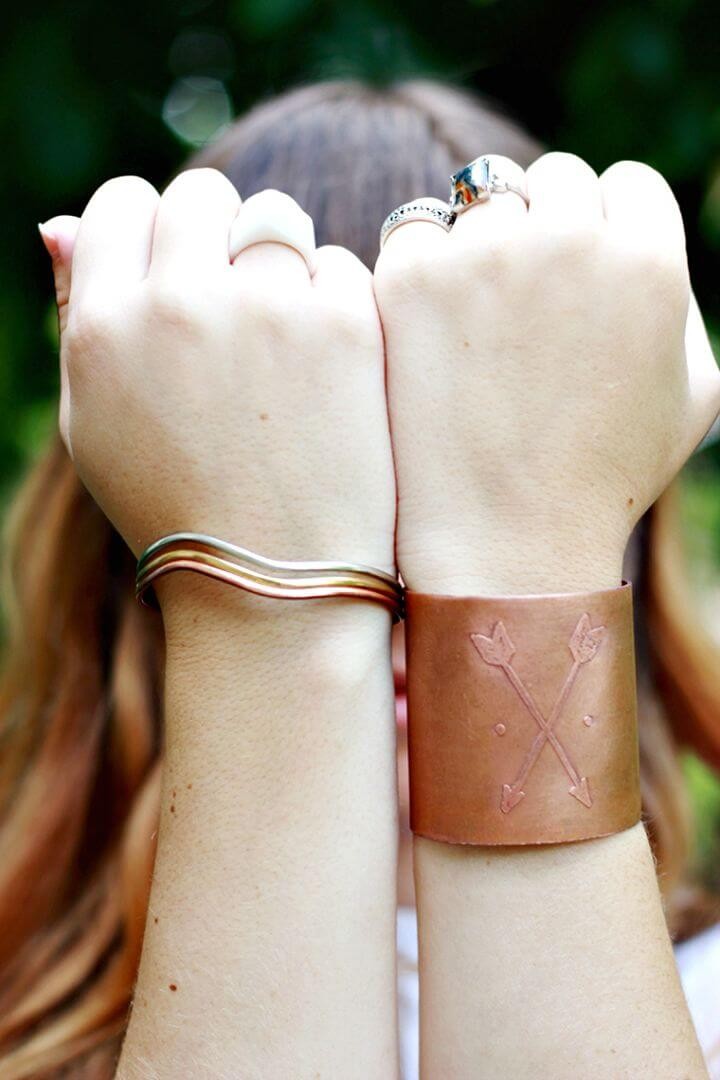
Transforming raw copper into a unique piece of jewelry can be an incredibly rewarding experience, allowing you to express your creativity through metalwork. By following Caitlin McGrath’s tutorial on The Merrythought, you’ll learn how to create a stunning etched copper cuff inspired by her father’s copper etching techniques. To get started, gather the necessary materials: a copper pipe, steel wool, tin shears, a metal file, permanent marker, hydrogen peroxide, muriatic acid, packing tape, a scour pad, baking soda, and either car wax or metal lacquer to finish. As you work through the step-by-step process, from cleaning and cutting the copper to etching your design and sealing the finished cuff, safety must be your top priority, particularly when handling acids. By following the instructions carefully and disposing of materials responsibly, you’ll not only create a personalized piece of jewelry but also develop valuable skills in metalwork. The end result is a truly one-of-a-kind accessory that’s sure to turn heads.
Pom Pom Wrap Bracelet Designs
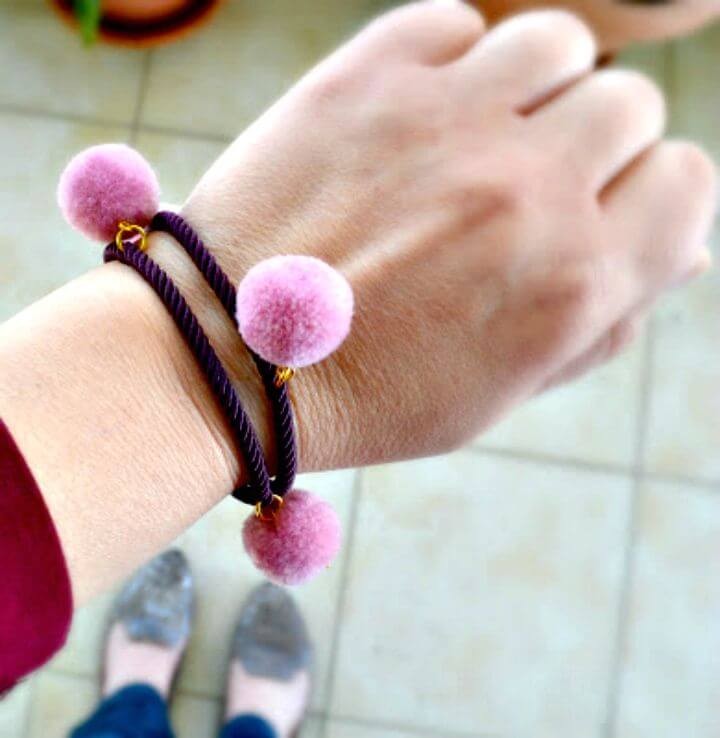
Bring a dash of whimsy to your wardrobe with a DIY pom pom wrap bracelet! This charming accessory is surprisingly easy to create, thanks to Happy Girly Crafty’s clear instructions. By combining silk cord, colorful pom poms, and a lobster clasp, you’ll craft a one-of-a-kind piece that adds a playful touch to any outfit. Whether you’re looking to personalize your own style or make a thoughtful gift for friends, this project is perfect for anyone who loves to express their creativity through crafting. By following Happy Girly Crafty’s step-by-step guide, you’ll discover the joy of creating something truly unique and special – and adding a pop of color and texture to your jewelry collection in the process.
Seed Bead Epoxy Clay Bangles
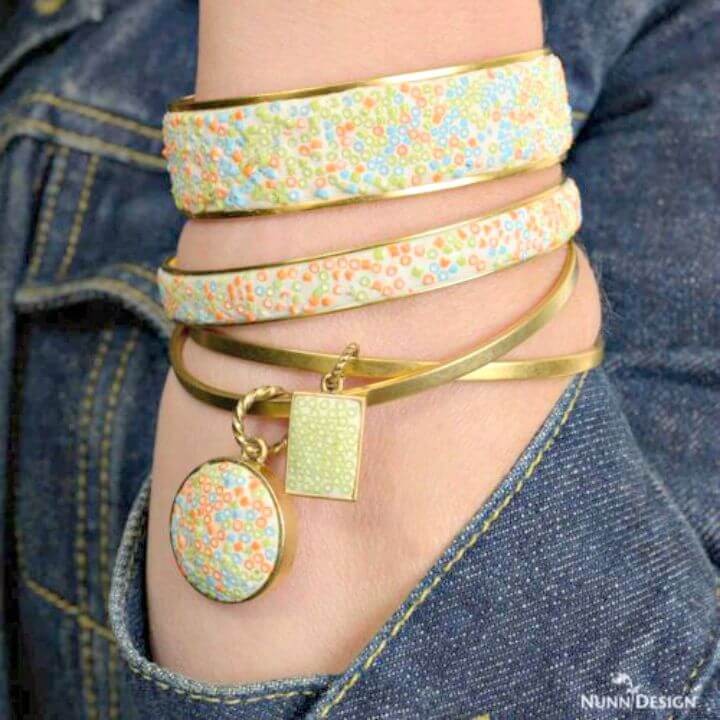
Transform your creativity into a stunning seed bead epoxy clay bangle with Nunn Design’s comprehensive tutorial. By following their easy-to-follow steps, you can turn basic materials like a bangle bracelet channel, crystal clay, and an assortment of seed beads into a piece of jewelry that exudes meticulous craftsmanship. As you work through the process, from blending the clay to meticulously placing the beads, you’ll appreciate the clarity and helpful hints provided. To maintain a flawless finish, use wet wipes to clean as you go. Once completed, your bangle will serve as a testament to your crafting prowess and the exceptional quality of Nunn Design’s materials. This project is ideal for personal adornment or as a thoughtful gift, offering creative fulfillment and satisfying results.
Make a Stylish Rope Jewelry Bracelet
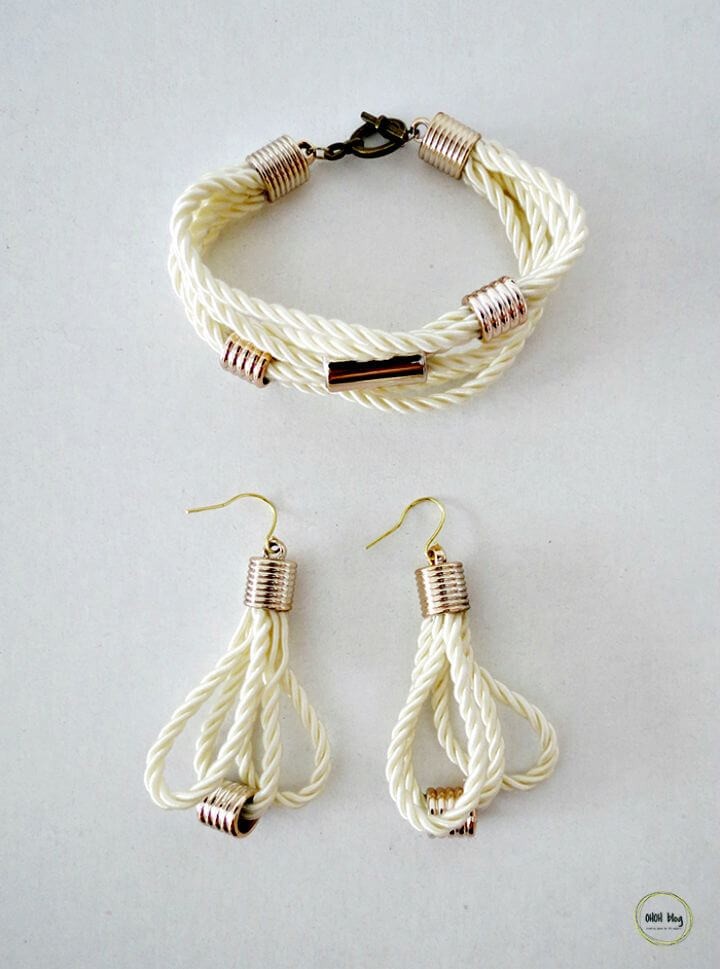
Create a statement piece of handmade jewelry with the simplicity of Ohoh Deco’s rope jewelry tutorial. Perfect for those who enjoy crafting unique accessories, this step-by-step guide takes you through the process of creating a stunning bracelet and earrings set in under 30 minutes using just basic materials – jewelry rope, beads, and simple tools. The possibilities are endless as you customize your designs with different rope colors to match your personal style or create thoughtful gifts for loved ones. This hands-on project is an excellent way to add a personal touch to your jewelry collection and experience the joy of DIY crafting.
Gorgeous DIY Embroidered Copper Bracelet
For a jewelry collection with a personalized touch, look no further than Lana Red Studio’s DIY guide for making an embroidered copper bracelet. This creative project is perfect for those who enjoy crafting and experimenting with materials like copper foil. The 0.3mm thickness of the copper makes it easy to shape and embroider, allowing for a wide range of designs from simple cross-stitches to intricate patterns using various thread colors. With step-by-step instructions, this DIY guide simplifies the process of measuring, cutting, and embroidering your way to a beautiful, handcrafted bangle that reflects your unique style. As you craft a sturdy and stylish copper bracelet, get ready to add a one-of-a-kind accessory to your collection that perfectly complements any outfit.
Watch Strap Rhinestone Bracelet
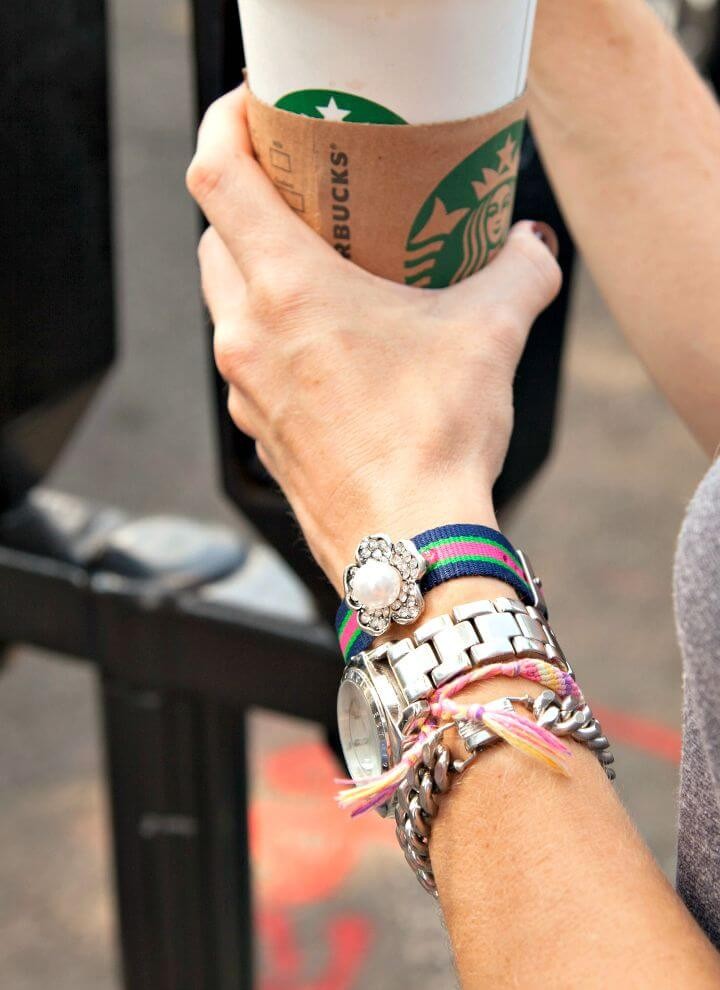
Add a dash of glamour and individuality to your accessory repertoire by crafting a DIY Watch Strap Rhinestone Bracelet that exudes effortless sophistication. With Trinkets in Bloom’s step-by-step guide, you’ll discover how to seamlessly merge the refined charm of grosgrain ribbon with the vintage allure of rhinestones. Simply fasten a brooch or button onto a watch strap using Aleene’s Jewel-It, and you’ll be treated to a one-of-a-kind, punk-inspired accessory that’s sure to turn heads. The beauty of this project lies in its customizability – substitute the watch strap with grosgrain ribbon, opt for different embellishments, or experiment with various brooches and buttons to create a truly unique piece that reflects your personal style. Share your finished masterpiece with the crafting community and get inspired by the endless possibilities!
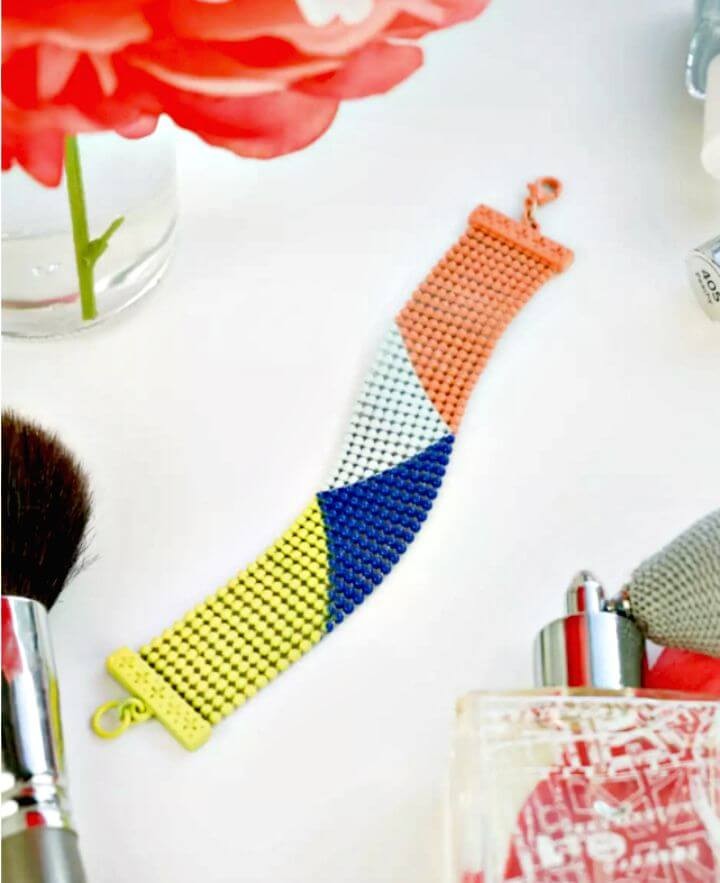
Make Your Own Bead Loom Cuff Bracelets
Transform your fashion sense with a unique Miyuki bead loom cuff bracelet, crafted using Petit Bout de Chou’s comprehensive step-by-step guide. This tutorial takes you through the process of preparing the bead loom, threading beads, and securing your design, demystifying the technique of bead weaving for DIY jewelry enthusiasts. As you learn to select the ideal supplies, manage thread tension, and add finishing touches with glue, you’ll be empowered to create a durable, handmade accessory that reflects your personal style. With this engaging guide, you can turn Miyuki delica beads into a stunning cuff bracelet, perfect for adding a touch of elegance to your wardrobe or gifting to a loved one.
How to DIY Famous Bracelets
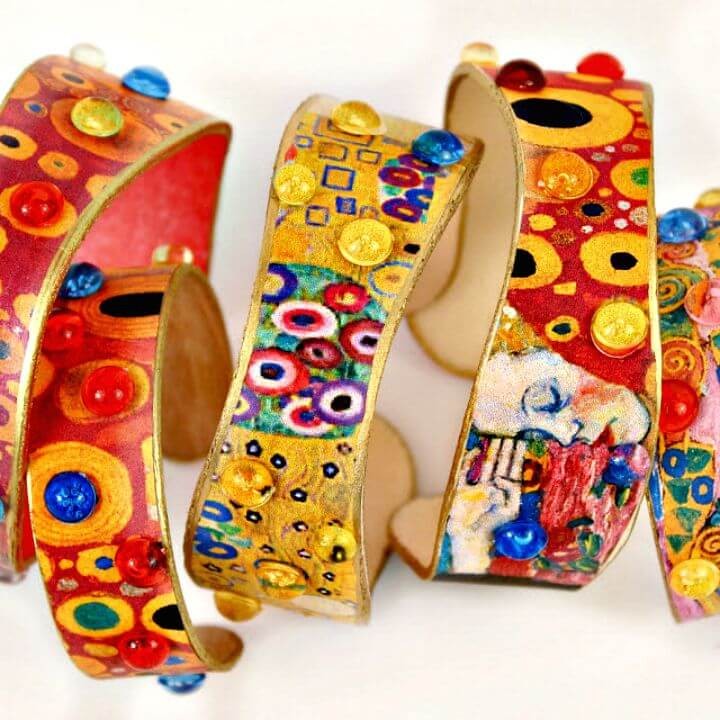
Transform your appreciation for art into distinctive jewelry by incorporating Gustav Klimt’s opulent patterns and hues into wearable bangles. This creative guide empowers you to print your cherished artwork and craft it into unique adornments that reflect your personal style.
To bring this DIY project to life, gather E-6000 spray adhesive, a sealer, popsicle sticks, decorative gems, and any other embellishments that resonate with your artistic vision. Soften the sticks by boiling them, shape them to your desired form, and once dry, attach your art cutouts using the spray adhesive. Add a personal touch by incorporating metallic edges and strategically placing the gems.
In just a few easy steps, you’ll be wearing your arm as a mobile art gallery, showcasing your exceptional taste and artistic flair.
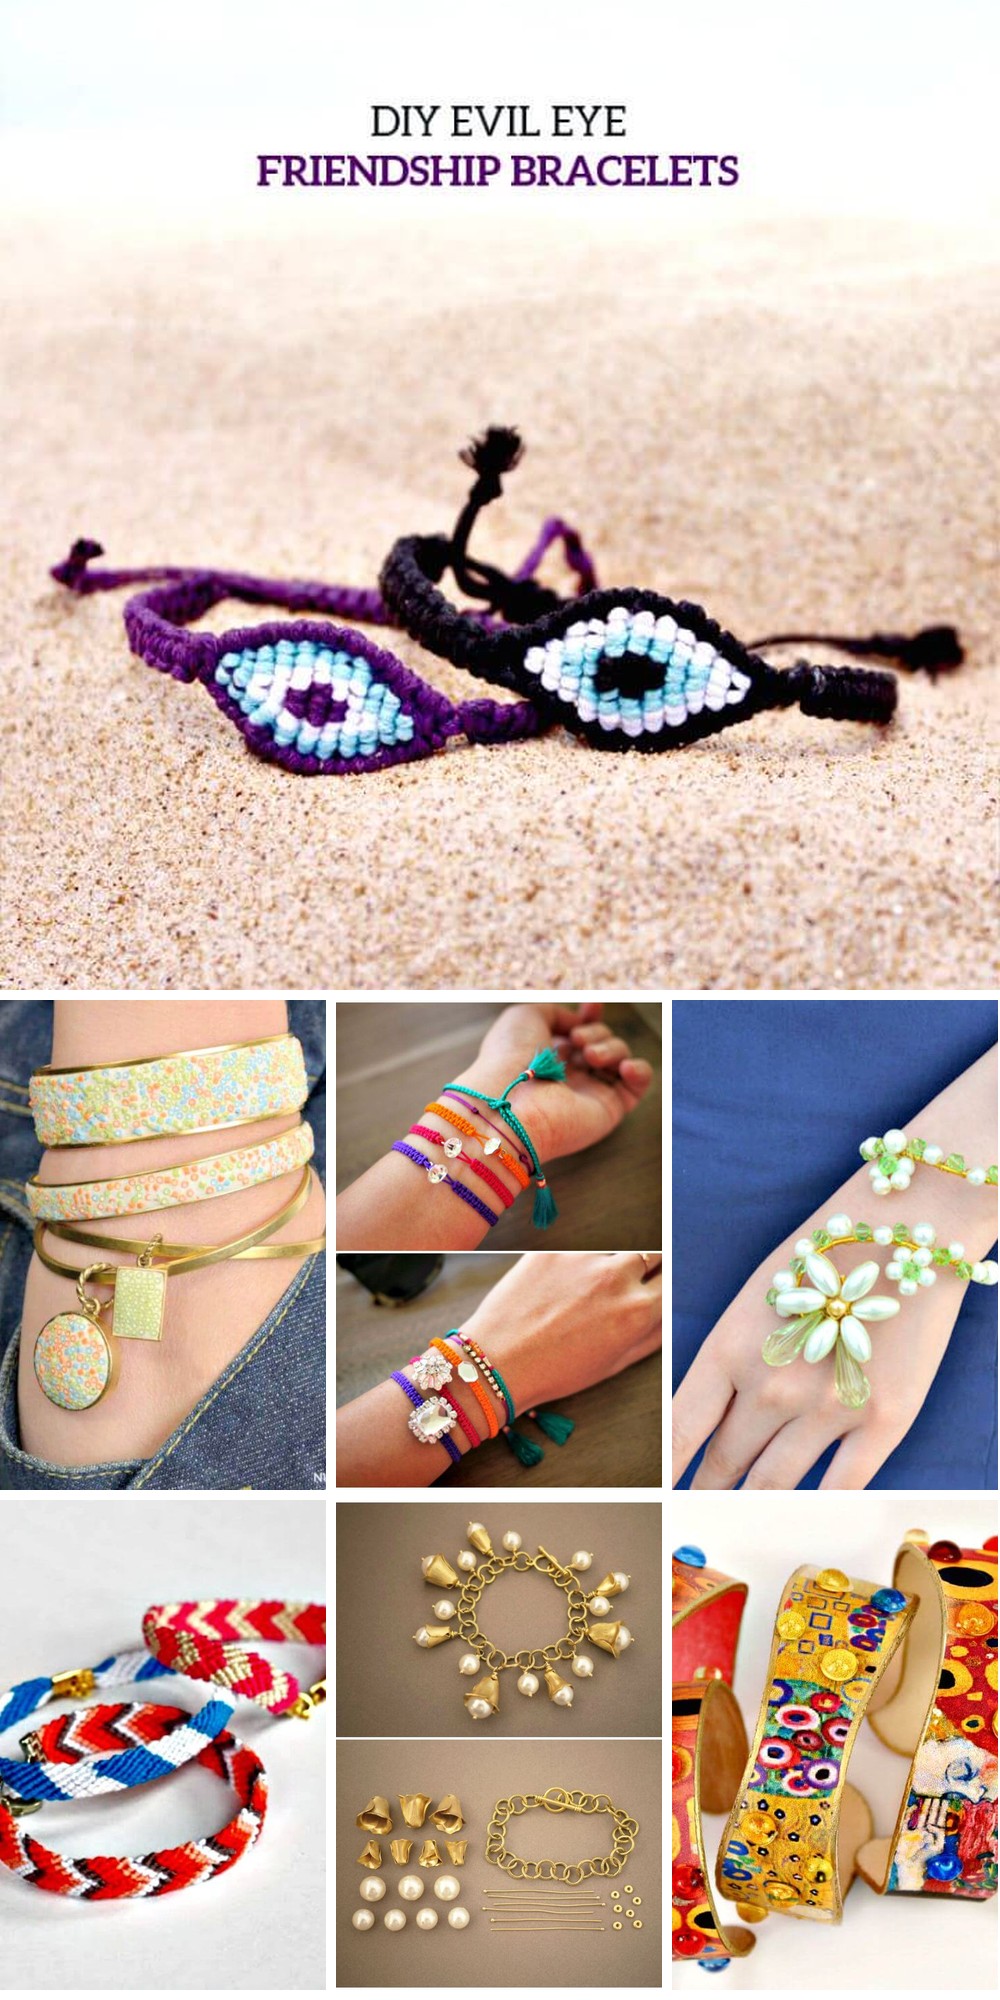
Evil Eye Macramé Friendship Bracelets

Unleash your creativity this summer with Curly Made’s DIY Evil Eye Macramé Friendship Bracelet tutorial, perfect for making waves at the beach. Designed to withstand water and sand, these lightweight yet chic accessories promise both comfort and style as you soak up the sun. With the step-by-step video guide, crafting these bracelets is a breeze, and if any questions arise, Curly Made’s community support is just a comment away. Simply gather your waxed cotton cords, glue, scissors, strong tape or clipboard, and get ready to weave some summer magic into your wardrobe.
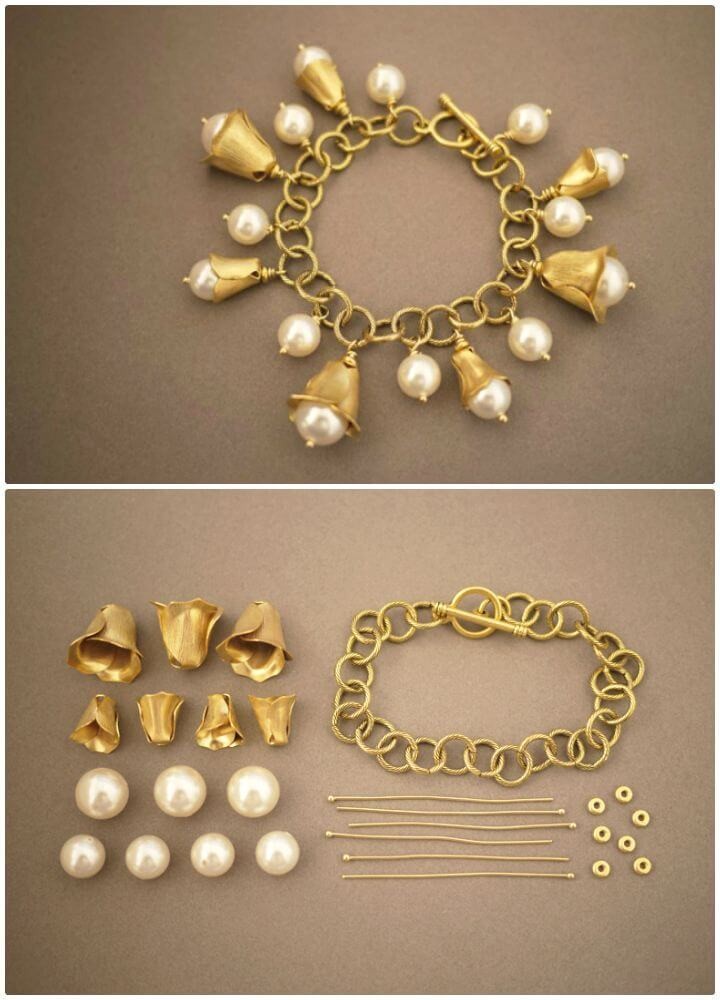
Personalized Wire Wrap Pearl Flower Bracelet
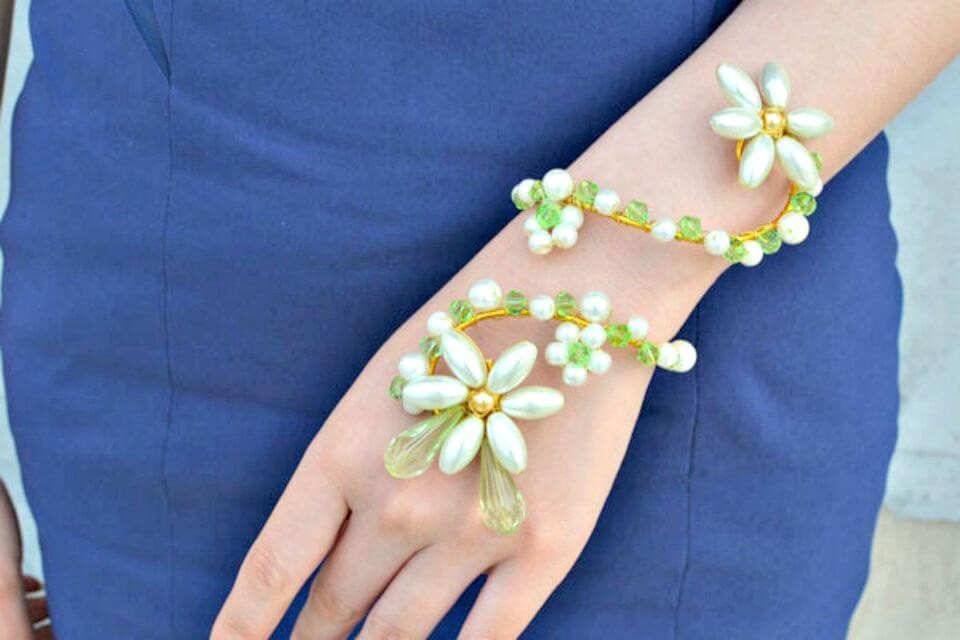
Crafting a personalized wire wrap pearl flower bracelet can be an incredibly rewarding DIY experience. To ensure a seamless journey, this guide breaks down the process into manageable steps. Begin by collecting the essential materials: pearl beads, faceted green beads, and a combination of golden aluminum and copper wire. Additionally, have on hand the necessary pliers to shape and secure the components. Starting with the flower formation using beads, proceed to twist the aluminum wire for the bracelet base. With patience and attention to detail, carefully add beads and additional flowers in a symmetrical design. The end result is a charming and unique accessory that comfortably rests on the wrist, perfect for personal use or gifting. As you work through this project, remember to take pride in your creation and enjoy the process of bringing it to life.
How to Make a Sweater Bangle
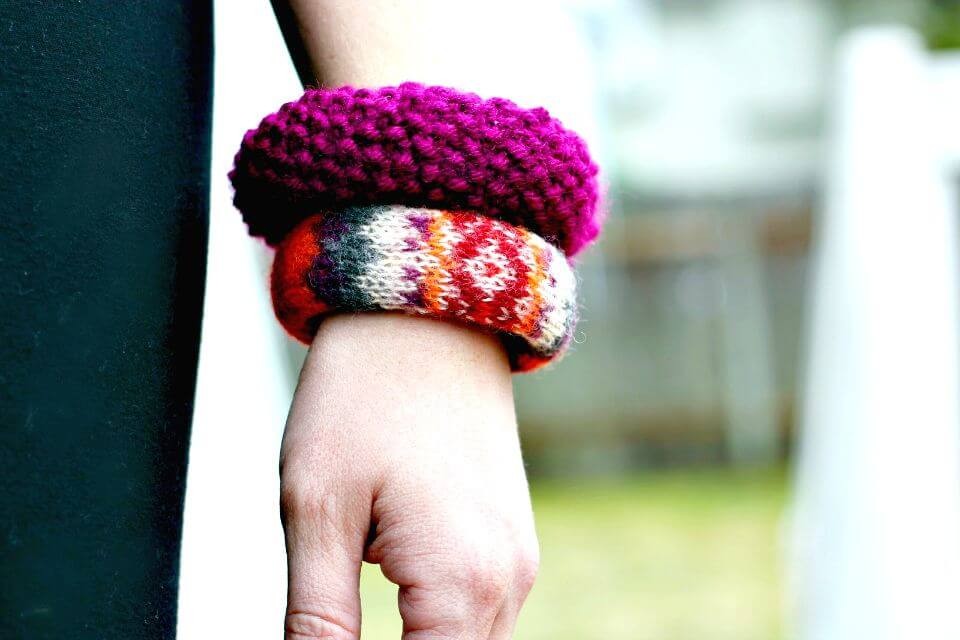
Transform an old or thrifted sweater into a trendy accessory with this easy DIY project from Make Something Monday. A worn-out baby sweater can be reimagined as a stylish winter bangle, perfect for adding a touch of elegance to your outfit. To get started, you’ll need the sweater itself, a bracelet form, scissors, a ruler, a needle, and thread or yarn. Begin by cutting the sweater to wrap around your chosen form, leaving room for stretch and seams. Once you’re happy with the fit, hand-stitch or glue the pieces together to create a one-of-a-kind accessory that will keep you warm and stylish during the colder months.
Gorgeous DIY Woven Yarn Bangles Bracelet
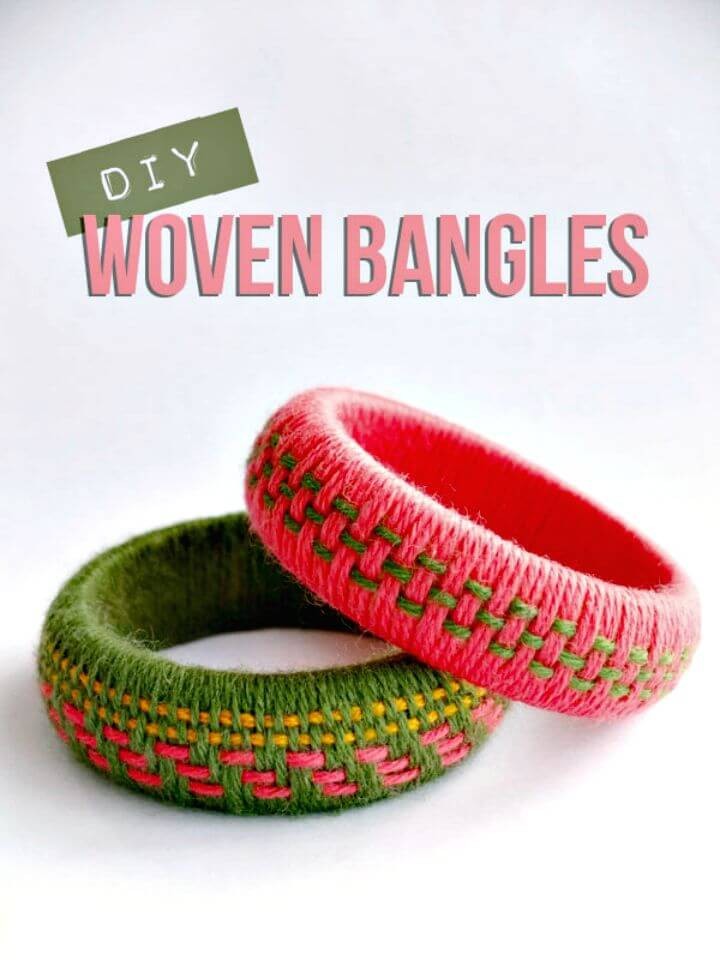
My Poppet Makes empowers creativity by transforming yarn scraps into stunning Woven Yarn Bangles. This DIY endeavour offers a practical solution for adding a pop of warmth and colour to your autumnal and winter outfits. The step-by-step instructions are carefully crafted to be accessible to crafters of all skill levels, ensuring an enjoyable experience in creating one-of-a-kind accessories.
To give your bangles unique flair, experiment with various yarn colours and weaving patterns using wooden or thrifted bases as a canvas. Simply gather essential materials like yarn, double-sided tape, tapestry needle, and scissors before diving into the wrapping and weaving process to fashion these cozy and chic accessories.
Make a Finger Fishtail Loom Bracelet
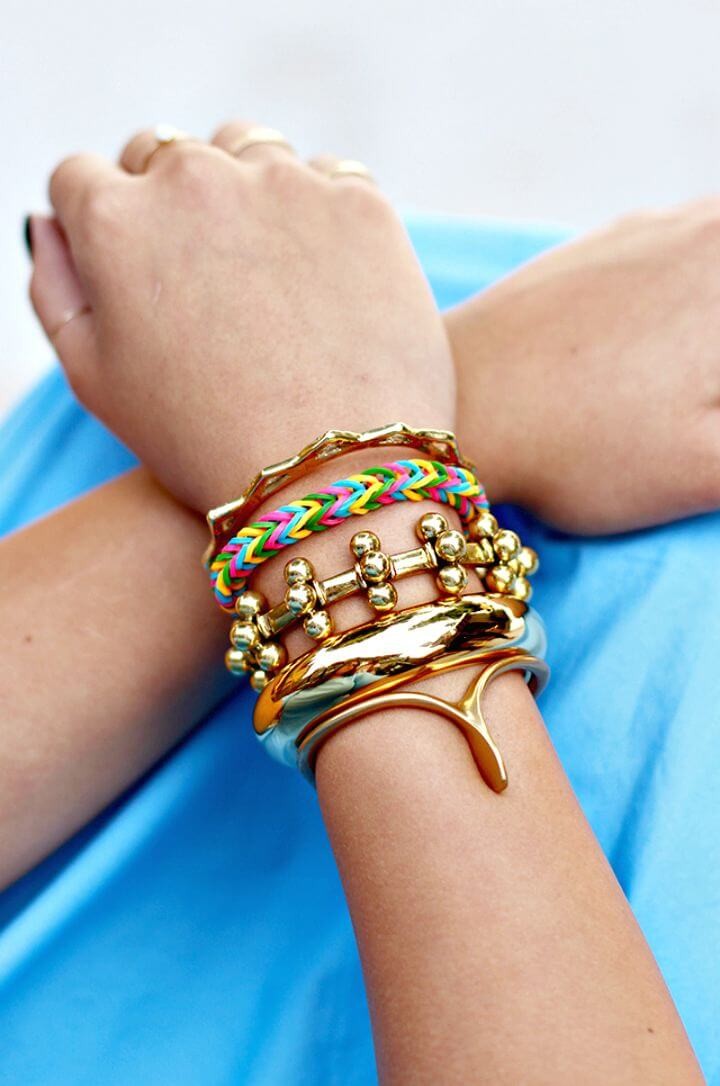
Crafting a DIY Finger Fishtail Loom Bracelet is an entertaining way to infuse playfulness into your jewelry collection. This tutorial, courtesy of Honestly WTF, provides a straightforward guide for creating these vibrant rubber band bracelets without requiring a loom. To begin, arrange your preferred loom bands by color and then utilize your fingers to weave them into a fishtail pattern. Not only is this activity enjoyable, but it also yields a charming accessory that can be personalized with various color combinations. By employing a simple twisting and layering technique, you’ll have a delightful bracelet ready for wear or sharing in no time. It’s essential to maintain three bands on your fingers throughout the process.
How to Make Macrame Rhinestone Bracelet
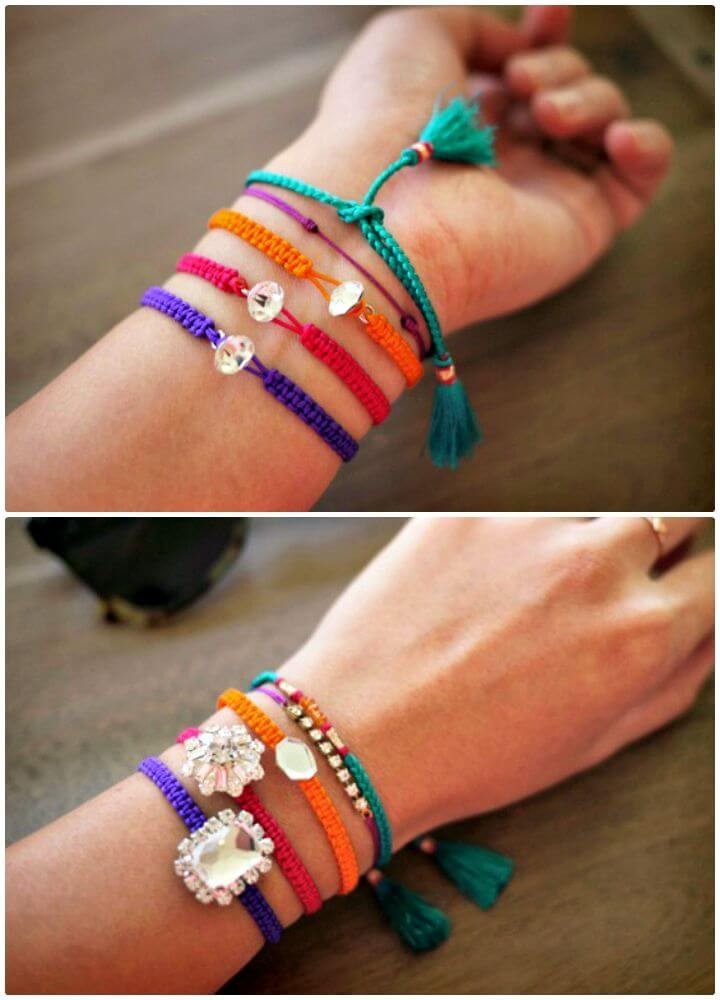
Transform your jewelry collection with a dazzling macrame rhinestone bracelet, achievable through a straightforward DIY guide from Honestly WTF. By combining basic macrame techniques with gleaming buttons, you can craft a show-stopping piece of jewelry that exudes style and sophistication. To get started, gather Chinese knotting cord, a few rhinestone buttons, and some essential tools. The tutorial takes you by the hand through each step, from intricate knotting to secure button placement, ensuring a comfortable fit. Perfect for adding an air of glamour to your accessories, this bracelet is an engaging project suitable for crafting enthusiasts of all levels. Let your creativity shine and start stacking your handmade bracelets for a personalized look that’s uniquely yours.
Painted Wood Bangle Bracelets
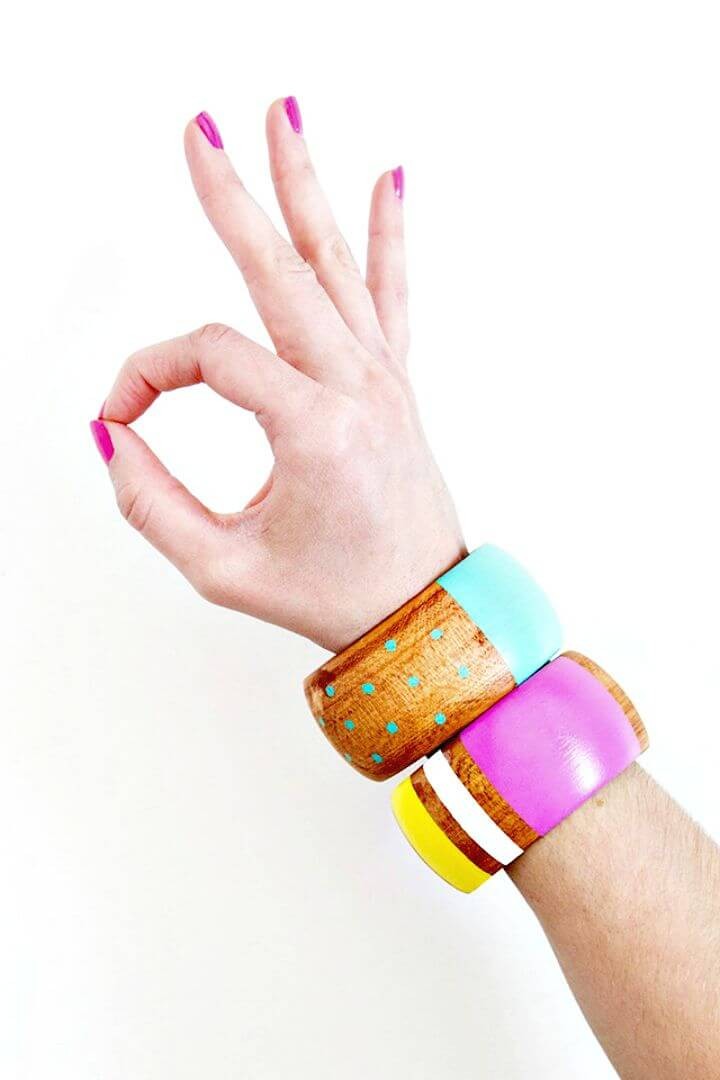
Elevate your spring wardrobe by embracing creativity with this innovative tutorial from Sarah Hearts. Transform plain wood bangle bracelets into statement pieces using a trifecta of materials: wood stain, craft paint, and gloss finish. Begin by applying wood stain to the bracelet using a foam brush, allowing it to dry completely before moving forward. Next, use washi tape as stencils to create patterns on the wood, then bring your design to life with multiple coats of craft paint. Finally, seal your masterpiece with a glossy finish for added protection and a radiant sheen. This DIY project is ideal for anyone seeking to infuse their personal style with handmade jewelry that reflects their unique personality.
DIY Kit Braided Bracelets
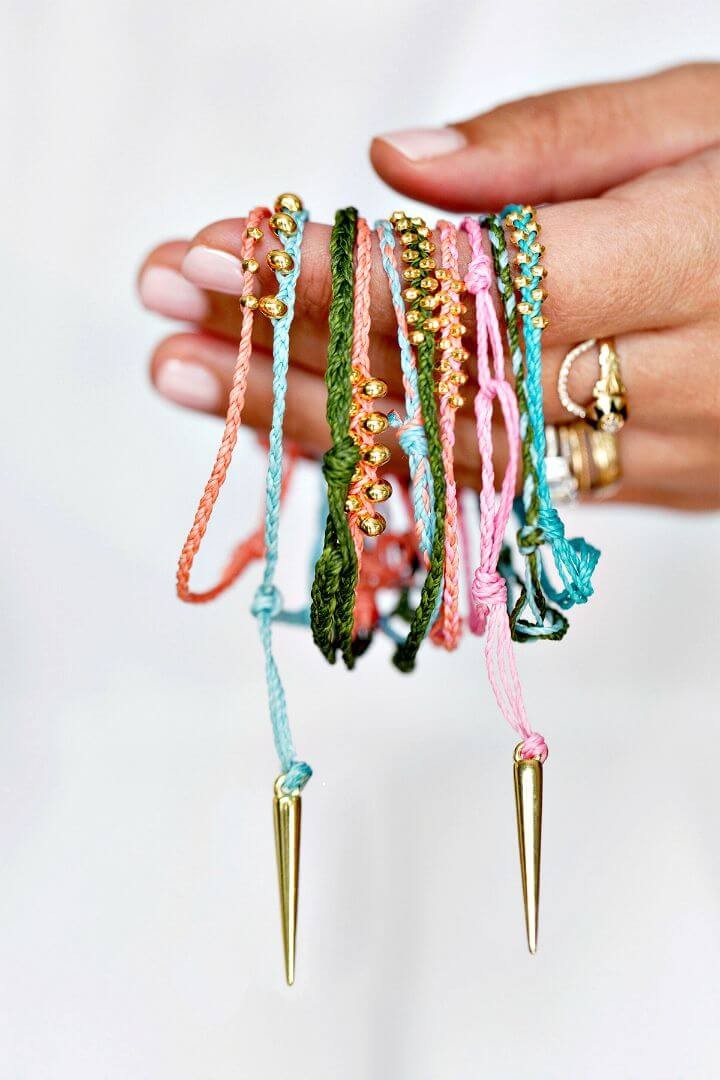
Prepare for a summer filled with creativity and self-expression by diving into the world of DIY jewelry making with the HWTF x Makers Kit Braided Bracelets. This comprehensive kit lets you create four unique, colorful, and textured bracelets that can be stacked and mixed-and-matched to reflect your personal style. The adjustable sliding knot closure ensures a comfortable fit, while the variety of cord colors, gold-plated beads, and spike charms provides endless opportunities for experimentation and self-expression. Follow the step-by-step guide to learn the art of braiding and bead-adding, then share your creations with friends and family or wear them as a badge of pride.
How to Make Macrame Friendship Bracelets
As summer approaches, what better way to celebrate than by crafting a unique and artistic DIY Miyuki & Macrame Friendship Bracelet? With Petit Bout de Chou’s comprehensive guide, you’ll learn the ins and outs of creating adjustable bracelets using Miyuki delica glass beads and simple macrame knots. To get started, gather your supplies – think colorful beads, beading cord, scissors, and jewelry glue – and get ready to embark on a fun and rewarding crafting journey.
The tutorial takes you by the hand through every step of the process, from beading the bracelet to perfecting the macrame knots that ensure adjustability. Plus, it includes a special section on decorating the ends of your bracelet with beads for that extra touch.
Whether you’re looking to gift these beautiful creations or add them to your own collection, this activity is the perfect way to spend a sunny afternoon – and enhance your craft skills in the process.
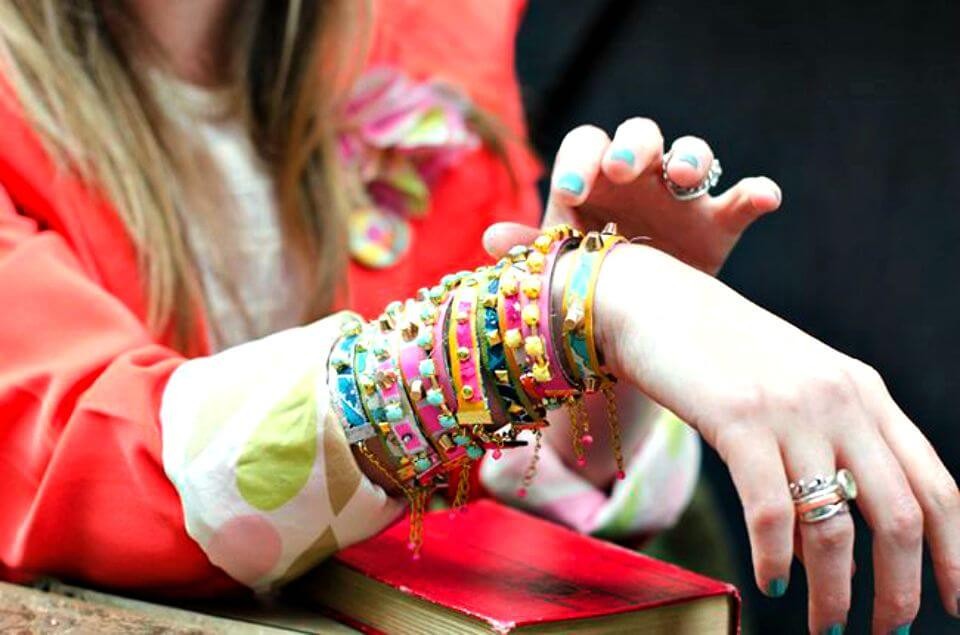
Personalised Bracelets + Book Bundle Giveaway
Embrace your creative spirit and strengthen bonds with cherished friendships by crafting personalized bracelets through DIY home decor’s comprehensive guide. These one-of-a-kind keepsakes, adorned with initials, make thoughtful gifts for loved ones or an engaging activity to share with kids. With simple materials like oven-bake clay and leather cord, you can create unique treasures that exude thoughtfulness. Additionally, discover how to secure a special book bundle giveaway for an added touch of literary magic. The easy-to-follow instructions ensure a delightful experience in assembling these charming accessories, perfect for the upcoming festive season or as a heartfelt gesture at any time.
How to Make a Vintage Button Bracelet
Transform your accessory collection or create one-of-a-kind gifts by crafting chic stone wire-wrapped bangle bracelets using this comprehensive tutorial from Made in A Day. This step-by-step guide is perfect for crafters seeking to produce stunning jewelry pieces at home, regardless of their skill level. By exploring the world of materials, from beading wire gauge to bead or gemstone selection, you’ll gain the knowledge to create custom designs that reflect your personal style. With the aid of common jewelry-making tools and precise wrapping techniques, you’ll produce durable and secure bangles that can accommodate a single stone or multiple gemstones, allowing for endless design possibilities.
Cute DIY Multi-strand Bracelets
Transform a ruined favorite into a chic multi-strand bracelet with Amy’s expert guidance on Homey Oh My. Drawing from her own creative journey, Amy distills the essence of simplicity and turns imperfection into opportunity. With only a few essential materials – including round leather lace, metal beads, and a set of basic tools – you’ll be empowered to craft a personalized accessory that seamlessly integrates with your unique style. The step-by-step tutorial is designed to be engaging, helpful, and crystal-clear, ensuring an enjoyable DIY experience for jewelry enthusiasts of all skill levels. By following this guide, you’ll refine your craft and add an understated yet sophisticated touch to your jewelry collection.
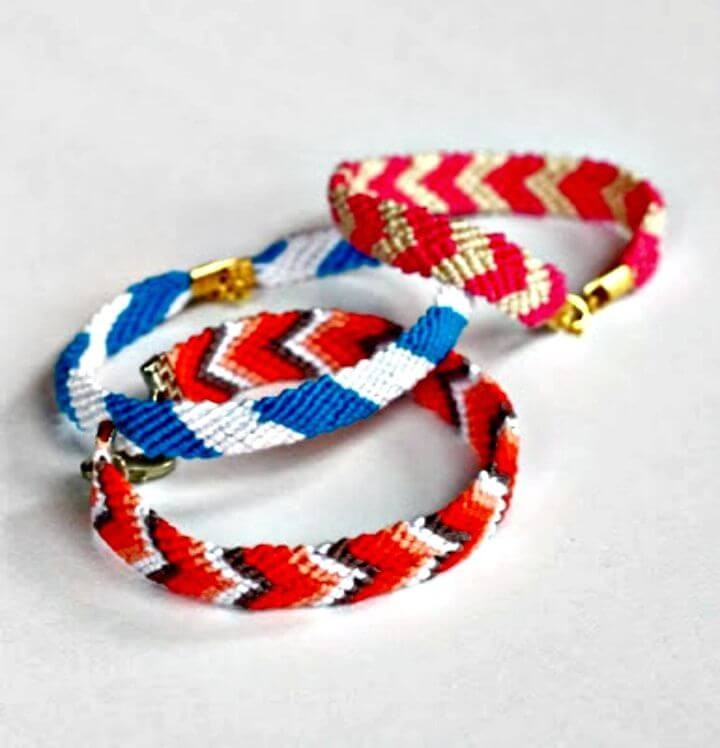
Make Braided Friendship Bracelets
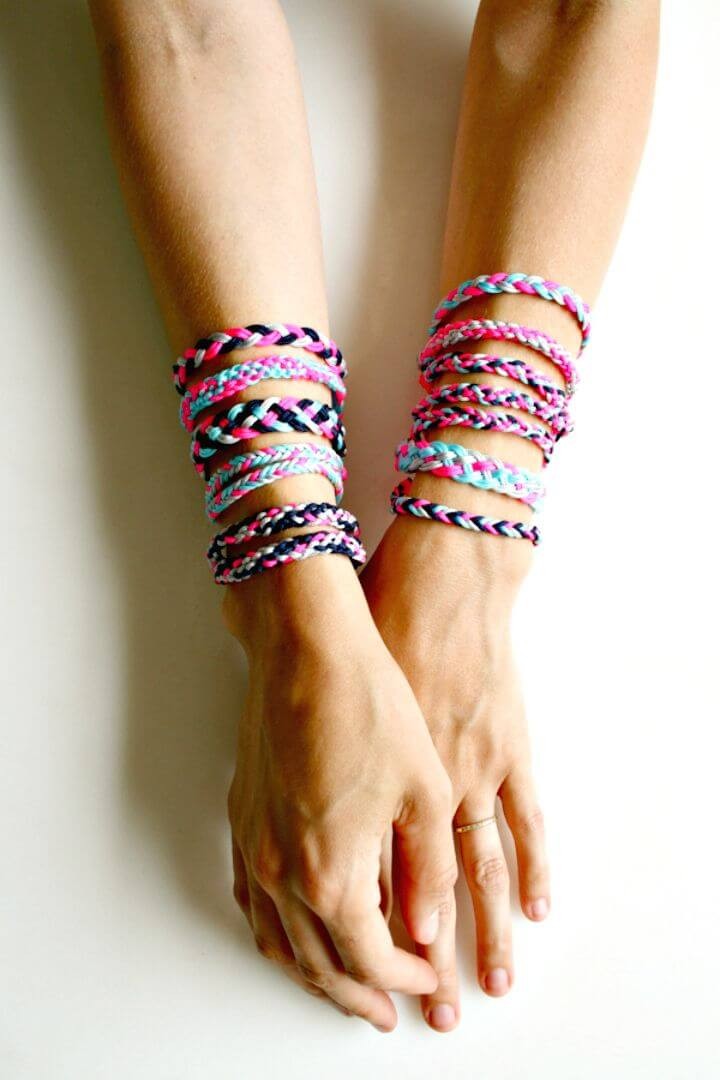
At Purl Soho, crafters can indulge their creative side by mastering the art of braided friendship bracelets that evoke the carefree spirit of summer camp days gone by. This charming project utilizes vibrant Chinese Knotting Cord, available in a kaleidoscope of colors, to create stunning accessories with an adjustable closure for a comfortable fit. By following simple steps, you can trim the cords to your desired length, braid using various patterns, and secure the ends for a polished finish. Perfect for those who revel in hands-on projects and the joy of crafting heartfelt, personalized gifts, this tutorial offers crystal-clear instructions and requires no complex tools, allowing you to savor the process and take pride in your finished creations.
Cute DIY Sea Glass Bracelet + Earrings
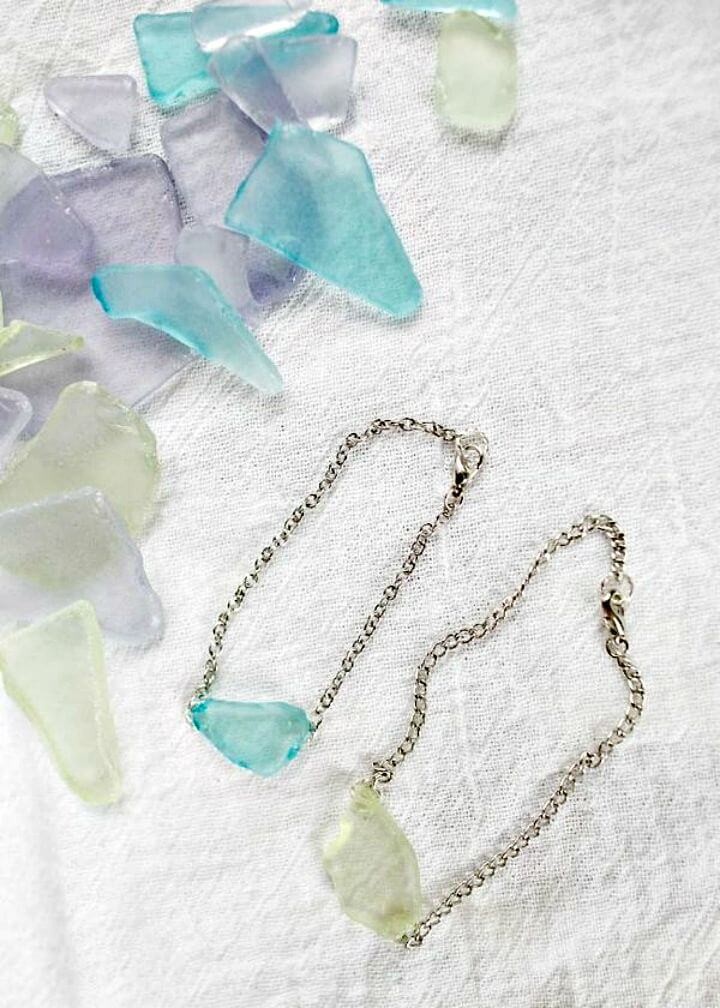
Elevate your jewelry-making skills by creating unique pieces with the DIY bracelet and earring tutorial from The Sweetest Occasion. This step-by-step guide is designed to help you craft delicate, summer-inspired jewelry featuring sea glass in soothing shades of purple and blue. With a list of simple supplies including sea glass, E-6000 glue, silver chain, jump rings, clasps for bracelets, and stud backs for earrings, you’ll be well-equipped to securely attach the components and customize the length for a perfect fit. For added versatility, you can create a stack of bracelets or pair them with simple stud earrings for a beachy vibe. This project is ideal for adding a personal touch to your accessories and making it a relaxing day of crafting.
Beautiful Studded Leather Bracelet Ideas
Unlock the essence of summer by infusing your style with an artistic touch. By creating your own studded leather bracelets, as demonstrated in the Hello Glow tutorial, you’ll discover a fresh spin on the iconic punk-inspired trend. The incorporation of vibrant leather shades and whimsical Liberty print fabrics adds a playful charm to this DIY project. With its clear and concise instructions, this guide is perfect for those who relish adding their personal touch to their accessory collection.
With just a few essential supplies – including leather, fabric, studs, and basic jewelry findings – you can craft eye-catching bracelets that perfectly complement your summer look. These handmade pieces are ideal for stacking and are sure to garner attention from friends. Furthermore, they’ll add an unparalleled flair to any outfit, allowing you to express your unique personality. Get ready to unleash your creativity and create a stunning set of studded leather bracelets!
DIY Gold & Leather Curved Clasp Bracelet
Elevate your style with a chic gold and leather curved clasp bracelet, expertly crafted through Happy Hour Projects’ comprehensive tutorial. This DIY endeavor is perfect for jewelry aficionados seeking a quick and creative way to add a touch of sophistication to their wardrobe. By following the step-by-step guide, you’ll learn how to cut the leather, secure the clasp, and achieve a stunning result in no time. The versatility of this project lies in its customization options, allowing you to personalize the color and details to suit your taste. This on-trend accessory perfectly complements the season’s bangle craze, ensuring you’ll be the envy of friends and family with your very own handmade bracelet.
Conclusion:
With this guide on 60 easy DIY bracelets now complete, you’re well-versed in creating charming and creative accessories for yourself or as a thoughtful gift. The process of making DIY bracelets is more than just producing something visually appealing – it’s an opportunity to develop new skills, explore your creativity, and potentially discover a fulfilling hobby. As you continue on this crafting journey, we hope the ideas presented here will inspire future DIY projects and bring a personal touch to your jewelry collection or that of someone special.