Embarking on a DIY hot glue gun adventure can be an exhilarating experience for crafters. These versatile tools can transform ordinary materials into extraordinary creations. Whether it’s decorating your home, creating unique gifts, or adding a personal touch to your belongings, the possibilities with hot glue gun crafts are endless. This guide aims to empower crafters of all levels by providing a comprehensive introduction to hot glue guns and their applications. From understanding your tool to selecting an appealing project, this segment sets the stage for a rewarding crafting experience. By mastering the fundamentals and overcoming common challenges, you’ll be equipped to tackle even the most ambitious projects with confidence. As you progress through each DIY endeavor, you’ll refine your skills and develop a keen sense of how to apply just the right amount of glue, ensuring every project is a triumph.
How to Get Started with DIY Hot Glue Gun Crafts
Embarking on your DIY hot glue gun crafting adventure can be an exhilarating experience, offering endless possibilities for creating unique and personalized projects that reflect your personal style. With its versatility and range of applications, from home decor to fashion accessories, a hot glue gun is an excellent tool for unleashing your creativity. This straightforward guide aims to equip you with the knowledge and confidence needed to start crafting with ease and precision.
Understanding Your Hot Glue Gun
Understanding the nuances of hot glue guns is crucial to achieving optimal results. Unlike other adhesives, hot glue guns offer varying temperature settings and sizes that cater to diverse materials. For instance, low-temperature guns are ideal for delicate materials like fabric or foam, whereas high-temperature guns excel at forming strong bonds with materials such as wood or plastic.
Gathering Your Materials
To begin crafting, it’s essential to have the right tools at your disposal. A hot glue gun is a must-have, but make sure to select one that fits comfortably in your hand and suits the projects you’re interested in pursuing. Alongside the gun, stock up on glue sticks of various sizes and types (clear, colored, glitter) to unlock a world of creative possibilities. To ensure safe crafting, always have heat-resistant gloves and a silicone mat or parchment paper at the ready to protect your surfaces from any potential damage. Finally, gather all necessary crafting supplies, such as fabric, paper, decorations (beads, sequins), and any specific molds or templates required for your project.
Picking Your First Project
To build momentum, begin with straightforward projects that instill confidence in your abilities. Examples of beginner-friendly endeavors include crafting decorative push pins, creating simple jewelry pieces, or adding basic embellishments to household items. These initial projects will help you develop a comfort level when working with hot glue guns and gain an appreciation for their capabilities.
Basic Steps for Most Hot Glue Gun Crafts
To begin, prepare your workspace by laying out all the necessary materials and preheating your hot glue gun. Cover the surface with a silicone mat or parchment paper to prevent any accidental gluing mishaps. Before applying the adhesive, conduct a test squeeze on some scrap material to ensure the flow and temperature are suitable for your project. This preliminary step will help you adjust the glue’s viscosity to achieve the desired consistency.
Next, apply the hot glue in a smooth motion by gently squeezing the trigger of your gun. If you’re working with intricate designs, lightly sketch the outline on the material first to guide your application. For more precise placement, quickly assemble and press your materials together before the glue cools and hardens. Use silicone finger protectors or a pencil to handle small items safely.
Once assembled, let your project cool completely before handling or adding any additional decorations. Finally, when cleaning up, allow the hot glue gun time to cool down first. Then, use a silicone mat or aluminum foil to effortlessly clean up any glue drips that may have occurred during the process.
Tips for Success
Mastering the art of crafting with hot glue guns requires patience, practice, and a commitment to safety. First and foremost, it’s essential to allow the glue to cool and set properly for a strong bond. Don’t rush the process – take your time to ensure a solid hold. When mistakes do occur, remember that hot glue is forgiving, and many errors can be easily peeled off and corrected. This is an opportunity to learn and refine your skills. To work safely with hot glue guns, always operate in a well-ventilated area and store the gun on a silicone mat or stand when not in use. By following these guidelines and being willing to experiment and progress, you’ll be able to unlock endless creativity and master this versatile tool. Every project counts towards building your skills and confidence, so don’t be discouraged by initial setbacks – keep crafting and you’ll soon see the results.
Crafting with Precision: The Art of Applying the Right Amount of Hot Glue
When it comes to using hot glue, crafters know that the key to success lies in achieving the ideal balance of application. This is where many users encounter challenges – too much glue can lead to messy results, while too little may not provide a strong bond. To overcome this hurdle, consider the following strategies:
Understand Your Materials: The type of material you’re working with plays a significant role in determining how much hot glue you’ll need. For instance, porous materials like fabric often require more glue than non-porous surfaces like plastic.
Test and Adjust: Before applying glue to your main project, test it on scrap material first. This will give you an idea of the right amount of glue for the job at hand.
Apply Glue in Small Amounts: Start by applying a thin line or small dots of glue, especially when working with smaller pieces. You can always add more if needed, but it’s harder to remove excess glue.
Avoid Overloading Your Gun: Make sure you’re not overloading your hot glue gun by loading only what you need for the task at hand. This will prevent excessive glue application and make cleanup easier.
Use a Release Agent (Optional): If you’re looking for an additional way to gauge the right amount of glue, try applying a small amount to a non-stick surface and letting it cool. You can then use this as a guide for future applications.
Clean Up Excess Glue: If you do end up applying too much glue, don’t worry – you can quickly clean up the excess with scrap cardboard or a silicone spatula before it cools.
Give Yourself Time: Finally, remember to allow your glue to heat fully before application. A partially heated glue stick can lead to uneven results and wasted material.
By following these steps, you’ll be well on your way to creating crafts that look clean, professional, and well-bonded. And don’t forget – practice makes perfect!
Troubleshooting Common Hot Glue Gun Issues
When your hot glue gun starts acting up, it can really put a damper on your crafting session. But don’t worry, we’ve got you covered! Here are some common issues and their fixes to get you back on track in no time.
First off, if the glue isn’t flowing smoothly, it’s likely due to a clogged nozzle. Simply unplug the gun, let it cool down, and then use a needle to clear out any blockages. If that doesn’t work, the issue might be with the glue stick itself – make sure you’re using one that’s compatible with your specific gun model.
Next up, if you’re experiencing excessive dripping, there are a few potential culprits at play. It could be due to a worn-out nozzle or O-rings, so be sure to check those out and replace them if necessary. Also, double-check that you’re using the right glue sticks for your gun – some may not be designed to work well together.
Now, if your glue gun just isn’t heating up at all, it’s time to do some troubleshooting. First, try plugging in another device to rule out any issues with the power source. If that checks out, the problem might be with the heating element inside the gun itself – in which case, you might need to replace it.
Finally, if your trigger isn’t cooperating, there’s probably a broken mechanism inside that needs attention. In some cases, replacing the entire trigger or even the whole gun may be necessary – but don’t worry, we’ve got you covered with tips and tricks to get you back crafting in no time.
Keeping Your Hot Glue Gun Clean
To ensure optimal performance and longevity of your hot glue gun, regular maintenance is essential. This involves a combination of immediate cleaning after use, addressing hardened glue, using appropriate cleaning agents for tougher residue, and performing regular nozzle care.
Firstly, clean the nozzle with aluminum foil or a dryer sheet immediately after each use while it’s still warm. This prevents glue buildup and ensures smooth application in subsequent uses. If you notice any hardened glue on the gun, use a heat gun or blow dryer to warm it up, making it easier to remove with foil.
For more stubborn residue, apply acetone (nail polish remover) to a paper towel and gently rub the affected areas. This can help remove tough glue and stains that may have accumulated over time.
In addition to these cleaning steps, regular nozzle care is crucial for maintaining your hot glue gun’s overall performance. To do this, remove the nozzle while it’s still hot (taking necessary precautions with protective gloves) to clean off any excess glue. It’s essential never to remove a cold nozzle as this can cause damage to the threads.
By following these simple yet effective steps, you’ll be able to keep your hot glue gun in top shape and ensure it continues to perform well over time.
FAQs About Hot Glue Gun Crafts
Get expert advice on creating stunning hot glue gun crafts with our detailed and informative FAQ section. Dive into a treasure trove of answers to frequently asked questions, and uncover the secrets to crafting like a pro.
What is a hot glue gun and how does it work?
A hot glue gun functions as a handheld device that melts solid adhesive sticks into a liquid form. This viscous substance is then applied to the desired area, where it cools and solidifies, forming a robust bond between materials. The tool’s ease of use, rapid setting time, and versatility have made it a staple in various repair and craft projects.
Can hot glue be used on any type of material?
When utilizing hot glue, it’s crucial to select the appropriate adhesive and heat settings based on the material you’re working with. This versatile medium can effectively bond a wide range of materials, such as fabric, wood, plastic, and metal. Nevertheless, failing to choose the correct glue stick and temperature setting can lead to a weak bond or even damage to the material. As a result, it’s essential to consider these factors when using hot glue to ensure a strong and reliable hold.
How can I prevent hot glue strings from forming?
To minimize the annoying strings that can come with using a glue gun, it’s crucial to release the trigger before pulling the gun away from your project. This simple trick can make a big difference in reducing stringing. Furthermore, keeping the glue sticks in the freezer and ensuring the tip of the gun is clean will also help minimize the formation of strings. If some strings do form, they can typically be peeled off once the glue has cooled to room temperature.
Is hot glue waterproof?
Hot glue may not be fully waterproof, but it does possess water-resistant qualities. Light moisture won’t pose a significant threat, yet it’s not designed to handle immersion in water or prolonged exposure to heavy rainfall. Its limitations become apparent when faced with more substantial water exposure.
How do I remove hot glue from a surface?
To effectively remove hot glue from a surface, allow it to cool down first and then carefully peel it off. If stubborn adhesive persists, consider employing a gentle approach by dipping a Q-tip in rubbing alcohol or placing the item in the freezer to render the glue more brittle, making removal easier.
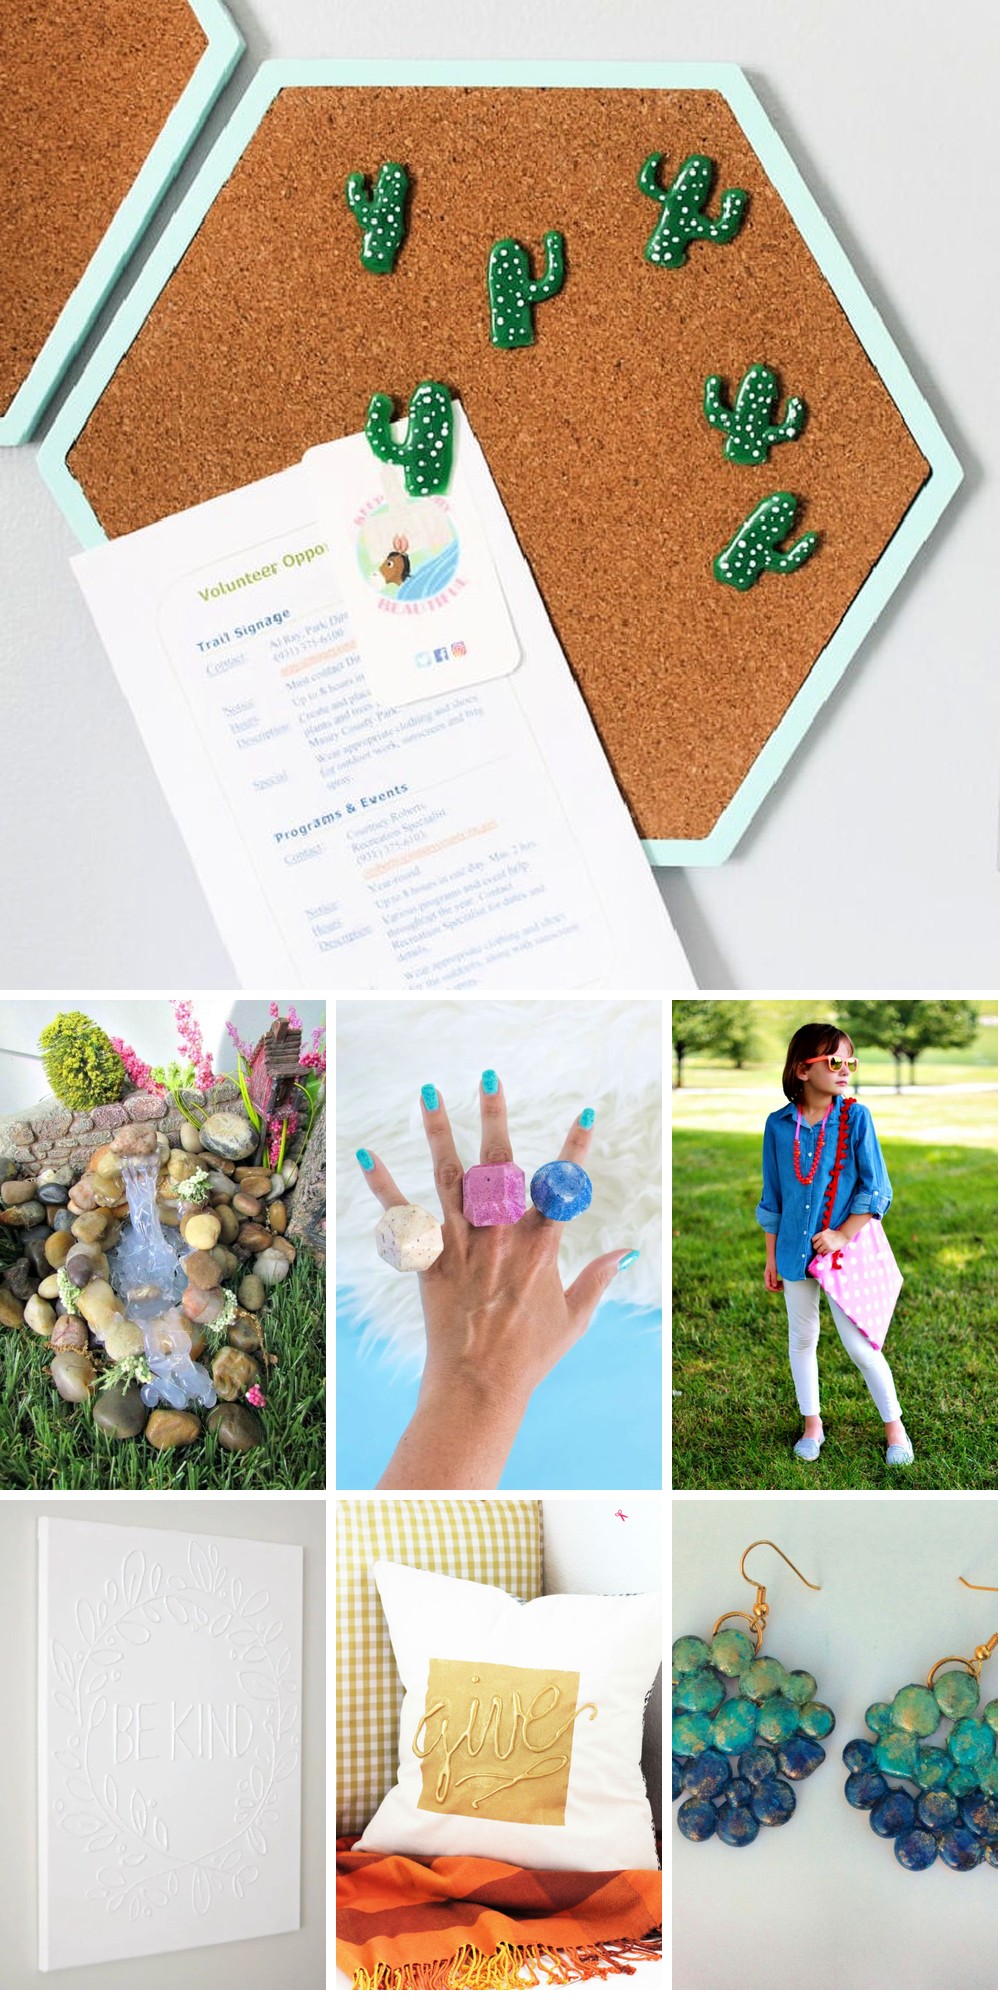
25 DIY Hot Glue Gun Crafts and Projects
Unleash your inner crafter and get ready to transform everyday objects into unique treasures using the humble hot glue gun. With a plethora of creative possibilities at your fingertips, this versatile tool is just begging to be used in 25 innovative projects that span from home decor masterpieces to exquisite jewelry creations.
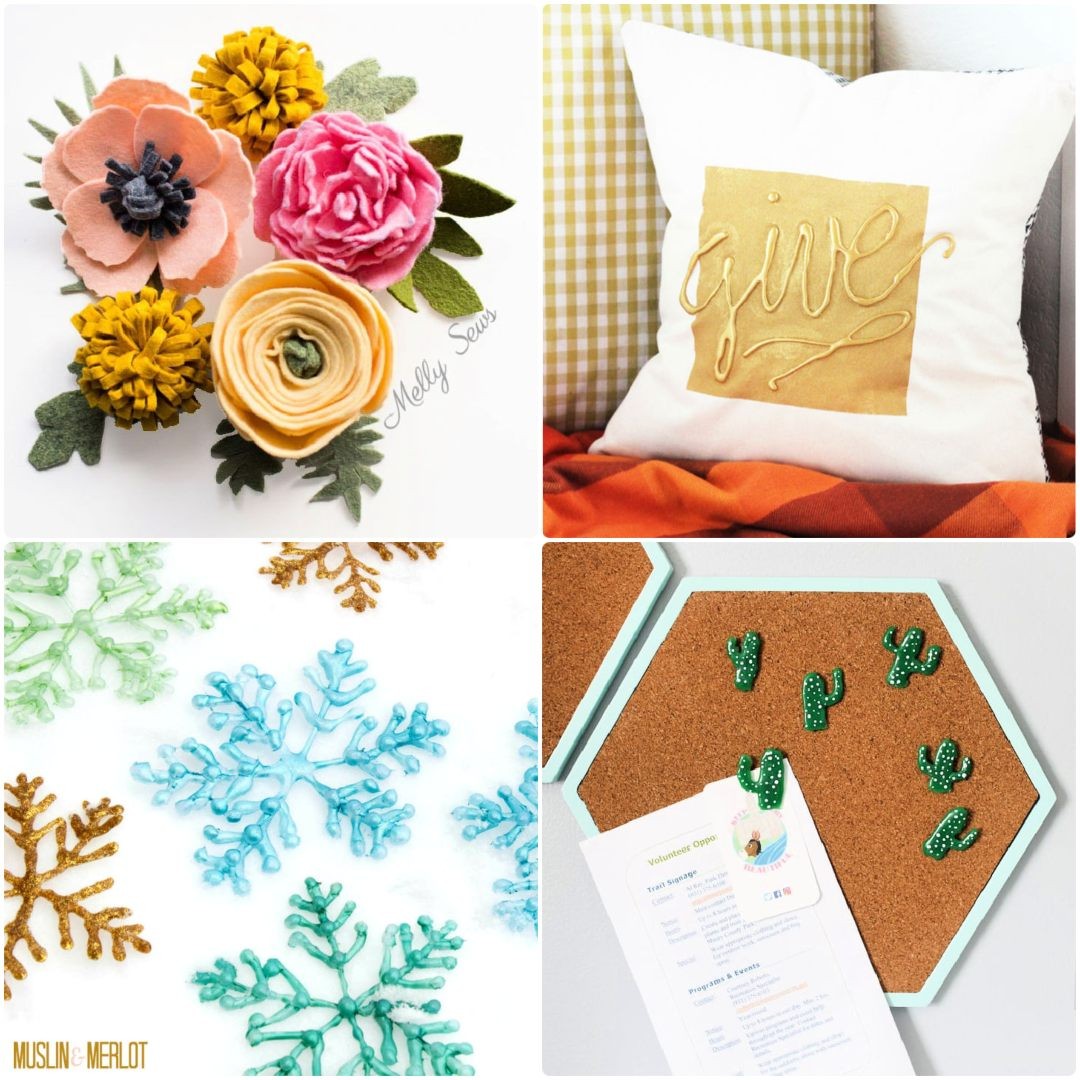
DIY Glue Gun Snow Flakes
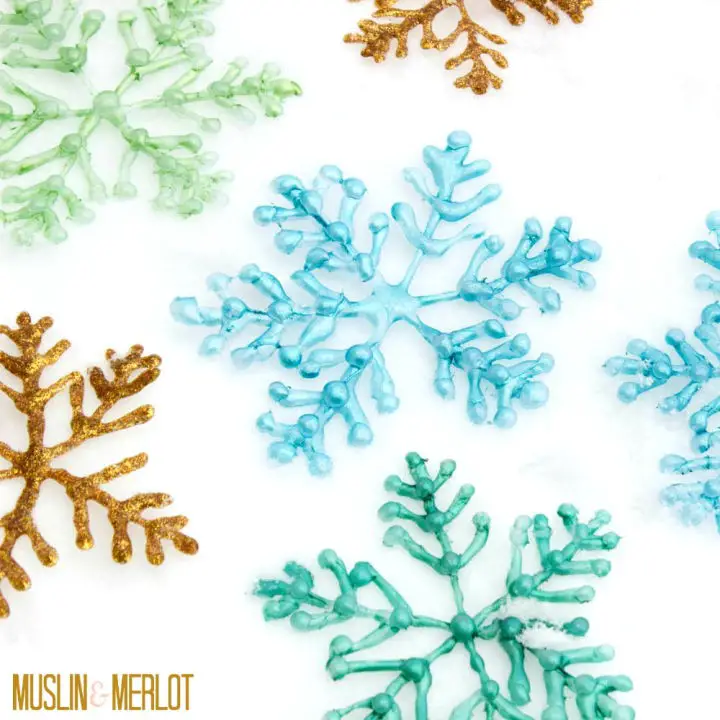
Transform your home into a winter wonderland by crafting stunning DIY glue gun snowflakes, minus the mess! Start by creating the snowflakes on parchment paper and use a blow dryer to effortlessly remove excess glue strands. Once each one is carefully peeled off, give it a vibrant makeover by painting both sides with nail polish. Jewel-toned hues work particularly well, and you can reuse the parchment paper to create an array of unique snowflakes. Let your creativity shine this winter season as you add a touch of sparkle to your decor with these easy-to-make DIY ornaments that are sure to impress.
Decorative Cactus Push Pins Made From Hot Glue
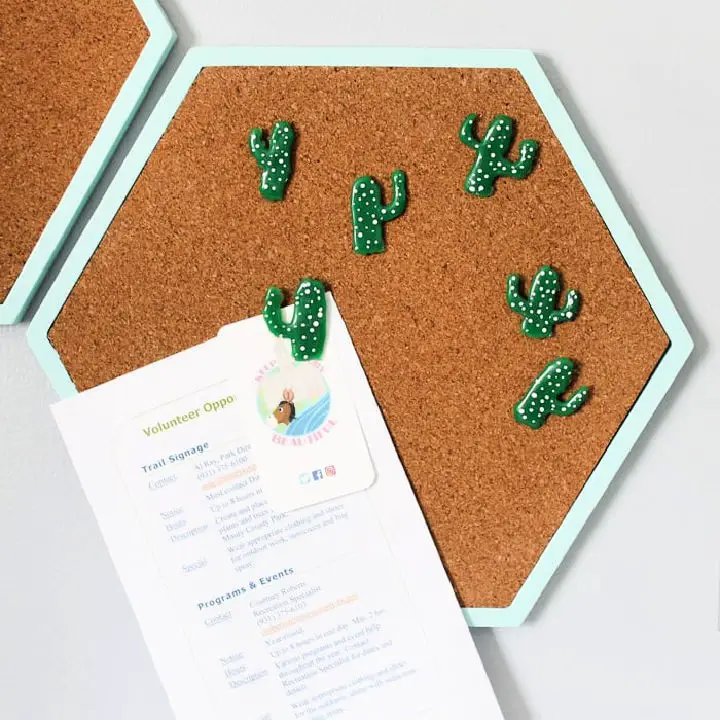
Transform your home workspace into a haven of creativity by crafting unique decorative cactus push pins using hot glue. To start, gather essential materials like a hot glue gun, green sticks, white craft paint, a paintbrush, thumbtacks, and a non-stick mat. The process is straightforward: apply the thumbtacks to the hot glue base using the glue gun, followed by a coat of white paint for added texture. Once complete, arrange your mini cacti creations in patterned rows or groupings on your wall, creating a stunning array of accents that will bring a touch of nature-inspired charm into any room.
How to Make Felt Flowers
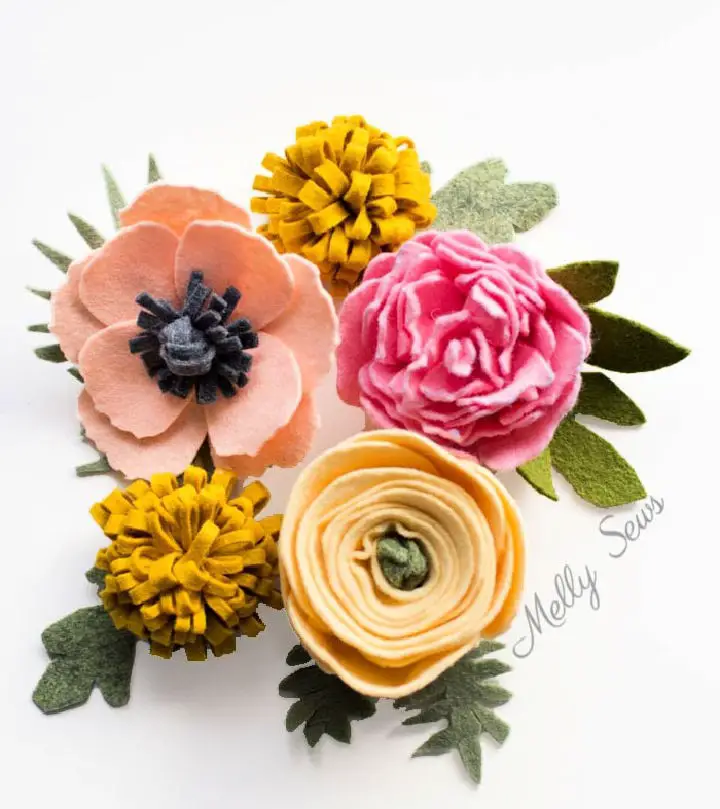
Elevate your crafting abilities by mastering the art of hot glue gun crafts, a versatile technique for seamlessly bonding various materials. One such creative endeavor is crafting beautiful felt flowers, which requires minimal effort and yields impressive results. Begin by carefully cutting out petals in the desired shape and size using sharp scissors. Next, refine their shapes to ensure they appear visually appealing. Then, assemble the petals around a stem, working from outermost to innermost, to create an eye-catching design. To add the finishing touches, attach a calyx (the green base) and some leaves for added detail. By following these straightforward steps, you can effortlessly produce stunning felt flowers that will instantly enhance any setting.
Handmade Fabulous Gem Rings
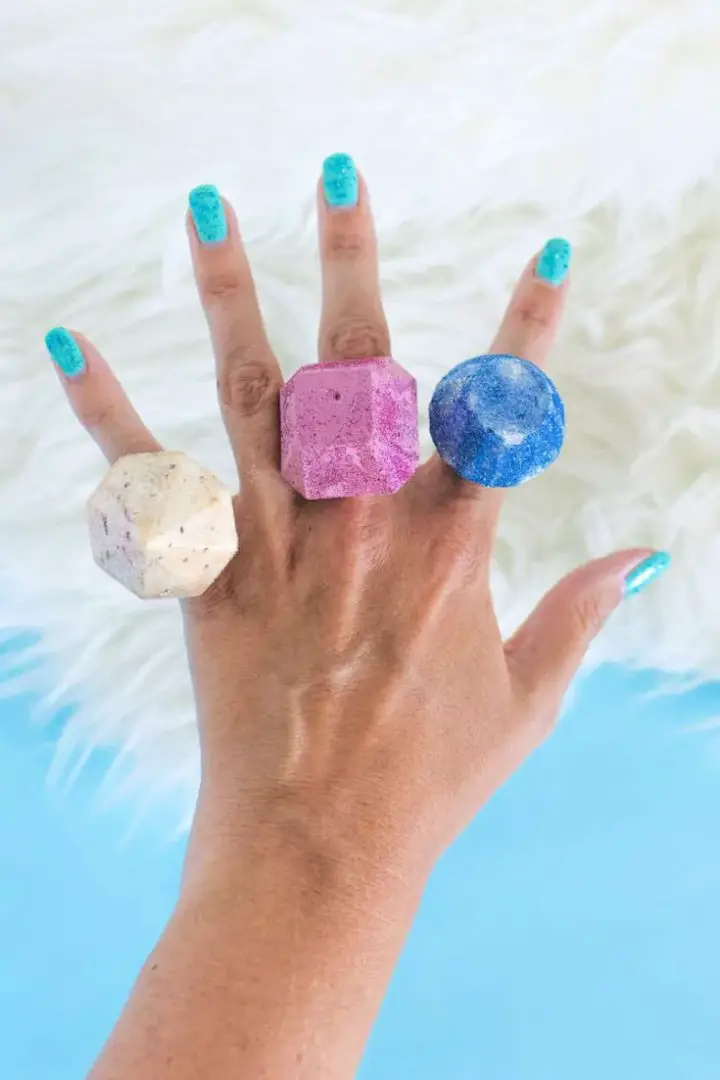
Transform your creativity into wearable art by crafting unique gemstone rings with this straightforward DIY guide! With a minimal set of materials, including silicone 3D gem molds, hot glue guns and sticks, ring blanks, paints, brushes, and glitter, you can create one-of-a-kind handmade accessories for yourself or as a thoughtful gift. Experiment with color combinations to create striking solid designs or bold mixed-patterned pieces that are sure to turn heads. Once complete, proudly showcase your masterpieces to the world!
DIY Hot Glue Embellished Throw Pillow
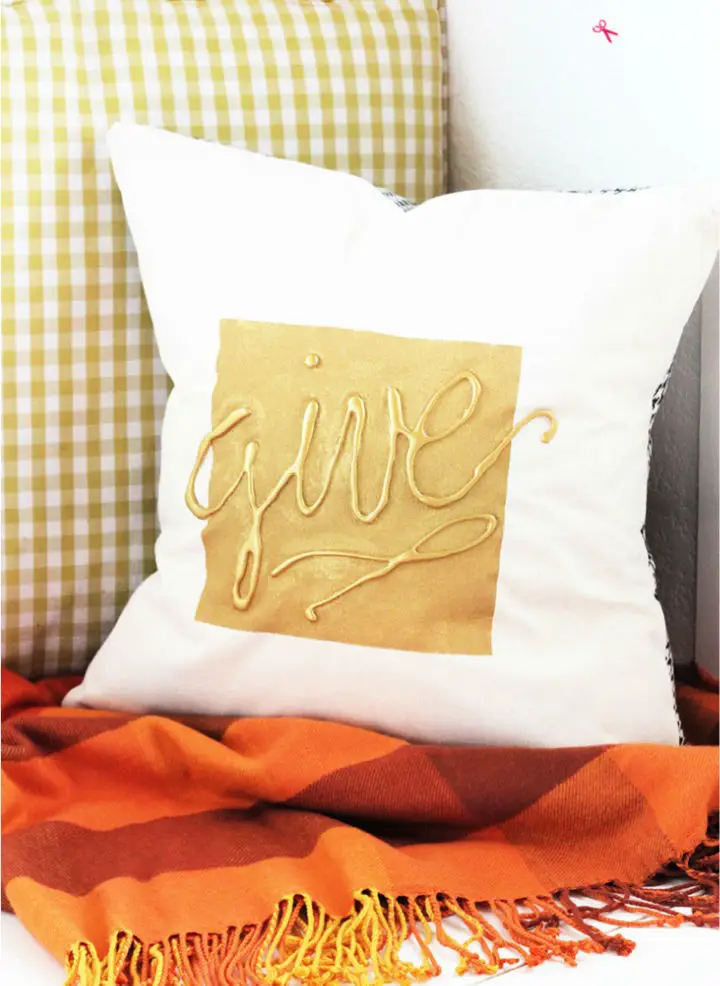
Transform a plain DIY hot glue embellished throw pillow into a stunning work of folk art by combining multi-surface acrylic paint with other creative supplies. Begin by designing the tape-off pattern for your pillow insert using a fabric pen, then carefully apply hot glue along the lines to create a sturdy foundation. Next, grab some FolkArt multi-surface acrylic paint and craft foam sponsors to add vibrant colors to your throw pillow. As you work, be mindful of the painter’s tape edges and let everything dry before removing it for that final touch. With these easy steps, you’ll turn an ordinary throw pillow into a one-of-a-kind masterpiece that will captivate anyone who sees it.
How to Embellish Sandals Using Hot Glue
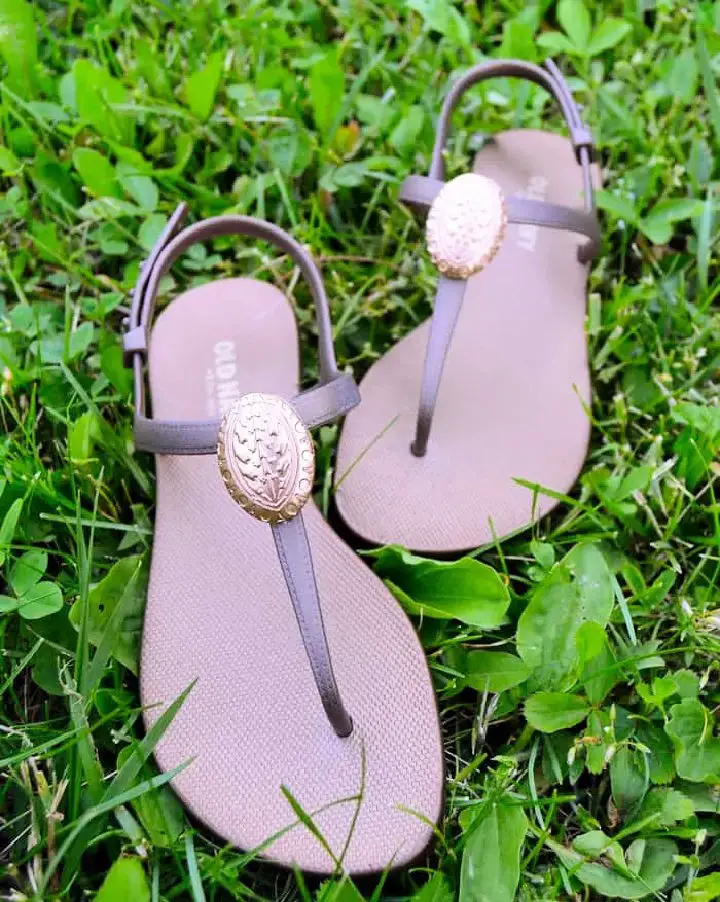
Elevate a mundane pair of sandals into a distinctive fashion statement by harnessing the power of hot glue and creativity. To get started, gather your essential tools: heat-resistant molds, a hot glue gun, a heat gun, an assortment of colorful mod melts or hot glue sticks, and scissors. Next, give your sandals a personal touch by applying paint as desired. This sets the stage for your creative makeover. Employ the molds to carefully craft intricate designs, such as flowers or circles, onto your sandals. If you want to add an extra layer of glamour, incorporate beads into your design. Once you’ve finished, allow the embellishments to dry before showcasing your one-of-a-kind footwear wherever you go.
No Sew DIY Baby Flower Headband
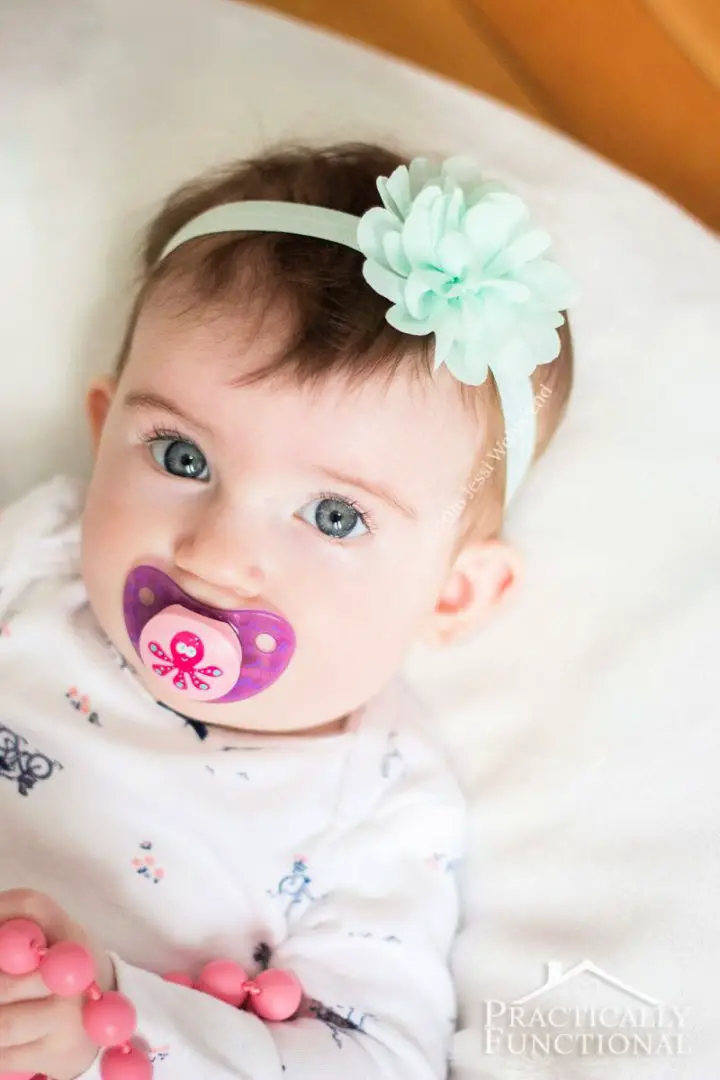
Stand out from the crowd with this effortlessly chic, no-sew DIY baby flower headband! With a mere handful of essential supplies – including soft, stretchy elastic, fabric flowers, and scissors – you can create a stunning headpiece that will captivate all who lay eyes on it. Simply measure the elastic to fit your little one’s head circumference, attach the fabric flower using a hot glue gun, and wrap it snugly around their forehead for an accessory that exudes effortless style. To take it to the next level, experiment with different colors and styles of flowers to create a truly one-of-a-kind look that’s sure to turn heads!
Make Tote Bag Using Glue Gun
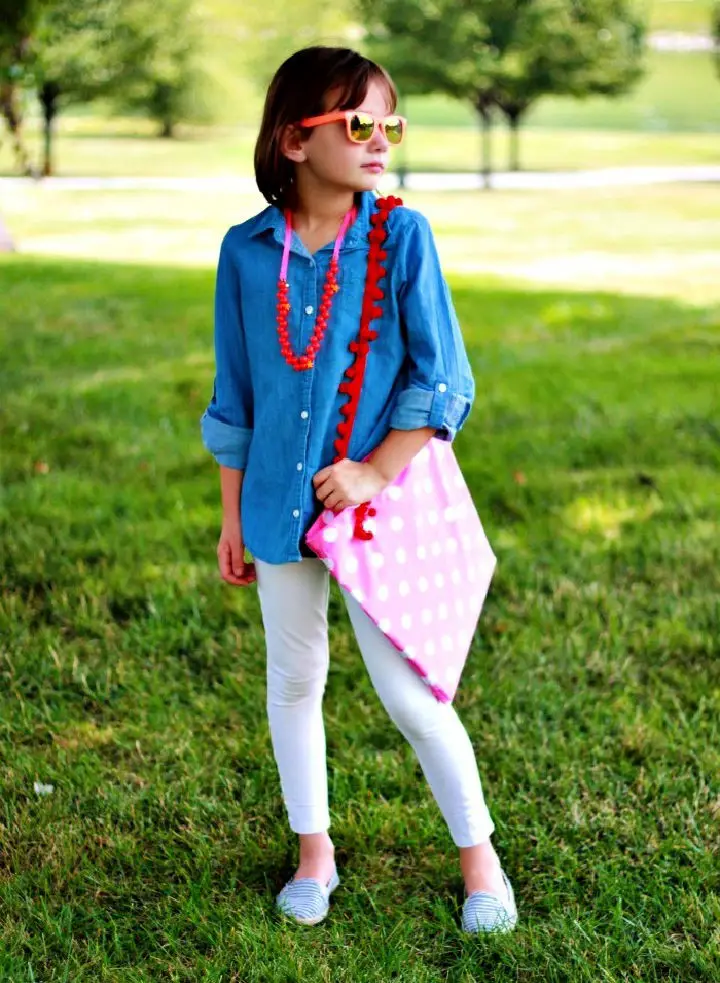
Transform an ordinary tote bag into an extraordinary one with just a hot glue gun and some fabric. Begin by folding your fabric in half and determining the size of your tote, leaving room for seams as you go. Next, cut out your desired design, taking care to fold the fabric inwards to form the base of the bag. Using your trusty hot glue gun, ‘sew’ together each side and across the top, securing the edges with precision. Before you know it, you’ll have a unique and stylish accessory that’s not only functional but also long-lasting.
How to Make No-sew Rope Coil Basket
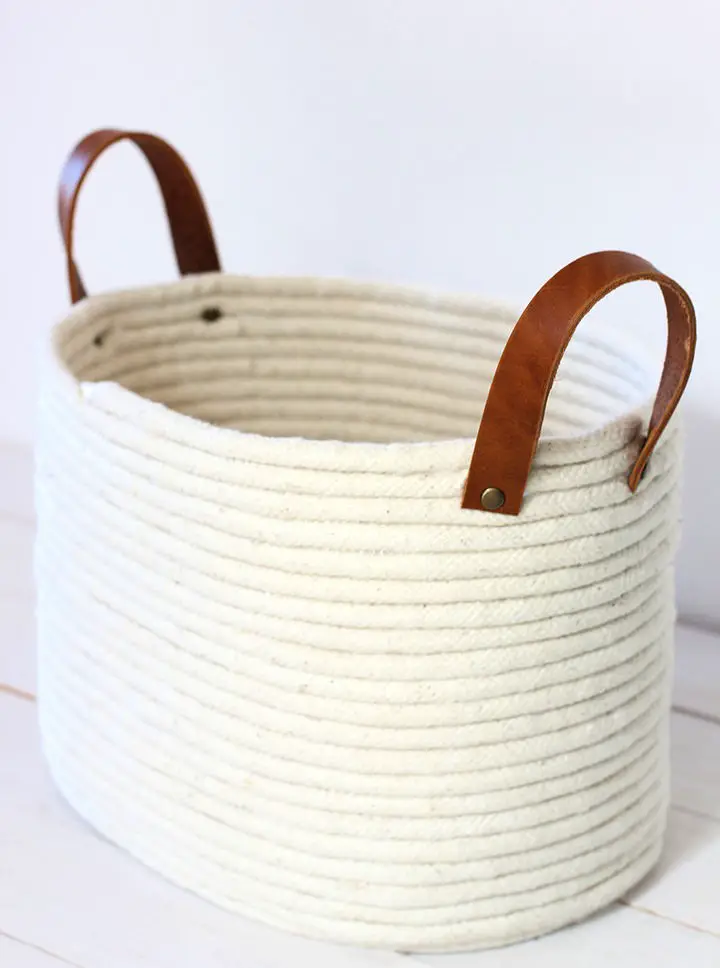
Make a statement in your home decor with this DIY no-seam rope coil basket project, requiring just a few simple materials: 3/8 inch natural cotton piping, scissors, and a hot glue gun. Optional support from a bucket or basket adds an extra layer of stability. To get started, cut the piping into 40 equal strips, each measuring 6 feet in length. Then, secure each strip around the base of your chosen container using hot glue. From there, coil the rope into small circular shapes until all the material is used up. With minimal effort and maximum style, anyone can create their own unique no-sew rope coil baskets.
Make a Waterfall Using A Hot Glue Gun
Elevate your home décor with a stunning DIY waterfall that’s mess-free and uniquely crafted with a hot glue gun. By following a few simple steps and unleashing your creative flair, you can create a breathtaking feature that’s sure to leave an impression.
To get started, collect essential supplies such as fabric, foam board, and hot glue sticks. Next, envision the final product by laying out your design in advance. Once you’re ready, utilize the hot glue gun to shape your waterfall feature into a beautiful masterpiece, free from the hassle of natural waterfalls.
Cute DIY Hot Glue Sequin Pillow
Transform everyday items into extraordinary pieces by unleashing your creativity with hot glue gun crafts. For instance, transform ordinary fabric into a dazzling sequin pillow by combining hot glue and innovative designs. Start by sketching the design of your choice onto the fabric, then apply a string of hot glue using an applicator bottle or gun. Strategically place your sequins along these lines to create unique patterns and textures. To add a finishing touch, incorporate other embellishments such as yarn tufts that reflect your personal style. This project allows for endless creativity – make it one-of-a-kind for yourself or present it as a special gift. The possibilities are endless with hot glue and sequins, making it an ideal medium to create striking works of art that will stand out in any home décor.
Anthropologie-Inspired Floral Lamp Shade
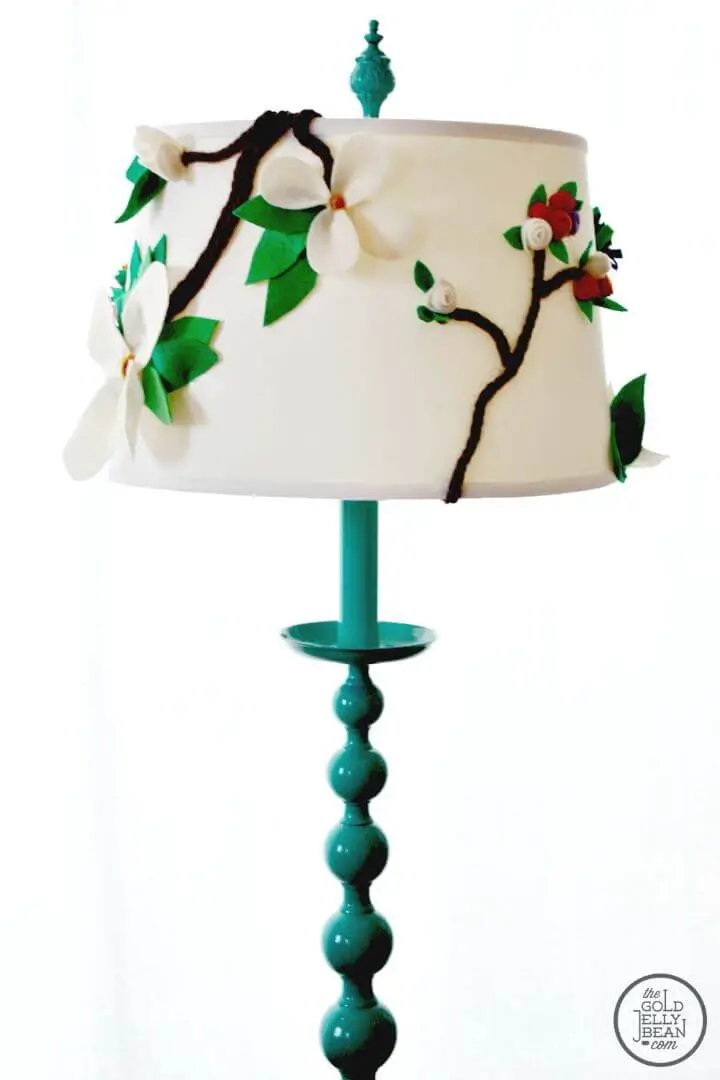
Elevate any room’s ambiance with this exquisite, handcrafted lampshade inspired by Anthropologie’s signature style. The delicate floral pattern adds an air of sophistication, effortlessly transporting a touch of nature indoors. As the soft fabric gently diffuses light, it casts subtle shadows that create a warm and inviting atmosphere in any space. Constructed from high-quality materials, this lampshade is built to last, ensuring years of stylish elegance wherever it’s placed. To recreate this masterpiece, you’ll need a few simple materials: scissors, thread, yarn, felt, and hot glue. With these basic supplies, thegoldjellybean invites you to unleash your creativity and get crafty!
Crate & Barrel Spin Vase Knock Off
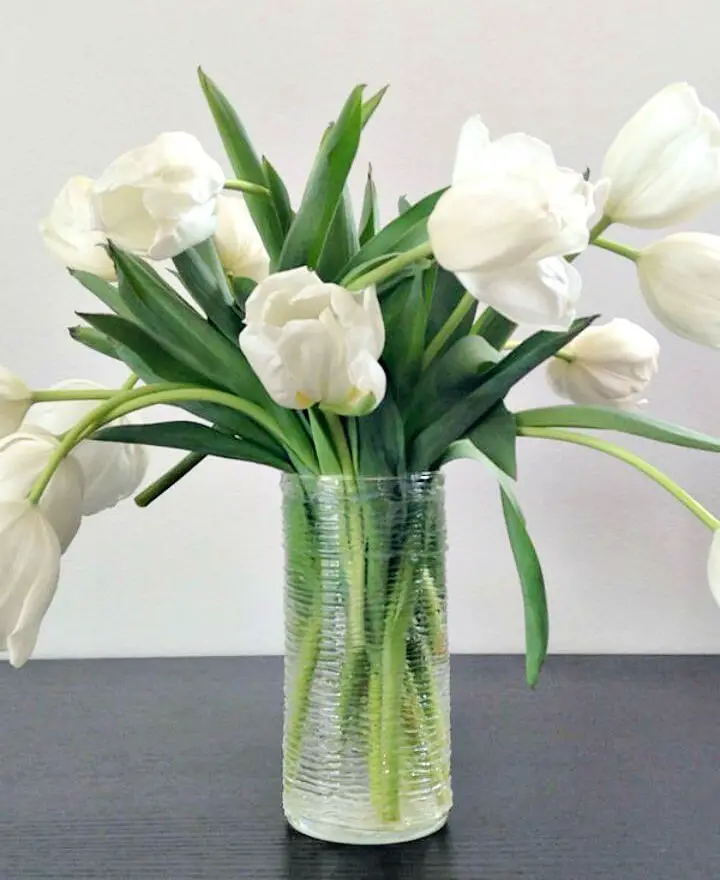
Transform the iconic Crate & Barrel spin vase with minimal materials and maximum creativity! Simply gather a round candle holder or vase, a glue gun, and some glue sticks – no special skills required. Assemble the piece without too much fuss, and feel free to get an extra pair of hands involved if you like. Let your imagination run wild as you give any room in your home a fresh new look with this budget-friendly DIY masterpiece. Show off your crafting prowess while bringing vibrancy into any space at a price that won’t break the bank.
Fix a Hole In Your Pants with Hot Glue
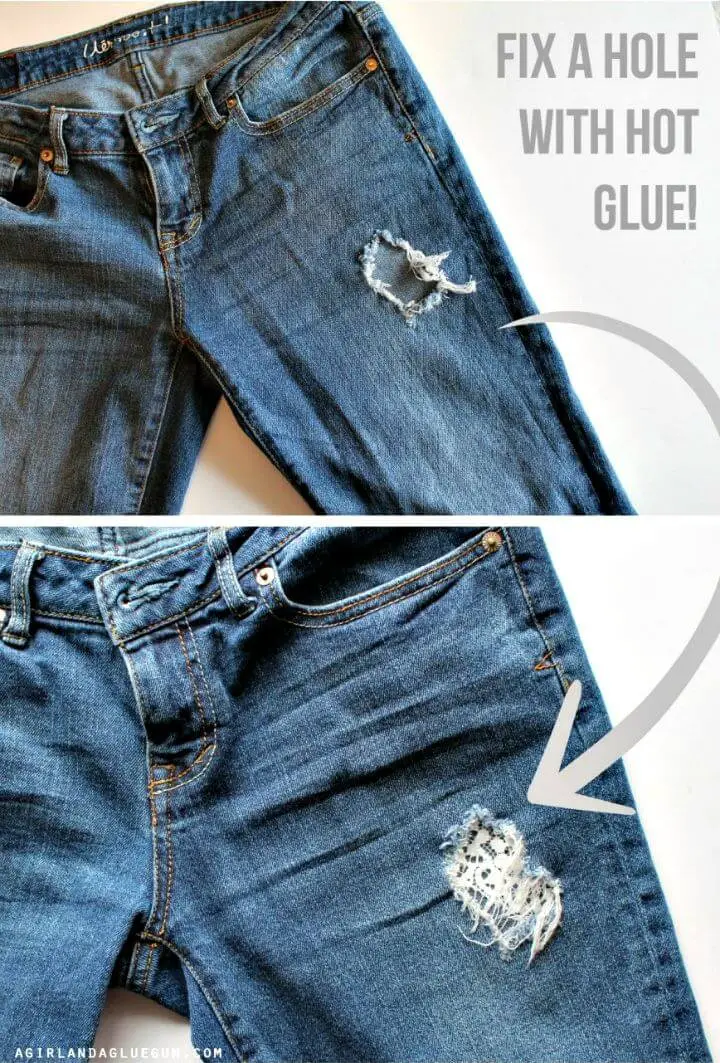
Discover the endless possibilities of hot glue gun crafts, a creative outlet that’s both budget-friendly and versatile. From mending torn clothing to crafting unique DIY projects, a hot glue gun can help you turn your imagination into reality. For instance, if you find yourself with a pesky hole in your pants, don’t stress – it’s an easy fix! Simply apply some fabric lace over the affected area, followed by a neat application of hot glue around the edges to provide extra protection. Alternatively, you can secure the patch with a sewing machine for added durability. With minimal time and effort, you’ll be sporting like-new jeans in no time. And it’s not just about clothing – a hot glue gun can help you fix any torn or ripped fabric item, giving you a sense of accomplishment and pride in your handiwork.
Easy DIY Hot Glue Glitter Fall Leaves
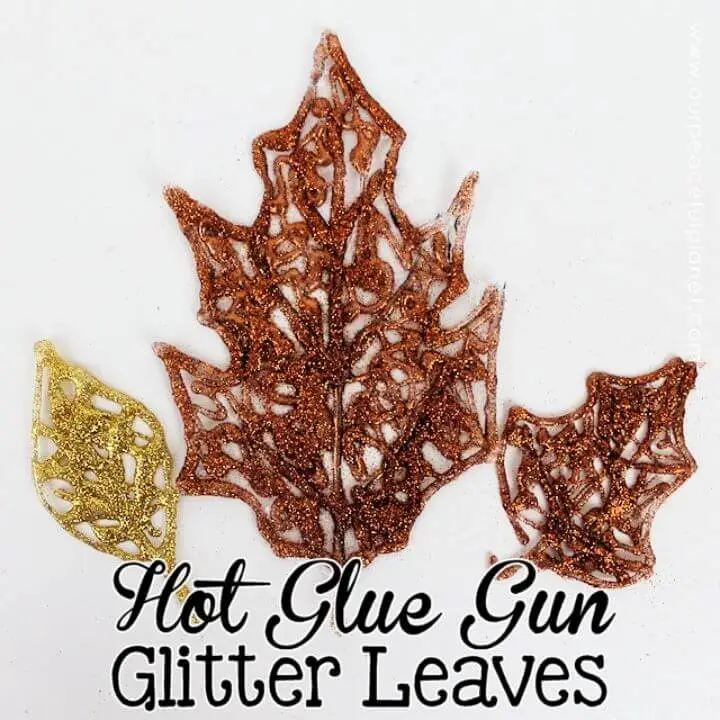
Elevate the ambiance of your space with these stunning fall decor ideas that require just a glue gun, some creative flair, and a few basic materials. Using a Teflon sheet or dry-erase marker, draw the outline of a leaf onto your chosen surface – be it foil, oil, or glitter – then apply hot glue along the edges to create a mesmerizing, sparkly effect. Once you’ve covered all areas with glitter, seal them with a protective spray to ensure your masterpieces remain damage-free. From vibrant wall displays to embellishing wreaths and more, the possibilities are endless when it comes to this fun and easy craft – perfect for adding a touch of autumnal charm to any room!
Make Your Own Hot Glue Earrings
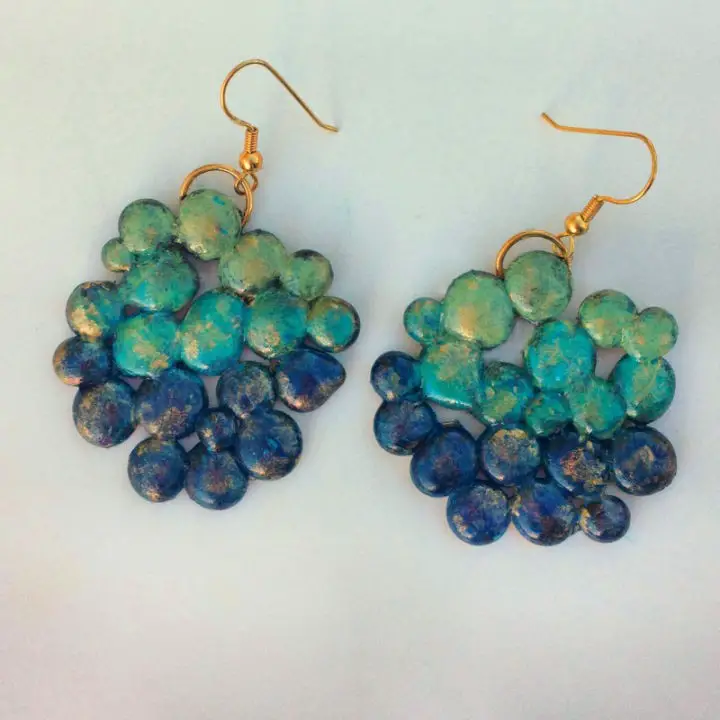
Want to create your own statement earrings? Hot glue earring crafting is a fun and accessible way to do so, requiring just a few simple supplies like a hot glue gun, spray paint, acrylic paint, gold-plated jump rings, and strong adhesive. With these essentials at hand, you can produce stunning earrings in a flash, experimenting with matte or glossy finishes in vibrant hues or subtle tones. The possibilities are endless! Get creative with layering techniques and patterns to design one-of-a-kind pieces that reflect your individual style.
DIY Flameless Rose Tea Lights
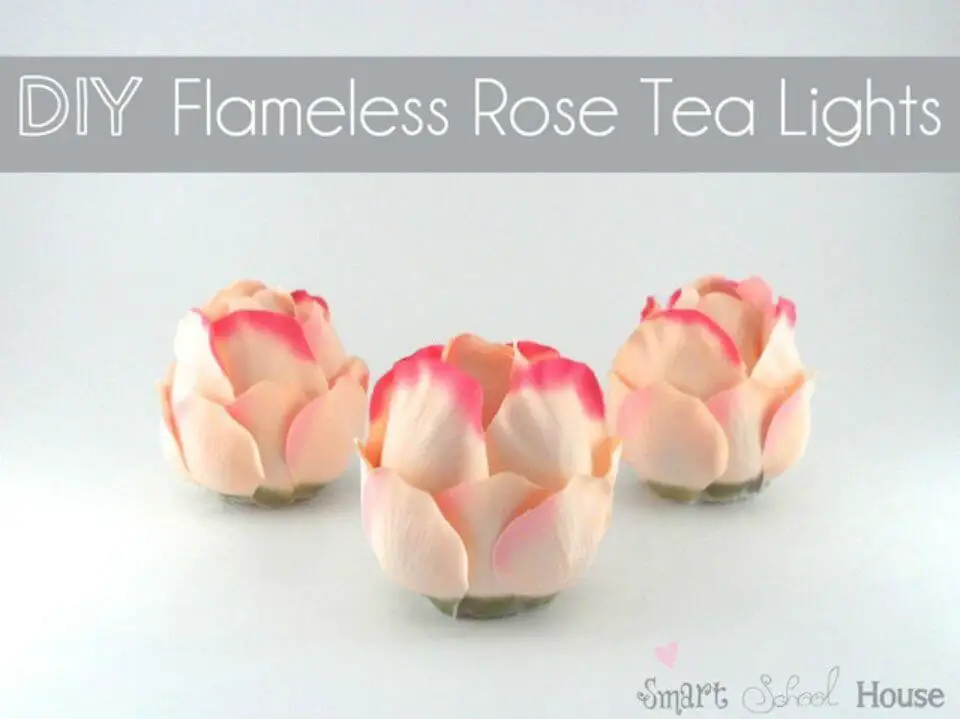
Transform your home’s ambiance with a DIY flameless rose tea light that combines elegance and safety. This simple yet creative project requires just a few materials: fabric rose petals, a flameless tea light, and plastic spoons. Begin by arranging the rose petals around the tea light in your desired design. Secure them in place using the spoon pieces to ensure a long-lasting display of soft, warm lighting that’s perfect for any room in your home. This craft eliminates the risks associated with fire or heat, allowing you to enjoy a beautifully lit space without compromise.
No Sew Pillow Using Hot Glue
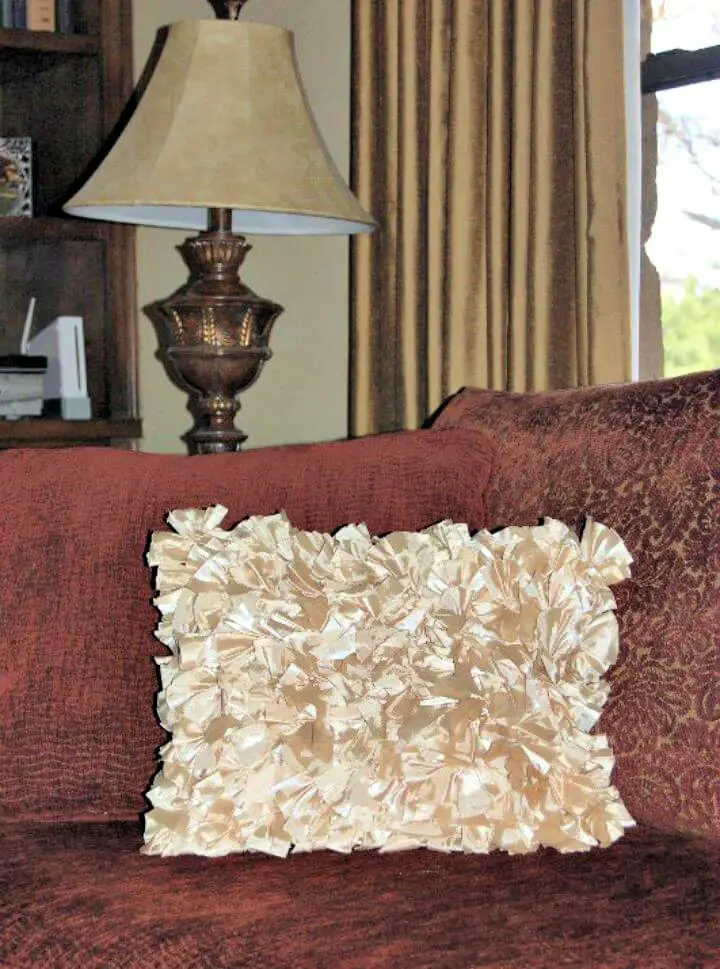
Transform a simple table runner or placemat into a beautiful no-sew pillow in mere minutes with this clever hot glue technique! To get started, use a ruler and fabric marker to mark the desired size of your pillow onto the fabric. Then, carefully cut out two identical pieces for each side along the marked lines. Before assembling the pillow, iron both sides together to remove any wrinkles or creases. Next, apply hot glue around the edges of the fabric to securely attach the two pieces together. Once the glue has dried, simply fill the pillow with your preferred stuffing material and admire your handiwork – you’ll have a one-of-a-kind, no-sew pillow in no time! With just a few basic supplies, including fabric, scissors, an iron, and hot glue, you can create a unique and cozy accent for any room.
Snowflake Cake Topper Using Hot Glue
This weekend, unleash your creativity and create a one-of-a-kind cake topper using wooden skewers and hot glue. To get started, gather your materials: a hot glue gun, some wooden skewers, cooking spray, and a clear dish. First, prep the dish by spraying it with cooking spray for a non-stick surface. Next, arrange the skewers in the shape of a snowflake, following your desired design. Allow them to cool completely before proceeding. Once the skewers are ready, heat up your hot glue gun and begin attaching each one together until you’ve achieved your desired design. Let it dry before carefully lifting it off the dish. This stunning craft is sure to impress, and you can add it to your list of DIY projects.
Colorful Holiday Votive Candles with Hot Glue
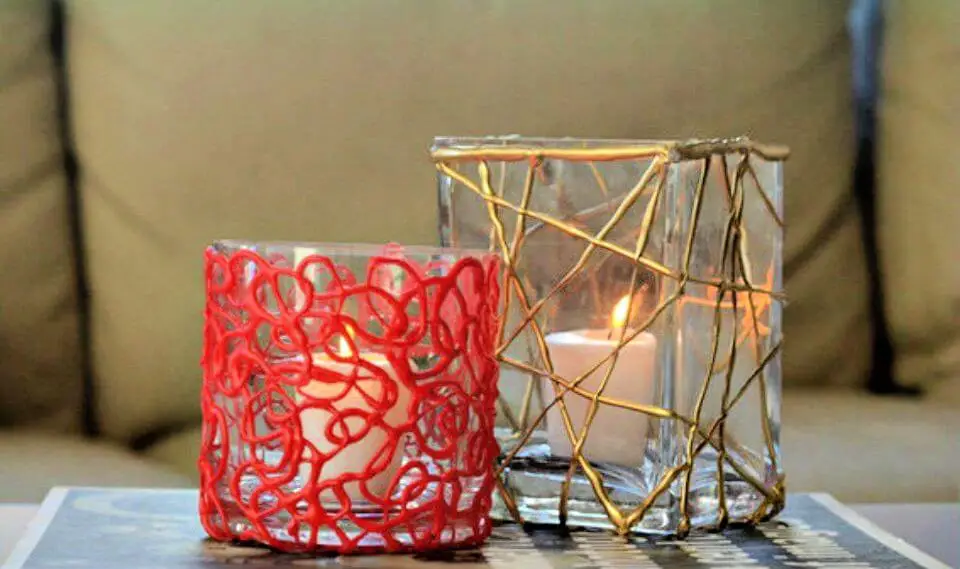
Transform your holiday celebrations with customized votive candles using hot glue techniques. By following step-by-step tutorials, you can create stunning and durable crafts that perfectly match your festive decor. Whether you’re celebrating Christmas, Hanukkah, or other special occasions, these vibrant candles will add a touch of elegance. The versatility of hot glue allows for endless creative possibilities – from intricate designs to simple yet effective decorations. To get started, gather the necessary materials: a vase, spray paint, vegetable oil spray, a small candle, and a reliable hot glue gun. With these essential tools, you’ll be well on your way to crafting beautiful votive candles that will illuminate your holiday season.
DIY Harry Potter Wands

Unleash your inner wizard by crafting a one-of-a-kind DIY Harry Potter wand with just a few simple materials. To get started, gather brown acrylic paint in a variety of colors, foam brushes, a hot glue gun, glue sticks, and glossy spray sealant. With these essentials at your disposal, you’ll be able to create an authentic-looking wand that’s sure to cast a spell on any fellow wizard or witch. Perfect for aspiring witches and wizards who want to showcase their love of the Boy Who Lived, this DIY project is a must-try for anyone looking to add a touch of magic to their day.
Make Frozen Snowflakes Hair Clips Using Hot Glue
Transform your hairstyle into a winter wonderland with this delightful DIY project! Create adorable frozen snowflake hair clips using hot glue, perfect for kids and adults to enjoy together. With no special tools or materials required, this craft is as easy as it gets. Get creative by experimenting with different glitter sizes, shapes, and colors, or add some extra sparkle for an added touch. Before you know it, you’ll have a collection of cute and stylish hair accessories that will make you feel like the queen of Arendelle. Follow our simple guide to start making beautiful frozen snowflake hair clips today!
DIY Hot Glue Gun Necklace
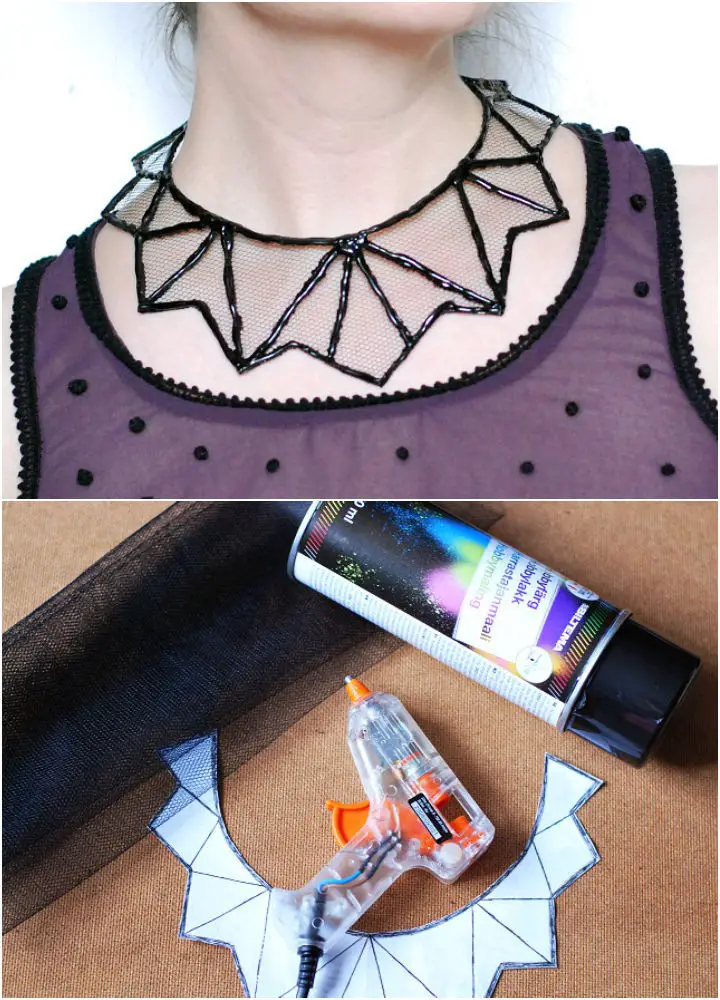
Hot glue gun crafts have revolutionized the world of DIY creativity, offering an endless array of innovative designs for home decor, fashion accessories, and beyond. One of the most exciting applications of this versatile crafting technique is creating personalized jewelry. With just a few simple materials – including a glue gun, glue sticks, tulle fabric, plastic wrap, and a necklace template – you can create your own stunning piece to wear. This easy-to-follow tutorial is perfect for those looking to express their individuality through fashion, and the best part is that it’s incredibly accessible. Whether you’re looking to make unique patterns or use the provided template to create something truly personalized, this fun craft project has got you covered. So why not start making today and stand out from the crowd with a one-of-a-kind accessory that reflects your personal style?
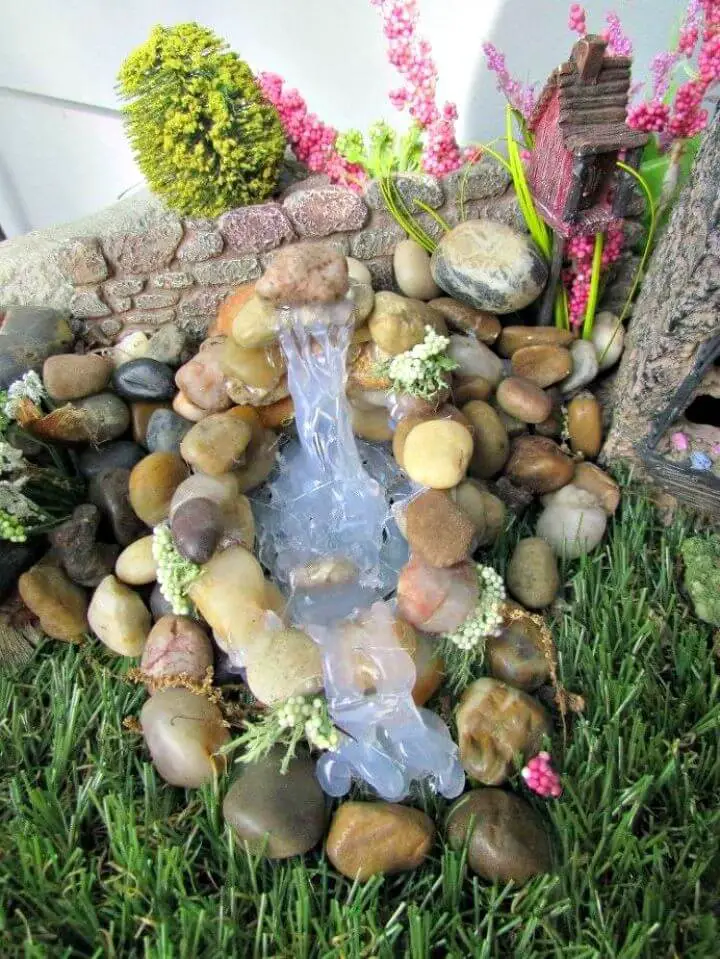
Make Your Own Hot Glue Gun Waterfall
Transform a ordinary space into an oasis with a unique waterfall crafted using hot glue and everyday materials. To create this breathtaking piece, gather the following essentials: hot glue gun, scissors, transparent plastic sheets to achieve the flowing water effect, blue and white paint for an underwater landscape, artificial moss rocks and textured rocks for added depth, and decorative leaves to bring in a touch of greenery. Assemble the components on a plate or tray, and voilà! You’ll have a one-of-a-kind DIY waterfall that brings the outdoors in. This straightforward guide makes it possible to create your very own hot glue gun masterpiece – perfect for adding a natural touch to any room.
DIY Glue Art on Canvas
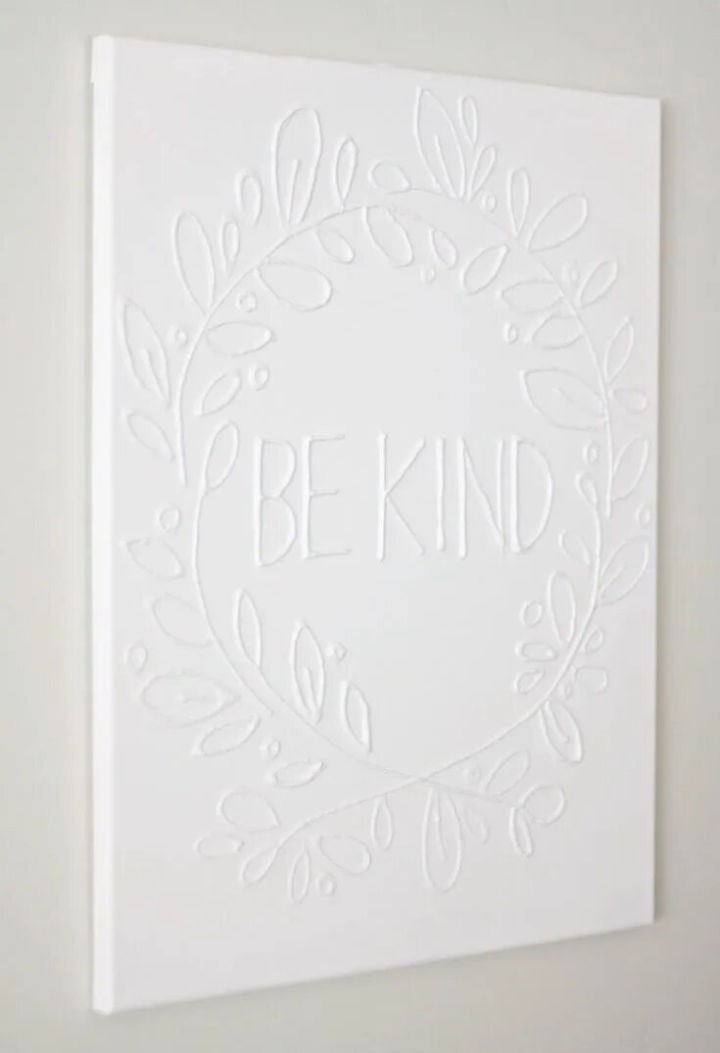
Transform blank canvases into vibrant works of art with DIY glue art. Unleash your creativity and add a personal touch to your home’s decor with unique, handmade pieces that reflect your personality. To get started, gather essential materials: a hot glue gun or craft glue, glue sticks, paint in your chosen color, a pencil for sketching out designs, transfer paper, and a paintbrush. With these simple tools, you can create stunning masterpieces perfect for gifting to friends and family or showcasing in your own home. Start crafting now and bring new life to your space with this easy-to-follow hot glue gun craft.
Conclusion:
By delving into the world of 25 DIY hot glue gun crafts and projects, you’ve unlocked a treasure trove of creativity and engagement. This comprehensive guide has not only introduced you to the fundamental principles of working with hot glue guns but also equipped you with the skills to navigate the process from start to finish.
From grasping the intricacies of your hot glue gun to selecting the perfect materials, executing your first project, and mastering the essential steps, this guide has been designed to empower you with the confidence to take on any creative endeavor. Additionally, it offers valuable insights into troubleshooting common challenges and maintaining a clean working environment.
With the right combination of technique and imagination, the possibilities are endless. By honing your skills in applying the perfect amount of hot glue and embracing the artistic freedom these projects provide, you’re poised to create with precision and passion. The joy of crafting is now within your reach; simply remember to stay enthusiastic and keep exploring.